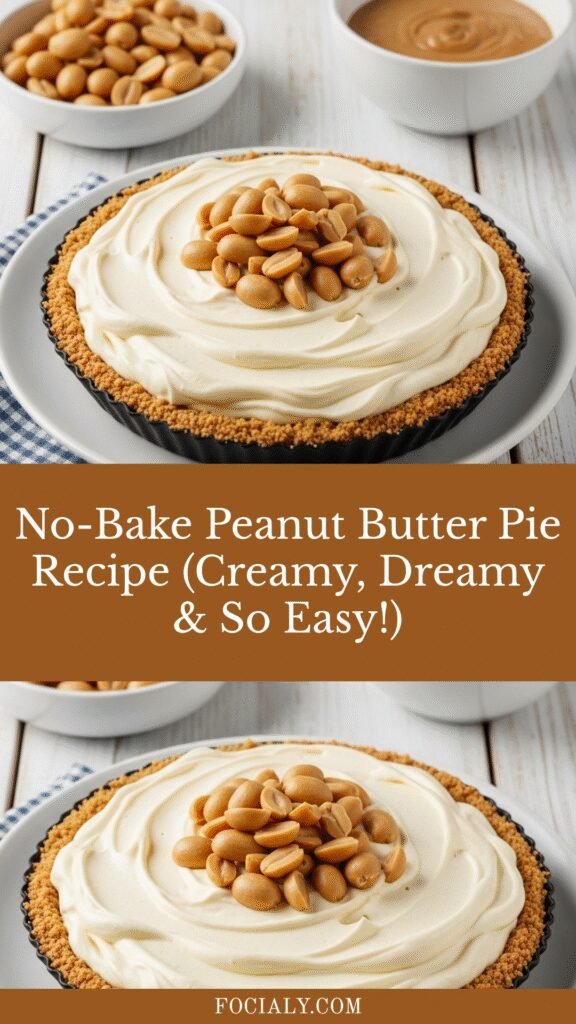
No-Bake Peanut Butter Pie Recipe (Creamy, Dreamy & So Easy!)
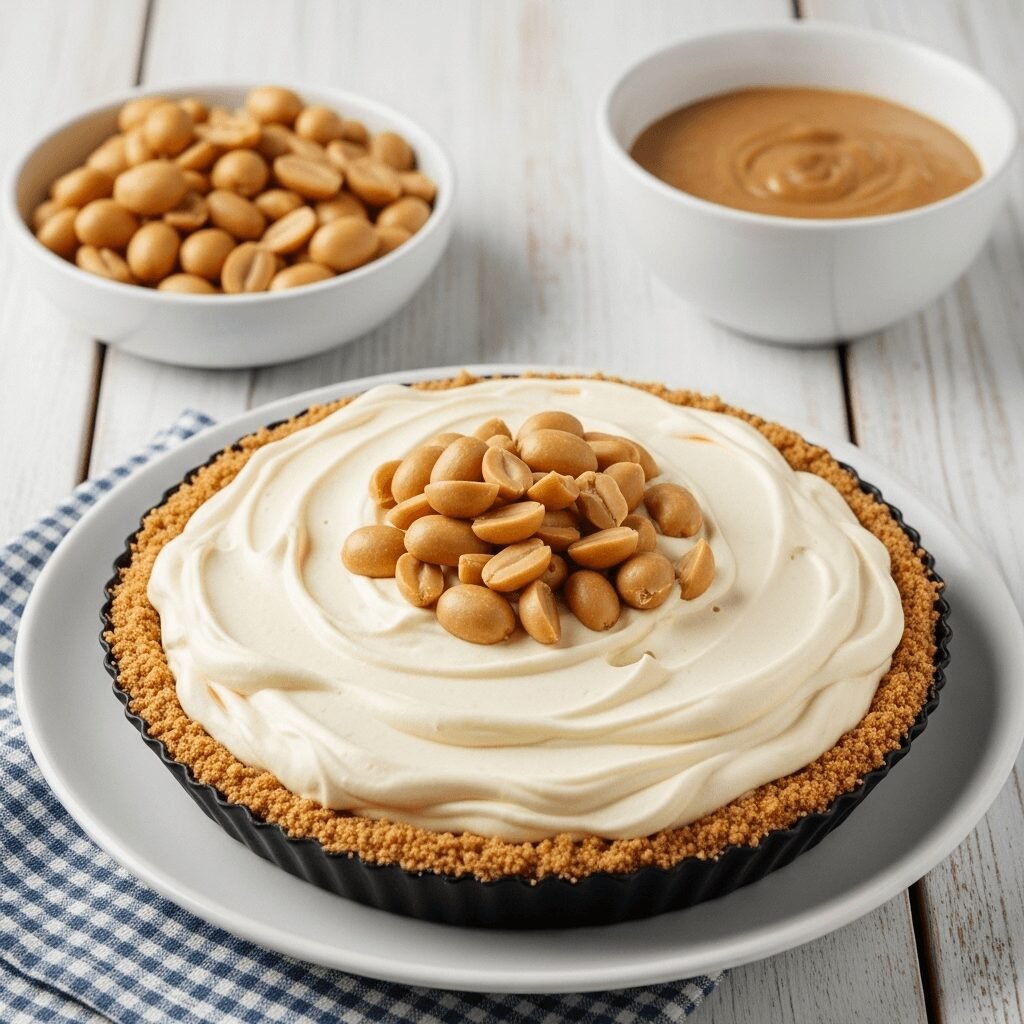
If you’re looking for a dessert that’s guaranteed to steal the show at any gathering, this no-bake peanut butter pie is your answer! This luscious, creamy pie combines a buttery graham cracker crust with a rich peanut butter filling that’s so smooth and decadent, you’ll be amazed it comes together without ever turning on your oven. Perfect for summer potlucks, holiday celebrations, or simply satisfying that intense peanut butter craving, this pie delivers restaurant-quality results with minimal effort.
What makes this peanut butter pie truly special is its incredible texture—light yet satisfying, sweet but perfectly balanced with that nutty richness we all love. The filling is made with cream cheese and whipped cream, creating an almost mousse-like consistency that melts in your mouth. Topped with chocolate ganache or whipped cream and chopped peanut butter cups, it’s a show-stopping dessert that looks as impressive as it tastes. Best of all? You can make it ahead of time, making it the ultimate stress-free dessert for entertaining.
Whether you’re a peanut butter fanatic or just someone who appreciates a foolproof dessert recipe, this no-bake peanut butter pie will quickly become your go-to. It’s the kind of recipe you’ll make again and again, tweaking it to your preferences and watching it disappear within minutes at every gathering.
History / Background
The peanut butter pie has deep roots in American dessert culture, particularly in the South, where peanuts have been a staple crop since the early 1900s. While the exact origin of peanut butter pie is difficult to pinpoint, it gained significant popularity in the mid-20th century when cream cheese became a household staple and no-bake desserts started trending in American home kitchens.
The rise of peanut butter pie coincides with the popularity of peanut butter itself in America. After George Washington Carver promoted peanuts as a crop alternative in the South during the early 1900s, peanut butter became increasingly popular. By the 1950s and 60s, it was a pantry essential in nearly every American home. Creative home cooks began incorporating this beloved spread into desserts beyond just cookies and brownies.
The no-bake version of peanut butter pie became especially popular during the hot summer months in Southern states, where turning on the oven was the last thing anyone wanted to do. The combination of a simple graham cracker crust, a creamy peanut butter filling made lighter with whipped cream or Cool Whip, and a chocolate topping created the perfect trifecta of flavors and textures.
Today, peanut butter pie remains a beloved classic across America, with countless regional variations. Some versions are more like a traditional custard pie that requires baking, while others (like this one) embrace the no-bake approach that makes dessert preparation so much easier. Diners and restaurants across the country feature their own signature versions, but nothing beats a homemade peanut butter pie made with love in your own kitchen.
Why You’ll Love This Recipe
This no-bake peanut butter pie is about to become your new favorite dessert, and here’s why: it delivers maximum impact with minimal effort, making you look like a professional pastry chef without any of the fuss. The combination of creamy, rich peanut butter with the lightness of whipped cream creates a texture that’s absolutely divine—not too heavy, not too light, but absolutely perfect.
Here’s what makes this recipe irresistible:
- No baking required – Perfect for hot summer days when you don’t want to heat up the kitchen, or anytime you need a quick dessert solution
- Make-ahead friendly – Prepare it the day before your event and let it chill, making party prep so much easier
- Crowd-pleasing flavor – Peanut butter lovers go absolutely crazy for this pie, and even those who aren’t die-hard fans find themselves going back for seconds
- Simple ingredients – Everything you need is readily available at any grocery store, with no specialty items required
- Customizable – Easily adjust the sweetness, add different toppings, or create variations to suit your preferences
- Budget-friendly – Despite tasting like a million bucks, this pie costs just a few dollars to make
- Kid-approved – Children absolutely love helping make this dessert, and they devour every bite
- Impressive presentation – It looks like you spent hours creating this masterpiece, but it comes together in about 20 minutes of active time
Ingredient Notes
Let’s break down what makes this peanut butter pie so incredibly delicious. Understanding your ingredients helps you make smart substitutions and achieve the best results every time.
Graham Cracker Crumbs: These form the base of your crust, providing that classic sweet, slightly honey-flavored foundation. You can buy pre-made crumbs or make your own by crushing whole graham crackers in a food processor. For a twist, try chocolate graham crackers or even Oreo cookies for the crust.
Butter: Used in the crust to bind the crumbs together. Always use unsalted butter so you can control the saltiness. Make sure it’s fully melted for even distribution throughout the crust.
Cream Cheese: This is the secret to that incredibly smooth, creamy filling. It must be at room temperature or it won’t blend properly—leave it out for at least an hour before starting. Full-fat cream cheese works best; don’t use reduced-fat versions as they can make the filling grainy.
Peanut Butter: The star of the show! Use creamy peanut butter (not natural/separated varieties) for the best texture. Brands like Jif, Skippy, or Peter Pan work perfectly. Natural peanut butter can make the filling grainy and separated. If you want extra peanut flavor, look for peanut butter with higher peanut content.
Powdered Sugar: Also called confectioner’s sugar, this sweetens the filling without adding graininess. It dissolves completely into the mixture, creating that silky-smooth texture. Regular granulated sugar won’t work as well here.
Vanilla Extract: Enhances all the other flavors and adds depth. Always use pure vanilla extract, not imitation, for the best flavor.
Heavy Whipping Cream: This is what makes the filling light and fluffy. It must be very cold to whip properly—put both the cream and your mixing bowl in the refrigerator for 30 minutes before whipping. You can substitute with Cool Whip in a pinch, but fresh whipped cream tastes significantly better.
Chocolate Ganache/Topping: Optional but highly recommended! Semi-sweet chocolate chips melted with a bit of cream create a professional-looking finish. You can also use hot fudge sauce or melted chocolate chips.
Equipment Needed
Having the right tools makes this recipe even easier. Here’s what you’ll need:
- 9-inch pie pan – Standard size works perfectly; glass or ceramic are ideal
- Mixing bowls – You’ll need at least two (one large, one medium)
- Electric mixer – Stand mixer or hand mixer for whipping cream and beating filling
- Rubber spatula – For folding ingredients and scraping bowls clean
- Measuring cups and spoons – For accurate ingredient measurements
- Microwave-safe bowl – For melting butter and chocolate
- Food processor (optional) – If making your own graham cracker crumbs
- Plastic wrap or aluminum foil – For covering pie while it chills
- Refrigerator space – You’ll need room for the pie to chill for at least 4 hours
Peanut Butter Pie Recipe
This no-bake peanut butter pie features a buttery graham cracker crust filled with a silky-smooth, creamy peanut butter filling made with cream cheese and fresh whipped cream. Topped with chocolate ganache and peanut butter cups, it’s the ultimate dessert for peanut butter lovers!
- Prep Time: 20 minutes
- Total Time: 4 hours 20 minutes
- Yield: 8-10 servings 1x
- Category: Dessert
- Method: No Bake
- Cuisine: American
- Diet: Vegetarian
Ingredients
For the Crust:
- 1½ cups graham cracker crumbs (about 10 full crackers)
- ¼ cup granulated sugar
- 6 tablespoons unsalted butter, melted
For the Filling:
- 8 oz cream cheese, softened to room temperature
- 1 cup creamy peanut butter
- 1 cup powdered sugar
- 1 teaspoon vanilla extract
- 1½ cups heavy whipping cream, cold
- 2 tablespoons powdered sugar (for whipped cream)
For the Topping:
- ½ cup semi-sweet chocolate chips
- ¼ cup heavy cream
- 4-5 peanut butter cups, chopped (optional)
- Additional whipped cream for garnish (optional)
Instructions
Step 1: Make the Crust
In a medium bowl, combine graham cracker crumbs, sugar, and melted butter. Mix until the texture resembles wet sand and holds together when pressed. Press the mixture firmly and evenly into the bottom and up the sides of a 9-inch pie pan. Use the bottom of a measuring cup to pack it down firmly. Place in the refrigerator while you prepare the filling.
Step 2: Prepare the Cream Cheese Mixture
In a large mixing bowl, beat the softened cream cheese with an electric mixer on medium speed until smooth and fluffy, about 2 minutes. Add the peanut butter, 1 cup powdered sugar, and vanilla extract. Beat on medium-high speed until completely smooth and well combined, about 2-3 minutes, scraping down the sides as needed.
Step 3: Whip the Cream
In a separate cold mixing bowl, beat the heavy whipping cream and 2 tablespoons of powdered sugar on high speed until stiff peaks form, about 3-4 minutes. The cream should hold its shape when you lift the beaters.
Step 4: Fold Together
Using a rubber spatula, gently fold about one-third of the whipped cream into the peanut butter mixture to lighten it. Then carefully fold in the remaining whipped cream in two additions, being gentle to maintain the airiness. Fold just until no white streaks remain.
Step 5: Fill the Pie
Spoon the filling into the prepared crust, smoothing the top with a spatula. The filling should dome slightly above the crust—this is perfect!
Step 6: Make the Ganache
In a microwave-safe bowl, combine chocolate chips and ¼ cup heavy cream. Microwave in 20-second intervals, stirring between each, until smooth and glossy (usually 40-60 seconds total). Let cool for 5 minutes, then pour or drizzle over the pie filling.
Step 7: Chill
Cover the pie loosely with plastic wrap (don’t let it touch the surface) and refrigerate for at least 4 hours or overnight until completely set and firm.
Step 8: Garnish and Serve
Before serving, garnish with chopped peanut butter cups and additional whipped cream if desired. Slice with a sharp knife, wiping the blade clean between cuts for neat slices.
Notes
- Make sure cream cheese is truly softened—cold cream cheese will create lumps that are hard to smooth out.
- Don’t overbeat when folding in the whipped cream or you’ll deflate it and lose that light, airy texture.
- For easier slicing, dip your knife in hot water and wipe it clean between each cut.
- This pie must chill for at least 4 hours to set properly; overnight is even better.
- Natural peanut butter (the kind that separates) won’t work well in this recipe—stick with conventional creamy peanut butter.
Nutrition
- Serving Size: 1 slice (⅛ of pie)
- Calories: 585
- Sugar: 38g
- Sodium: 285mg
- Fat: 42g
- Saturated Fat: 20g
- Unsaturated Fat: 18g
- Trans Fat: 0g
- Carbohydrates: 46g
- Fiber: 2g
- Protein: 10g
- Cholesterol: 75mg
Nutrition information is approximate and based on 8 servings. Values may vary based on specific ingredients used.
Tips & Variations
Chocolate Peanut Butter Pie: Use chocolate graham crackers or an Oreo cookie crust instead of regular graham crackers. Add 2 tablespoons of cocoa powder to the filling for double chocolate goodness.
Lighter Version: Substitute half of the heavy cream with Cool Whip or use reduced-fat cream cheese. While it won’t be quite as rich, it’s still delicious and cuts some calories.
Peanut Butter Banana Pie: Layer thin banana slices over the crust before adding the filling. The combination is absolutely heavenly!
Extra Crunchy: Fold ½ cup of chopped peanuts or toffee bits into the filling for added texture and crunch.
Salted Caramel Drizzle: Skip the chocolate ganache and drizzle with salted caramel sauce instead. Sprinkle with flaky sea salt for a sweet-salty masterpiece.
Mini Pies: Make individual portions using a muffin tin lined with cupcake papers. Adjust chill time to 2-3 hours for these smaller versions.
Vegan Version: Use vegan cream cheese, coconut cream instead of dairy cream, and ensure your graham crackers and chocolate are vegan-friendly.
Pro Chef Tips
Temperature Matters: Always start with room temperature cream cheese. Cold cream cheese creates lumps that are nearly impossible to eliminate, no matter how long you beat the mixture. Set it out at least an hour before you start baking.
Crust Perfection: For an extra-delicious crust, toast your graham cracker crumbs in a dry skillet for 2-3 minutes before mixing with butter. This deepens the flavor and adds a subtle nuttiness.
Whipped Cream Secret: Chill your mixing bowl and beaters in the freezer for 15 minutes before whipping cream. Cold equipment helps the cream whip faster and achieve better volume.
Folding Technique: When folding whipped cream into the peanut butter mixture, use a “cut and fold” motion—slice through the center with your spatula, then sweep around the edges and fold over. This maintains maximum airiness.
Ganache Consistency: If your chocolate ganache is too thick to pour, add cream one teaspoon at a time until it reaches the perfect drizzling consistency. Too thin? Let it sit for a few minutes to thicken up.
Serving Temperature: Let the pie sit at room temperature for 10-15 minutes before slicing. This makes it easier to cut clean slices and enhances the flavor. Too cold straight from the fridge can mute the peanut butter taste.
Professional Presentation: Use an offset spatula to smooth the top of your filling before adding ganache. For beautiful ganache drips, pour it in the center and use a spoon to push it toward the edges, letting it drip naturally down the sides.
Common Mistakes to Avoid
Using Natural Peanut Butter: Natural peanut butter (the kind where oil separates on top) will make your filling separated and grainy. Always use conventional creamy peanut butter like Jif or Skippy that has emulsifiers to keep everything smooth.
Not Chilling Long Enough: Cutting into your pie before it’s fully set will result in a messy slice that doesn’t hold its shape. Patience is key! Give it the full 4 hours minimum, or better yet, make it the day before.
Overbeating After Adding Whipped Cream: Once you add whipped cream to the peanut butter mixture, you’re done with the electric mixer! Overbeating at this stage deflates the cream and makes your filling dense instead of light and fluffy. Fold gently by hand.
Loose Crust: If you don’t pack the crust firmly enough into the pan, it will crumble when you try to slice the pie. Really press it down with the bottom of a measuring cup or glass to compact it properly.
Lumpy Filling: This happens when cream cheese isn’t fully softened or when ingredients aren’t beaten long enough. Take your time beating the cream cheese and peanut butter mixture until it’s completely smooth before adding whipped cream—any lumps at this stage won’t go away.
Storage & Meal Prep
Refrigerator Storage: Store your peanut butter pie covered in the refrigerator for up to 5 days. Use plastic wrap or aluminum foil to cover it, being careful not to press the covering directly onto the surface if you have whipped cream topping, or it will stick. A pie carrier or cake dome works wonderfully.
Freezing Individual Slices: For long-term storage, slice the pie and wrap individual pieces tightly in plastic wrap, then place in a freezer-safe container or bag. Freeze for up to 2 months. This is perfect for portion control or having dessert ready whenever a craving hits!
Reheating: This pie is actually best served cold, so there’s no reheating needed. If you’ve frozen slices, thaw them in the refrigerator overnight or at room temperature for about 30-45 minutes before serving.
Transporting Tips: If taking this pie to a potluck or party, keep it chilled until the last possible moment. Transport it in a cooler with ice packs, and try to keep it refrigerated at your destination if possible. The filling can soften if left at room temperature for extended periods.
Make-Ahead & Freezer Notes
Make-Ahead Success: This is actually one of those magical recipes that tastes better when made ahead! The flavors meld together beautifully, and the filling firms up perfectly. Make it 1-2 days in advance and store covered in the refrigerator. Add any fresh whipped cream garnish and chopped peanut butter cups right before serving.
Freezing the Whole Pie: You can absolutely freeze the entire pie! After it’s fully chilled and set, wrap it tightly in two layers of plastic wrap followed by aluminum foil. Freeze for up to 2 months. To thaw, place it in the refrigerator overnight. The texture might be slightly softer after freezing, but it’s still absolutely delicious.
Freezing Just the Crust: Want to get even more ahead? Make and freeze just the crust up to 1 month in advance. Wrap it well and freeze, then thaw and fill when ready to make the pie.
Best Reheating Method: Since this is a no-bake pie meant to be served cold, there’s no reheating involved. Simply thaw frozen slices in the refrigerator or let them sit at room temperature for 30-45 minutes until they reach your desired temperature. The pie is actually perfect slightly softened—not rock-hard from the fridge.
Holiday Prep Strategy: During busy holiday seasons, make this pie 2-3 days ahead and keep it refrigerated. It actually holds up beautifully and frees you up to focus on other dishes closer to your event.
Serving Suggestions
This decadent peanut butter pie is rich enough to stand on its own, but pairing it with the right accompaniments takes it to the next level!
Coffee & Beverages: Serve alongside hot coffee, cold milk (a classic!), or even a salted caramel latte. The combination of peanut butter and coffee is surprisingly amazing. For an adult twist, pair it with dessert wine or bourbon.
Fresh Fruit: Balance the richness with fresh berries—strawberries, raspberries, or sliced bananas work beautifully. The fruit’s natural tartness cuts through the sweet, creamy filling perfectly.
Ice Cream: Why not go all out? Add a scoop of vanilla ice cream or chocolate ice cream on the side. Vanilla complements the peanut butter flavor without competing, while chocolate creates a peanut butter cup experience.
Whipped Cream: Even if you’ve already topped the pie with ganache, a dollop of fresh whipped cream on each slice adds a lovely lightness. Try adding a splash of vanilla or even a bit of peanut butter to the whipped cream for extra flavor.
Sauces & Drizzles: Drizzle individual slices with hot fudge, caramel sauce, or even a berry coulis for a restaurant-style presentation.
Party Presentation: When serving at gatherings, set out small bowls of chopped peanuts, mini chocolate chips, and crushed pretzels so guests can customize their slices.
FAQs Section
Can I use crunchy peanut butter instead of creamy?
While you technically can, the texture will be quite different—less smooth and creamy, more chunky and textured. Most people prefer the silky consistency that creamy peanut butter provides, but if you love crunch, go for it! Just know that it changes the overall mouthfeel of the pie.
Why is my peanut butter pie runny?
The most common reason is not chilling it long enough. This pie needs at least 4 hours to fully set. Another culprit could be using natural peanut butter or not whipping the cream to stiff peaks. Make sure your whipped cream holds its shape before folding it in, and always use conventional creamy peanut butter.
Can I make this pie without cream cheese?
Cream cheese is essential to the structure and texture of this pie, so substituting it significantly changes the recipe. However, you could try using mascarpone cheese or even Greek yogurt cream cheese as alternatives, though results will vary.
How do I prevent the crust from getting soggy?
The key is making sure your crust is firmly packed and fully chilled before adding the filling. Some bakers like to brush the crust with a thin layer of melted chocolate and let it set before adding filling—this creates a moisture barrier. However, with this no-bake pie, sogginess typically isn’t an issue since there’s no moisture-heavy layer.
Can I use Cool Whip instead of making whipped cream?
Yes! You can substitute 3 cups of thawed Cool Whip for the homemade whipped cream. Simply fold it into the peanut butter mixture just as you would the fresh whipped cream. The texture will be slightly different and not quite as light, but it’s definitely easier and still delicious.
Is this pie gluten-free?
The filling is naturally gluten-free, but traditional graham crackers contain gluten. To make it gluten-free, simply use gluten-free graham crackers or crushed gluten-free cookies for the crust. Confirm that all your other ingredients (like peanut butter) are certified gluten-free if you’re serving someone with celiac disease.
How far in advance can I make this pie?
You can make this pie up to 2 days in advance and store it covered in the refrigerator. It actually improves after sitting, as the flavors meld together. Just wait to add any fresh whipped cream garnish until right before serving to keep it looking its best.
Conclusion
There you have it—the ultimate no-bake peanut butter pie that’s guaranteed to become your signature dessert! This recipe combines simplicity with impressive results, making it perfect for both novice bakers and experienced home cooks. The creamy, dreamy texture paired with that rich peanut butter flavor creates a dessert that’s truly unforgettable.
What I love most about this peanut butter pie is how it brings people together. Whether you’re serving it at a summer barbecue, a holiday gathering, or just making it for a weeknight treat, it always disappears quickly and leaves everyone asking for the recipe. The fact that it requires no baking makes it accessible year-round, and the make-ahead nature means less stress when you’re entertaining.
I’d love to hear how your peanut butter pie turns out! Did you try any of the variations? Add your own creative twist? Drop a comment below and let me know. And if you loved this recipe as much as I do, please share it on Pinterest to help other home cooks discover this amazing dessert. Pin it to your favorite dessert board so you can find it again and again—because trust me, you’ll be making this one on repeat!
Happy baking (or should I say, happy no-baking!), and enjoy every creamy, peanut buttery bite! 🥜🥧