Homemade Glazed Donuts Recipe: Fluffy, Golden, and Irresistibly Delicious

There’s something truly magical about biting into a fresh, warm, homemade donut—that pillowy-soft texture, the golden-brown exterior with just the right amount of crispness, and that sweet, glossy glaze that melts on your tongue. These classic glazed donuts are the real deal: made from scratch with a yeasted dough that fries up incredibly light and airy, then dunked in a simple vanilla glaze while still warm. Unlike store-bought donuts that can taste artificial or sit heavy in your stomach, homemade donuts are surprisingly light, beautifully fresh, and absolutely worth the effort. Whether you’re making them for a special weekend breakfast, a birthday celebration, a holiday brunch, or just because you’re craving something extraordinary, these homemade glazed donuts deliver that authentic bakery experience right in your own kitchen. The process is easier than you might think, and the results are so impressive that everyone will think you’ve been secretly trained as a professional pastry chef. Once you taste a donut that’s fresh from your own fryer, still warm and glistening with glaze, you’ll understand why homemade donuts create such excitement and joy.
History / Background
Donuts have a rich and surprisingly international history that spans centuries and continents. The concept of fried dough has existed in various cultures for thousands of years—ancient Greeks and Romans made fried dough fritters, while medieval Arab cooks prepared similar sweet fried pastries. However, the donut as we know it today has roots in Dutch cuisine. Dutch settlers brought their “olykoeks” (oil cakes)—balls of sweet dough fried in pork fat—to New Amsterdam (now New York) in the early 19th century. These early versions were often filled with nuts or fruit in the center, where the dough tended to remain undercooked.
The iconic ring shape that defines modern donuts emerged around the mid-1800s. One popular legend credits a young ship captain named Hanson Gregory, who in 1847 reportedly punched a hole in the center of his mother’s fried dough cakes using the ship’s pepper box, creating the ring shape that would cook more evenly. Whether this story is entirely true or not, the ring-shaped donut quickly became the American standard. By the early 20th century, donuts had become deeply embedded in American food culture, particularly after World War I, when “Donut Lassies” served them to American soldiers in France, creating powerful nostalgic associations.
The 1950s brought the rise of donut shop chains and automation that made donuts widely available and affordable. Krispy Kreme, Dunkin’ Donuts, and other chains transformed donuts from occasional treats into everyday breakfast staples. Today, donuts represent pure American comfort food—they’re associated with coffee breaks, police officer stereotypes, weekend treats, and celebration breakfasts. The simple glazed donut remains the most popular variety, beloved for its straightforward sweetness and perfect balance of textures. Making them at home connects us to this rich culinary tradition while allowing us to experience them at their absolute freshest and best.
Why You’ll Love This Recipe
These homemade glazed donuts are a game-changer that will completely transform how you think about donuts. Yes, they require a bit more time and effort than most breakfast recipes, but the results are so extraordinarily delicious that they’re worth every single minute. The dough is enriched with butter, milk, and eggs, creating a tender, brioche-like texture that’s incredibly soft and flavorful. When fried to golden perfection, these donuts achieve that ideal contrast: crispy on the outside, pillowy and light on the inside, with an airy crumb that practically melts in your mouth.
Here’s why this homemade donut recipe will become your new favorite weekend project:
- Bakery-quality results at home – These taste better than most donut shops, with fresher flavor and lighter texture
- Surprisingly manageable – Despite seeming intimidating, the process is straightforward with clear steps
- Customizable glazes and toppings – Once you master the base, you can create endless flavor variations
- More economical – Makes a dozen donuts for less than buying them from a premium donut shop
- Impressive presentation – Homemade donuts wow guests and make any morning feel special
- Fresher ingredients – You control exactly what goes in, with no preservatives or artificial flavors
- Fun family activity – Kids love helping cut out donuts and watching them puff up while frying
- That unbeatable fresh-made taste – Nothing compares to donuts eaten within hours of frying
- Perfect for special occasions – Birthday breakfasts, holiday mornings, brunch parties, or weekend treats
- Freezer-friendly – Make a big batch and freeze extras for quick future breakfasts
Ingredient Notes
All-purpose flour creates the structure of your donuts. You want enough gluten development for the dough to hold its shape when fried, but not so much that the donuts become tough. Bread flour can be used for a slightly chewier texture, but all-purpose gives you the perfect tender result.
Active dry yeast is the leavening agent that makes these donuts light and fluffy. Make sure your yeast is fresh (check the expiration date) and proof it properly in warm milk—this activates the yeast and ensures your dough will rise beautifully. Instant yeast can be substituted in equal amounts and mixed directly into the flour without proofing.
Whole milk adds richness and helps create a tender crumb. The fat in whole milk contributes to the soft texture. You can use 2% milk in a pinch, but don’t use skim milk or the donuts will be less tender.
Granulated sugar sweetens the dough and feeds the yeast, helping it activate and rise. The sugar also contributes to browning when the donuts fry, creating that beautiful golden color.
Butter should be unsalted and softened to room temperature. It enriches the dough, making it tender and flavorful, almost like a brioche. Don’t substitute with oil or margarine—real butter makes a noticeable difference in flavor.
Eggs add richness, structure, and help bind the dough together. They also contribute to the beautiful golden color of the finished donuts. Use large eggs at room temperature for best results.
Vanilla extract adds warmth and depth to both the dough and the glaze. Always use pure vanilla extract, never imitation, especially in simple recipes like this where the vanilla flavor shines through.
Salt enhances all the other flavors and balances the sweetness. Don’t skip it—even in sweet baking, salt is essential.
Powdered sugar creates a smooth, sweet glaze that hardens slightly as it sets, giving you that classic glazed donut appearance. Make sure to sift it if it has lumps for the smoothest glaze.
Vegetable oil for frying needs to be a neutral oil with a high smoke point. Canola oil, vegetable oil, or peanut oil all work perfectly. You’ll need enough to fill your pot 2-3 inches deep for proper frying.
Equipment Needed
- Large mixing bowl
- Stand mixer with dough hook attachment (or mix by hand)
- Measuring cups and spoons
- Kitchen thermometer (crucial for frying)
- Rolling pin
- 3-inch round donut cutter (or two round cutters: 3-inch and 1-inch)
- Large heavy-bottomed pot or Dutch oven for frying
- Long-handled tongs or slotted spoon
- Wire cooling rack set over a baking sheet
- Paper towels
- Small saucepan for warming milk
- Parchment paper cut into squares
- Medium bowl for glaze
- Whisk
Homemade Glazed Donuts Recipe: Fluffy, Golden, and Irresistibly Delicious

hese classic homemade glazed donuts feature a tender, fluffy yeasted dough that fries up golden and light, then gets dipped in a sweet vanilla glaze. They taste exactly like your favorite bakery donuts but fresher and more delicious. Perfect for special weekend breakfasts, celebrations, or whenever you want to treat yourself to something truly extraordinary.
- Prep Time: 25 minutes (plus 1 hour 30 minutes rising time)
- Cook Time: 20 minutes
- Total Time: 2 hours 15 minutes
- Yield: 12 donuts plus donut holes 1x
- Category: Breakfast, Dessert, Brunch
- Cuisine: American
- Diet: Vegetarian
Ingredients
For the Donuts:
- 2¼ teaspoons (1 packet) active dry yeast
- ¼ cup warm water (105-110°F)
- ¾ cup whole milk, warmed (105-110°F)
- ¼ cup granulated sugar
- 1 teaspoon salt
- 2 large eggs, room temperature
- ¼ cup (½ stick) unsalted butter, softened
- 3½ to 4 cups all-purpose flour, plus more for dusting
- Vegetable oil for frying (about 8 cups, depending on pot size)
For the Glaze:
- 3 cups powdered sugar, sifted
- ½ teaspoon vanilla extract
- ⅓ cup whole milk, plus more as needed
- Pinch of salt
Instructions
- Activate the yeast: In a large mixing bowl or the bowl of your stand mixer, combine the warm water (make sure it’s between 105-110°F—too hot will kill the yeast, too cold won’t activate it) with the yeast. Stir gently and let it sit for about 5 minutes until foamy and bubbly. If it doesn’t foam, your yeast is dead—start over with fresh yeast.
- Mix wet ingredients: Add the warm milk, sugar, salt, eggs, and softened butter to the yeast mixture. Whisk or mix on low speed until everything is combined.
- Add flour gradually: Add 3½ cups of flour to the bowl. If using a stand mixer, attach the dough hook and mix on low speed for about 2 minutes until a dough begins to form. If mixing by hand, stir with a wooden spoon until too thick to stir, then knead in the bowl. The dough should be soft and slightly sticky. Add more flour, 2 tablespoons at a time, only if the dough is excessively sticky and wet—you want it to remain soft.
- Knead the dough: If using a stand mixer, increase speed to medium-low and knead for 5-7 minutes until the dough is smooth, elastic, and pulls away from the sides of the bowl. If kneading by hand, turn dough out onto a lightly floured surface and knead for 8-10 minutes until smooth and elastic. The dough should be soft and slightly tacky but not sticky.
- First rise: Shape the dough into a ball and place it in a large, lightly greased bowl. Turn it over so all sides are greased. Cover the bowl with a clean kitchen towel or plastic wrap and place in a warm, draft-free spot. Let it rise for 60-75 minutes, or until doubled in size.
- Roll out the dough: Once risen, punch down the dough to release air bubbles. Turn it out onto a well-floured surface and roll it out to about ½-inch thickness. Don’t roll it too thin or your donuts will be dense; don’t roll it too thick or the centers won’t cook through.
- Cut out donuts: Using a floured donut cutter (or a 3-inch round cutter for the outer circle and a 1-inch cutter for the center hole), cut out donuts and place them on parchment paper squares. This makes it easier to transfer them to the oil later. Gather scraps, re-roll once (don’t overwork the dough), and cut more donuts. Save the donut holes!
- Second rise: Cover the cut donuts loosely with a kitchen towel and let them rise for 30-45 minutes until puffy and nearly doubled. They should feel light and airy when gently poked.
- Heat the oil: While donuts rise, heat 2-3 inches of vegetable oil in a large, heavy-bottomed pot or Dutch oven over medium heat. Use a thermometer to bring the oil to exactly 350-360°F. This temperature is crucial—too low and donuts absorb oil and become greasy; too high and they’ll burn outside while staying raw inside.
- Fry the donuts: Working in batches (don’t overcrowd), carefully slide 2-3 donuts with their parchment squares into the hot oil. The parchment will float up—use tongs to remove it. Fry for about 1-1½ minutes per side until deep golden brown. The donuts should flip themselves when ready; if not, use a slotted spoon to flip them. They cook quickly, so stay attentive.
- Drain: Use a slotted spoon or tongs to transfer fried donuts to a wire rack set over a baking sheet or to a paper towel-lined plate. Let them cool for 2-3 minutes before glazing. Fry the donut holes for about 45-60 seconds per side.
- Make the glaze: While donuts cool slightly, whisk together the sifted powdered sugar, vanilla extract, milk, and a pinch of salt in a medium bowl until smooth. The glaze should be thick but pourable—think pancake batter consistency. Add more milk, one teaspoon at a time, if too thick, or more powdered sugar if too thin.
- Glaze the donuts: While donuts are still slightly warm (not hot—they should be cool enough to handle but still warm to the touch), dip the top of each donut into the glaze, letting excess drip off, then place glazed-side-up on the wire rack. The glaze will set as it cools, creating that classic glossy finish.
- Serve: Let the glaze set for 5-10 minutes, then serve immediately for the ultimate fresh donut experience. These are best enjoyed within a few hours of making.
Notes
- Temperature control is everything when frying. Invest in a good thermometer and maintain 350-360°F throughout frying. Adjust your heat as needed between batches.
- Don’t skip the second rise after cutting—this is what makes donuts light and airy instead of dense and heavy.
- For perfectly shaped donuts, make sure your dough is rolled evenly and your cutters are sharp and floured.
- If you don’t have a donut cutter, use two different-sized round cookie cutters or biscuit cutters.
- Day-old donuts can be refreshed by microwaving for 8-10 seconds, but they’re truly best fresh.
- Save and fry all the donut holes—they’re the cook’s treat!
Nutrition
- Serving Size: 1 glazed donu
- Calories: 285
- Sugar: 22g
- Sodium: 215g
- Fat: 11g
- Saturated Fat: 3g
- Unsaturated Fat: 7g
- Trans Fat: 0g
- Carbohydrates: 42g
- Fiber: 1g
- Protein: 4g
- Cholesterol: 40mg
Tips & Variations
Chocolate Glazed Donuts: Make a chocolate glaze by whisking together 2 cups powdered sugar, ⅓ cup cocoa powder, 4 tablespoons melted butter, 3-4 tablespoons milk, and 1 teaspoon vanilla. Adjust consistency with more milk or powdered sugar.
Cinnamon Sugar Donuts: Skip the glaze entirely and toss warm donuts in a mixture of ¾ cup granulated sugar and 1 tablespoon cinnamon. Classic and delicious!
Maple Glazed Donuts: Replace the vanilla glaze with a maple version: 2 cups powdered sugar, 3 tablespoons pure maple syrup, 2-3 tablespoons milk, and a pinch of salt. The maple flavor is incredible.
Filled Donuts: Don’t cut out the center holes. After frying and cooling, use a piping bag fitted with a long tip to inject jam, custard, or cream filling into the side of each donut.
Boston Cream Donuts: Fill with vanilla custard and top with chocolate glaze for an iconic donut shop favorite.
Baked Donuts Option: While not traditional, you can bake these in a 375°F oven for 12-14 minutes in a donut pan, though the texture will be more cake-like and less authentic.
Buttermilk Donuts: Replace the milk with buttermilk for a tangier, more tender donut with extra flavor complexity.
Old-Fashioned Sour Cream Donuts: Add ½ cup sour cream to the dough and reduce milk to ½ cup. These will be slightly denser and more cake-like—perfect for dunking in coffee.
Pro Chef Tips
Temperature precision is non-negotiable: The single most important factor in perfect homemade donuts is maintaining the correct oil temperature. Too cold and your donuts absorb oil and become greasy and heavy. Too hot and they burn outside while staying raw inside. Keep that thermometer in the oil at all times and adjust your heat constantly to maintain 350-360°F.
The windowpane test for dough: To know if you’ve kneaded enough, take a small piece of dough and gently stretch it between your fingers. If it stretches thin enough to see light through it without breaking (like a windowpane), you’ve developed enough gluten. If it tears immediately, keep kneading.
Warm rising environment: Yeast loves warmth. Create the perfect rising environment by turning your oven to the lowest setting for just 1-2 minutes, then turning it off and placing your covered dough inside. Alternatively, place the bowl near (not on) a warm stovetop or in a sunny spot.
Don’t rush the rises: Patience during both rises creates lighter, fluffier donuts with better flavor. If you rush the process, you’ll have dense, heavy donuts. The yeast needs time to create those air pockets that make donuts so light.
Fry in batches: Never overcrowd your pot. Frying too many donuts at once drops the oil temperature dramatically, resulting in greasy, undercooked donuts. Fry just 2-3 at a time and let the oil return to temperature between batches.
The “just warm” sweet spot for glazing: Glaze your donuts when they’re still warm but not hot—you should be able to comfortably handle them. Hot donuts will melt the glaze into a thin coating; cold donuts won’t absorb the glaze properly. Slightly warm donuts give you that perfect glossy coating.
Use fresh oil: Old or reused oil imparts off-flavors and breaks down at lower temperatures. Start with fresh oil for the best-tasting donuts. After using it for donuts, you can strain and save it for one more use, but then discard it.
Common Mistakes to Avoid
Using water that’s the wrong temperature for yeast: This is the #1 killer of donut dough. Water or milk above 115°F will kill your yeast; below 100°F won’t activate it properly. Always use a thermometer to check—it should feel warm but not hot to the touch, like a comfortable bath. If your yeast doesn’t foam after 5-10 minutes, start over.
Rolling the dough too thin or too thick: Half-inch thickness is the sweet spot. Thinner and your donuts will be dense and crispy rather than fluffy; thicker and the centers won’t cook through before the outside burns. Use a ruler if you’re not confident eyeballing it.
Not letting the oil return to temperature between batches: After frying each batch, the oil temperature drops. If you immediately add the next batch without letting it reheat, those donuts will absorb excess oil. Wait 1-2 minutes between batches, watching your thermometer, until the oil returns to 350-360°F.
Skipping the second rise after cutting: It might be tempting to fry immediately after cutting, but that second rise is crucial. It allows the cut donuts to relax and puff up, creating that light, airy texture. Skipping it results in dense, heavy donuts.
Flipping too early or too often: Let each side cook until deep golden brown before flipping—usually 60-90 seconds per side. Flipping too early or multiple times interferes with the cooking process and can make donuts absorb more oil. Be patient and flip just once.
Storage & Meal Prep
Room Temperature Storage: Homemade donuts are best eaten fresh, ideally within 4-6 hours of making them. However, you can store them at room temperature in an airtight container for up to 2 days. They’ll gradually lose their fresh texture and become slightly denser, but they’re still delicious. Don’t refrigerate donuts—the cold temperature makes them stale faster.
Refreshing Day-Old Donuts: To bring back some of that fresh-made magic, microwave individual donuts for 8-10 seconds. This softens them and makes them taste fresher. Don’t overdo it or they’ll become tough.
Freezing Unglazed Donuts: For best results, freeze donuts before glazing them. Let them cool completely after frying, then place in a single layer on a baking sheet and freeze until solid (about 1 hour). Transfer to a freezer bag or airtight container and freeze for up to 2 months. Thaw at room temperature for 30-45 minutes, then warm briefly in the microwave (10-15 seconds) before glazing and serving.
Freezing Glazed Donuts: You can freeze glazed donuts, but the glaze may crack or look less perfect when thawed. Place them in a single layer in an airtight container with parchment paper between layers. Freeze for up to 1 month. Thaw at room temperature for 45-60 minutes.
Reheating from Frozen: For the best texture, thaw donuts at room temperature, then warm in a 300°F oven for 3-5 minutes, or microwave for 15-20 seconds. This helps restore some of that fresh-fried texture.
Make-Ahead & Freezer Notes
Make the dough ahead: You can prepare the dough through the first rise, then refrigerate it overnight in a covered bowl. The next morning, let it come to room temperature (about 30 minutes), then proceed with rolling, cutting, and the second rise. Cold-fermented dough actually develops more complex, interesting flavor.
Freeze the dough: After the first rise, you can freeze the dough for up to 1 month. Thaw it overnight in the refrigerator, then bring to room temperature before rolling and cutting. Let the cut donuts rise fully before frying.
Cut and freeze unbaked donuts: After cutting out donuts, place them on a parchment-lined baking sheet and freeze until solid. Transfer to a freezer bag. When ready to use, place frozen donuts on parchment squares, cover, and let them thaw and rise at room temperature for 1-2 hours until puffy, then fry as directed.
Make glaze fresh: Glaze only takes 5 minutes to make, so always prepare it fresh rather than storing it. It thickens and crystallizes as it sits, making it difficult to work with.
Best reheating method: For the most authentic fresh-donut experience, thaw frozen unglazed donuts at room temperature, warm them in a 300°F oven for 4-5 minutes, then glaze while still warm. This method comes closest to replicating the taste and texture of freshly made donuts.
Serving Suggestions
Homemade glazed donuts are spectacular on their own, but here are some ways to create a complete experience:
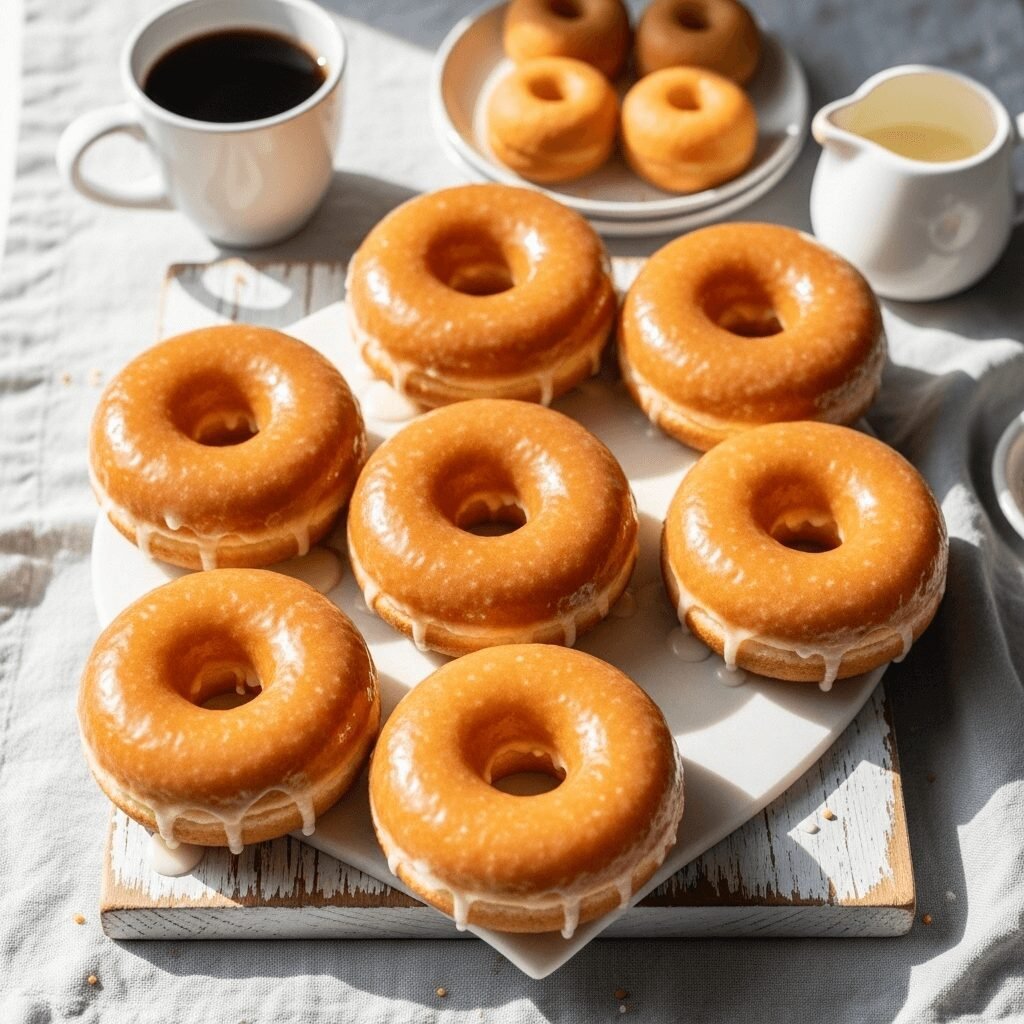
Hot Beverages: The classic pairing is, of course, fresh coffee—whether that’s drip coffee, espresso drinks, cappuccinos, or lattes. Hot chocolate, chai tea, or even matcha lattes also complement the sweetness beautifully. The combination of hot coffee and a slightly sweet donut is unbeatable.
Cold Beverages: Ice-cold milk is the childhood classic for good reason. Cold brew coffee, iced lattes, or even chocolate milk work wonderfully. For brunch parties, mimosas or Bellinis add a festive touch.
Fresh Fruit: Balance the richness of donuts with fresh berries (strawberries, blueberries, raspberries), sliced peaches, or a simple fruit salad. The bright, tart fruit cuts through the sweetness perfectly.
Breakfast Spread: Serve donuts as part of a larger breakfast or brunch spread with scrambled eggs, crispy bacon or sausage, fresh orange juice, and maybe some yogurt parfaits for those who want a lighter option.
Donut Bar: Create a DIY donut bar for parties with various glazes (chocolate, maple, vanilla), toppings (sprinkles, crushed cookies, chopped nuts, shredded coconut, mini chocolate chips), and dipping sauces. Let guests customize their own donuts.
Ice Cream Sandwiches: Slice donuts in half horizontally and use them as “buns” for ice cream sandwiches. This decadent dessert is perfect for summer celebrations.
Special Occasions: Homemade donuts elevate any special morning—birthdays, Mother’s Day, Father’s Day, Christmas morning, Easter brunch, or lazy weekend mornings when you want to make something memorable.
FAQs Section
Can I make donuts without a stand mixer?
Absolutely! While a stand mixer makes the process easier, you can mix and knead this dough entirely by hand. Mix the ingredients in a large bowl with a wooden spoon until too thick to stir, then turn onto a floured surface and knead by hand for 8-10 minutes until smooth and elastic. Your arm will get a workout, but the results are identical.
Why are my donuts greasy and heavy?
This almost always means your oil temperature was too low. When oil isn’t hot enough (below 340°F), donuts absorb excess oil instead of quickly developing that crispy exterior that seals them. Always use a thermometer and maintain 350-360°F. Also, make sure your donuts completed their second rise—under-risen donuts are denser and absorb more oil.
Can I bake these donuts instead of frying?
You can bake them in donut pans at 375°F for 12-14 minutes, but understand that the texture will be completely different—more like cake donuts than the light, airy, crispy-outside yeasted donuts this recipe creates. Frying is really what makes these special. If you want baked donuts, look for a recipe specifically designed for baking.
What’s the difference between cake donuts and yeast donuts?
Cake donuts use baking powder/soda for leavening, creating a denser, more crumbly texture similar to cake (think old-fashioned donuts). Yeast donuts (like this recipe) use yeast and require rising time, resulting in a lighter, airier, bread-like texture with more chew. Both are delicious but completely different in texture and flavor.
Why didn’t my dough rise?
The most common culprits are dead yeast (check expiration dates), water/milk that was too hot (killed the yeast) or too cold (didn’t activate it), or a cold rising environment. Make sure your liquids are 105-110°F, your yeast foams during proofing, and your dough rises in a warm, draft-free spot (75-80°F is ideal).
Can I use instant yeast instead of active dry?
Yes! Use the same amount of instant yeast, but you can skip the proofing step and add it directly to the flour. Mix the flour, instant yeast, salt, and sugar together, then add the warm milk, water, eggs, and butter. The rise times remain the same.
How do I know when the donuts are done frying?
They should be deep golden brown on both sides—not pale or blonde, which indicates they’re undercooked. Each side typically takes 60-90 seconds at the proper temperature. If you’re unsure, break open a donut hole to check—the interior should be fully cooked through with no raw dough, and it should look fluffy and light, not dense or gummy.
Conclusion
Making homemade glazed donuts from scratch is one of those special kitchen projects that creates pure joy and unforgettable memories. Yes, it takes time and patience—from activating the yeast to those two crucial rises to carefully monitoring frying temperatures—but every single step is worth it when you bite into a donut that’s still warm, impossibly fluffy, and covered in sweet, glossy glaze. These donuts taste better than 99% of donut shops because they’re made with real ingredients, no preservatives, and most importantly, they’re absolutely fresh. Once you experience the magic of homemade donuts, you’ll understand why people get so excited about them.
The process might seem intimidating at first, but this recipe breaks everything down into manageable steps that even beginner bakers can master. After you make them once, you’ll feel confident enough to experiment with different glazes, fillings, and toppings. You might find yourself planning special donut mornings with family or friends, or surprising loved ones with a batch of warm, fresh donuts for their birthday. However you choose to enjoy them, these homemade glazed donuts will bring smiles, create memories, and remind everyone why simple pleasures are often the sweetest.
I’d absolutely love to hear about your donut-making adventure! Drop a comment below telling me how they turned out, what variations you tried, or any questions you have. If you loved this recipe, please share it on Pinterest so other home bakers can discover the joy of making donuts from scratch. And don’t forget to snap a photo of your beautiful golden donuts and tag me on social media—I genuinely love seeing your creations! Now grab that thermometer and get ready to make some donut magic. Happy frying!