The Ultimate Fresh Fruit Tart Recipe – Buttery, Beautiful & Bursting with Flavor

There’s something undeniably magical about a fresh fruit tart. With its golden, buttery crust, silky vanilla pastry cream, and jewel-toned fresh fruit arranged in perfect harmony, this dessert is a showstopper that tastes every bit as good as it looks. Whether you’re hosting a summer garden party, celebrating a birthday, or simply treating yourself to something special, a homemade fruit tart delivers elegance without the fuss.
What makes this recipe truly special is its versatility. You can use whatever fresh fruit is in season—think juicy strawberries and blueberries in summer, or citrus segments and kiwi in winter. The buttery tart crust (pâte sucrée) provides the perfect crisp foundation, while the luscious pastry cream adds a creamy, vanilla-kissed layer that ties everything together. Finished with a glossy apricot glaze, this fruit tart looks like it came straight from a French pâtisserie, but I promise you can make it right at home.
This recipe is perfect for special occasions, holiday gatherings, Mother’s Day brunch, Easter celebrations, or any time you want to impress your guests with a dessert that’s as beautiful as it is delicious.
History / Background
The fruit tart, or “tarte aux fruits” as it’s known in France, has been a cornerstone of French pastry-making for centuries. Originating in the elegant pâtisseries of Paris and Lyon, these tarts were created as a way to showcase the finest seasonal fruits while demonstrating a pastry chef’s technical skill. The combination of sweet pastry dough (pâte sucrée), crème pâtissière (pastry cream), and fresh fruit became a hallmark of French dessert culture.
The concept of fruit tarts dates back to medieval times when simple fruit-filled pastries were enjoyed across Europe. However, it was the French who elevated the humble fruit tart into an art form during the Renaissance and later during the 19th century, when French haute cuisine reached its peak. Legendary pastry chefs like Marie-Antoine Carême refined the techniques, creating the foundation for what we know today as the classic French fruit tart.
In America, fruit tarts gained popularity in the mid-20th century as French cooking techniques became more accessible to home cooks. Julia Child’s influential cookbooks and television shows introduced American audiences to these elegant desserts, making them a beloved choice for celebrations and special occasions. Today, fruit tarts remain a symbol of refined taste and culinary artistry, yet they’re wonderfully approachable for home bakers willing to follow a few key steps.
Why You’ll Love This Recipe
This fresh fruit tart is the perfect balance of elegance and simplicity. While it looks incredibly impressive—like something you’d order at an upscale bakery—the techniques involved are actually quite straightforward. The recipe breaks down into manageable components that you can even prepare ahead of time, making it ideal for entertaining without the stress.
Here’s why this recipe will become your go-to celebration dessert:
- Bakery-Quality Results at Home – Create a stunning, professional-looking dessert that tastes better than store-bought
- Customizable & Seasonal – Use any combination of fresh fruits based on what’s in season or your personal preferences
- Make-Ahead Friendly – Prepare components in advance and assemble the day of serving for stress-free entertaining
- Crowd-Pleasing Elegance – Impresses guests of all ages with its beautiful presentation and delicious flavors
- Perfect Texture Contrast – Crispy, buttery crust meets silky cream and fresh, juicy fruit in every bite
- Not Overly Sweet – Balanced flavors that let the natural fruit shine through
- Versatile for Any Occasion – Works beautifully for birthdays, showers, holidays, or dinner parties
- Worth the Effort – While it takes some time, every step is rewarding and the results are absolutely spectacular
Ingredient Notes
For the Sweet Tart Crust (Pâte Sucrée):
All-Purpose Flour – The foundation of your crust. Use a quality brand and spoon it into your measuring cup rather than scooping to avoid dense pastry.
Unsalted Butter – Must be cold and cubed. European-style butter with higher fat content creates an even more tender, flavorful crust. Don’t substitute margarine.
Powdered Sugar – Creates a more tender, cookie-like crust compared to granulated sugar. It also dissolves more easily into the dough.
Egg Yolk – Enriches the dough and helps bind it together while adding beautiful golden color. Save the egg white for another recipe.
Vanilla Extract – Use pure vanilla extract, not imitation, for the best flavor.
Salt – Enhances all the other flavors. Even sweet recipes need a pinch of salt.
For the Vanilla Pastry Cream:
Whole Milk – Full-fat milk creates the creamiest texture. You can substitute 2% milk if needed, but avoid skim milk.
Granulated Sugar – Sweetens the cream and helps thicken it properly.
Egg Yolks – The key to rich, silky pastry cream. Use fresh eggs at room temperature for best results.
Cornstarch – Thickens the cream to the perfect consistency. Flour can be substituted but cornstarch creates a smoother texture.
Butter – Added at the end for extra richness and silky mouthfeel. Use unsalted to control the salt level.
Vanilla Extract or Vanilla Bean Paste – Vanilla bean paste provides beautiful flecks and intense flavor, but pure extract works wonderfully too.
For the Fruit Topping:
Fresh Fruit – Choose a colorful variety: strawberries, blueberries, raspberries, blackberries, kiwi, mandarin oranges, grapes. Select ripe but firm fruit that’s not overly juicy.
Apricot Preserves – Creates a beautiful glossy finish that also seals the fruit and prevents the tart from getting soggy. You can substitute apple jelly for lighter-colored fruits.
Equipment Needed
- 9-inch or 10-inch tart pan with removable bottom
- Food processor or pastry cutter
- Rolling pin
- Pie weights or dried beans (for blind baking)
- Parchment paper or aluminum foil
- Medium-heavy saucepan
- Whisk (preferably silicone or balloon whisk)
- Mixing bowls (various sizes)
- Plastic wrap
- Fine-mesh strainer
- Pastry brush
- Sharp knife
- Cutting board
- Measuring cups and spoons
- Rubber spatula
The Ultimate Fresh Fruit Tart Recipe – Buttery, Beautiful & Bursting with Flavor

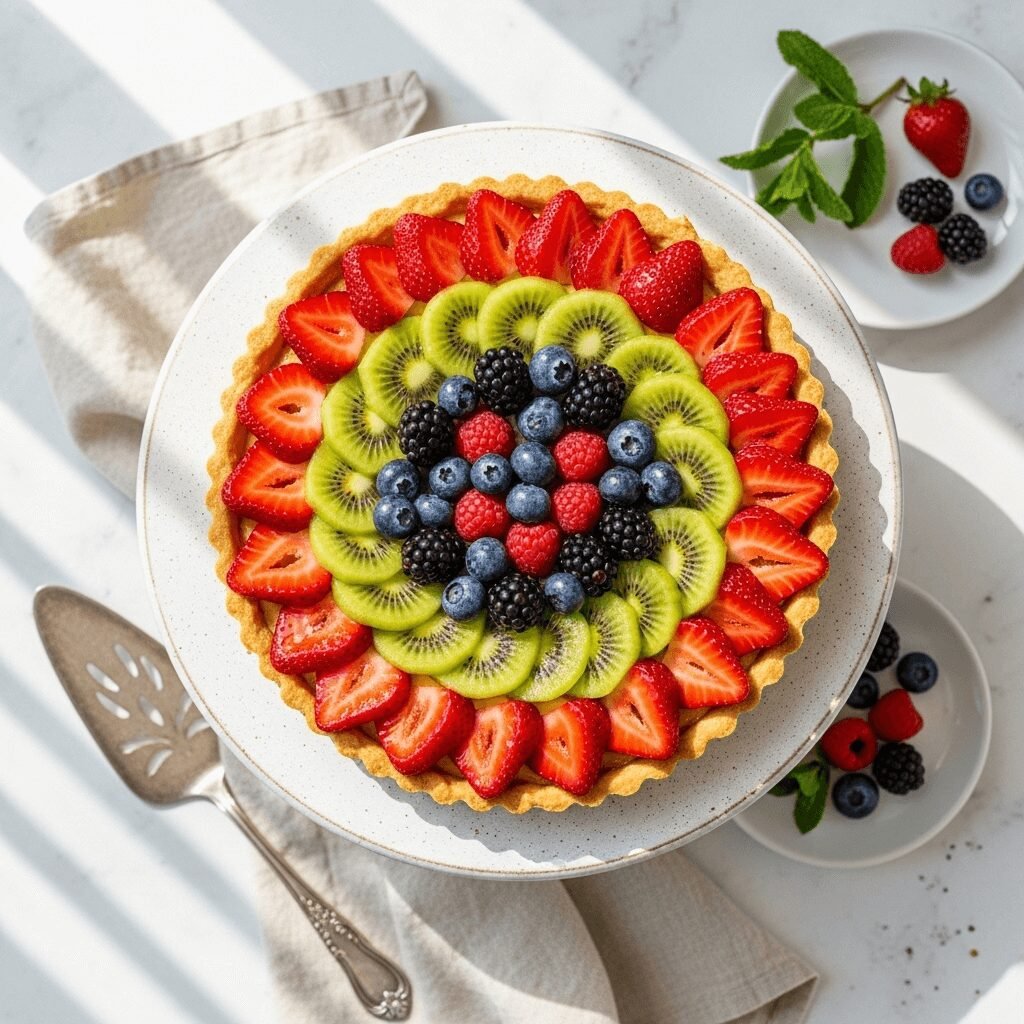
A stunning French-style fruit tart featuring a buttery sweet pastry crust, silky vanilla pastry cream, and an array of fresh seasonal fruits. This elegant dessert looks impressive but is surprisingly achievable for home bakers.
- Prep Time: 45 minutes (plus chilling time)
- Cook Time: 30 minutes
- Total Time: 1 hour 15 minutes (plus 3+ hours chilling)
- Yield: 8-10 servings 1x
- Category: Dessert
- Method: Baking
- Cuisine: French
- Diet: Vegetarian
Ingredients
Sweet Tart Crust:
- 1¼ cups (156g) all-purpose flour
- ½ cup (113g) unsalted butter, cold and cubed
- ⅓ cup (40g) powdered sugar
- 1 large egg yolk
- 1 teaspoon pure vanilla extract
- ⅛ teaspoon salt
- 1-2 tablespoons ice water (if needed)
Vanilla Pastry Cream:
- 2 cups (480ml) whole milk
- ½ cup (100g) granulated sugar, divided
- 5 large egg yolks
- ¼ cup (32g) cornstarch
- 2 tablespoons unsalted butter
- 2 teaspoons pure vanilla extract or 1 tablespoon vanilla bean paste
- Pinch of salt
Fruit Topping & Glaze:
- 3-4 cups mixed fresh fruit (strawberries, blueberries, raspberries, blackberries, kiwi, mandarin oranges, grapes, etc.)
- ⅓ cup (100g) apricot preserves
- 1 tablespoon water
Instructions
Make the Tart Crust:
- Prepare the dough: In a food processor, pulse together flour, powdered sugar, and salt. Add the cold cubed butter and pulse until the mixture resembles coarse crumbs with some pea-sized butter pieces remaining. Add the egg yolk and vanilla extract, then pulse until the dough just begins to come together. If the dough seems too dry, add ice water one tablespoon at a time. The dough should hold together when pinched but not be wet or sticky.
- Chill the dough: Turn the dough out onto a piece of plastic wrap, shape it into a flat disk, and wrap tightly. Refrigerate for at least 1 hour or up to 2 days. This chilling time is crucial for achieving a tender, flaky crust.
- Roll out the dough: Remove the dough from the refrigerator and let it sit for 5-10 minutes to soften slightly. On a lightly floured surface, roll the dough into an 11-12 inch circle about ⅛-inch thick. Carefully transfer the dough to your tart pan by rolling it around your rolling pin, then unrolling it over the pan.
- Form the crust: Gently press the dough into the bottom and up the sides of the tart pan. Roll the rolling pin over the top edges to trim off excess dough. Prick the bottom of the crust all over with a fork to prevent puffing during baking. Freeze the crust for 15 minutes while you preheat the oven.
- Blind bake the crust: Preheat your oven to 375°F (190°C). Line the frozen crust with parchment paper or aluminum foil and fill with pie weights or dried beans. Bake for 20 minutes, then carefully remove the parchment and weights. Return the crust to the oven and bake for an additional 8-10 minutes until golden brown. Let cool completely on a wire rack.
Make the Pastry Cream:
- Heat the milk: In a medium saucepan, heat the milk and ¼ cup of sugar over medium heat until it just begins to simmer. Remove from heat.
- Prepare the egg mixture: In a medium bowl, whisk together the egg yolks, remaining ¼ cup sugar, cornstarch, and salt until smooth and pale yellow.
- Temper the eggs: Slowly pour about ½ cup of the hot milk into the egg mixture while whisking constantly. This tempers the eggs so they won’t scramble. Then pour the egg mixture back into the saucepan with the remaining milk, whisking constantly.
- Cook the cream: Return the saucepan to medium heat and cook, whisking constantly, until the mixture thickens and begins to bubble, about 3-5 minutes. Continue cooking for 1 additional minute to cook out the starchy taste, whisking vigorously.
- Finish the cream: Remove from heat and whisk in the butter and vanilla extract until smooth. Strain the pastry cream through a fine-mesh strainer into a clean bowl to remove any lumps. Press plastic wrap directly onto the surface of the cream (this prevents a skin from forming) and refrigerate until completely chilled, at least 2 hours or overnight.
Assemble the Tart:
- Fill the tart: Once both the crust and pastry cream are completely cool, give the pastry cream a good whisk to smooth it out. Spread it evenly into the cooled tart shell using an offset spatula or the back of a spoon.
- Arrange the fruit: Prepare your fresh fruit by washing, drying thoroughly, and cutting as needed (slice strawberries, peel and slice kiwi, etc.). Arrange the fruit on top of the pastry cream in any pattern you like—concentric circles, rows, or a more rustic arrangement. Pack the fruit closely together for the most beautiful presentation.
- Make the glaze: In a small bowl, whisk together the apricot preserves and water. Microwave for 20-30 seconds until melted and smooth. If there are chunks, strain through a fine-mesh strainer.
- Glaze the fruit: Using a pastry brush, gently brush the warm apricot glaze over all the fruit. This adds shine and helps seal the tart.
- Chill and serve: Refrigerate the tart for at least 30 minutes before serving to allow everything to set. To serve, remove the outer ring of the tart pan, slice with a sharp knife, and enjoy!
Notes
- The tart crust can be made up to 3 days ahead and stored in the refrigerator, or frozen for up to 1 month.
- Pastry cream can be made 2 days in advance and stored in the refrigerator with plastic wrap pressed directly on its surface.
- For the crispest crust, assemble the tart no more than 4-6 hours before serving.
- Pat fruit completely dry before arranging to prevent a soggy crust.
- Use a variety of colorful fruits for the most striking visual presentation.
- If you don’t have a tart pan, you can use a 9-inch pie dish, though the presentation won’t be quite as elegant.
Nutrition
- Serving Size: 1 slice (based on 10 servings)
- Calories: 315
- Sugar: 24g
- Sodium: 95mg
- Fat: 15g
- Saturated Fat: 9g
- Unsaturated Fat: 5g
- Trans Fat: 0g
- Carbohydrates: 39g
- Fiber: 2g
- Protein: 6g
- Cholesterol: 160mg
Tips & Variations
Flavor Variations:
- Lemon Pastry Cream: Add the zest of 2 lemons and 2 tablespoons of lemon juice to the pastry cream for a bright, citrusy twist.
- Chocolate Fruit Tart: Add 3 ounces of chopped dark chocolate to the hot pastry cream and stir until melted for a chocolate version.
- Almond Crust: Replace ¼ cup of flour with almond flour for a subtle nutty flavor.
- Coconut Cream: Replace ½ cup of milk with coconut milk and add ½ teaspoon coconut extract for a tropical twist.
Fruit Combinations:
- Classic Berry Medley: Strawberries, blueberries, raspberries, and blackberries
- Tropical Paradise: Mango, kiwi, pineapple, and passion fruit
- Stone Fruit Summer: Peaches, nectarines, plums, and cherries
- Citrus Sunshine: Orange segments, grapefruit, blood oranges, and kumquats
- Fall Harvest: Figs, grapes, pomegranate arils, and sliced pears
Dietary Modifications:
- Gluten-Free: Use a 1:1 gluten-free flour blend in place of all-purpose flour for the crust.
- Dairy-Free: Use plant-based butter and milk alternatives (oat milk works particularly well in pastry cream).
- Reduced Sugar: Cut the sugar in the pastry cream by ¼ cup if you prefer a less sweet dessert that lets the fruit shine more.
Pro Chef Tips
For the Perfect Crust:
- Keep everything cold! Cold butter creates a flakier, more tender crust. If your kitchen is warm, chill your flour and bowl too.
- Don’t overwork the dough. Mix just until it comes together to prevent tough, chewy pastry.
- Freeze the crust before baking—this helps it hold its shape and prevents shrinking.
For Silky Pastry Cream:
- Whisk constantly while cooking to prevent lumps and ensure even cooking. The mixture will seem thin, then suddenly thicken dramatically—keep whisking!
- Straining the finished cream is non-negotiable for silky-smooth results.
- Cool pastry cream quickly by placing the bowl over an ice bath and stirring occasionally if you’re in a hurry.
For Assembly Success:
- Make sure both the crust and pastry cream are completely cool before assembling, or you’ll end up with a soggy crust.
- Pat fruit completely dry with paper towels before arranging—moisture is the enemy of a crisp crust.
- Warm your apricot glaze slightly before brushing for the easiest, most even application.
Presentation Tips:
- Arrange fruit in color gradients or patterns for Instagram-worthy results.
- Use smaller pieces of fruit and pack them tightly for a professional look.
- Add fresh mint leaves or edible flowers as a final garnish for extra elegance.
Common Mistakes to Avoid
1. Overworking the Tart Dough
When you overmix or overwork the pastry dough, you develop too much gluten, which results in a tough, chewy crust instead of tender, crumbly perfection. Mix only until the dough just comes together, then stop immediately.
2. Skipping the Blind Baking Step
Some bakers try to skip blind baking (pre-baking with weights), but this leads to a soggy, undercooked bottom. The weights prevent the crust from puffing up and ensure it’s fully cooked and crisp before adding the wet pastry cream.
3. Not Chilling Between Steps
Rushing the chilling process is a recipe for disaster. The dough needs to chill so the butter firms up (preventing shrinkage), and both components need to be completely cool before assembly to maintain the crisp texture of the crust.
4. Using Wet or Overly Ripe Fruit
Wet fruit will make your tart soggy, and overly ripe fruit can be mushy and release too much juice. Pat fruit dry thoroughly and choose fruit that’s ripe but still firm to the touch.
5. Assembling Too Far in Advance
While the components can be made ahead, assembling the tart more than 6 hours before serving can cause the crust to soften from the moisture in the cream and fruit. For the crispest results, assemble the same day you plan to serve.
Storage & Meal Prep
Refrigerator Storage:
Store the assembled fruit tart covered loosely with plastic wrap in the refrigerator for up to 2 days. However, the crust will gradually soften over time, so it’s best enjoyed within 24 hours of assembly for optimal texture. If you have leftover slices, store them in an airtight container in the refrigerator.
Component Storage:
- Unbaked tart dough: Wrap tightly and refrigerate for up to 3 days or freeze for up to 2 months.
- Baked tart shell: Store at room temperature, covered, for up to 2 days, or freeze for up to 1 month.
- Pastry cream: Store in an airtight container with plastic wrap pressed directly on the surface for up to 3 days in the refrigerator.
Reheating Notes:
This tart is best served chilled or at room temperature and should not be reheated. If the tart has been refrigerated, you can let it sit at room temperature for 15-20 minutes before serving to take the chill off and allow the flavors to bloom.
Leftover Ideas:
If you have leftover pastry cream, it makes a wonderful filling for cream puffs, éclairs, or layered parfaits. Leftover tart dough can be rolled out, cut into shapes, and baked as cookies.
Make-Ahead & Freezer Notes
Make-Ahead Strategy:
This is an excellent make-ahead dessert when you break it into components:
- 3 days ahead: Make and blind bake the tart shell. Let cool completely, then cover and store at room temperature or wrap well and freeze.
- 2 days ahead: Make the pastry cream, cover with plastic wrap pressed directly on the surface, and refrigerate.
- Day of serving: Whisk the pastry cream smooth, fill the tart shell, arrange the fruit, apply the glaze, and refrigerate until serving.
This strategy allows you to spread out the work and ensures everything is fresh and crisp when you serve.
Freezer Instructions:
- Tart shell: The baked tart shell freezes beautifully for up to 1 month. Wrap it tightly in plastic wrap, then aluminum foil. Thaw at room temperature for 1 hour before filling.
- Unbaked dough: Freeze the dough disk for up to 2 months. Thaw overnight in the refrigerator before rolling out.
- Assembled tart: I don’t recommend freezing the assembled tart as the fruit and cream won’t maintain their texture and quality upon thawing.
Best Reheating Method:
As mentioned, this dessert should not be reheated. Serve chilled or at cool room temperature for the best experience.
Serving Suggestions
A fresh fruit tart is stunning enough to stand alone as dessert, but here are some wonderful accompaniments to round out your menu:
Beverage Pairings:
- Champagne or Prosecco for celebratory occasions
- Sweet dessert wine like Moscato or Sauternes
- Freshly brewed espresso or cappuccino
- Mint tea or chamomile tea for afternoon service
- Sparkling lemonade or berry-infused water for non-alcoholic options
Complementary Desserts (for a dessert buffet):
- Delicate French macarons
- Simple butter cookies or shortbread
- Light lemon sorbet or vanilla bean ice cream
- Chocolate truffles for those who want something richer
Occasion-Specific Serving Ideas:
- Bridal/Baby Shower: Serve individual mini tarts for elegant single servings
- Birthday Party: Add a birthday candle to the center and surround with fresh flowers
- Holiday Dinner: Use seasonal fruits like berries for summer, citrus for winter
- Afternoon Tea: Cut into small wedges and serve alongside finger sandwiches and scones
Plating Suggestions: Serve slices on dessert plates with a small dollop of freshly whipped cream, a light dusting of powdered sugar, or a sprig of fresh mint. For extra elegance, drizzle the plate with a thin line of fruit coulis or chocolate sauce before placing the slice.
FAQs Section
Q: Can I use frozen fruit instead of fresh fruit?
A: Fresh fruit is always best for this recipe because frozen fruit releases too much moisture as it thaws, which will make your tart soggy. If you must use frozen fruit, thaw it completely, drain thoroughly, and pat it very dry with paper towels before arranging on the tart. Be aware that the texture won’t be quite as good as with fresh fruit.
Q: My pastry cream has lumps. How do I fix it?
A: If your pastry cream develops lumps despite constant whisking, simply strain it through a fine-mesh strainer while it’s still warm. This will remove any cooked egg bits or cornstarch clumps, leaving you with silky-smooth cream. For extra insurance, you can also blend it with an immersion blender.
Q: Why did my tart crust shrink during baking?
A: Tart crust shrinks when the gluten in the dough hasn’t had adequate time to relax, or when the butter has become too warm. Always chill your dough for at least 1 hour before rolling, and freeze the shaped crust for 15 minutes before baking. Also, avoid stretching the dough when fitting it into the pan—let it gently settle into the corners instead.
Q: Can I make this tart without a tart pan?
A: Yes! You can use a 9-inch pie dish instead, though you won’t get the same elegant, clean edges or be able to remove the tart from the pan. A springform pan also works in a pinch, though the sides won’t be as tall. Just adjust the dough quantity as needed.
Q: How do I know when my pastry cream is thick enough?
A: Your pastry cream is ready when it coats the back of a spoon and holds a line when you drag your finger through it. It should be thick like pudding, not pourable. Remember that it will thicken further as it cools, so don’t worry if it seems slightly loose when hot—just make sure it’s bubbling and has cooked for that extra minute.
Q: What’s the difference between pâte sucrée and regular pie crust?
A: Pâte sucrée (sweet tart dough) is richer than pie crust, made with powdered sugar and egg yolk, creating a tender, cookie-like texture. It’s less flaky and more sturdy than traditional pie crust, making it perfect for holding pastry cream. Regular pie crust is flakier but not sweet, and wouldn’t provide the right flavor or structure for a fruit tart.
Q: My tart crust is too crumbly and won’t hold together. What went wrong?
A: This usually means your dough is too dry. Add ice water one teaspoon at a time, mixing just until the dough holds together when pinched. Humidity, flour measurement technique, and even the size of your egg yolk can affect moisture levels, so don’t be afraid to adjust.
Conclusion
There you have it—a stunning, bakery-worthy fresh fruit tart that you can make right in your own kitchen! While this recipe does require some time and attention to detail, I promise the results are absolutely worth every minute. The combination of that buttery, crisp crust with silky vanilla pastry cream and vibrant fresh fruit creates a dessert that’s not only beautiful to look at but truly unforgettable to taste.
The best part? Once you master this classic technique, you can customize it endlessly with different fruits, flavored creams, and seasonal variations. It’s a recipe that will earn you compliments every single time you make it, whether you’re serving it at a holiday gathering, birthday celebration, or simply treating yourself to something special on a Sunday afternoon.
I’d love to hear how your fruit tart turns out! Did you try a specific fruit combination? Make any fun variations? Drop a comment below and let me know. And if you loved this recipe, please save it to your favorite Pinterest board so you can find it again and share the fruit tart love with your friends. Don’t forget to snap a photo and tag me—I live for seeing your beautiful creations!
Happy baking, and here’s to making memories (and gorgeous desserts) in your kitchen! 🍓🥝✨