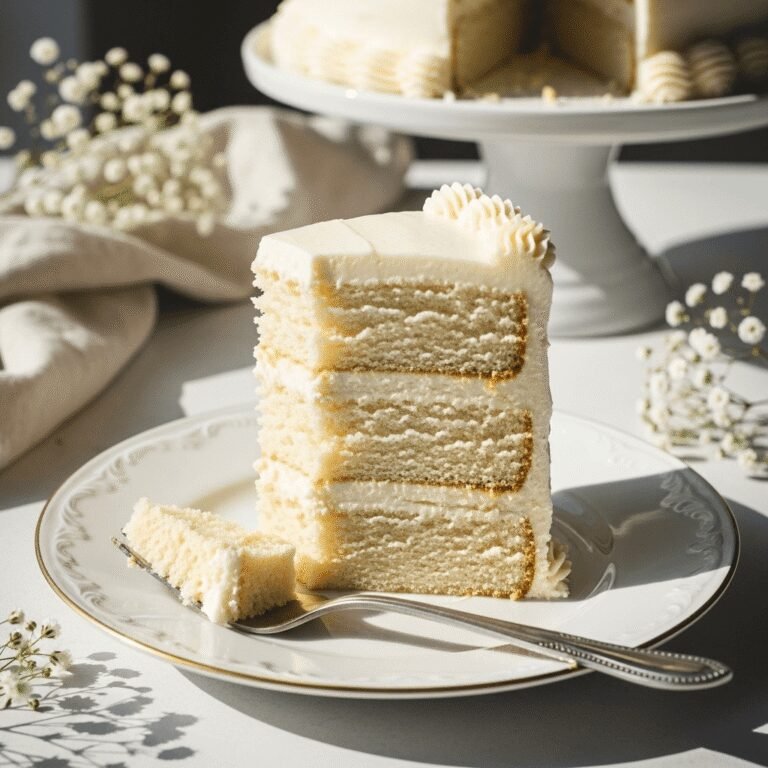
The Perfect Victoria Sponge Recipe – Light, Fluffy & Truly British!

There’s something truly magical about a classic Victoria Sponge cake. This iconic British dessert is the epitome of afternoon tea elegance, yet surprisingly simple to make at home. With two layers of light, buttery sponge cake sandwiched together with sweet strawberry jam and a cloud of fresh whipped cream (or buttercream, if you prefer), this traditional Victoria Sponge recipe delivers pure nostalgic comfort in every bite.
Whether you’re hosting a proper afternoon tea, celebrating a birthday, or simply craving a slice of something homemade and delicious, this Victoria Sponge cake never disappoints. It’s the kind of recipe that looks impressive on your table but doesn’t require fancy techniques or hard-to-find ingredients. Just honest, straightforward baking that results in a beautifully risen, golden cake that practically melts in your mouth.
What makes this recipe so beloved is its perfect balance – not too sweet, wonderfully moist, and with just enough vanilla flavor to complement the jam and cream filling. It’s a cake that lets quality ingredients shine without any fuss or frosting overload. If you’ve never made a Victoria Sponge before, you’re in for a treat. And if you’re a longtime fan, this recipe will become your new go-to version.
History / Background
The Victoria Sponge holds a special place in British baking history, and its story is as delightful as the cake itself. Named after Queen Victoria, this beloved cake rose to prominence during the 1800s when the Queen herself popularized the tradition of afternoon tea. Legend has it that Queen Victoria was particularly fond of enjoying a slice of this sponge cake with her afternoon tea, and thus the “Victoria Sandwich” or “Victoria Sponge” was born.
During the Victorian era, the availability of baking powder revolutionized home baking, making it possible for ordinary home cooks to create light, fluffy cakes without the laborious task of beating air into eggs for hours. The Victoria Sponge became the ultimate test of a baker’s skill – a simple recipe with nowhere to hide imperfections. A proper Victoria Sponge should rise evenly, have a tender crumb, and be light as air.
Traditionally, the cake was filled with just raspberry or strawberry jam and a light dusting of caster sugar on top. Over time, variations emerged with the addition of whipped cream or buttercream, but purists still insist that jam alone is the authentic filling. The cake became a staple at village fêtes, church bake sales, and family gatherings across Britain, cementing its status as a national treasure.
What’s remarkable is how this nearly 200-year-old recipe remains virtually unchanged and just as popular today. It’s a testament to the timeless appeal of simple, quality ingredients combined with proper technique. The Victoria Sponge isn’t just a cake – it’s a slice of British heritage that continues to bring people together over cups of tea and conversation.
Why You’ll Love This Recipe
This Victoria Sponge recipe strikes the perfect balance between elegance and simplicity. It’s a cake that looks like you spent hours in the kitchen, but the actual hands-on time is wonderfully short. The texture is incredibly light and tender, with a delicate crumb that practically dissolves on your tongue. Unlike heavy American-style layer cakes, this British classic is refreshingly not-too-sweet, allowing the pure flavors of butter, vanilla, and jam to shine through.
Here’s why this recipe will become your favorite:
- Beginner-friendly – No complicated techniques or special skills required; if you can cream butter and sugar, you can make this cake
- Minimal ingredients – Just six basic ingredients for the cake layers that you probably already have in your pantry
- Quick preparation – Ready to bake in about 15 minutes of active prep time
- Consistently reliable – This recipe uses the classic “equal weights” method that virtually guarantees success every time
- Versatile for occasions – Perfect for afternoon tea, birthdays, bridal showers, Mother’s Day, or casual weekend baking
- Make-ahead friendly – The cake layers can be baked in advance and assembled when you’re ready to serve
- Customizable filling – Stick with traditional jam and cream, or experiment with different flavors to suit your taste
- Budget-friendly – Uses everyday ingredients without any expensive add-ins or specialty items
- Crowd-pleaser – Appeals to all ages and tastes; it’s neither too fancy nor too plain
- Impressive presentation – Looks bakery-worthy with minimal decorating effort
Ingredient Notes
Understanding your ingredients is key to baking the perfect Victoria Sponge. Here’s what you need to know about each component:
Unsalted Butter – The foundation of flavor in this cake. Room temperature butter (about 65-68°F) creams beautifully with sugar, creating tiny air pockets that make the cake light and fluffy. Unsalted butter allows you to control the salt level precisely. If you only have salted butter, reduce the added salt by half. European-style butter with higher fat content will produce an even richer cake.
Caster Sugar (Superfine Sugar) – Finer than regular granulated sugar, caster sugar dissolves more quickly when creamed with butter, resulting in a lighter texture. If you can’t find caster sugar, pulse regular granulated sugar in a food processor for 30 seconds. Don’t substitute with powdered sugar as it contains cornstarch.
Large Eggs – Room temperature eggs incorporate more easily and create better volume. Cold eggs can cause the batter to curdle. If you forgot to take them out ahead, place them in a bowl of warm (not hot) water for 5-10 minutes. Free-range or organic eggs will give you a richer color and flavor.
Self-Raising Flour – This contains the perfect amount of leavening for a Victoria Sponge. Don’t have self-raising flour? Make your own by combining 1 cup all-purpose flour with 1½ teaspoons baking powder and ¼ teaspoon salt. Sift it at least twice for even distribution.
Pure Vanilla Extract – Use the real thing, not imitation. Vanilla enhances all the other flavors and adds aromatic depth. Vanilla bean paste is an excellent upgrade if you have it.
Strawberry or Raspberry Jam – Choose a good-quality jam with visible fruit pieces. Seedless raspberry jam is traditional, but strawberry is equally popular. The jam should be thick enough not to soak into the cake layers.
Heavy Whipping Cream or Buttercream – Traditional recipes use whipped cream, which creates a lighter filling. For a cake that needs to sit out longer or withstand warmer temperatures, vanilla buttercream is more stable. You can also do half-and-half for the best of both worlds.
Equipment Needed
Having the right tools makes baking this Victoria Sponge much easier and ensures consistent results:
- Two 8-inch round cake pans (straight sides are best for even layers)
- Parchment paper for lining pans
- Electric mixer (stand mixer or hand mixer) – essential for proper creaming
- Large mixing bowl
- Medium mixing bowl (for dry ingredients)
- Rubber spatula for folding and scraping
- Wire cooling rack (a must for proper cooling)
- Sifter or fine-mesh sieve (for flour and powdered sugar)
- Measuring cups and spoons (or a kitchen scale for precision)
- Offset spatula or butter knife (for spreading jam and cream)
- Cake lifter or large flat spatula (helpful for moving layers)
- Whisk (if making whipped cream)
- Toothpick or cake tester
- Serving plate or cake stand
Victoria Sponge Recipe
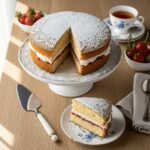
This classic Victoria Sponge recipe creates two perfectly light and fluffy cake layers filled with sweet strawberry jam and fresh whipped cream. A timeless British favorite that’s surprisingly easy to make at home!
- Prep Time: 25 minutes
- Cook Time: 25 minutes
- Total Time: 45 minutes (plus cooling time)
- Yield: 8-10 servings 1x
- Category: Dessert
- Method: Baking
- Cuisine: British
- Diet: Vegetarian
Ingredients
For the Cake:
- 1 cup (225g) unsalted butter, softened to room temperature
- 1 cup (200g) caster sugar (superfine sugar)
- 4 large eggs, room temperature
- 1¾ cups (225g) self-raising flour
- 2 teaspoons pure vanilla extract
- Pinch of salt
For the Filling:
- ⅔ cup (200g) strawberry or raspberry jam
- 1 cup (240ml) heavy whipping cream
- 2 tablespoons powdered sugar
- ½ teaspoon vanilla extract
For Finishing:
- 2 tablespoons powdered sugar (for dusting)
- Fresh strawberries (optional, for garnish)
Instructions
- Prepare Your Pans: Preheat your oven to 350°F (180°C). Grease two 8-inch round cake pans with butter, then line the bottoms with parchment paper circles. Lightly grease the parchment and dust with flour, tapping out any excess. This double insurance ensures your cakes release perfectly.
- Cream Butter and Sugar: In a large mixing bowl, beat the softened butter and caster sugar together using an electric mixer on medium-high speed for 4-5 minutes. The mixture should become pale, fluffy, and almost doubled in volume. This step incorporates air, which is crucial for a light texture. Scrape down the sides of the bowl halfway through.
- Add Eggs Gradually: Reduce mixer speed to medium. Add eggs one at a time, beating well after each addition (about 30 seconds each). The mixture might look slightly curdled after the third egg – this is normal. Add the vanilla extract with the last egg. If the mixture does curdle significantly, add a tablespoon of flour to bring it back together.
- Fold in Flour: Sift the self-raising flour and salt into a separate bowl. Using a rubber spatula, gently fold the flour into the butter mixture in three additions. Use a figure-eight motion and turn the bowl as you fold. Mix only until you can no longer see flour streaks – overmixing develops gluten and creates a tough cake.
- Divide and Smooth: Divide the batter evenly between your prepared pans (use a kitchen scale for perfect accuracy if you have one – about 450g per pan). Smooth the tops gently with your spatula, creating a slight dip in the center to ensure even rising.
- Bake to Perfection: Bake for 23-26 minutes, until the cakes are golden brown, spring back when gently pressed, and a toothpick inserted in the center comes out clean. The cakes should just be starting to pull away from the pan sides. Avoid opening the oven door for the first 18 minutes.
- Cool Properly: Let the cakes cool in their pans for 10 minutes on a wire rack. This prevents them from breaking apart when you remove them. Run a knife around the edges, then carefully turn out onto the wire rack. Peel off the parchment paper and flip the cakes right-side up to cool completely (about 1 hour). They must be completely cool before filling.
- Prepare Whipped Cream: When cakes are cool, make your filling. In a chilled bowl, beat the heavy cream, powdered sugar, and vanilla extract on medium-high speed until stiff peaks form (about 2-3 minutes). Don’t overbeat or you’ll make butter. If using buttercream instead, prepare according to your favorite recipe.
- Assemble the Cake: Place one cake layer on your serving plate (bottom-side up for a flat surface). Spread the jam evenly over the surface, leaving a ½-inch border around the edge. The jam will spread slightly when you add the cream and top layer.
- Add Cream Layer: Spoon or pipe the whipped cream over the jam layer, spreading it gently and evenly. Don’t spread it all the way to the edge – leave about ¼ inch space so it doesn’t squish out.
- Top and Finish: Carefully place the second cake layer on top (bottom-side down so the pretty top is visible). Press down very gently to settle. Dust generously with powdered sugar using a fine-mesh sieve. For an elegant touch, place a paper doily on top before dusting, then carefully remove it to leave a pretty pattern.
- Serve and Enjoy: Slice with a sharp knife, wiping it clean between cuts for neat slices. Serve immediately or refrigerate if not serving within an hour due to the cream filling.
Notes
- The classic “equal weights” method calls for equal amounts (by weight) of butter, sugar, eggs, and flour. This recipe uses 225g each for foolproof results.
- Cake layers can be baked 1-2 days ahead and stored wrapped tightly at room temperature, then filled just before serving.
- For a more stable filling that can sit at room temperature longer, use buttercream instead of whipped cream.
- The cake is best eaten the day it’s filled, but will keep refrigerated for up to 2 days.
- Room temperature ingredients are essential – they mix together more smoothly and create better texture.
Nutrition
- Serving Size: 1 slice (1/10 of cake)
- Calories: 445
- Sugar: 32g
- Sodium: 185mg
- Fat: 26g
- Saturated Fat: 16g
- Unsaturated Fat: 8g
- Trans Fat: 0g
- Carbohydrates: 48g
- Fiber: 1g
- Protein: 6g
- Cholesterol: 145mg
Tips & Variations
Flavor Variations:
- Lemon Victoria Sponge: Add 2 teaspoons lemon zest to the batter and use lemon curd instead of jam
- Chocolate Version: Replace 3 tablespoons of flour with cocoa powder for a light chocolate sponge
- Berry Burst: Add fresh sliced strawberries between the jam and cream layers
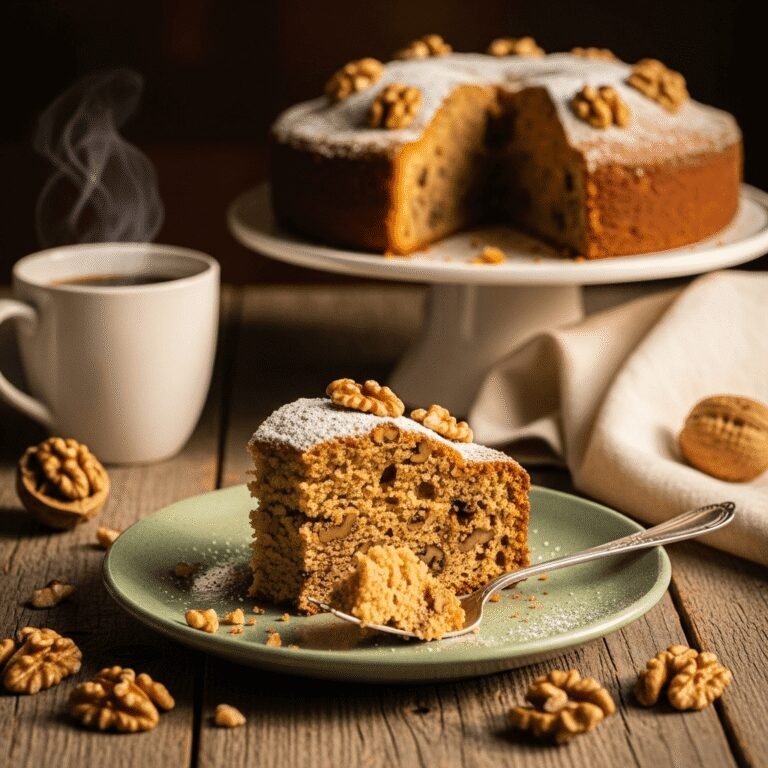
- Coffee Walnut: Add 1 tablespoon instant coffee dissolved in 1 teaspoon hot water to the batter, and mix chopped walnuts into coffee buttercream
- Lavender Honey: Add 1 teaspoon culinary lavender to the batter and use honey instead of half the sugar
Dietary Adaptations:
- Gluten-Free: Use a 1:1 gluten-free baking flour blend with xanthan gum; the texture will be slightly denser
- Dairy-Free: Substitute butter with vegan baking block and use coconut cream (chilled overnight) for the filling
- Reduced Sugar: You can reduce the sugar to ¾ cup, though the texture will be slightly less tender
Filling Options:
- Traditional: Just jam with a dusting of sugar (most authentic)
- Buttercream only: For a sweeter, more stable filling
- Jam and buttercream: Classic combination
- Jam and mascarpone: Italian twist that’s slightly tangy
- Lemon curd and cream: Bright and citrusy
Pro Chef Tips
Temperature Control is Everything: The single most important factor in Victoria Sponge success is having all your ingredients at true room temperature (65-68°F). Cold eggs will cause your butter mixture to seize and separate, resulting in a dense cake. Set everything out 1-2 hours before baking.
The Creaming Method Matters: When creaming butter and sugar, don’t rush it. A full 5 minutes of beating creates thousands of tiny air bubbles that expand in the oven, creating that signature light texture. The mixture should be almost white and noticeably increased in volume – if it’s still yellow, keep beating.
Sift Your Flour Twice: This isn’t fussy baker nonsense – sifting twice ensures there are absolutely no lumps and aerates the flour, making it easier to fold in without overmixing. Overmixed cake batter develops too much gluten, resulting in a tough, chewy crumb instead of tender perfection.
The Tap Test: After pouring batter into pans, lift each pan about 2 inches off the counter and drop it flat. Do this 2-3 times. This releases large air bubbles that would create holes in your finished cake. It’s a simple step that dramatically improves crumb structure.
Oven Positioning: Bake cakes on the middle rack with at least 2 inches of space around each pan for air circulation. If your oven has hot spots, rotate the pans 180 degrees halfway through baking (but only after the first 18 minutes when the structure has set).
The Toothpick Truth: A toothpick should come out with a few moist crumbs clinging to it – not completely clean. Completely clean means you’ve overbaked slightly. Those moist crumbs will finish cooking as the cake cools, leaving you with perfectly moist layers.
Patience with Cooling: Resist the urge to assemble a warm cake. Even slightly warm cakes will melt the cream and cause the jam to soak in, creating a soggy mess. Wait until the cakes are completely cool to touch – this takes a full hour on a wire rack.
Common Mistakes to Avoid
Dense, Heavy Cake: Usually caused by overmixing the flour or using cold ingredients. Once you add flour, fold gently just until combined – every extra stir develops more gluten and toughens the cake. Also ensure butter and eggs are truly at room temperature so they emulsify properly.
Sunken Center: This happens when you open the oven door too early (before 18 minutes) or when you use too much leavening. The sudden temperature drop or excessive rising causes the structure to collapse. Also avoid overfilling your pans – batter should only fill them 2/3 full.
Dry, Crumbly Texture: Overbaking is the main culprit. Even 3-4 extra minutes can dry out a Victoria Sponge. Set a timer for the minimum time and check doneness carefully. Also measure flour correctly – spoon it into measuring cups rather than scooping, which compacts it and adds too much.
Jam Soaking into Cake: If your cake isn’t completely cool, the jam will be absorbed into the warm cake, making it soggy. Also, spread jam onto the flat bottom of the cake layer (flipped upside down) rather than the domed top – the tighter crumb on the bottom prevents soaking.
Uneven Rising or Domed Tops: Oven temperature that’s too high causes the outside to set before the middle rises, creating a dome. Use an oven thermometer to verify your temperature is accurate. Creating a slight depression in the center of the batter before baking also helps cakes rise level.
Cream Squishing Out: Using too much filling or pressing down too hard when adding the top layer causes this messy problem. Leave a border when spreading, and place the top layer on gently – it will settle on its own.
Storage & Meal Prep
Room Temperature Storage: An unfilled Victoria Sponge can sit at room temperature, wrapped tightly in plastic wrap, for up to 2 days. Store in a cool, dry place away from direct sunlight. The cake actually tastes better the day after baking as the flavors develop and the crumb softens slightly.
Refrigerator Storage: Once filled with whipped cream, the cake must be refrigerated. Cover loosely with plastic wrap or place under a cake dome, and it will keep for up to 2 days. Note that refrigeration dries out cake, so it’s best eaten within 24 hours of filling. Buttercream-filled versions hold up better in the fridge.
Bringing to Room Temperature: For the best flavor and texture, remove the filled cake from the refrigerator 30 minutes before serving. Cold cake doesn’t have the same tender, melt-in-your-mouth quality as room temperature cake.
Individual Slice Storage: Cut leftover slices can be wrapped individually in plastic wrap and refrigerated for 2-3 days. Let them sit at room temperature for 15 minutes before eating for optimal texture.
Cake Layer Separation: If you need to transport the cake, keep the layers separate and assemble on-site. Wrap each layer in plastic wrap and place in a rigid container to prevent damage during transport.
Make-Ahead & Freezer Notes
Advance Baking: The cake layers are perfect for making ahead. Bake them up to 2 days in advance, let them cool completely, then wrap each layer tightly in plastic wrap followed by aluminum foil. Store at room temperature until you’re ready to fill and serve.
Freezing Unfilled Layers: Victoria Sponge layers freeze beautifully for up to 3 months. Wrap cooled layers individually in plastic wrap, then foil, then place in freezer bags with the air pressed out. Label with the date. Thaw wrapped layers at room temperature for 2-3 hours before filling – don’t unwrap until fully thawed to prevent condensation from making the cake soggy.
Freezing Filled Cake: You can freeze a filled cake, but only if using buttercream (not whipped cream, which separates when frozen). Freeze uncovered for 30 minutes to firm up the filling, then wrap well. Thaw overnight in the refrigerator, then bring to room temperature before serving.
Quick Thaw Method: If you’re short on time, you can assemble and serve the cake while the layers are still slightly frozen – they’ll thaw as they sit. The texture won’t be quite as perfect, but it works in a pinch.
Jam and Cream Prep: Whipped cream must be made fresh and used immediately – it doesn’t store well. However, you can prepare buttercream filling up to 3 days ahead and refrigerate it. Bring to room temperature and re-whip briefly before using.
Serving Suggestions
A Victoria Sponge is the star of afternoon tea, but its versatility makes it suitable for many occasions. Here’s how to serve it perfectly:
Traditional Afternoon Tea: Serve slices alongside other tea sandwiches and petit fours. Offer English Breakfast, Earl Grey, or Darjeeling tea. Add small scones with clotted cream, cucumber sandwiches, and shortbread cookies for a complete tea experience.
Beverage Pairings: Beyond tea, this cake pairs beautifully with hot coffee, especially cappuccino or a mild latte. For special occasions, serve with champagne or Prosecco – the bubbles complement the light texture perfectly. Iced tea with lemon is lovely for summer gatherings.
Plate Presentation: Dust each slice with additional powdered sugar just before plating. Add a fresh strawberry or raspberry alongside, perhaps with a small dollop of whipped cream. A sprig of fresh mint adds color and elegance. For fancier occasions, drizzle the plate with raspberry coulis.
Dessert Course: Serve as the finale to a Sunday roast or light lunch. Pair with vanilla ice cream or a berry compote for extra indulgence. The cake is rich enough to satisfy but light enough not to feel heavy after a meal.
Special Occasions: This cake is perfect for Mother’s Day, baby showers, bridal showers, or birthday celebrations. Decorate the top with fresh berries, edible flowers, or pipe rosettes of whipped cream around the edge for extra flair.
Casual Serving: For everyday enjoyment, simply serve slices with a cup of tea or coffee. It’s wonderful for weekend brunch or as an after-school treat for children.
FAQs Section
Can I make Victoria Sponge without a mixer?
Yes, though it requires more effort. Cream the butter and sugar vigorously with a wooden spoon for about 8-10 minutes until very pale and fluffy. Beat eggs in a separate bowl and add gradually while beating continuously. The result won’t be quite as light, but it’s definitely doable.
Why did my cake sink in the middle?
The most common causes are opening the oven door too early (before 18 minutes), using too much baking powder, or underbaking. Make sure your oven temperature is accurate and avoid any sudden temperature changes during baking.
Can I use regular granulated sugar instead of caster sugar?
Yes, but pulse it in a food processor for 30 seconds first to make it finer. Caster sugar’s smaller crystals dissolve better during creaming, creating a lighter texture. In a pinch, regular sugar works but the texture won’t be quite as delicate.
How do I know when the cake is done?
Look for three signs: the cake should be golden brown, spring back when gently touched, and a toothpick inserted in the center should come out with just a few moist crumbs (not wet batter, but not completely clean). The edges should just be starting to pull away from the pan.
Can I make this recipe in different pan sizes?
Yes, but adjust baking time. In 6-inch pans (deeper layers), bake for 30-35 minutes. In 9-inch pans (thinner layers), reduce time to 18-22 minutes. You can also make this as cupcakes – bake for 15-18 minutes in standard muffin tins.
What’s the difference between Victoria Sponge and regular sponge cake?
Victoria Sponge uses the creaming method with butter, creating a denser, moister cake with rich flavor. True sponge cake uses the foam method with whipped eggs and no butter, resulting in a lighter, drier texture. Victoria Sponge is more forgiving and flavorful.
My cake layers are domed – how do I fix this?
Before baking, create a slight depression in the center of the batter with your spatula. Also check your oven temperature with a thermometer – too hot causes doming. If layers do dome, carefully level them with a serrated knife before filling.
Conclusion
There you have it – the complete guide to creating a show-stopping Victoria Sponge that would make Queen Victoria herself proud! This classic British cake proves that sometimes the simplest recipes are the most satisfying. With just a handful of pantry staples and some basic technique, you can create a dessert that’s equally at home at an elegant afternoon tea or a casual family gathering.
The beauty of this Victoria Sponge recipe is its reliability. Once you master the basic technique of creaming butter and sugar and gently folding in flour, you’ll have a foolproof recipe you can turn to again and again. And the best part? It’s endlessly customizable. Swap the jam flavors, experiment with different fillings, or add your own creative touches while staying true to the classic spirit.
I hope this recipe brings as much joy to your kitchen as it has to mine. There’s something wonderfully comforting about slicing into those golden layers, seeing the ruby jam and cloud-like cream peeking through. It’s the kind of cake that makes ordinary days feel special and special occasions even more memorable.
Now it’s your turn! Preheat that oven, gather your ingredients, and give this traditional Victoria Sponge recipe a try. I’d absolutely love to hear how it turns out for you. Did you stick with the classic strawberry jam and cream, or did you create your own variation? Share your results in the comments below, and don’t forget to save this recipe to your Pinterest boards so you can find it easily when that baking mood strikes!
Happy baking, and may your Victoria Sponge rise beautifully and taste absolutely divine! 🍰☕