The Ultimate No-Bake Icebox Cake Recipe – Easy, Elegant & Perfect for Any Occasion!
If you’ve ever wanted a show-stopping dessert that requires absolutely zero baking, let me introduce you to the magic of icebox cake! This dreamy, creamy dessert is exactly what it sounds like—a cake that “bakes” in your refrigerator (or icebox, if you’re feeling vintage). All you need are simple ingredients like cookies or graham crackers, whipped cream, and a little patience while the fridge works its magic overnight.
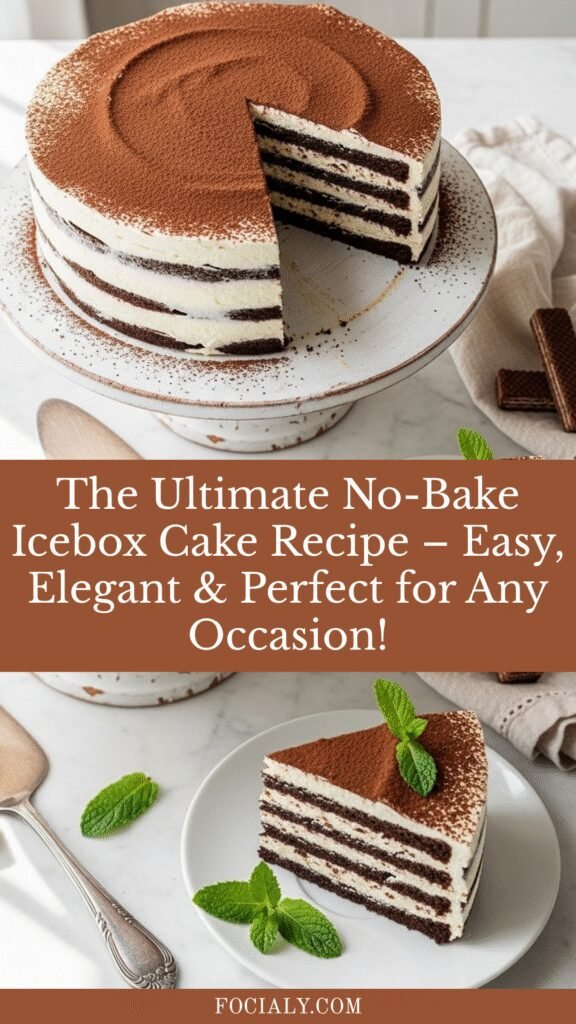
What makes icebox cake so beloved is its incredible versatility and fool-proof nature. Whether you’re hosting a summer barbecue, celebrating a birthday, or just craving something sweet on a Tuesday night, this dessert delivers impressive results without turning on your oven. The cookies soften into tender, cake-like layers as they absorb moisture from the cream, creating a texture that’s somewhere between tiramisu and layer cake—absolutely heavenly!
Perfect for Pinterest-loving home cooks who want maximum impact with minimal effort, this icebox cake recipe will become your secret weapon for stress-free entertaining. Serve it at potlucks, holiday gatherings, or whenever you need a dessert that looks like you spent hours in the kitchen but actually took just 20 minutes to assemble.
History / Background
The icebox cake has a fascinating history that takes us back to the 1920s and 1930s, during the golden age of American convenience cooking. When refrigerators (then called “iceboxes”) became more common in American households, they revolutionized home cooking and opened up entirely new possibilities for cold desserts.
The genius of the icebox cake was reportedly born from the marketing departments of cookie companies, particularly Nabisco. They created recipes using their Famous Chocolate Wafers specifically to encourage consumers to buy more cookies. These early recipes were brilliantly simple: layer cookies with whipped cream, refrigerate overnight, and voila—a sophisticated dessert was born! The concept was so popular that Nabisco printed the recipe right on the box, and it became a staple in American kitchens throughout the mid-20th century.
During the Great Depression and World War II rationing periods, icebox cakes remained popular because they required no butter for a crust, no eggs for a batter, and no oven time—making them economical in every sense. The dessert represented modern convenience at its finest, perfectly aligned with the era’s enthusiasm for newfangled electric refrigerators and time-saving recipes.
While the classic version uses chocolate wafers, variations emerged across different regions and cultures. Southern cooks made versions with vanilla wafers and banana pudding flavors, while Jewish bakeries in New York popularized versions with chocolate and coffee flavors reminiscent of European tortes. Today, the icebox cake has experienced a wonderful renaissance, with modern home cooks creating Instagram-worthy versions using everything from Oreos to gingersnaps, proving this nearly century-old dessert is truly timeless.
Why You’ll Love This Recipe
This icebox cake is about to become your new favorite dessert, and here’s why: imagine creating a stunning, multi-layered dessert that looks like it came from a fancy bakery, but you never once turned on your oven or worried about whether a cake would rise properly. That’s the beauty of this recipe—it’s essentially fail-proof while delivering absolutely spectacular results.
Here’s what makes this icebox cake irresistible:
- No baking required – Perfect for hot summer days when you don’t want to heat up the kitchen, or anytime you want dessert without the stress
- Make-ahead friendly – Actually tastes BETTER the next day, making it ideal for party planning and stress-free entertaining
- Customizable to your taste – Use chocolate cookies, vanilla wafers, graham crackers, or even fancy European biscuits—the possibilities are endless
- Kid-friendly assembly – Simple enough that children can help layer the ingredients, making it a fun family activity
- Impressive presentation – Guests will be amazed when you tell them this elegant dessert required no baking whatsoever
- Budget-friendly ingredients – Uses pantry staples and affordable store-bought cookies, making it economical for feeding a crowd
- Texture heaven – The overnight refrigeration transforms crispy cookies into tender, cake-like layers that melt in your mouth
- Portion control built-in – Easy to slice into neat portions, and serves 8-12 people depending on how generous your slices are
- Adaptable for dietary needs – Can easily be made gluten-free with GF cookies or lightened up with reduced-fat cream
Whether you’re a baking novice or an experienced home cook looking for an easy win, this icebox cake delivers every single time. It’s the kind of recipe you’ll return to again and again, tweaking it to match the season, the occasion, or whatever cookies happen to be in your pantry.
Ingredient Notes
Let’s talk about what goes into this magical no-bake dessert. The beauty of icebox cake lies in its simplicity—just a few quality ingredients transform into something extraordinary.
Chocolate Wafer Cookies (or your preferred cookies): The foundation of your cake! Traditional recipes call for Nabisco Famous Chocolate Wafers, which have the perfect thin, crisp texture that softens beautifully overnight. Can’t find them? Don’t worry! Graham crackers, vanilla wafers, gingersnaps, Oreos (filling removed or left in for extra sweetness), or even shortbread cookies work wonderfully. Choose cookies that are thin and flat rather than thick and chunky for best results. You’ll need about 35-40 cookies for a standard 8-inch cake.
Heavy Whipping Cream: This is where the magic happens! Heavy cream (with at least 36% fat content) whips up into stable, luscious peaks that hold the layers together and provide that dreamy, mousse-like texture. Don’t substitute with Cool Whip or other pre-made toppings for the best results—real whipped cream makes all the difference in both flavor and texture. You’ll need about 3 cups of cold heavy cream.
Powdered Sugar: Also called confectioners’ sugar, this sweetens your whipped cream while keeping it silky smooth. Granulated sugar can make whipped cream grainy, so powdered is definitely the way to go. Use about ½ cup, adjusting to your sweetness preference.
Pure Vanilla Extract: A tablespoon of good vanilla extract elevates the flavor profile and adds depth to the cream. Don’t skip this—it’s subtle but important! Pure vanilla extract is worth the investment over imitation.
Cocoa Powder (for dusting): Unsweetened cocoa powder for dusting the top adds a professional bakery finish and a hint of bittersweet chocolate flavor that balances the sweetness. You can also use shaved chocolate, chocolate curls, or crushed cookies for garnish.
Optional Flavor Additions: Consider adding espresso powder (1-2 teaspoons) for a mocha version, peppermint extract during the holidays, or a splash of liqueur like Kahlúa or amaretto for an adults-only version.
Equipment Needed
The wonderful news about icebox cake is that you probably already have everything you need in your kitchen! Here’s what you’ll want to gather:
- 9-inch springform pan or cake pan – A springform pan makes serving easier, but any 8 or 9-inch cake pan works. You can even use a loaf pan for a different presentation!
- Large mixing bowl – Needs to be cold for whipping cream, so chill it in the freezer for 10 minutes before starting
- Electric hand mixer or stand mixer – While you can whip cream by hand, an electric mixer makes this job so much easier and faster
- Rubber spatula – For spreading cream evenly and scraping down bowl sides
- Plastic wrap or aluminum foil – To cover your cake while it chills overnight
- Measuring cups and spoons – For accurate ingredient measurements
- Fine-mesh sieve or small strainer – For dusting cocoa powder evenly on top
- Offset spatula (optional but helpful) – Makes spreading cream between layers even easier and more professional-looking
- Parchment paper (optional) – Line the bottom of your pan for foolproof removal
That’s it! No special baking equipment, no cake pans, no worrying about oven temperatures. Just simple tools you use every day.
PrintIcebox Cake Recipe

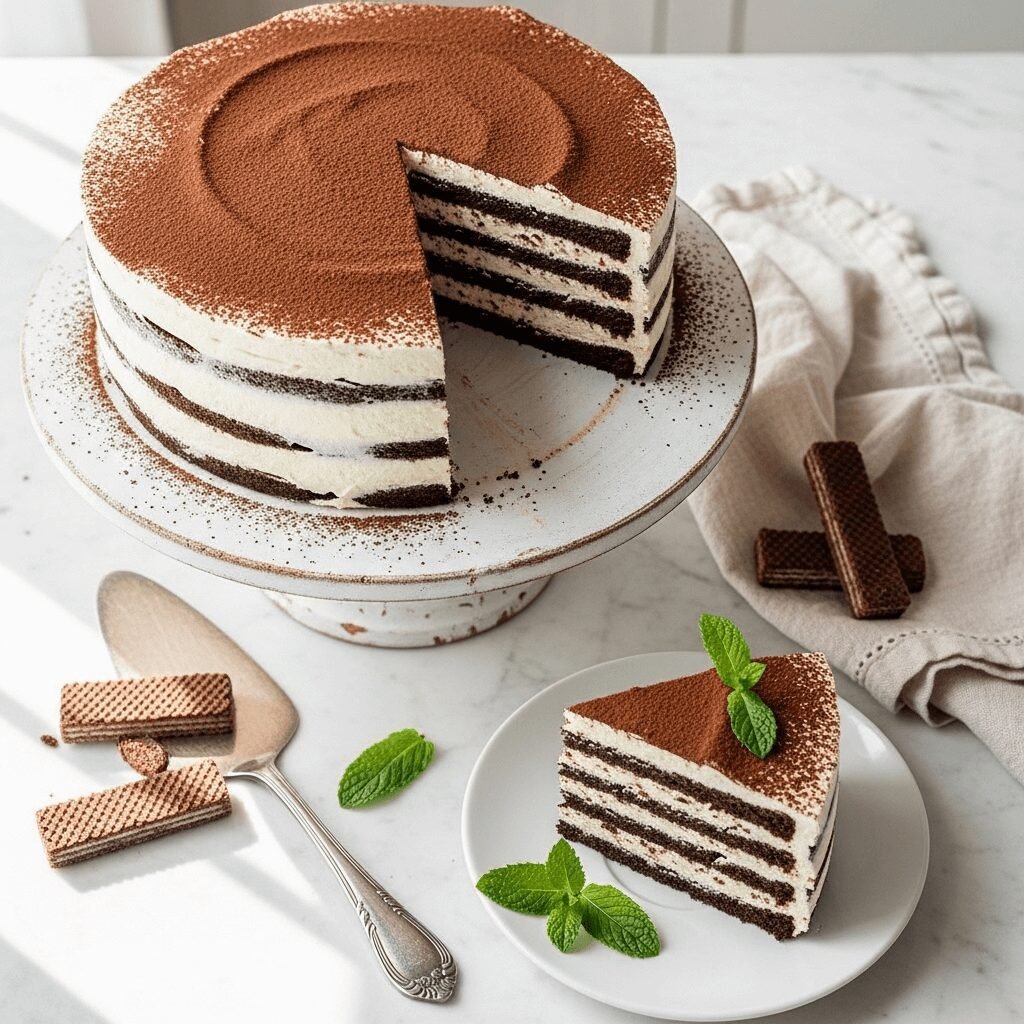
This classic no-bake icebox cake features layers of chocolate wafer cookies and homemade whipped cream that magically transform into a tender, cake-like dessert overnight. Simple to make yet impressively elegant, it’s the perfect make-ahead dessert for any occasion!
- Prep Time: 20 minutes
- Cooling Time: 6 hours (or overnight)
- Total Time: 6 hours 20 minutes
- Yield: 10-12 servings 1x
- Category: Dessert
- Method: No-Bake, Refrigerated
- Cuisine: American
- Diet: Vegetarian
Ingredients
- 3 cups heavy whipping cream, cold
- ½ cup powdered sugar
- 1 tablespoon pure vanilla extract
- 1 package (9 oz) chocolate wafer cookies (about 35-40 cookies)
- 2 tablespoons unsweetened cocoa powder, for dusting
- Optional: chocolate shavings or fresh berries for garnish
Instructions
- Chill your equipment: Place your mixing bowl and beaters in the freezer for 10 minutes. Cold equipment helps cream whip faster and maintain better peaks.
- Whip the cream: Pour the cold heavy cream into your chilled bowl. Using an electric mixer on medium-low speed, begin beating the cream. After about 1 minute, gradually add the powdered sugar and vanilla extract. Increase speed to medium-high and continue whipping until stiff peaks form, about 3-4 minutes total. Be careful not to over-whip, or you’ll end up with butter! The cream should hold its shape when you lift the beaters.
- Prepare your pan: If using a springform pan, you’re all set. If using a regular cake pan, line the bottom with parchment paper for easier removal later. You can also lightly grease the pan.
- Start layering: Spread about ½ cup of whipped cream on the bottom of your pan to create a base layer. This helps the cookies stick and creates a nice bottom.
- Add first cookie layer: Arrange chocolate wafer cookies in a single layer over the cream, covering the bottom completely. You may need to break some cookies to fit the edges—that’s totally fine and won’t affect the final result!
- Continue layering: Spread about ½ cup of whipped cream over the cookies, using your spatula to spread it evenly to the edges. Add another layer of cookies, then cream. Continue this pattern until you’ve used all the cookies, making sure to end with a layer of whipped cream on top. You should have about 6-7 layers total.
- Smooth the top: Use your spatula to smooth the final layer of whipped cream, creating an even surface. Don’t worry about making it perfect—rustic is beautiful!
- Cover and chill: Cover the pan tightly with plastic wrap, making sure it doesn’t touch the cream surface (you can insert toothpicks around the edges to create a tent if needed). Refrigerate for at least 6 hours, but overnight (8-12 hours) is ideal. This is when the magic happens—the cookies absorb moisture from the cream and soften into cake-like layers.
- Finish and serve: Just before serving, remove the plastic wrap and dust the top generously with cocoa powder using a fine-mesh sieve. If using a springform pan, carefully remove the sides. Slice with a sharp knife, wiping it clean between cuts for neat slices. Garnish individual slices with chocolate shavings, fresh berries, or a dollop of extra whipped cream if desired.
Notes
- Cookie substitutions: Can’t find chocolate wafers? Use graham crackers, vanilla wafers, gingersnaps, or even Oreos (you can leave the filling in for extra sweetness).
- Make it ahead: This dessert actually improves with time, so feel free to make it up to 2 days in advance.
- Flavor variations: Add 1-2 teaspoons espresso powder to the cream for mocha flavor, or try peppermint extract during holidays.
- Stabilizing whipped cream: If making more than 24 hours ahead, add 1 tablespoon of cream cheese or 1 teaspoon of gelatin to help stabilize the whipped cream.
- Serving tip: Let the cake sit at room temperature for 5 minutes before slicing for the cleanest cuts.
Nutrition
- Serving Size: 1 slice (1/12 of cake
- Calories: 285
- Sugar: 18g
- Sodium: 95mg
- Fat: 22g
- Saturated Fat: 14g
- Unsaturated Fat: 6g
- Trans Fat: 0g
- Carbohydrates: 24g
- Fiber: 1g
- Protein: 2g
- Cholesterol: 68g
Nutrition information is approximate and based on standard ingredients. Values may vary depending on specific brands used.
Tips & Variations
The beauty of icebox cake is its incredible versatility! Once you master the basic technique, you can customize it in endless ways to match your taste preferences, dietary needs, or the season.
Flavor Variations to Try:
Create a Coffee Lover’s Version by adding 2 tablespoons of instant espresso powder to your whipped cream for a delicious mocha flavor that pairs perfectly with chocolate cookies. You can even drizzle each cookie layer with a tiny bit of cooled espresso for extra coffee intensity.
For a Cookies and Cream Dream, use Oreo cookies instead of chocolate wafers (leave the filling in) and fold mini chocolate chips into your whipped cream. Kids absolutely go crazy for this version!
Try a Strawberry Shortcake Icebox Cake using vanilla wafers or graham crackers, and fold diced fresh strawberries into half of your whipped cream. Layer the plain and strawberry cream alternately for a stunning pink-and-white effect.
Make it Peanut Butter Paradise by using peanut butter sandwich cookies and adding ⅓ cup of creamy peanut butter to your whipped cream (beat it in with the powdered sugar). Drizzle with chocolate ganache before serving.
Dietary Adaptations:
For a lighter version, substitute half of the heavy cream with Greek yogurt (though note this will change the texture slightly and should be consumed within 24 hours). You can also use reduced-fat whipped topping, though the flavor won’t be quite as rich.
Make it gluten-free by using your favorite gluten-free cookies or GF graham crackers. The technique remains exactly the same!
Seasonal Twists:
Create a Pumpkin Spice Icebox Cake in fall using gingersnap cookies and adding ¼ cup of pumpkin puree plus 2 teaspoons of pumpkin pie spice to your whipped cream.
During the holidays, make a Peppermint Bark version using chocolate wafers, adding ½ teaspoon of peppermint extract to the cream, and topping with crushed candy canes.
In summer, go tropical with vanilla wafers, coconut cream instead of some of the heavy cream, and layers of sliced mango or pineapple between the cookies.
Presentation Ideas:
Instead of making one large cake, create individual portions in small glasses or mason jars—perfect for parties! Just layer cookies (you may need to break them into smaller pieces) with cream in each glass.
Try making an icebox cake loaf using a loaf pan and standing the cookies vertically for a stunning striped effect when you slice it.
For special occasions, create a show-stopping tall cake by using a deep springform pan and doubling the recipe for extra layers. Decorate with fresh flowers, chocolate curls, or fresh berries.
Pro Chef Tips
Want your icebox cake to taste like it came from a professional bakery? Here are insider secrets that make all the difference:
Temperature is everything. Always start with very cold cream—straight from the coldest part of your refrigerator. Cold cream whips up faster, holds its shape better, and incorporates more air for a lighter texture. Some pros even chill their cream in the freezer for 10 minutes before whipping (just don’t freeze it solid!).
Don’t over-whip your cream. The moment you see stiff peaks that hold their shape, stop mixing immediately. Over-whipped cream will look grainy and eventually separate or turn to butter. You want cream that’s billowy and cloud-like, not stiff and chunky. If you’re using a stand mixer, watch it carefully during the last minute.
Layer strategically for the best texture. Apply the whipped cream while it’s freshly whipped for the lightest texture. If you need to stop mid-assembly, keep the whipped cream chilled. Also, don’t be skimpy with the cream between layers—you want about ½-inch thickness for that perfect ratio of cookie-to-cream.
Breaking cookies is actually a good thing. Don’t stress about cookies that break or about fitting them perfectly into your pan. Broken pieces actually help fill gaps and create a more cohesive final cake. Think of it like a delicious puzzle where imperfection is the goal!
Weight it down for cleaner layers. Here’s a pro trick: after assembling your cake, place a piece of parchment paper on top of the final cream layer, then gently place another cake pan on top. Add a can of beans or tomatoes for gentle weight. This creates perfectly even, compressed layers that slice beautifully. Just be gentle—you don’t want to squish it too much.
The overnight rest is non-negotiable. I know it’s tempting to serve this early, but trust me—12 hours is the sweet spot. This is when the cookies fully hydrate and achieve that incredible cake-like texture. If you try to cut it at 4 hours, you’ll have crispy cookies and cream, not a cohesive cake.
Use the right knife for perfect slices. A long, thin, sharp knife works best. Dip it in hot water, wipe it clean, then make one smooth cut from back to front. Wipe the knife completely clean between each slice. This simple technique creates those Instagram-worthy clean slices that show off your beautiful layers.
Stabilize for make-ahead success. If you’re making this more than 24 hours ahead or in hot weather, add stabilized whipped cream. Mix 1 teaspoon of unflavored gelatin with 2 tablespoons of cold water, let it bloom for 5 minutes, then microwave for 10 seconds until dissolved. Let it cool slightly, then drizzle it into your cream while whipping. This helps the cream maintain its structure for days.
Common Mistakes to Avoid
Even though icebox cake is one of the easiest desserts you’ll ever make, a few common pitfalls can prevent you from achieving perfection. Here’s what to watch out for:
Using warm cream or equipment. This is the number one mistake! If your cream, bowl, or beaters aren’t cold, the cream will take forever to whip and may never reach stiff peaks. Always chill your equipment for 10 minutes before starting, and make sure your cream comes straight from the refrigerator. Some bakers even work near an open freezer on hot days!
Not refrigerating long enough. I know the temptation is real, but cutting into your icebox cake at hour four instead of hour eight means you’ll have cookies that are still crispy rather than cake-like. The transformation truly happens around hour six and gets even better at hour twelve. Patience pays off deliciously here! Think of the refrigeration time as “baking time”—it’s just as important as actual oven time would be for a regular cake.
Spreading cream too thin between layers. Skimpy cream layers result in a less impressive final cake. You want about ½-inch of cream between each cookie layer—this ensures proper softening of the cookies and creates that luxurious, decadent texture that makes icebox cake so special. Don’t try to stretch your whipped cream too far; make another batch if you run out.
Forgetting to cover the cake properly. An uncovered icebox cake will develop a skin on the whipped cream and absorb refrigerator odors. Always cover tightly with plastic wrap, but be careful not to let the plastic touch the cream surface (use toothpicks to create a tent if needed). This protects your cake and keeps it fresh.
Over-whipping the cream. Once you see stiff peaks, stop immediately! Over-whipped cream looks grainy and curdled, and while it’s still technically usable, it won’t have that silky, smooth texture that makes icebox cake so dreamy. If you accidentally over-whip, you can sometimes save it by gently folding in a tablespoon or two of unwhipped cream.
Using cookies that are too thick. Thick, chunky cookies won’t soften properly in the refrigeration time. Stick with thin, crisp cookies like chocolate wafers, graham crackers, or gingersnaps. These have the right texture-to-surface-area ratio to transform into tender cake layers. Save those thick cookies for enjoying with milk!
Not accounting for air pockets. When layering cookies, make sure they’re arranged closely together with minimal gaps. Large air pockets can cause the cake to collapse or create hollow spots when sliced. Use broken cookie pieces to fill gaps around the edges—nobody will know once the cake is chilled and sliced!
Storage & Meal Prep
One of the best things about icebox cake (besides not needing an oven!) is how beautifully it stores and how perfect it is for meal prep and make-ahead entertaining.
Refrigerator Storage: Your icebox cake will stay fresh in the refrigerator for up to 4-5 days when properly stored. Cover it tightly with plastic wrap or keep it in an airtight container. The texture actually gets better over the first 48 hours as the cookies continue to soften and the flavors meld together. After day three, the cream may start to weep slightly, and the cookies might become almost pudding-like (which some people actually prefer!). The cake is still safe to eat, just slightly different in texture.
Best Practices for Storage: If you’ve already dusted the top with cocoa powder, add the dusting fresh before each serving rather than storing it with cocoa on top—this prevents the cocoa from absorbing moisture and looking splotchy. If using a springform pan, you can leave the sides on during storage for extra protection, or carefully transfer the cake to an airtight container.
Reheating (or Rather, Serving Temperature): Icebox cake is meant to be served cold, straight from the refrigerator! However, if it’s too firm to slice cleanly, let it sit at room temperature for about 5 minutes before cutting. This makes slicing easier without softening it too much. Never attempt to warm this dessert—it’s meant to be enjoyed chilled.
Portion Prep for Easy Serving: If you’re planning to serve this throughout the week, consider slicing the entire cake after the initial overnight chill, then storing individual slices in airtight containers separated by parchment paper. This makes grabbing a slice super convenient and prevents you from having to clean-cut the cake multiple times. Each slice should be wrapped individually for maximum freshness.
Transporting Your Icebox Cake: Need to bring this to a party? Keep it chilled until the last possible moment. Transport it in a cooler with ice packs, and don’t remove it until you’re ready to serve. If it’s a long drive, consider bringing the cocoa powder separately and dusting just before serving. Springform pans are excellent for transport since the sides provide protection.
Make-Ahead & Freezer Notes
Icebox cake is the ultimate make-ahead dessert—in fact, it’s designed to be made in advance! Here’s everything you need to know about preparing it ahead of time.
Make-Ahead Timeline: The sweet spot for making icebox cake is 12-24 hours before serving. This gives the cookies ample time to soften into that perfect cake-like texture. You can absolutely make it up to 2 days ahead without any loss of quality—some would argue it’s even better at 48 hours! For maximum freshness and the best texture, avoid making it more than 3 days in advance.
Day-Before Preparation: If you’re entertaining, assemble your icebox cake the night before your event. Do all the layering, cover it tightly, and refrigerate. The next day, all you need to do is dust with cocoa powder, add any garnishes, and slice. It’s literally the most stress-free dessert option for parties, especially when you’ve got a dozen other things on your to-do list!
Can You Freeze Icebox Cake? Yes, you can! While it’s not as common as refrigeration, freezing icebox cake works well and can be a lifesaver when you need to prep way ahead. To freeze: assemble the cake completely, but skip the cocoa powder dusting. Wrap it tightly in two layers of plastic wrap, then cover with aluminum foil. It will keep frozen for up to 1 month. The whipped cream maintains its texture surprisingly well when frozen.
How to Thaw Properly: Transfer the frozen cake to the refrigerator and let it thaw slowly overnight (about 8-12 hours). Never thaw at room temperature, as this can cause the cream to separate or become watery. Once thawed, dust with cocoa powder and serve. The texture should be nearly identical to a freshly made icebox cake, though the cookies may be slightly softer (which many people actually prefer!).
Freezing Individual Slices: For ultimate convenience, freeze individual pre-sliced portions. Wrap each slice tightly in plastic wrap, place in a freezer bag, and freeze for up to 1 month. Thaw individual slices in the refrigerator for 2-3 hours before serving. This is perfect for portion control or when you want a quick dessert available anytime!
Component Prep: If you want to get even more ahead, you can whip the cream and store it in the refrigerator for up to 2 hours before assembling (give it a quick re-whip if it’s deflated). However, don’t assemble the cake and then wait to refrigerate it—the cookies will get soggy in an unpleasant way. Once you start layering, commit to the full assembly and get it into the fridge immediately.
Serving Suggestions
Icebox cake is stunning enough to stand alone, but pairing it with complementary sides and beverages takes your dessert presentation to the next level!
Coffee & Tea Pairings: The classic pairing! Serve slices of icebox cake alongside freshly brewed coffee—the rich chocolate and cream flavors are perfectly complemented by a robust cup of joe. Espresso is especially divine, as the slight bitterness cuts through the sweetness beautifully. For tea lovers, try it with English Breakfast, Earl Grey, or even a chai latte. The warming spices in chai create an interesting contrast with the cool, creamy cake.
Fresh Fruit Accompaniments: Balance the richness of icebox cake with fresh berries on the side. Strawberries, raspberries, blackberries, or a mixed berry compote add bright, tart notes that cleanse the palate between bites. In summer, grilled peaches or nectarines provide a smoky-sweet contrast. During winter holidays, poached pears with cinnamon are elegant and seasonal.
Sauce Drizzles: While icebox cake doesn’t need sauce, a small pool of raspberry coulis, salted caramel, or chocolate ganache on the plate makes for restaurant-worthy presentation. Drizzle it artistically around the slice, not on top, so your beautiful layers stay visible.
Ice Cream or Gelato: For true indulgence, serve a small scoop of vanilla bean ice cream or gelato alongside your slice. The temperature contrast between cold ice cream and cold cake is surprisingly delightful, and vanilla’s subtle flavor enhances the chocolate without competing.
Texture Contrasts: Add crunch to your plate with candied nuts, toffee bits, or homemade cookies on the side. The contrast between the smooth, creamy cake and crispy elements creates a more dynamic eating experience. Crushed honeycomb candy or praline pieces are especially impressive.
Beverage Pairings for Adults: If you’re serving adults at an evening gathering, consider pairing icebox cake with dessert wine (a late harvest Riesling or port), Irish coffee, or even a chocolate martini. These elevated pairings turn simple icebox cake into a sophisticated dinner party finale.
Occasion-Specific Serving: For birthday parties, add candles directly to the top and serve with glasses of cold milk for kids. For bridal or baby showers, garnish each slice with edible flowers and serve with champagne or sparkling cider. For casual summer barbecues, serve it straight from the pan, family-style, with a stack of small plates and forks for guests to help themselves.
FAQs Section
Can I make icebox cake without an electric mixer?
Yes, absolutely! While an electric mixer makes the job easier, you can whip cream by hand using a large balloon whisk and some arm strength. Place your bowl inside a larger bowl filled with ice water to keep everything cold. Expect it to take about 8-10 minutes of continuous whisking to reach stiff peaks. It’s a good arm workout, and the results are just as delicious! Alternatively, use pre-made whipped topping, though the flavor won’t be quite as rich.
Why are my cookies still crunchy after refrigerating overnight?
This usually means one of two things: either the cookies weren’t in full contact with the cream (make sure every cookie surface touches cream), or you didn’t wait long enough. Some thicker or harder cookies need a full 12-24 hours to fully soften. Make sure you’re using thin, crisp cookies like chocolate wafers or graham crackers, not thick sandwich cookies or hard biscuits. If it’s been 24 hours and they’re still crunchy, they may be the wrong type of cookie for this application.
Can I use Cool Whip or other pre-made whipped topping instead of real cream?
You can, and it will still work, but the flavor and texture will be different. Real whipped cream has a lighter, more luxurious texture and a fresh dairy flavor that can’t be replicated. Pre-made toppings often have stabilizers and artificial flavors that some people find less appealing. However, if convenience is your priority or you’re avoiding real cream, go ahead and use the pre-made stuff—the cake will still set up properly and taste good. You’ll need about 3 cups (roughly one and a half 8-oz containers).
My whipped cream looks grainy and curdled. Can I fix it?
You’ve over-whipped it and started turning it into butter! Unfortunately, you can’t completely reverse this, but you can sometimes salvage it by very gently folding in 2-3 tablespoons of unwhipped cold cream. This might smooth it out enough to use. If it’s too far gone (looks like cottage cheese), you’ll need to start over with fresh cream. To prevent this, watch carefully during the last minute of whipping and stop the instant you see stiff peaks form.
Is there a dairy-free version of icebox cake?
Yes! Use coconut cream (the thick cream from a can of full-fat coconut milk that’s been refrigerated overnight) whipped with powdered sugar and vanilla. You can also use dairy-free whipped topping products. For the cookies, make sure to use dairy-free options (many graham crackers and chocolate wafer brands are naturally dairy-free, but always check labels). The technique remains exactly the same, and the results are surprisingly similar!
How do I get clean, pretty slices?
The secret is a long, thin, sharp knife and a cup of hot water. Before each cut, dip the knife in hot water and wipe it completely dry with a towel. Make one smooth, confident cut from back to front (don’t saw back and forth). Wipe the knife completely clean before the next cut. This technique creates those Instagram-worthy slices with clearly defined layers. Also, make sure the cake is fully chilled—room temperature icebox cake is much harder to slice cleanly.
Can I make this in different shaped pans?
Absolutely! Icebox cake is extremely versatile with pan shapes. Use a square pan for nice rectangular slices, a loaf pan for a striped effect when you cut across it, or even individual glasses or jars for personal portions. The key is adjusting your cookie placement—you may need to break cookies into smaller pieces or arrange them differently, but the layering technique stays the same. Just maintain that approximate 1:2 ratio of cookies to cream, and you’ll have success in any vessel!
Conclusion
And there you have it—the ultimate guide to creating a stunning, delicious, no-bake icebox cake that will make you look like a dessert genius! Whether you’re a seasoned home cook or a complete beginner, this recipe proves that impressive desserts don’t have to be complicated or require hours in front of a hot oven.
The magic of icebox cake lies in its simplicity and flexibility. It’s the kind of recipe that welcomes creativity, forgives small mistakes, and delivers consistently beautiful results. From classic chocolate and cream to creative seasonal variations, you can adapt this dessert to match any occasion, taste preference, or dietary need.
I hope this recipe becomes a go-to in your dessert rotation, especially during those hot summer months or busy holiday seasons when you need something spectacular without the stress. The fact that it actually gets better as it sits in the refrigerator makes it the ultimate make-ahead dessert for entertaining—no last-minute panic required!
Now it’s your turn! I’d love to hear about your icebox cake adventures. Did you stick with the classic chocolate version, or did you get creative with different cookies and flavors? Share your results, questions, or creative variations in the comments below. And if you loved this recipe, please save it to your Pinterest boards so you can find it again and share it with other home cooks who need easy, impressive dessert ideas!
Happy baking (or should I say, happy NOT baking)! 🍰