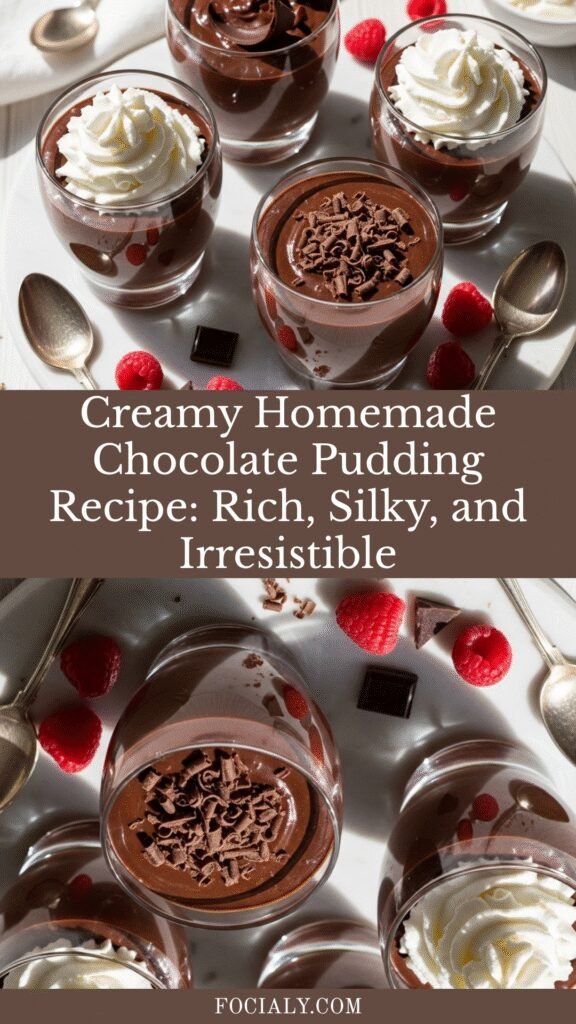
Creamy Homemade Chocolate Pudding Recipe: Rich, Silky, and Irresistible
There’s something deeply comforting about a bowl of rich, creamy homemade chocolate pudding—that luxuriously smooth texture, the deep chocolate flavor that melts on your tongue, and the satisfaction of knowing you made it completely from scratch. This classic chocolate pudding recipe is worlds apart from those instant boxed versions. Made with real cocoa powder, whole milk, and just the right amount of sugar, this homemade chocolate pudding delivers an intensely chocolatey, velvety-smooth dessert that both kids and adults absolutely adore. Whether you’re serving it as a weeknight dessert, packing it in lunchboxes, making it for a dinner party, or simply indulging in a midnight chocolate craving, this homemade chocolate pudding hits the spot every single time. It comes together in just about 15 minutes of active cooking time, uses simple pantry ingredients, and tastes infinitely better than anything you can buy at the store. The best part? You can customize it with different toppings, flavors, and textures to make it your own signature dessert that everyone requests again and again.
History / Background
Chocolate pudding as we know it today has fascinating roots that stretch back centuries across multiple continents. Pudding itself is an ancient concept—the word “pudding” comes from the French “boudin,” originally referring to sausages and other foods cooked in casings. However, the sweet, creamy dessert puddings we enjoy today evolved separately. In medieval Europe, puddings were typically savory dishes, but by the 17th and 18th centuries, sweet puddings sweetened with sugar and flavored with spices began appearing in English cookbooks.
Chocolate pudding specifically emerged after chocolate became more widely available and affordable in Europe and America during the 19th century. Early chocolate puddings were often quite different from what we make today—they might include breadcrumbs, suet, or other ingredients that created a denser, more cake-like consistency. The smooth, creamy chocolate pudding we recognize today developed alongside advances in food science and the creation of cornstarch as a thickening agent in the mid-1800s. Cornstarch revolutionized pudding-making by creating that signature silky-smooth texture without eggs (though many recipes, including this one, use eggs for extra richness).
By the early 20th century, chocolate pudding had become a beloved American dessert, appearing regularly in home kitchens and restaurant menus. The 1940s and 1950s brought instant pudding mixes that promised convenience, and companies like Jell-O made pudding an everyday staple. However, many home cooks and dessert lovers have returned to making chocolate pudding from scratch because the flavor and texture are dramatically superior. Today’s homemade chocolate pudding represents the best of traditional technique combined with modern understanding of ingredients and temperatures, creating a dessert that’s both nostalgic and sophisticated—comfort food at its finest.
Why You’ll Love This Recipe
This homemade chocolate pudding recipe strikes the perfect balance between impressive results and accessible technique. Unlike complicated desserts that require special equipment or advanced skills, this chocolate pudding comes together in one saucepan with basic ingredients you probably already have in your kitchen. The process is straightforward—mix, heat, whisk, and chill—yet the results taste like something from a high-end restaurant or specialty dessert shop. The pudding achieves that ideal creamy, spoonable consistency that coats your spoon beautifully and melts luxuriously in your mouth.
Here’s why this homemade chocolate pudding will become your go-to dessert:
- Incredibly rich chocolate flavor – Made with real cocoa powder and optional melted chocolate for deep, authentic taste
- Silky-smooth texture – No lumps, no graininess, just pure creamy perfection
- Quick and easy – Ready in about 15 minutes of active cooking, plus chilling time
- Budget-friendly – Costs a fraction of store-bought premium puddings and serves 4-6 people
- Customizable – Easy to adapt with different chocolates, flavors, and toppings
- Kid-approved – Children absolutely love this, making it perfect for family desserts
- No artificial ingredients – You control exactly what goes in, with no preservatives or artificial flavors
- Make-ahead friendly – Perfect for meal prep, entertaining, or preparing dessert in advance
- Gluten-free naturally – No modifications needed for gluten-free diets
- Elegant enough for entertaining – Serve in fancy glasses or cups for an impressive presentation
- Versatile serving options – Works as is, layered in parfaits, as pie filling, or in trifles
Ingredient Notes
Whole milk creates the creamy base for your pudding. Whole milk’s fat content (around 3.5%) contributes to the rich, luxurious texture. You can substitute with 2% milk, though the pudding will be slightly less rich. Avoid skim milk, which produces a thinner, less satisfying result. For extra decadence, replace half the milk with heavy cream.
Granulated sugar sweetens the pudding and balances the natural bitterness of cocoa powder. The amount in this recipe creates a moderately sweet pudding—not overwhelmingly sugary, but sweet enough to satisfy. Adjust up or down by 1-2 tablespoons based on your preference and the cocoa you’re using (Dutch-process is less bitter than natural).
Unsweetened cocoa powder is the star ingredient providing that deep chocolate flavor. You can use either natural cocoa powder or Dutch-process cocoa. Dutch-process (also called European-style) is treated with alkali, making it darker, smoother, and less acidic. Natural cocoa powder has a more intense, slightly fruity chocolate flavor. Both work beautifully—choose based on your taste preference.
Cornstarch acts as the thickening agent, creating that perfect spoonable consistency. It needs to be cooked fully to activate its thickening power and eliminate any starchy taste. Cornstarch creates a clearer, smoother result than flour. Make sure to whisk it thoroughly with the dry ingredients to prevent lumps.
Egg yolks add richness, a beautiful golden color, and extra creaminess to the pudding. They also help thicken the mixture while contributing to that luxurious mouthfeel. Make sure your eggs are fresh and bring them to room temperature before using for easier incorporation. Save the egg whites for meringues or another recipe.
Salt might seem like an odd addition to chocolate pudding, but it’s essential. A small amount of salt enhances all the other flavors, making the chocolate taste more chocolatey and balancing the sweetness. Don’t skip it—it’s the secret ingredient that elevates the entire dessert.
Butter stirred in at the end adds silkiness and a glossy sheen to your finished pudding. It also contributes subtle richness and helps create that luxurious mouthfeel. Use unsalted butter so you can control the salt level. The butter should be added after cooking, off the heat, so it doesn’t separate.
Vanilla extract provides depth and rounds out the chocolate flavor. Always use pure vanilla extract, not imitation—the flavor difference is noticeable in simple recipes like this. The vanilla doesn’t taste distinct but makes the chocolate flavor taste more complex and complete.
Optional: Dark chocolate can be added for extra richness and a more sophisticated chocolate flavor. Chopped dark chocolate (60-70% cacao) melts into the hot pudding, intensifying the chocolate experience. This is optional but highly recommended for true chocolate lovers.
Equipment Needed
- Medium heavy-bottomed saucepan (2-3 quart capacity)
- Whisk (preferably a balloon whisk)
- Medium mixing bowl
- Measuring cups and spoons
- Fine-mesh strainer (optional but recommended)
- Rubber spatula
- 4-6 serving bowls, cups, or ramekins
- Plastic wrap or wax paper
- Ladle or large spoon for portioning
Print
Creamy Homemade Chocolate Pudding Recipe: Rich, Silky, and Irresistible

This homemade chocolate pudding is incredibly creamy, rich, and smooth with deep chocolate flavor. Made from scratch with simple ingredients, it’s far superior to boxed pudding mixes and comes together in just 15 minutes. Perfect for a quick weeknight dessert or elegant enough for entertaining.
- Prep Time: 5 minutes
- Cook Time: 10 minutes
- Total Time: 15 minutes (plus 2-4 hours chilling time)
- Yield: 4-6 servings 1x
- Category: Dessert
- Method: Stovetop
- Cuisine: American
- Diet: Vegetarian
Ingredients
Scale- 2½ cups whole milk
- ½ cup granulated sugar
- ⅓ cup unsweetened cocoa powder
- 3 tablespoons cornstarch
- ¼ teaspoon salt
- 3 large egg yolks
- 2 tablespoons unsalted butter
- 1½ teaspoons pure vanilla extract
- 2 ounces dark chocolate, finely chopped (optional, for extra richness)
Instructions
- Whisk dry ingredients: In a medium heavy-bottomed saucepan, whisk together the sugar, cocoa powder, cornstarch, and salt until completely combined with no lumps. This dry-mixing step is crucial for preventing lumps later. Make sure the cocoa powder is fully incorporated—you shouldn’t see any streaks.
- Add egg yolks: In a small bowl, lightly beat the egg yolks with a fork. Add them to the saucepan with the dry ingredients and whisk until you have a thick paste. This might seem odd at first, but keep whisking—it will come together.
- Gradually add milk: While whisking constantly, slowly pour in the milk a little at a time. Start with just a few tablespoons, whisking vigorously to create a smooth slurry with no lumps. Once you’ve incorporated about ½ cup of milk and have a smooth mixture, you can add the remaining milk more quickly. Whisk until everything is completely smooth and well combined.
- Cook the pudding: Place the saucepan over medium heat. Cook, whisking constantly and making sure to scrape the bottom and corners of the pan, for 6-10 minutes. The mixture will start thin and gradually thicken. At first, nothing much will happen, then suddenly it will begin to thicken rapidly. Keep whisking constantly—this prevents scorching and ensures even cooking.
- Watch for the thickening point: The pudding is ready when it comes to a full boil and thickens noticeably—it should coat the back of your spoon and hold its shape when you drag your finger through it. It will look thick and glossy, almost like hot fudge sauce. Once it reaches this point, let it boil for about 1 minute while continuing to whisk, then remove from heat. This ensures the cornstarch is fully cooked and eliminates any starchy taste.
- Add butter and vanilla: Remove the pan from heat. Add the butter and vanilla extract (and chopped dark chocolate if using), and whisk until everything is melted and fully incorporated. The pudding will become even silkier and more glossy.
- Strain (optional but recommended): For the smoothest possible texture, pour the pudding through a fine-mesh strainer into a clean bowl. This catches any small lumps or bits of cooked egg, ensuring perfectly smooth pudding. Use a rubber spatula to press it through the strainer.
- Portion into serving dishes: Divide the hot pudding among 4-6 serving bowls, cups, or ramekins. If you prefer one large bowl, that works too.
- Prevent skin formation: To prevent a skin from forming on top (some people like it, some don’t), press plastic wrap or wax paper directly onto the surface of each pudding portion. Make sure the plastic touches the entire surface with no air gaps.
- Chill: Refrigerate for at least 2-4 hours until completely chilled and set. The pudding will firm up as it cools and develop an even better texture and flavor.
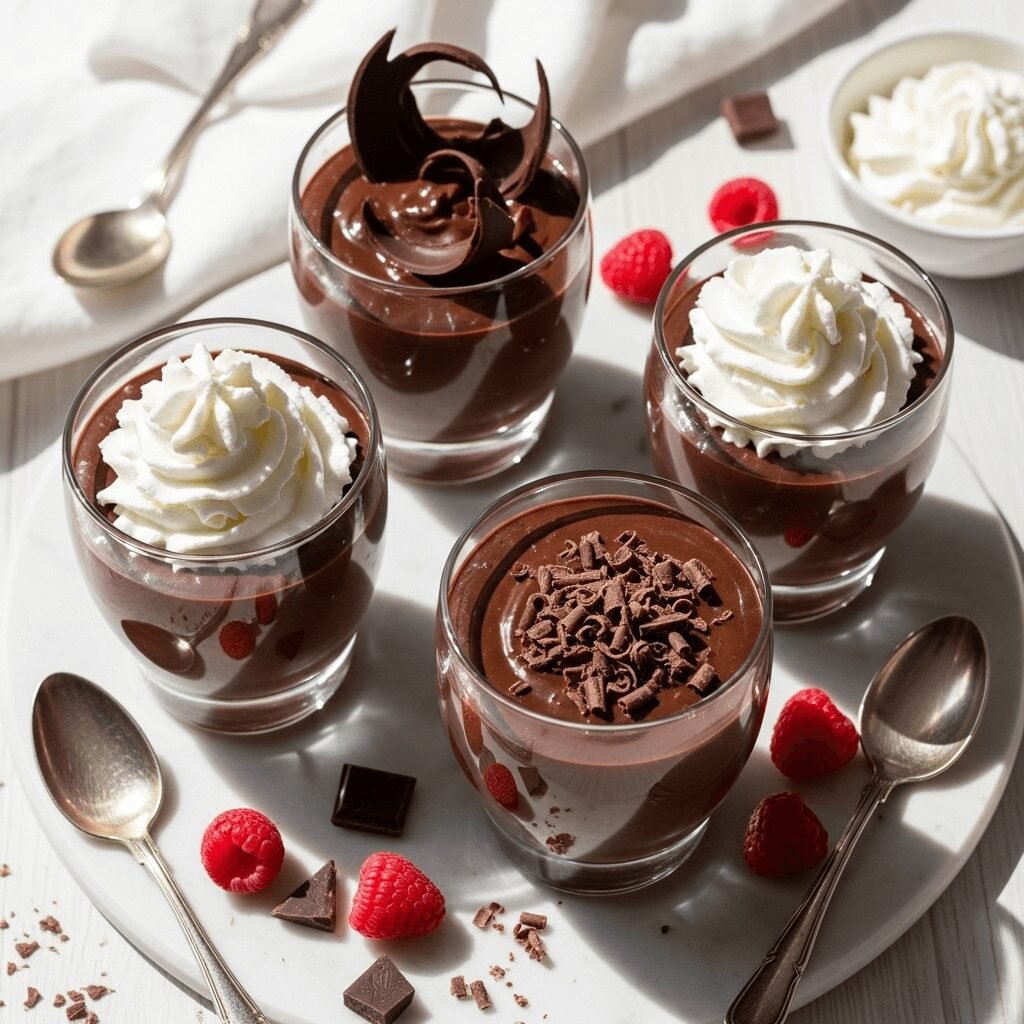
- Serve: Remove plastic wrap and serve cold, topped with whipped cream, chocolate shavings, fresh berries, or your favorite toppings.
Notes
- Constant whisking during cooking is essential to prevent lumps and burning. Don’t walk away from the stove!
- The pudding will seem thin while hot but thickens considerably as it chills.
- For a darker, richer chocolate flavor, use Dutch-process cocoa powder.
- This recipe easily doubles if you’re serving a crowd—just use a larger saucepan.
- Store covered in the refrigerator for up to 4 days.
Nutrition
- Serving Size: ½ cup (based on 6 servings)
- Calories: 215
- Sugar: 22g
- Sodium: 145mg
- Fat: 9g
- Saturated Fat: 5g
- Unsaturated Fat: 3g
- Trans Fat: 0g
- Carbohydrates: 30g
- Fiber: 2g
- Protein: 5g
- Cholesterol: 105mg
Dark Chocolate Pudding: Add 2-3 ounces of chopped dark chocolate (60-70% cacao) when you add the butter for an intensely rich, sophisticated chocolate flavor. This creates a more adult, less sweet version.
Milk Chocolate Pudding: Use 2 ounces of chopped milk chocolate and reduce the sugar to ⅓ cup for a sweeter, milder chocolate pudding that kids especially love.
Mocha Pudding: Add 1-2 tablespoons of instant espresso powder or very finely ground coffee to the dry ingredients for a sophisticated coffee-chocolate combination.
Mexican Chocolate Pudding: Add ½ teaspoon ground cinnamon and a tiny pinch of cayenne pepper to the dry ingredients for warming spice notes that complement the chocolate beautifully.
Mint Chocolate Pudding: Replace the vanilla extract with ½ teaspoon peppermint extract. Start with less—peppermint extract is potent. You can always add more after tasting.
Peanut Butter Chocolate Pudding: Whisk in ¼ cup creamy peanut butter along with the butter and vanilla for an irresistible chocolate-peanut butter combination.
Vegan Chocolate Pudding: Use full-fat coconut milk instead of dairy milk, replace egg yolks with 2 tablespoons additional cornstarch, and use vegan butter. The texture will be slightly different but still delicious.
Sugar-Free Version: Replace granulated sugar with a 1:1 sugar substitute like erythritol or monk fruit sweetener. The texture may be slightly different, and you might need to adjust sweetness to taste.
Extra-Rich Pudding: Replace 1 cup of the milk with heavy cream for an ultra-decadent, luxurious result.
Pro Chef Tips
Whisk constantly and thoroughly: The single most important technique for perfect chocolate pudding is constant, vigorous whisking during the cooking process. This serves multiple purposes: it prevents the bottom from scorching, ensures even heat distribution, keeps the mixture smooth, and prevents eggs from curdling. Keep your whisk moving in a figure-eight pattern, making sure to reach the corners and bottom of the pan.
Medium heat is your friend: Resist the temptation to turn up the heat to speed things along. Medium heat allows the pudding to thicken gradually and evenly without scorching or creating lumps. If your pudding seems to be taking forever to thicken, be patient—it will suddenly thicken quite rapidly once it reaches the right temperature.
The temperature technique: The pudding must reach a full boil for the cornstarch to fully activate and for the egg yolks to cook properly. You’ll see large bubbles breaking the surface. Once it reaches this point, let it boil for a full minute while whisking to ensure the cornstarch is completely cooked and you’ve eliminated any starchy taste.
Straining is worth it: Even if you think your pudding looks perfectly smooth, straining it through a fine-mesh sieve creates an extraordinarily silky texture and catches any tiny bits of cooked egg or lumps you might have missed. Professional pastry chefs always strain their pudding, and you should too for the best results.
Tempering isn’t necessary here: Unlike some pudding recipes that require tempering (slowly adding hot liquid to eggs), this recipe adds cold milk to the eggs, which accomplishes the same goal more simply. The gradual heating prevents the eggs from scrambling.
The plastic wrap trick: Pressing plastic wrap directly onto the surface of hot pudding prevents a skin from forming as it cools. If you enjoy pudding skin (some people do!), skip this step. For the smoothest eating experience, use the plastic wrap.
Flavor development: Chocolate pudding actually tastes better the day after making it. The flavors meld and mature, becoming more rounded and complex. If time allows, make it a day ahead for optimal flavor.
Common Mistakes to Avoid
Not whisking constantly during cooking: This is the #1 mistake people make. If you stop whisking, even for 30 seconds, you risk scorching the bottom of the pan or creating lumps. The mixture can also curdle if it heats unevenly. Set yourself up for success by having everything ready before you start cooking so you can whisk continuously without interruption.
Using low-fat or skim milk: While you might think this makes the pudding healthier, it actually creates a thin, less satisfying result that lacks that luxurious creamy texture. The fat in whole milk is essential for proper texture and mouthfeel. If you want to lighten it up, use 2% milk at minimum—never skim.
Insufficient cooking time: Some home cooks get nervous when the pudding starts to thicken and immediately remove it from heat. However, the pudding must reach a full boil and cook for an additional minute to fully activate the cornstarch and cook the eggs properly. Undercooked pudding will have a starchy taste and may not set properly when chilled.
Adding butter to hot pudding still on the burner: Once you’ve removed the pudding from heat, wait 30 seconds before adding butter. If the pudding is too hot, the butter can separate instead of emulsifying smoothly, creating an oily layer on top instead of silky smoothness.
Not chilling long enough: Warm or room-temperature pudding has a completely different consistency than properly chilled pudding. For the best texture and flavor, chill for at least 2 hours, preferably 4 hours or overnight. Rushed pudding is runny pudding.
Storage & Meal Prep
Refrigerator Storage: Store homemade chocolate pudding in airtight containers or in individual serving dishes covered with plastic wrap. Keep it refrigerated at all times. Properly stored, chocolate pudding stays fresh for 4-5 days, though it’s best enjoyed within 3 days for optimal texture and flavor. Always press plastic wrap directly onto the surface to prevent skin formation and to keep it fresh.
Preventing Pudding Skin: If you forgot to cover your pudding and it developed a skin on top, simply remove and discard the skin layer before serving. While some people enjoy pudding skin for its unique texture, most prefer smooth pudding throughout. Prevention is easier than removal—always cover while still warm.
Texture Changes: Chocolate pudding may release a small amount of liquid (weeping) after a few days, especially if the cornstarch wasn’t cooked quite long enough. Simply stir the pudding before serving to reincorporate any separated liquid. The pudding will thicken slightly more each day in the refrigerator.
Individual Portions: Making pudding in individual serving cups is perfect for meal prep, portion control, and grab-and-go convenience. Kids especially love having their own personal pudding cups for lunchboxes or after-school snacks.
Reheating: Chocolate pudding is traditionally served cold, but you can gently warm it if desired. Microwave individual portions for 15-20 seconds, stirring halfway through, or warm gently in a saucepan over very low heat, whisking constantly. Warmed pudding has a lovely, comforting quality perfect for cold winter nights.
Make-Ahead & Freezer Notes
Perfect Make-Ahead Dessert: Chocolate pudding is actually ideal for making ahead—it needs several hours to chill anyway, and the flavor develops and improves over time. Make it 1-2 days before you need it for the best flavor and to save time on your entertaining day. Store covered in the refrigerator until ready to serve.
Meal Prep Sunday: Make a batch of chocolate pudding on meal prep day and portion it into individual containers for easy weekday desserts. It’s perfect for packing in lunches, after-dinner treats, or late-night snack cravings. Having homemade pudding ready to go helps you avoid reaching for less healthy processed desserts.
Freezing Chocolate Pudding: While chocolate pudding can technically be frozen for up to 2 months, the texture changes significantly upon thawing. It tends to separate and become grainy or watery. If you do freeze it, thaw overnight in the refrigerator and whisk vigorously (or blend briefly) to try to restore smoothness. Honestly, pudding is so quick to make that freezing isn’t particularly necessary or recommended.
Frozen Pudding Pops: Instead of freezing pudding in cups, pour it into popsicle molds for a fun frozen treat that maintains better texture. The pudding’s creamy richness makes fantastic fudge pops that kids adore. Freeze for 4-6 hours until solid.
Best Reheating Method: If serving leftover chilled pudding, you don’t need to reheat it—it’s designed to be enjoyed cold. Simply remove from the refrigerator 10-15 minutes before serving to take off the extreme chill, which allows the chocolate flavor to come through more fully.
Serving Suggestions
Chocolate pudding is wonderful on its own, but these accompaniments and serving ideas take it to the next level:
Classic Toppings: A generous dollop of freshly whipped cream is the most traditional and beloved topping. Add chocolate shavings (use a vegetable peeler on a chocolate bar), a sprinkle of cocoa powder, or mini chocolate chips for extra chocolate intensity.
Fresh Fruit: Sliced strawberries, fresh raspberries, or sliced bananas provide freshness and acidity that beautifully balances the rich chocolate. The fruit also adds color and elegance to your presentation.
Crunchy Elements: Add textural contrast with crushed Oreos, graham cracker crumbs, chopped toasted nuts (pecans or hazelnuts are especially good), toffee bits, or crumbled cookies. The crunch against the smooth pudding creates an exciting eating experience.
Layered Parfaits: Layer chocolate pudding with whipped cream, crumbled cookies, fresh berries, or vanilla pudding in clear glasses or jars for a beautiful, impressive presentation perfect for dinner parties or special occasions.
Pudding Pie: Use this chocolate pudding as filling for a graham cracker crust or chocolate cookie crust. Top with whipped cream and chocolate shavings for an easy, no-bake chocolate cream pie.
Beverages: Serve alongside coffee, espresso, or hot chocolate for a decadent chocolate-on-chocolate experience. Cold milk is the classic children’s pairing that never goes out of style.
Cake or Brownie Base: Serve warm brownies or chocolate cake with a scoop of cold chocolate pudding on top for a sophisticated dessert that combines temperatures and textures beautifully.
Breakfast Treat: Layer chocolate pudding with granola and yogurt for a breakfast parfait that feels indulgent but provides protein and whole grains to start your day.
FAQs Section
Can I make chocolate pudding without eggs?
Yes! To make eggless chocolate pudding, simply omit the egg yolks and increase the cornstarch to 5 tablespoons total. The pudding will be slightly less rich and creamy but still delicious. This version is also great for anyone with egg allergies or dietary restrictions.Why is my chocolate pudding lumpy?
Lumps typically result from not whisking the dry ingredients thoroughly before adding liquid, adding the milk too quickly at the beginning, or not whisking constantly during cooking. Prevention is key: whisk dry ingredients well, add milk gradually at first, and whisk continuously. If you do get lumps, strain the hot pudding through a fine-mesh sieve.Can I use milk chocolate or white chocolate instead of cocoa powder?
You can, but you’ll need to adjust the recipe. For chocolate chip pudding, reduce sugar to ⅓ cup and omit the cocoa powder, then stir in 6 ounces of chopped chocolate after cooking. For white chocolate, use the same method with white chocolate chips. The texture will be different—smoother and more ganache-like.How do I make chocolate pudding thicker or thinner?
For thicker pudding, increase cornstarch by 1 tablespoon. For thinner pudding, reduce cornstarch by 1 tablespoon. Remember that pudding continues to thicken as it cools, so it should look slightly thinner than your desired final consistency when hot.Is homemade chocolate pudding better than boxed instant pudding?
Absolutely! Homemade chocolate pudding has richer, more authentic chocolate flavor without artificial ingredients, preservatives, or that distinctive “instant pudding” taste. The texture is silkier and more luxurious, and you control the sweetness and intensity. Once you try homemade, it’s hard to go back to boxed versions.Can I make this dairy-free?
Yes! Use full-fat coconut milk or oat milk for the creamiest dairy-free result. Almond milk works but creates a thinner pudding. Replace butter with coconut oil or vegan butter. The flavor will be slightly different but still delicious. Make sure your chocolate (if adding) is also dairy-free.Why does my pudding have a skin on top?
Pudding skin forms when the surface is exposed to air as it cools. The liquid evaporates, creating a thin film. Prevent it by pressing plastic wrap directly onto the pudding surface immediately after pouring it into serving dishes. Some people love pudding skin for its unique chewy texture—if that’s you, skip the plastic wrap!Conclusion
Homemade chocolate pudding is one of those timeless desserts that never goes out of style. It reminds us of childhood comfort while satisfying our adult appreciation for quality ingredients and real chocolate flavor. The beauty of this recipe lies in its perfect balance of simplicity and deliciousness—anyone can make it, yet the results are extraordinary enough to serve at dinner parties or special occasions. Just 15 minutes of active cooking time plus a few hours of hands-off chilling yields a dessert that’s infinitely better than anything you can buy at the store.
Whether you’re making it for your family’s weeknight dessert, prepping grab-and-go treats for busy weeks, impressing guests with elegant parfaits, or simply treating yourself to something wonderful, this creamy chocolate pudding delivers pure satisfaction in every spoonful. The silky texture, rich chocolate flavor, and endless customization possibilities make it a recipe you’ll return to again and again throughout the years.
I’d love to hear about your chocolate pudding experience! Share your results, favorite variations, or any questions in the comments below. Did you add peanut butter? Try the mocha version? Serve it in fancy glasses for a dinner party? Let me know! If this recipe brought you joy (and I’m confident it will), please share it on Pinterest so other chocolate lovers can discover the magic of homemade pudding. Don’t forget to snap a photo of your beautiful pudding creations and tag me on social media—seeing your desserts always makes my day! Now grab your whisk and get ready to make the creamiest, dreamiest chocolate pudding of your life. Happy cooking!