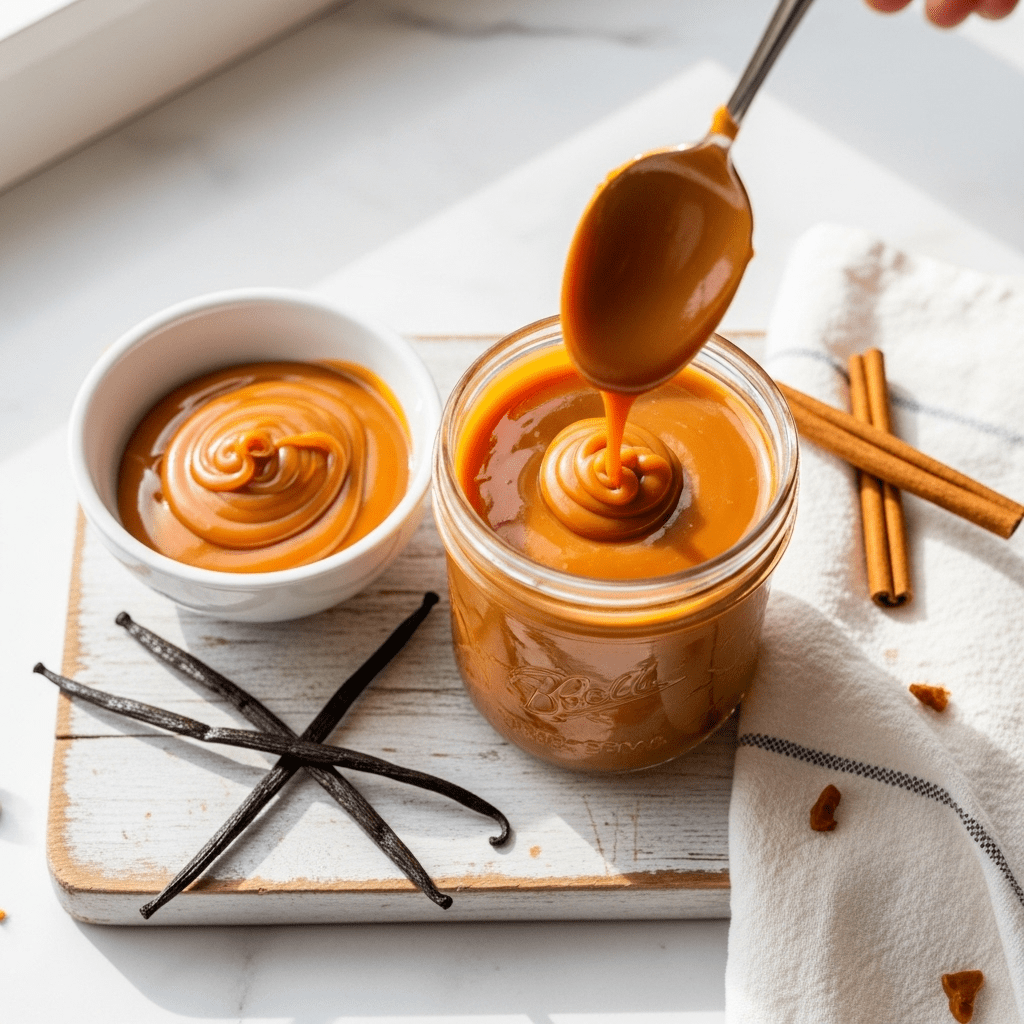
Homemade Dulce de Leche Recipe – Silky, Sweet, and Irresistibly Delicious
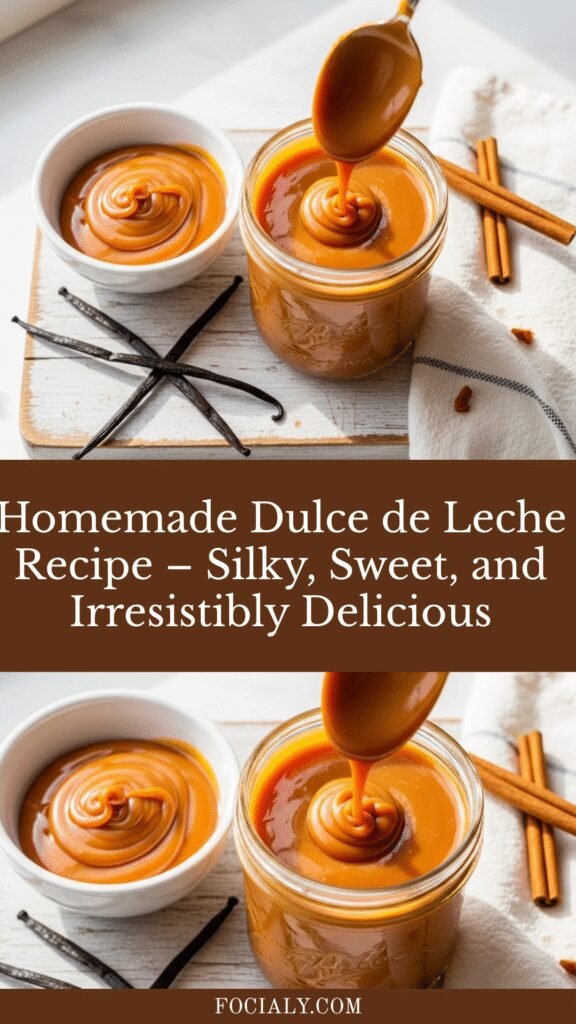
Dulce de leche is pure magic in a jar – a luscious, golden caramel sauce that’s smoother than regular caramel and deeply complex in flavor. This sweet, creamy spread transforms simple milk and sugar into a luxurious treat that tastes like butterscotch, toffee, and caramel all rolled into one heavenly spoonful.
Whether you’re drizzling it over ice cream, swirling it into brownies, spreading it on toast, or eating it straight from the spoon (no judgment here!), dulce de leche is one of those magical recipes that feels fancy but is surprisingly simple to make at home. It’s perfect for holiday gifting, special occasion desserts, or whenever you want to elevate your everyday treats with something truly special.
This recipe walks you through three foolproof methods to make authentic dulce de leche in your own kitchen – the traditional stovetop method, the hands-off oven method, and the easy slow cooker technique. Each method produces that signature caramel-colored sweetness that’s become beloved worldwide.
History / Background
Dulce de leche, which translates to “candy of milk” or “sweet of milk,” has a rich and somewhat disputed history in Latin America. While several countries claim to be its birthplace, the most widely accepted origin story traces back to Argentina in the early 19th century.
Legend has it that in 1829, a maid was preparing sweetened milk (a common beverage called lechada) for Juan Manuel de Rosas, a powerful Argentine military leader. She accidentally left the milk-sugar mixture cooking on the stove for too long, and when she returned, the white liquid had transformed into a thick, caramel-colored spread. Instead of discarding her “mistake,” she tasted it – and dulce de leche was born.
Whether or not this story is entirely accurate, we know that dulce de leche quickly spread throughout Argentina, Uruguay, and eventually across all of Latin America, with each region developing its own variations and preferred methods. In Mexico, it’s known as “cajeta” when made with goat’s milk. In Colombia and Venezuela, it’s called “arequipe.” In Brazil, it goes by “doce de leite.”
The confection became so culturally significant that Argentina even celebrates National Dulce de Leche Day on October 11th! It’s deeply woven into the fabric of South American cuisine, appearing in everything from traditional alfajores cookies to birthday cakes, crepes, and pastries.
European settlers brought similar milk-based sweets to the Americas, including France’s confiture de lait and Norway’s brunost, but dulce de leche’s unique cooking method and texture make it distinctly Latin American. Today, it’s enjoyed globally, with major brands producing jarred versions, but nothing compares to the depth of flavor and silky texture of homemade dulce de leche.
Why You’ll Love This Recipe
Making dulce de leche from scratch might seem intimidating, but once you try it, you’ll never want to go back to store-bought versions. The homemade version has a richer, more complex flavor with notes of toffee and butterscotch that simply can’t be replicated in commercial products.
Here’s why this recipe is a game-changer:
- Incredibly versatile – Use it as a dessert topping, cake filling, cookie spread, or eat it straight from the jar
- Only 2 ingredients – You literally only need milk and sugar (and a pinch of salt and vanilla for extra depth)
- Multiple methods included – Choose from stovetop, oven, or slow cooker based on your schedule and preference
- Budget-friendly – Costs a fraction of store-bought gourmet dulce de leche
- Makes beautiful gifts – Pour into cute jars for thoughtful homemade presents
- Authentic flavor – Tastes just like what you’d find in Argentina or Uruguay
- No corn syrup or preservatives – You control exactly what goes into your dulce de leche
- Impressive to guests – People will think you’re a culinary genius when you serve homemade dulce de leche
Ingredient Notes
The beauty of dulce de leche lies in its simplicity. With just a handful of basic ingredients, you’ll create something extraordinary.
Whole Milk – This is the star of the show. Whole milk (3.25% fat) is essential for achieving that signature creamy, luxurious texture. The fat content is crucial – don’t substitute with low-fat or skim milk, as you won’t get the same richness. You can use goat’s milk for a tangier variation called cajeta, which is popular in Mexico.
Granulated Sugar – White sugar is traditional and allows the caramelization process to shine through without competing flavors. The ratio of milk to sugar is critical for proper texture and sweetness balance.
Baking Soda – Just a tiny pinch! This might seem odd, but baking soda serves two important purposes: it neutralizes the milk’s acidity (which prevents curdling during the long cooking process) and helps achieve that beautiful golden-brown color through enhanced caramelization.
Vanilla Extract – Added at the end for aromatic depth. Pure vanilla extract is best, though vanilla paste or scraped vanilla bean seeds create an even more luxurious version.
Salt – A small pinch enhances all the flavors and prevents the dulce de leche from being one-dimensionally sweet. It creates a more complex, sophisticated taste profile.
Substitution Notes: While you can technically make dulce de leche with condensed milk (the can method), this recipe uses fresh milk for more authentic flavor and better control over sweetness. If you need a dairy-free version, full-fat coconut milk can work, though the flavor will be noticeably different.
Equipment Needed
The equipment varies slightly depending on which method you choose, but here’s what you’ll need:
For Stovetop Method:
- Heavy-bottomed saucepan or Dutch oven (at least 4-quart capacity)
- Long-handled wooden spoon or heat-resistant silicone spatula
- Whisk
- Candy thermometer (optional but helpful)
For Oven Method:
- 9×13-inch glass or ceramic baking dish
- Larger roasting pan (for water bath)
- Aluminum foil
- Whisk
For Slow Cooker Method:
- 4-6 quart slow cooker
- Mason jars with lids or slow cooker-safe bowls
- Jar lifter or tongs
- Kitchen towel
For All Methods:
- Measuring cups and spoons
- Clean glass jars with tight-fitting lids (for storage)
- Fine-mesh strainer (optional, for ultra-smooth texture)
- Immersion blender (optional, helps achieve perfect smoothness)
Dulce De Leche Recipe
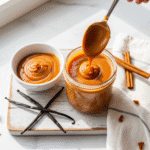
This homemade dulce de leche recipe transforms simple milk and sugar into a silky, caramel-colored spread that’s richer and more flavorful than any store-bought version. Choose from three foolproof methods!
- Prep Time: 5 minutes
- Cook Time: 2-3 hours (varies by method)
- Total Time: 2 hours 5 minutes – 3 hours 5 minutes
- Yield: About 1½ cups (12 servings, 2 tablespoons each) 1x
- Category: Condiment, Dessert Sauce
- Method: Stovetop, Oven, or Slow Cooker
- Cuisine: Argentinian, Latin American
- Diet: Vegetarian
Ingredients
- 4 cups (1 liter) whole milk
- 1½ cups (300g) granulated sugar
- ¼ teaspoon baking soda
- 1 teaspoon pure vanilla extract
- ¼ teaspoon sea salt
Instructions
Stovetop Method (Most Traditional):
- Combine the base ingredients: In a heavy-bottomed 4-quart saucepan, whisk together the whole milk, sugar, and baking soda until the sugar begins to dissolve. The mixture will foam slightly when you add the baking soda – this is normal.
- Begin heating: Place the saucepan over medium heat and bring the mixture to a gentle simmer, stirring frequently with a wooden spoon to prevent scorching on the bottom. This should take about 8-10 minutes.
- Reduce and monitor: Once simmering, reduce the heat to medium-low. You want a gentle, lazy bubble rather than a rolling boil. Cook for 1½ to 2 hours, stirring every 10-15 minutes at first, then more frequently (every 5 minutes) as it thickens.
- Watch for color change: The mixture will gradually transform from white to cream to golden to deep amber. As it thickens, stir more constantly to prevent burning. The dulce de leche is ready when it’s reduced by about two-thirds, coats the back of a spoon, and has reached a rich caramel color.
- Finish and strain: Remove from heat and stir in vanilla extract and salt. For ultra-smooth dulce de leche, strain through a fine-mesh sieve into a clean jar. Let cool to room temperature before sealing.
Oven Method (Hands-Off):
- Preheat and prepare: Preheat your oven to 425°F (220°C). Pour the milk and sugar into a 9×13-inch baking dish and whisk in the baking soda.
- Create water bath: Place the baking dish inside a larger roasting pan. Pour hot water into the roasting pan until it reaches halfway up the sides of the baking dish.
- Cover and bake: Cover the baking dish tightly with aluminum foil. Bake for 1 hour, then remove the foil, whisk the mixture, and return to the oven uncovered.
- Continue cooking: Bake for an additional 45-60 minutes, whisking every 15-20 minutes, until thickened and golden brown.
- Cool and finish: Remove from oven and whisk in vanilla and salt. Blend with an immersion blender for 30 seconds for the smoothest texture. Cool and store.
Slow Cooker Method (Easiest):
- Combine ingredients: Whisk milk, sugar, and baking soda in your slow cooker insert.
- Cook low and slow: Cover and cook on LOW for 8-10 hours, whisking every 2 hours if possible. The longer it cooks, the darker and thicker it becomes.
- Final steps: Once thickened and caramel-colored, whisk in vanilla and salt. Blend if desired for smoothness. Cool completely before storing.
Notes
Stovetop Method (Most Traditional):
- Combine the base ingredients: In a heavy-bottomed 4-quart saucepan, whisk together the whole milk, sugar, and baking soda until the sugar begins to dissolve. The mixture will foam slightly when you add the baking soda – this is normal.
- Begin heating: Place the saucepan over medium heat and bring the mixture to a gentle simmer, stirring frequently with a wooden spoon to prevent scorching on the bottom. This should take about 8-10 minutes.
- Reduce and monitor: Once simmering, reduce the heat to medium-low. You want a gentle, lazy bubble rather than a rolling boil. Cook for 1½ to 2 hours, stirring every 10-15 minutes at first, then more frequently (every 5 minutes) as it thickens.
- Watch for color change: The mixture will gradually transform from white to cream to golden to deep amber. As it thickens, stir more constantly to prevent burning. The dulce de leche is ready when it’s reduced by about two-thirds, coats the back of a spoon, and has reached a rich caramel color.
- Finish and strain: Remove from heat and stir in vanilla extract and salt. For ultra-smooth dulce de leche, strain through a fine-mesh sieve into a clean jar. Let cool to room temperature before sealing.
Oven Method (Hands-Off):
- Preheat and prepare: Preheat your oven to 425°F (220°C). Pour the milk and sugar into a 9×13-inch baking dish and whisk in the baking soda.
- Create water bath: Place the baking dish inside a larger roasting pan. Pour hot water into the roasting pan until it reaches halfway up the sides of the baking dish.
- Cover and bake: Cover the baking dish tightly with aluminum foil. Bake for 1 hour, then remove the foil, whisk the mixture, and return to the oven uncovered.
- Continue cooking: Bake for an additional 45-60 minutes, whisking every 15-20 minutes, until thickened and golden brown.
- Cool and finish: Remove from oven and whisk in vanilla and salt. Blend with an immersion blender for 30 seconds for the smoothest texture. Cool and store.
Slow Cooker Method (Easiest):
- Combine ingredients: Whisk milk, sugar, and baking soda in your slow cooker insert.
- Cook low and slow: Cover and cook on LOW for 8-10 hours, whisking every 2 hours if possible. The longer it cooks, the darker and thicker it becomes.
- Final steps: Once thickened and caramel-colored, whisk in vanilla and salt. Blend if desired for smoothness. Cool completely before storing.
Nutrition
- Serving Size: 2 tablespoons (about 30g)
- Calories: 140
- Sugar: 23g
- Sodium: 85mg
- Fat: 3g
- Saturated Fat: 2g
- Unsaturated Fat: 1g
- Trans Fat: 0g
- Carbohydrates: 25g
- Fiber: 0g
- Protein: 3g
- Cholesterol: 10mg
Tips & Variations
Flavor Variations:
- Coffee Dulce de Leche: Add 2 tablespoons instant espresso powder with the milk
- Chocolate Dulce de Leche: Stir in 3 tablespoons cocoa powder during the last 30 minutes
- Rum or Bourbon: Add 2 tablespoons dark rum or bourbon with the vanilla for an adult version
- Coconut: Replace 1 cup milk with coconut milk and add ½ teaspoon coconut extract
- Spiced: Add a cinnamon stick and star anise while cooking, remove before storing
Texture Adjustments:
- For thicker dulce de leche (spreadable): Cook 15-20 minutes longer until it holds its shape
- For thinner sauce (pourable): Stop cooking when it’s still flowing easily from the spoon
- For ultra-smooth: Use an immersion blender for 30-60 seconds after cooking
Dietary Modifications:
- Reduced Sugar: You can reduce sugar by up to ¼ cup, but it will be less thick and slightly less sweet
- Dairy-Free: Use full-fat coconut milk, though flavor will differ significantly
- Sweetener Options: Raw cane sugar or coconut sugar work but will affect color and flavor
Pro Chef Tips
Temperature Control is Everything: The difference between perfect dulce de leche and burnt milk comes down to temperature management. Keep your heat at medium-low for stovetop method – patience is key. If you rush with high heat, you’ll burn the milk proteins before proper caramelization occurs.
Stir Strategically: Early in the cooking process, stirring every 10-15 minutes is fine. But as the mixture thickens and darkens, increase stirring frequency to every 3-5 minutes, scraping the bottom and sides thoroughly. This prevents scorching and ensures even caramelization.
Use the Spoon Test: To check if your dulce de leche is ready, dip a clean metal spoon into the mixture, let excess drip off, then run your finger across the back. If the line holds and doesn’t run, it’s done. Remember, it will thicken more as it cools.
Embrace the Foam: Don’t panic when the mixture foams up after adding baking soda. This is a chemical reaction that helps prevent curdling. The foam will subside as cooking continues.
Cool Completely Before Sealing: Hot dulce de leche sealed in jars creates condensation that can lead to spoilage. Always cool to room temperature first, which takes about 2-3 hours.
Watch for the Color Cue: True dulce de leche should be a deep amber to light brown color – similar to caramel. If it’s still pale beige, keep cooking. The color correlates directly with flavor development.
Prevent Crystallization: If you notice sugar crystals forming on the pan sides during cooking, brush them down with a wet pastry brush. These crystals can cause the entire batch to crystallize and become grainy.
Common Mistakes to Avoid
Mistake #1: Using Low-Fat Milk – Skim or 2% milk simply doesn’t have enough fat to create authentic dulce de leche texture. The result will be thin, watery, and lack that signature creaminess. Always use whole milk for best results.
Mistake #2: Cooking at Too High Heat – High heat causes milk proteins to scorch before proper caramelization happens, resulting in burnt-tasting dulce de leche with dark specks. Low and slow wins this race every time.
Mistake #3: Not Stirring Enough Toward the End – As the mixture thickens, sugars concentrate at the bottom and can burn quickly. Those last 30 minutes require vigilant, frequent stirring to prevent disaster.
Mistake #4: Overcooking to Fix Thin Consistency – If your dulce de leche seems thin, remember it thickens substantially as it cools. Many home cooks overcook trying to achieve thick texture while hot, ending up with an overly firm, candy-like consistency.
Mistake #5: Skipping the Baking Soda – That tiny pinch might seem insignificant, but without it, your milk is more likely to curdle during the extended cooking time. The baking soda neutralizes acid and promotes even browning.
Mistake #6: Storing While Still Warm – Putting hot dulce de leche in sealed jars traps steam, creating condensation that promotes bacterial growth and spoilage. Patience pays off here.
Mistake #7: Giving Up Too Soon – Dulce de leche takes time! Many people stop cooking when the mixture is still too thin because they’ve been stirring for an hour. Trust the process and look for that deep caramel color and thick coating on the spoon.
Storage & Meal Prep
Refrigerator Storage: Once completely cooled, transfer your dulce de leche to clean glass jars with tight-fitting lids. Store in the refrigerator for up to 3 weeks. Always use clean utensils when scooping to prevent contamination.
Shelf Life Indicators: Fresh dulce de leche should maintain its smooth, creamy texture and caramel color. If you notice any mold, off smells, or separation that doesn’t remix with stirring, it’s time to discard it.
Reheating Tips: Dulce de leche often firms up in the refrigerator, which is completely normal. To restore its pourable consistency, you have several options:
- Microwave method: Heat in 15-second intervals, stirring between each, until desired consistency
- Stovetop method: Warm gently in a small saucepan over low heat, stirring constantly
- Water bath method: Place the jar in hot (not boiling) water for 10-15 minutes
- Room temperature method: Let sit at room temperature for 1-2 hours before using
Thinning if Needed: If your refrigerated dulce de leche becomes too thick, whisk in milk or heavy cream, one tablespoon at a time, until you reach the desired consistency.
Make-Ahead & Freezer Notes
Make-Ahead Advantage: Dulce de leche is the ultimate make-ahead condiment! Prepare a large batch during weekend meal prep and you’ll have gourmet dessert sauce ready whenever inspiration strikes. It actually improves slightly after a day or two as flavors meld.
Freezer-Friendly: Yes! Dulce de leche freezes beautifully for up to 3 months. Use these methods:
- Small portions: Freeze in ice cube trays, then transfer frozen cubes to a freezer bag for individual servings
- Larger amounts: Use freezer-safe containers or jars, leaving 1 inch headspace for expansion
- Flash-use portions: Freeze 2-4 tablespoon portions in muffin tins lined with plastic wrap for perfect single-use amounts
Best Thawing Method: Transfer frozen dulce de leche to the refrigerator 24 hours before use. For quicker thawing, place the sealed container in a bowl of cool water for 1-2 hours. Never microwave frozen dulce de leche, as it can separate.
Reheating After Freezing: Once thawed, you may notice slight texture changes – it might appear slightly grainy or separated. Simply whisk vigorously or blend with an immersion blender for 20-30 seconds to restore smooth texture. Warm gently if needed.
Planning Ahead: Making dulce de leche a week before a party or special occasion actually improves convenience. The flavors deepen, and you eliminate last-minute stress. Just remember to bring it to room temperature or warm slightly before serving for best drizzling consistency.
Serving Suggestions
Dulce de leche is incredibly versatile and can transform both simple and sophisticated desserts into something spectacular.
Classic Pairings:
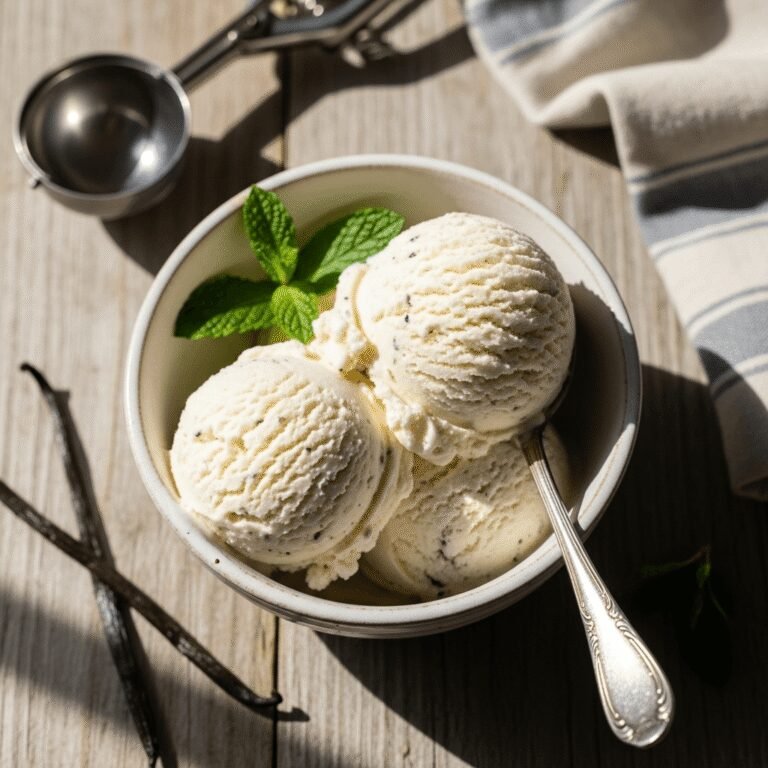
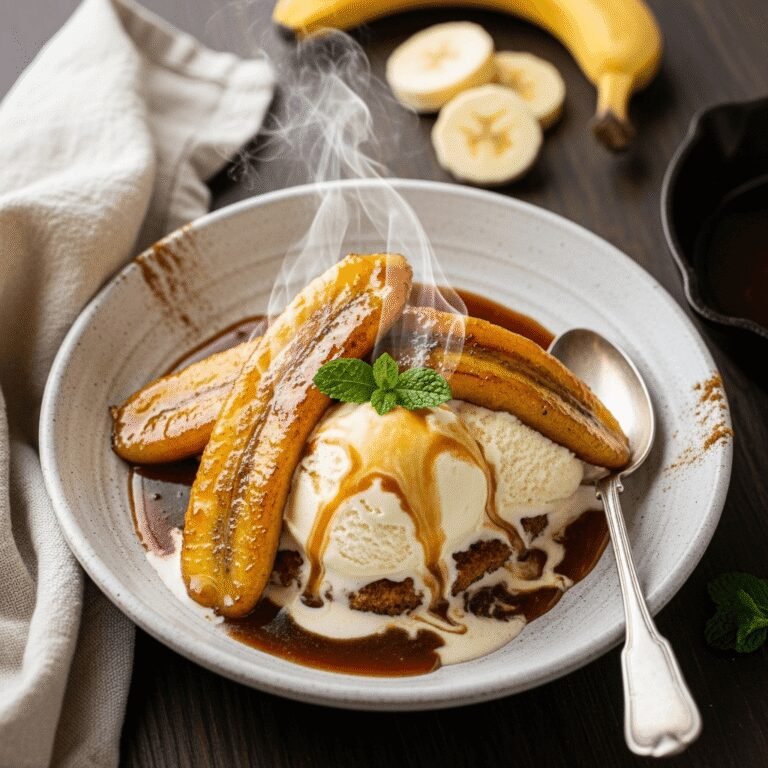
- Ice Cream: Drizzle over vanilla, chocolate, or coffee ice cream for instant decadence
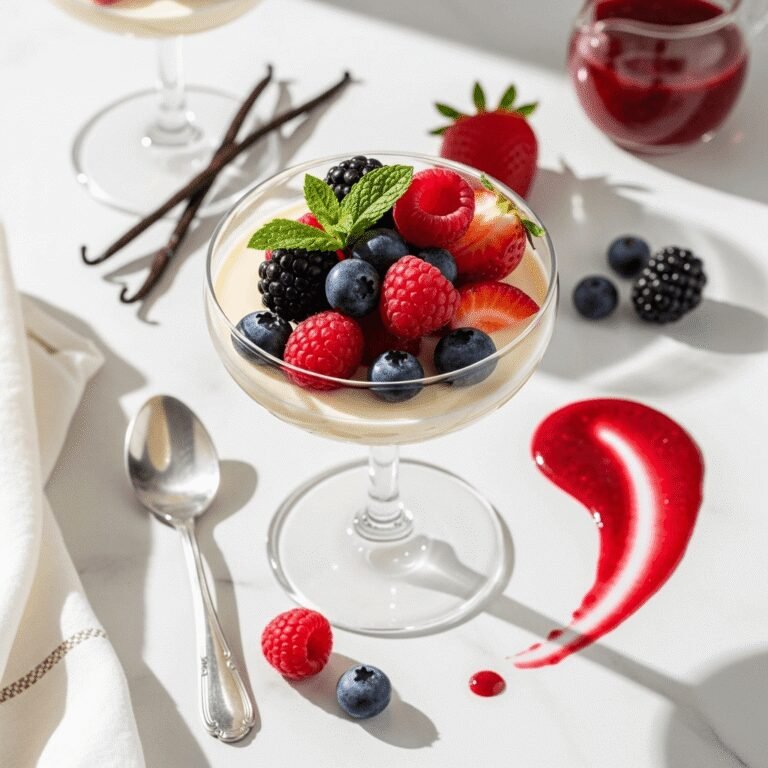
- Fresh Fruit: Pair with sliced apples, bananas, strawberries, or pears for an elegant dessert
- Toast or Waffles: Spread on buttered toast, waffles, or pancakes for a breakfast treat
- Churros: The traditional Spanish companion for dulce de leche dipping
- Alfajores: Make these classic South American sandwich cookies with dulce de leche filling
Baking Applications:
- Swirl into brownie or blondie batter before baking
- Use as cake filling between layers with buttercream
- Fill thumbprint cookies or linzer cookies
- Spread on crepes and fold into triangles
- Drizzle over cheesecake or panna cotta
- Mix into buttercream frosting for caramel-flavored cakes
Coffee and Beverages:
- Stir a spoonful into hot coffee or espresso
- Blend into milkshakes or smoothies
- Drizzle inside a glass before adding iced coffee
- Mix with warm milk for a Latin American-inspired drink
Creative Serving Ideas:
- Layer with yogurt and granola for breakfast parfaits
- Spread between graham crackers for quick s’mores
- Fill cream puffs or eclairs
- Use as a dip for pretzels, cookies, or pound cake
- Top oatmeal or chia pudding
Beverage Pairings: Dulce de leche pairs beautifully with coffee (especially espresso), hot chocolate, Argentine Malbec wine, rum, or bourbon for adults, and cold milk for a comforting treat.
FAQs Section
Q: Can I use condensed milk instead of regular milk?
A: While you can make dulce de leche from condensed milk (the can boiling method), this recipe uses fresh milk for more authentic flavor and better control over sweetness and texture. The condensed milk method is faster but produces a slightly different result with a more cloying sweetness.
Q: Why is my dulce de leche grainy or crystallized?
A: Graininess usually results from sugar crystallization, which happens when sugar crystals form on the pan sides and fall back into the mixture, or when the mixture is cooked too quickly. Prevent this by brushing down pan sides with a wet pastry brush during cooking and maintaining low heat. If it happens, try reheating gently and whisking vigorously or blending.
Q: How do I know when my dulce de leche is done?
A: Look for three signs: 1) Deep amber to caramel color, 2) Mixture coats the back of a spoon and holds a line when you run your finger through it, 3) Reduced to about one-third of original volume. Remember it thickens more as it cools, so err on the side of slightly thinner while hot.
Q: Can I make dulce de leche without baking soda?
A: Technically yes, but it’s not recommended. The baking soda prevents curdling during long cooking and enhances browning for better color. Without it, you risk ending up with curdled milk or pale, less flavorful results. It’s such a tiny amount that it won’t affect taste.
Q: What’s the difference between dulce de leche and caramel?
A: While both are sweet and caramel-colored, the process differs. Caramel is made by heating sugar (sometimes with butter and cream added), while dulce de leche is made by slowly cooking milk and sugar together. Dulce de leche has a creamier, more milk-forward flavor, while caramel tastes more intensely of cooked sugar with slight bitterness.
Q: Why did my dulce de leche burn?
A: Burning happens when heat is too high or stirring is too infrequent. Always use medium-low heat and increase stirring frequency as the mixture thickens. A heavy-bottomed pan also helps distribute heat evenly and prevent hot spots that can cause burning.
Q: Can I double this recipe?
A: Yes, but use a larger pot (at least 6-8 quarts) to prevent boil-overs, and note that cooking time will increase by 30-45 minutes. The mixture needs room to bubble without overflowing, especially when you first add the baking soda.
Conclusion
There’s something deeply satisfying about making dulce de leche from scratch – watching simple milk and sugar transform into liquid gold through nothing but time, heat, and a little patience. This isn’t just a recipe; it’s an edible piece of Latin American culinary history that you can recreate in your own kitchen.
Whether you choose the traditional stovetop method, the hands-off oven technique, or the easy slow cooker approach, you’ll end up with dulce de leche that’s infinitely better than anything you could buy at the store. The rich, complex flavor with notes of butterscotch and toffee simply can’t be replicated in commercial versions.
Now it’s your turn to experience the magic! Grab whole milk and sugar, set aside a few hours, and prepare to impress yourself and everyone you share it with. Once you taste homemade dulce de leche, you’ll find yourself adding it to everything from morning coffee to midnight ice cream raids.
Ready to make your own dulce de leche? Save this recipe to your Pinterest boards so you can find it again! I’d love to hear how yours turns out – drop a comment below with your favorite way to use dulce de leche, and don’t forget to share photos of your beautiful golden creation. Happy cooking!