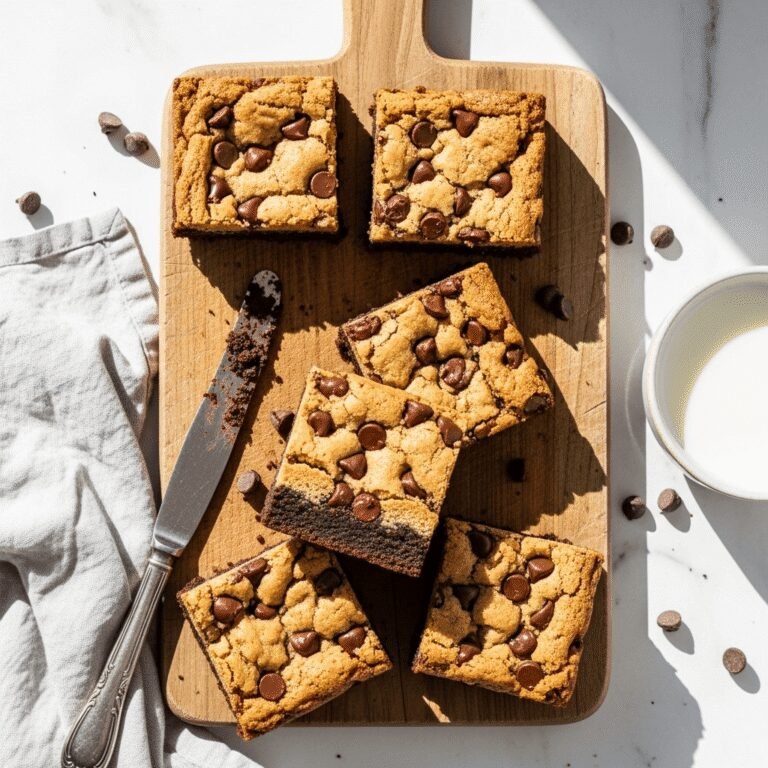
The Ultimate Easy Cookies Recipe: Soft, Chewy & Ready in 30 Minutes

There’s something magical about the smell of freshly baked cookies wafting through your kitchen. Whether you’re baking for a weekend treat, a school bake sale, or just because you need something sweet right now, this easy cookies recipe is about to become your new best friend. These classic cookies are soft in the center, slightly crispy around the edges, and absolutely irresistible. The best part? You probably already have all the ingredients sitting in your pantry right now.
This recipe is perfect for beginners who’ve never baked before, busy parents who need a quick dessert solution, and experienced bakers who want a reliable go-to recipe. With just one bowl, basic ingredients, and about 30 minutes from start to finish, you’ll have warm, homemade cookies that taste like they came from a fancy bakery. Whether you’re craving chocolate chip, want to add nuts, or prefer them plain and simple, this versatile base recipe adapts to whatever your heart desires.
History / Background
The history of the simple drop cookie dates back to the late 18th century when Dutch immigrants brought their “koekje” (meaning little cake) to America. However, the modern version of the easy, buttery cookie we know and love today really took off in the early 20th century when American home bakers began experimenting with readily available ingredients like butter, sugar, and eggs.
The chocolate chip cookie, arguably the most famous variation of the basic cookie recipe, was invented by accident in 1938 by Ruth Graves Wakefield at the Toll House Inn in Massachusetts. She expected the chocolate chunks to melt completely into the dough, but instead created what would become America’s favorite cookie. This happy accident revolutionized home baking and inspired countless variations of the simple cookie recipe.
During World War II, cookies became even more popular as they could be easily packaged and sent to soldiers overseas. Home bakers adapted recipes based on ingredient availability, leading to creative variations that used whatever they had on hand. This tradition of adaptability is why cookie recipes remain so versatile today—they’re designed to work with substitutions and additions, making them the perfect canvas for your creativity.
The drop cookie method—simply scooping dough and dropping it onto a baking sheet—became the standard because it was fast, easy, and didn’t require special tools or techniques. This accessibility made cookies the gateway baking project for generations of home cooks, and that tradition continues today. There’s a reason why “baking cookies” is often a child’s first introduction to the kitchen—it’s straightforward, forgiving, and delicious.
Why You’ll Love This Recipe
This easy cookies recipe is everything you want in a homemade treat without any of the fuss. It’s the kind of recipe you’ll turn to again and again, whether you’re baking with kids, need a last-minute dessert, or simply want to fill your home with that irresistible fresh-baked aroma.
Here’s why this recipe is a total winner:
- Beginner-Friendly: No complicated techniques, no fancy equipment, and no confusing steps. If you can mix ingredients in a bowl, you can make these cookies.
- One Bowl Wonder: Less cleanup means more time enjoying cookies. Everything comes together in a single mixing bowl.
- Quick & Easy: From opening your pantry to pulling cookies out of the oven takes just 30 minutes total.
- Pantry Staples Only: Butter, sugar, eggs, flour—ingredients you probably already have at home.
- Endlessly Customizable: Add chocolate chips, nuts, dried fruit, or keep them plain. This base recipe works with almost any mix-in you can imagine.
- Perfect Texture: Soft and chewy in the middle with slightly crisp edges—the ideal cookie texture that everyone loves.
- Kid-Approved: Children love helping make these, and they disappear within minutes of cooling.
- Budget-Friendly: Makes 24+ cookies for just a few dollars worth of ingredients.
- Freezer-Friendly: Make a double batch and freeze half the dough for fresh cookies anytime you want them.
- Always Impressive: Homemade cookies never fail to make people smile, whether you’re serving guests or packing them in lunchboxes.
Ingredient Notes
Understanding your ingredients helps you make better cookies every single time. Here’s what you need and why each component matters:
All-Purpose Flour: This is your structure builder. All-purpose flour provides just the right amount of gluten for cookies that hold together but stay tender. You can substitute with a 1:1 gluten-free flour blend if needed, though the texture may be slightly different. Avoid using cake flour (too delicate) or bread flour (too chewy).
Granulated Sugar: Provides sweetness and helps create those crispy edges we love. Sugar is also hygroscopic, meaning it absorbs moisture, which keeps cookies soft inside. You can reduce sugar slightly if you prefer less sweet cookies, but don’t eliminate it entirely or your texture will suffer.
Brown Sugar: Adds moisture, chewiness, and a subtle caramel flavor thanks to the molasses content. Light or dark brown sugar both work—dark brown gives a deeper flavor. If you don’t have brown sugar, you can use all granulated sugar, but your cookies will be less chewy and slightly less flavorful.
Unsalted Butter: The flavor foundation of your cookies. Always use unsalted so you can control the salt level. Butter should be softened to room temperature (it should leave a slight indent when pressed but not be melty). Cold butter won’t cream properly, and melted butter will make cookies spread too much.
Eggs: Bind everything together and add richness. Eggs should be at room temperature for better incorporation. One large egg is standard, but you can use a flax egg (1 tablespoon ground flaxseed + 3 tablespoons water) for a vegan option.
Vanilla Extract: Pure vanilla extract adds depth and enhances all the other flavors. Don’t skip it! Imitation vanilla works in a pinch but won’t taste quite as good.
Baking Soda: This leavening agent helps cookies rise slightly and spread properly. Make sure yours is fresh (test it by mixing a bit with vinegar—it should bubble vigorously). Old baking soda means flat, dense cookies.
Salt: Enhances sweetness and balances flavors. Even if you use salted butter, a pinch of extra salt improves the overall taste dramatically.
Optional Add-Ins: Chocolate chips (semi-sweet, milk, or dark), chopped nuts (walnuts, pecans, almonds), dried fruit (cranberries, raisins), or even candy pieces. Add about 1 to 1½ cups of mix-ins for perfectly studded cookies.
Equipment Needed
You don’t need a fancy kitchen to make amazing cookies. Here’s what you’ll use:
- Large Mixing Bowl: For combining all your ingredients
- Electric Mixer or Wooden Spoon: A hand mixer or stand mixer makes creaming butter and sugar easier, but a wooden spoon and some arm muscles work too
- Measuring Cups and Spoons: Accurate measurements matter in baking
- Baking Sheets: Two sheets mean you can bake multiple batches faster (rimmed or rimless both work)
- Parchment Paper or Silicone Baking Mats: Prevents sticking and makes cleanup effortless
- Cookie Scoop or Spoons: A 2-tablespoon cookie scoop creates uniform cookies that bake evenly, but two spoons work fine
- Wire Cooling Rack: Allows air circulation so bottoms don’t get soggy
- Rubber Spatula: For scraping down bowl sides and ensuring everything is mixed
- Oven Thermometer (Optional but Helpful): Many ovens run hot or cold, and accurate temperature is crucial for perfect cookies
Easy Cookies Recipe

This classic easy cookies recipe delivers soft, chewy cookies with crispy edges every single time. Made with simple pantry ingredients in just one bowl, these versatile cookies are perfect for beginners and experienced bakers alike. Customize with your favorite mix-ins or keep them wonderfully simple.
- Prep Time: 15 minutes
- Cook Time: 10-12 minutes
- Total Time: 27 minutes
- Yield: 24 cookies 1x
- Category: Dessert
- Method: Baking
- Cuisine: American
- Diet: Vegetarian
Ingredients
- 2¼ cups all-purpose flour
- 1 teaspoon baking soda
- 1 teaspoon salt
- 1 cup (2 sticks) unsalted butter, softened to room temperature
- ¾ cup granulated sugar
- ¾ cup packed light brown sugar
- 2 large eggs, room temperature
- 2 teaspoons pure vanilla extract
- 1½ cups chocolate chips (optional but highly recommended)
Instructions
- Preheat your oven to 375°F (190°C). Line two baking sheets with parchment paper or silicone baking mats and set aside.
- Combine dry ingredients: In a medium bowl, whisk together the flour, baking soda, and salt. Set this aside while you prepare the wet ingredients.
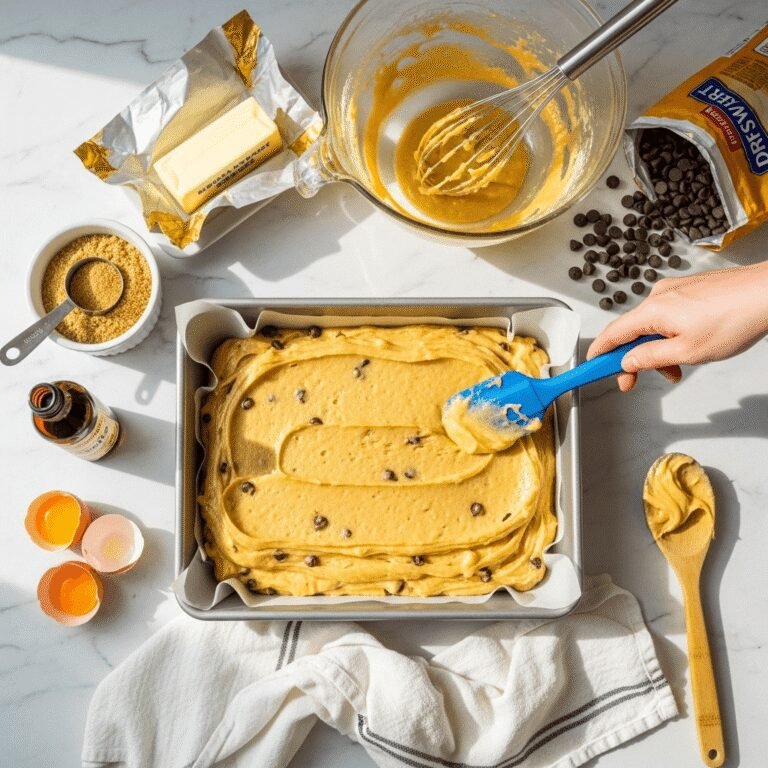
- Cream butter and sugars: In a large mixing bowl, beat the softened butter, granulated sugar, and brown sugar together with an electric mixer on medium speed for 2-3 minutes until light and fluffy. This step incorporates air and creates a better texture, so don’t rush it.
- Add eggs and vanilla: Beat in the eggs one at a time, mixing well after each addition. Add the vanilla extract and mix until fully combined. Scrape down the sides of the bowl with a rubber spatula to ensure everything is incorporated.
- Incorporate dry ingredients: Add the flour mixture to the butter mixture in two additions, mixing on low speed just until the flour disappears. Don’t overmix or your cookies will be tough. The dough should look thick and slightly sticky.
- Add mix-ins: If using chocolate chips or other add-ins, fold them into the dough with a spatula or wooden spoon until evenly distributed throughout.
- Scoop the dough: Using a cookie scoop or two spoons, drop rounded tablespoons of dough onto your prepared baking sheets, spacing them about 2 inches apart (they’ll spread during baking).
- Bake: Place in the preheated oven and bake for 10-12 minutes, or until the edges are golden brown but the centers still look slightly underdone. They’ll continue cooking on the hot pan after you remove them.
- Cool on pan: Let cookies cool on the baking sheet for 5 minutes (this is crucial—they’re too soft to move immediately). This resting time allows them to set properly.
- Transfer and finish cooling: Use a spatula to carefully transfer cookies to a wire cooling rack to cool completely. Or, if you’re like most of us, enjoy one while it’s still warm and gooey!
Notes
- Room temperature ingredients matter: Softened butter and room-temperature eggs incorporate more evenly and create better texture.
- Don’t overbake: Cookies should look slightly underdone in the center when you remove them. They’ll firm up as they cool but stay soft inside.
- Chill dough if needed: If your dough seems too soft or your kitchen is warm, refrigerate the dough for 30 minutes before scooping. This prevents excessive spreading.
- Rotate baking sheets: If baking two sheets at once, rotate them halfway through baking for even browning.
- Fresh baking soda: Check expiration dates! Old baking soda won’t work properly.
Nutrition
- Serving Size: 1 cookie
- Calories: 165
- Sugar: 15g
- Sodium: 125mg
- Fat: 8g
- Saturated Fat: 5g
- Unsaturated Fat: 2.5g
- Trans Fat: 0g
- Carbohydrates: 22g
- Fiber: 0.5g
- Protein: 2g
- Cholesterol: 30mg
Note: Nutrition information is calculated based on the ingredients listed and is approximate. Values will vary based on specific brands used and any modifications made.
Tips & Variations
Chocolate Lover’s Cookies: Use a combination of semi-sweet, milk, and dark chocolate chips for complex chocolate flavor. Add ½ cup of cocoa powder and reduce flour by ½ cup for double chocolate cookies.
Nutty Delight: Add 1 cup of chopped walnuts, pecans, or almonds along with (or instead of) chocolate chips. Toast nuts first for deeper flavor.
Oatmeal Cookies: Replace 1 cup of flour with 1½ cups of old-fashioned oats for chewy oatmeal cookies. Add cinnamon and raisins for classic oatmeal raisin cookies.
Peanut Butter Twist: Replace ½ cup of butter with ½ cup of peanut butter for cookies with nutty richness. Add peanut butter chips for double peanut flavor.
White Chocolate Cranberry: Swap chocolate chips for white chocolate chips and add ½ cup of dried cranberries for a tart-sweet combination.
Salted Caramel: Add ½ cup of caramel chips and sprinkle cookies with flaky sea salt before baking.
Healthier Version: Replace half the butter with unsweetened applesauce, use whole wheat flour instead of all-purpose, and reduce sugar by ¼ cup. Add chia seeds or ground flaxseed for extra nutrition.
Giant Cookies: Use ¼ cup of dough per cookie and bake for 14-16 minutes for bakery-style large cookies.
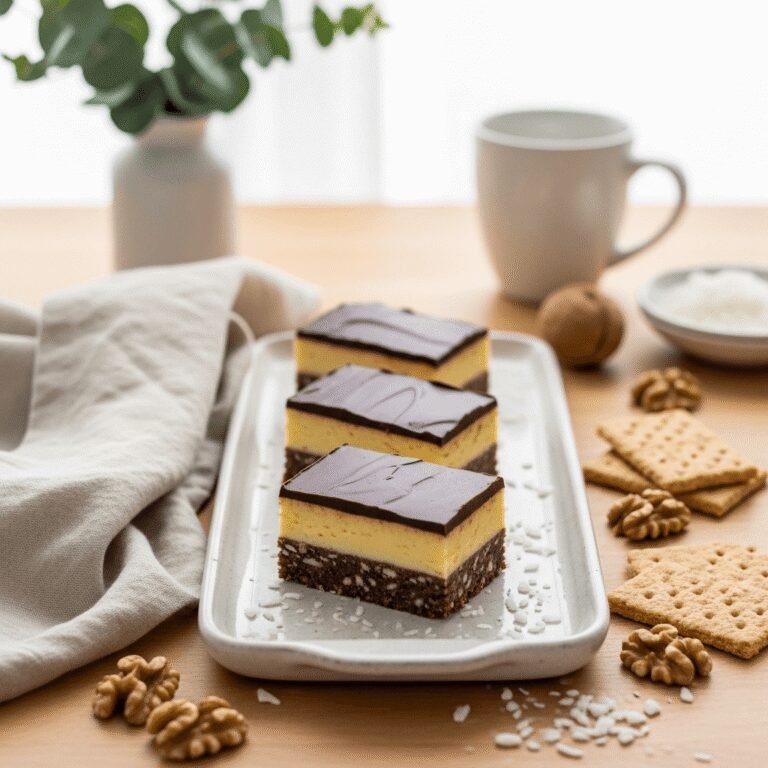
Cookie Sandwiches: Make smaller cookies and sandwich two together with frosting, Nutella, or marshmallow fluff in between.
Seasonal Variations: Add pumpkin spice in fall, peppermint extract and crushed candy canes during holidays, or lemon zest in summer.
Pro Chef Tips
Temperature is everything: Invest in an oven thermometer. Most home ovens are off by 25°F or more, and that difference can mean burnt or underbaked cookies.
Brown your butter: For next-level flavor, brown your butter before making the dough. Let it cool to room temperature first, then proceed with the recipe. This adds an incredible nutty, caramel-like depth.
Use a scale: Weighing ingredients (especially flour) is more accurate than measuring cups. 2¼ cups flour should be about 280 grams. This ensures consistent results every time.
Chill the dough: Even if the recipe doesn’t require it, chilling dough for at least 30 minutes (or up to 72 hours) develops better flavor and prevents spreading. Longer chill time = better cookies.
Underbake slightly: The single best tip for soft, bakery-style cookies is to remove them when they still look slightly underdone in the center. They’ll finish cooking on the hot pan and stay wonderfully soft.
Use quality vanilla: The difference between imitation and pure vanilla extract is noticeable. If you bake often, real vanilla is worth the investment.
Add a touch of espresso powder: Even ¼ teaspoon of espresso powder (not coffee!) intensifies chocolate flavor without making cookies taste like coffee.
Rest your dough: After mixing, let the dough rest for 10-15 minutes before scooping. This allows the flour to hydrate fully and creates better texture.
Rotate your pans: Halfway through baking, rotate your baking sheet 180 degrees for even browning, especially if your oven has hot spots.
Use parchment paper: It makes cleanup easy, prevents sticking, and promotes even browning better than greasing pans.
Common Mistakes to Avoid
Using Melted Butter: Melted butter creates flat, crispy cookies instead of thick, chewy ones. Always use softened (not melted) butter at room temperature. If you forgot to soften butter, cut it into small pieces and let it sit for 10 minutes—don’t microwave it into liquid.
Overmixing the Dough: Once you add flour, mix just until it disappears. Overmixing develops too much gluten, resulting in tough, cakey cookies. It’s okay if you see a few flour streaks right before you stop mixing—they’ll incorporate as you fold in add-ins.
Not Measuring Flour Correctly: Scooping flour directly with a measuring cup packs it down, giving you too much flour and dry, crumbly cookies. Instead, spoon flour lightly into your measuring cup, then level it off with a knife. Or better yet, weigh it.
Skipping the Cooling Time on the Pan: Moving cookies immediately after removing them from the oven will cause them to break apart. They need 5 minutes on the hot pan to set up properly. Be patient!
Baking All Cookies at Once: Using only one oven rack and crowding cookies causes uneven baking. Bake one sheet at a time on the center rack for best results, or rotate sheets if using two racks.
Overbaking: Cookies continue baking on the hot pan after removal from the oven. What looks “perfectly done” in the oven will be overbaked after cooling. Remove cookies when centers still look slightly soft and underdone.
Using Old Leavening Agents: Baking soda loses potency over time. If yours is more than six months old, test it by mixing with vinegar. If it doesn’t fizz vigorously, replace it. Old baking soda means flat, dense cookies.
Storage & Meal Prep
Room Temperature Storage: Store completely cooled cookies in an airtight container at room temperature for up to 5 days. Add a slice of bread to the container to keep cookies soft—the cookies will absorb moisture from the bread. Replace the bread slice every couple of days.
Refrigerator Storage: While not typically necessary, refrigerating cookies can extend their life to about 2 weeks. However, they may become harder. Let them come to room temperature before serving for best texture.
Keeping Cookies Fresh: Use containers with tight-fitting lids rather than zipper bags, which don’t seal as well. Layer cookies with parchment paper between layers if stacking to prevent them from sticking together.
Reheating: For that fresh-baked experience, reheat cookies in a 300°F oven for 3-5 minutes, or microwave individual cookies for 8-10 seconds. They’ll taste freshly baked!
Shipping Cookies: If mailing cookies as gifts, choose sturdier varieties (these are perfect). Wrap cookies individually in plastic wrap, pack tightly in an airtight container with minimal air space, and cushion the container well in your shipping box.
Make-Ahead & Freezer Notes
Freezing Baked Cookies: Let cookies cool completely, then freeze in a single layer on a baking sheet for 1 hour. Transfer frozen cookies to a freezer bag or airtight container with parchment paper between layers. They’ll keep for up to 3 months. Thaw at room temperature for 15-20 minutes or microwave for 10-15 seconds.
Freezing Cookie Dough (Scooped): This is a game-changer for fresh cookies anytime! Scoop dough into balls, freeze on a baking sheet until solid (about 1 hour), then transfer to a freezer bag. Bake from frozen, adding 1-2 extra minutes to the baking time. No thawing required!
Freezing Cookie Dough (In a Log): Shape dough into a log, wrap tightly in plastic wrap, then foil. Freeze for up to 3 months. Thaw in refrigerator overnight, slice, and bake as directed. This works beautifully for slice-and-bake convenience.
Make-Ahead Dough: Prepare dough up to 3 days ahead and refrigerate. In fact, many bakers swear that dough aged 24-72 hours in the refrigerator produces better-flavored cookies with superior texture. Let dough sit at room temperature for 10-15 minutes before scooping if it’s too firm.
Flash-Freezing Tips: When freezing either baked cookies or dough balls, freeze them in a single layer first before transferring to bags. This prevents them from sticking together in one giant clump.
Best Reheating Method: For frozen baked cookies, let thaw at room temperature or warm in a 300°F oven for 5 minutes. For frozen cookie dough, bake directly from frozen—no thawing needed—just add 1-2 minutes to the baking time.
Serving Suggestions
These versatile cookies pair beautifully with countless beverages and treats:
Classic Pairings: Serve with a cold glass of milk (the timeless combination), hot coffee, tea, or hot chocolate. The warm cookies soften slightly when dunked, creating an indulgent experience.
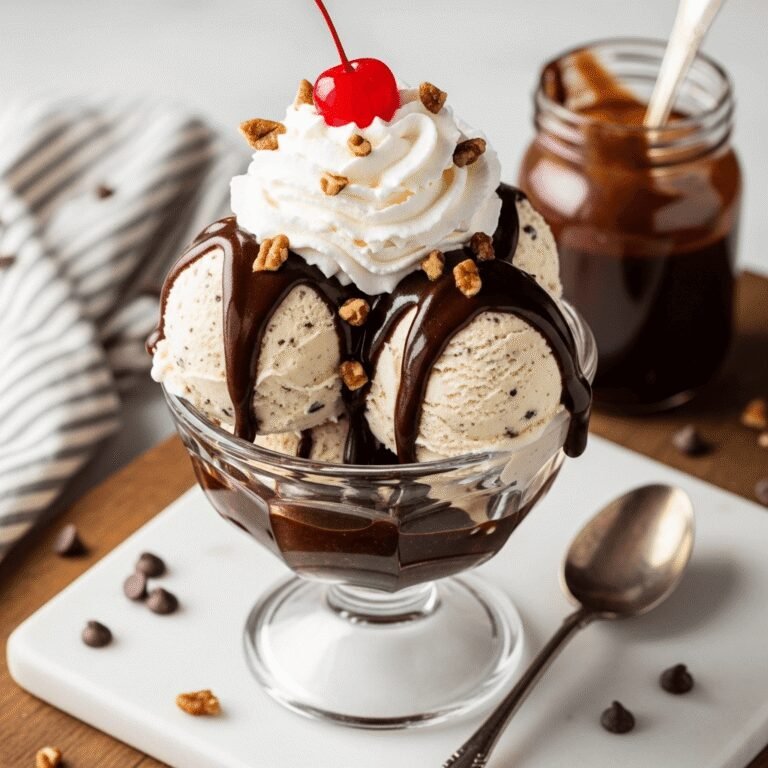
Ice Cream Sandwiches: Place a scoop of vanilla, chocolate, or strawberry ice cream between two cookies for homemade ice cream sandwiches. Roll the edges in mini chocolate chips or sprinkles for extra fun.
Dessert Platters: Arrange cookies on a platter with fresh berries, brownies, and other treats for parties. They’re perfect alongside pies, cakes, or as part of a dessert buffet.
Breakfast Treat: While not traditional, cookies with morning coffee make weekend mornings feel special. Pair with fresh fruit for balance.
Lunchbox Addition: Pack in school lunches or work lunches for a homemade touch that beats store-bought cookies every time.
Afternoon Snack: Serve with fresh fruit slices, cheese cubes, or yogurt for an after-school snack kids will love.
Party Presentation: Stack cookies on a cake stand, tie them in cellophane bags with ribbon for party favors, or arrange around a central bowl of milk for dipping.
Holiday Twist: During holidays, serve cookies on festive plates with seasonal drinks like eggnog, apple cider, or peppermint hot chocolate.
Cookie Crumble Topping: Crumble cookies over ice cream, yogurt parfaits, or use as a cheesecake topping for added texture and flavor.
FAQs Section
Can I make these cookies without eggs?
Yes! Substitute each egg with 1 tablespoon ground flaxseed mixed with 3 tablespoons water (let sit 5 minutes to thicken), or use a commercial egg replacer following package directions. You can also try ¼ cup unsweetened applesauce per egg, though texture may be slightly different—cookies will be a bit cakier but still delicious.
Why did my cookies spread too much or turn out flat?
The most common causes are: butter that was too warm or melted, dough that was too warm when it went into the oven, not enough flour (measure carefully!), old baking soda that’s lost its potency, or oven temperature that’s too low. To fix: chill your dough for 30 minutes before baking, make sure butter is softened but not melted, and verify your oven temperature with a thermometer.
Can I use salted butter instead of unsalted?
Yes, you can use salted butter if that’s what you have. Simply reduce or omit the additional salt in the recipe. However, unsalted butter is preferred because salt content varies by brand, and using unsalted gives you better control over the final flavor.
How do I know when the cookies are done?
Cookies are done when the edges are golden brown but the centers still look slightly soft and underdone. They should not be brown all over. Remember, they’ll continue cooking on the hot pan after you remove them from the oven, so slightly underbaking is actually perfect for soft, chewy cookies.
Can I make the dough ahead of time?
Absolutely! Cookie dough actually improves with age. Refrigerate dough for up to 3 days or freeze for up to 3 months. Many bakers believe that resting dough for 24-72 hours in the refrigerator produces superior flavor and texture as the flour fully hydrates and flavors develop.
My cookies came out too hard/crispy. What went wrong?
Cookies that are too hard were likely overbaked. Remember to remove them from the oven when centers still look slightly underdone. Other causes include too much flour (measure carefully by spooning and leveling), not enough fat/butter, or baking at too high a temperature. If cookies hardened after storage, place them in an airtight container with a slice of bread overnight to soften.
Can I make these gluten-free?
Yes! Substitute the all-purpose flour with a 1:1 gluten-free baking flour blend (ones that include xanthan gum work best). The texture may be slightly different—possibly a bit more crumbly—but they’ll still be delicious. Avoid using single-ingredient flour substitutes like almond flour or coconut flour alone, as they behave very differently from wheat flour.
Conclusion
There you have it—the ultimate easy cookies recipe that works every single time! These simple, buttery cookies prove that you don’t need complicated techniques or hard-to-find ingredients to create something absolutely magical in your kitchen. Whether you’re a first-time baker or a seasoned pro, this recipe delivers the perfect combination of soft, chewy centers and slightly crisp edges that make homemade cookies irresistible.
The beauty of this recipe is its versatility. Make it exactly as written for classic, delicious cookies, or use it as your base recipe for endless creativity. Add chocolate chips today, try nuts tomorrow, experiment with dried fruit next week—this dough is your canvas. And with make-ahead and freezer options, you’re always just 12 minutes away from warm cookies straight from the oven.
Remember, baking is as much about the joy of creating as it is about the final result. Don’t stress if your first batch isn’t perfect—even slightly imperfect cookies are still warm, homemade, and absolutely delicious. The more you bake, the more you’ll develop a feel for your oven, your dough, and what makes the perfect cookie for your taste.
So preheat that oven, grab your mixing bowl, and get ready to fill your kitchen with the most wonderful aroma imaginable. Your friends and family are going to think you’re a baking genius, and you’ll know it’s all thanks to this reliable, easy, absolutely crave-worthy recipe.
Ready to bake? I’d love to hear how your cookies turn out! Drop a comment below with your favorite mix-in combination, and don’t forget to save this recipe to Pinterest so you can find it whenever those cookie cravings hit. Happy baking!