Homemade Fig Bars Recipe (Better Than Store-Bought!)
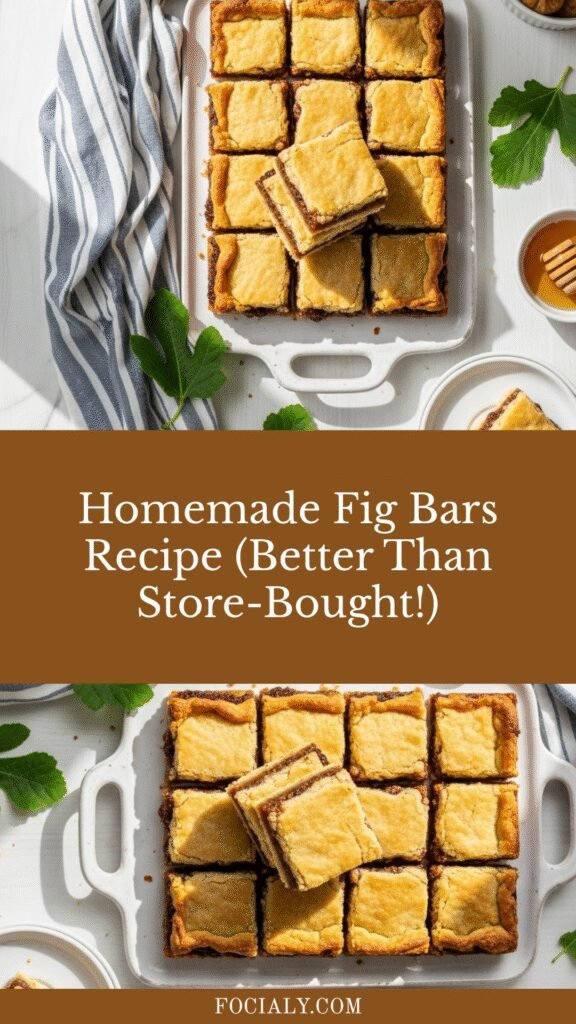
There’s something magical about biting into a soft, chewy fig bar with its delicate pastry exterior and sweet, jammy fig filling. These homemade fig bars are a nostalgic throwback to the beloved store-bought cookies many of us grew up with, but infinitely better. Made with real dried figs, warm spices, and a tender shortbread-like crust, these bars are perfect for lunchboxes, afternoon snacks, or a not-too-sweet dessert that pairs beautifully with your morning coffee or evening tea.
What makes this recipe truly special is how it transforms simple, wholesome ingredients into something that tastes like it came from an artisan bakery. Unlike their mass-produced counterparts loaded with preservatives and artificial flavors, these homemade fig bars let the natural sweetness of figs shine through. They’re ideal for meal prep, holiday cookie exchanges, school snacks, or anytime you want a satisfying treat that feels both indulgent and nutritious. The best part? They’re surprisingly easy to make, even for beginner bakers, and they store beautifully for weeks, making them perfect for busy families who want homemade goodness without daily baking.
History / Background
Fig bars have a fascinating history that dates back over a century. The original commercially produced fig bar was created in 1891 by Philadelphia baker and fig lover Charles Roser, who sold his recipe to the Kennedy Biscuit Company. They began mass-producing these fig-filled cookies in their bakery in Newton, Massachusetts, which is how the famous “Fig Newton” got its name—named after the town, not Sir Isaac Newton as many people assume!
However, the concept of combining figs with pastry is far more ancient. Figs are one of the oldest cultivated fruits in human history, mentioned in the Bible and revered throughout the Mediterranean and Middle East for thousands of years. Ancient Romans made fig-based confections, and medieval bakers throughout Europe created fig-filled pastries and tarts. When European immigrants came to America, they brought their love of figs with them, and the fruit became particularly popular in California, where the climate was perfect for cultivation.
The commercial fig bar became an instant sensation in America because it offered something unique: a portable, shelf-stable treat that tasted like homemade baking but could be purchased conveniently. It was marketed as a health food—wholesome, made with real fruit, and suitable for children. For over 130 years, fig bars have remained a beloved snack, though many people don’t realize how easy they are to make at home. This homemade version honors that rich history while giving you complete control over the quality of ingredients, allowing you to create fig bars that taste even better than the originals that started the craze over a century ago.
Why You’ll Love This Recipe
These homemade fig bars are about to become your new favorite baking project, and here’s why: they deliver that perfect balance of tender, buttery pastry with a rich, naturally sweet fig filling that’s neither too sticky nor too dry. The recipe is surprisingly forgiving and comes together in about an hour from start to finish, making it ideal for weekend baking sessions or even weeknight dessert prep.
Here’s what makes this recipe a winner:
- Naturally sweetened – Figs provide most of the sweetness, meaning you need minimal added sugar compared to other cookie recipes
- Perfect texture – The crust is tender and slightly crumbly (like shortbread), while the filling is soft, jammy, and full of flavor
- Kid-approved snack – Nutritious enough for lunchboxes but tasty enough that kids actually want to eat them
- Customizable flavors – Easy to adapt with different spices, citrus zests, or even nuts if you like
- Long shelf life – These bars stay fresh for up to two weeks, and they actually improve in flavor after a day or two
- Budget-friendly – Dried figs are affordable, especially when bought in bulk, and the other ingredients are pantry staples
- Impressive presentation – They look bakery-quality and make wonderful homemade gifts
- Meal prep champion – Make a batch on Sunday and have healthy snacks all week long
Ingredient Notes
Understanding your ingredients helps you become a better baker, so let’s break down what goes into these delicious fig bars:
Dried Figs: The star of the show! Use any variety—Black Mission figs are common and have a deep, rich flavor, while Calimyrna figs are lighter and slightly nuttier. Make sure they’re soft and pliable, not rock-hard. If your figs are too dry, soak them in warm water for 10 minutes before using. You’ll need about 2 cups (12 ounces). Can’t find figs? Dates make an excellent substitute and create a slightly different but equally delicious bar.
All-Purpose Flour: Forms the base of your pastry crust. For a nuttier flavor, you can substitute up to half the flour with whole wheat flour, though this will make the crust slightly denser.
Butter: Use unsalted butter so you can control the salt level. The butter should be cold for the crust, which helps create that tender, flaky texture. Vegan? Use cold coconut oil or vegan butter sticks.
Honey: Adds moisture and a gentle floral sweetness to the fig filling. You can substitute with maple syrup or agave nectar if preferred.
Orange Juice & Zest: Brightens the fig filling and cuts through the sweetness. Lemon works too if you prefer a more tart flavor profile.
Cinnamon & Vanilla: Warm spices that complement the figs beautifully. Feel free to add a pinch of nutmeg or cardamom for extra complexity.
Salt: Don’t skip this! Salt enhances all the other flavors and balances the sweetness.
Equipment Needed
You don’t need any fancy equipment to make these fig bars. Here’s what you’ll use:
- Food processor – Essential for both the crust and the filling; makes everything come together quickly and evenly
- 8×8-inch or 9×9-inch baking pan – Creates bars that are the perfect thickness; you can also use a 9×13-inch pan for thinner bars
- Parchment paper – Lines your pan for easy removal and cleanup
- Rolling pin (optional) – Helpful for evening out the dough, though you can press it with your hands
- Medium saucepan – For cooking down the fig filling
- Measuring cups and spoons – Accuracy matters in baking
- Sharp knife – For cutting your finished bars cleanly
- Mixing bowls – For holding ingredients
- Spatula – For spreading the filling
Fig Bars Recipe

These homemade fig bars feature a tender, buttery shortbread crust filled with naturally sweet, spiced fig filling. Better than store-bought, these nostalgic treats are perfect for snacking, lunchboxes, or dessert. They’re easy to make and store beautifully for up to two weeks!
- Prep Time: 20 minutes
- Cook Time: 35 minutes
- Total Time: 55 minutes
- Yield: 16 bars 1x
- Category: Dessert, Snack
- Method: Baking
- Cuisine: American
- Diet: Vegetarian
Ingredients
For the Crust:
- 2 cups (250g) all-purpose flour
- ½ cup (100g) granulated sugar
- ½ teaspoon salt
- ¾ cup (170g) cold unsalted butter, cut into small cubes
- 1 large egg
- 1 teaspoon vanilla extract
- 2-3 tablespoons cold water (if needed)
For the Fig Filling:
- 2 cups (12 oz/340g) dried figs, stems removed and roughly chopped
- ⅓ cup (80ml) orange juice (freshly squeezed preferred)
- ⅓ cup (80ml) water
- ¼ cup (60ml) honey
- 1 tablespoon orange zest
- ½ teaspoon ground cinnamon
- ¼ teaspoon vanilla extract
- Pinch of salt
Instructions
Make the Fig Filling:
- Cook the figs: In a medium saucepan, combine the chopped figs, orange juice, water, honey, orange zest, cinnamon, and salt. Bring to a boil over medium-high heat, then reduce to a simmer. Cook for 10-12 minutes, stirring occasionally, until the figs are very soft and the liquid has mostly evaporated.
- Blend until smooth: Transfer the cooked fig mixture to a food processor and add the vanilla extract. Pulse until you have a thick, jam-like consistency. You can leave it slightly chunky or make it completely smooth—your preference! Set aside to cool while you make the crust.
Make the Crust:
- Process dry ingredients: In the food processor (no need to wash it after the filling), combine the flour, sugar, and salt. Pulse a few times to mix.
- Cut in the butter: Add the cold butter cubes and pulse 10-15 times until the mixture resembles coarse crumbs with some pea-sized butter pieces remaining.
- Add wet ingredients: Add the egg and vanilla extract. Pulse until the dough starts to come together. If it’s still too dry and crumbly, add cold water one tablespoon at a time, pulsing between additions, until the dough holds together when pressed.
- Divide the dough: Remove the dough and divide it into two portions—one slightly larger (about ⅔) and one smaller (about ⅓).
Assemble the Fig Bars:
- Preheat and prepare: Preheat your oven to 350°F (175°C). Line an 8×8-inch baking pan with parchment paper, leaving overhang on two sides for easy removal.
- Press bottom layer: Press the larger portion of dough evenly into the bottom of the prepared pan. Use your hands or the bottom of a measuring cup to create an even layer.
- Spread the filling: Spread the cooled fig filling evenly over the bottom crust, leaving a small border around the edges.
- Add top layer: Take the remaining dough and either crumble it over the top or roll it out between two pieces of parchment paper and place it over the filling. If rolling, you can cut it into strips for a lattice pattern if desired.
- Bake: Bake for 32-37 minutes, until the top is light golden brown and the edges are slightly darker. The center should look set, not jiggly.
- Cool completely: Let the bars cool in the pan for at least 30 minutes, then use the parchment overhang to lift them out. Cool completely on a wire rack before cutting—this is important for clean cuts! Use a sharp knife to cut into 16 squares.
Notes
- Make them ahead: These bars actually taste better the next day after the flavors have melded together.
- Cutting tip: For the cleanest cuts, chill the bars in the refrigerator for 30 minutes before slicing, and wipe your knife clean between cuts.
- Storage: Store in an airtight container at room temperature for up to 2 weeks, in the refrigerator for up to 3 weeks, or freeze for up to 3 months.
- Texture preference: If you like chunkier filling, pulse less in the food processor. For ultra-smooth filling, process longer.
- Pan size adjustment: Using a 9×13-inch pan will give you thinner bars—reduce baking time to 25-30 minutes.
Nutrition
- Serving Size: 1 bar
- Calories: 185
- Sugar: 16g
- Sodium: 95mg
- Fat: 8g
- Saturated Fat: 5g
- Unsaturated Fat: 2.5g
- Trans Fat: 0g
- Carbohydrates: 28g
- Fiber: 2g
- Protein: 2g
- Cholesterol: 30mg
Tips & Variations
Make these fig bars your own with these creative variations:
Flavor Variations:
- Lemon Fig Bars: Replace orange juice and zest with lemon for a brighter, tangier filling
- Spiced Fig Bars: Add ¼ teaspoon each of ground ginger and cardamom to the filling for a chai-spiced version
- Walnut Fig Bars: Fold ½ cup of finely chopped toasted walnuts into the filling for added crunch
- Chocolate Fig Bars: Mix 2 tablespoons of cocoa powder into the crust for a chocolate-fig combination
Dietary Modifications:
- Gluten-Free: Use a 1:1 gluten-free flour blend in place of all-purpose flour
- Vegan: Substitute butter with vegan butter or coconut oil, and replace the egg with a flax egg (1 tablespoon ground flaxseed + 3 tablespoons water, let sit 5 minutes)
- Refined Sugar-Free: Use coconut sugar instead of granulated sugar in the crust
- Whole Grain: Replace half the all-purpose flour with whole wheat pastry flour for added fiber
Texture Tweaks:
- For a crunchier bar, bake an additional 5 minutes
- For softer bars, remove from the oven when just barely golden
- Make the filling chunkier by processing less, or smoother by processing more
Pro Chef Tips
Take your fig bars from good to extraordinary with these professional techniques:
Toast your spices first: Before adding cinnamon to the filling, toast it in a dry pan for 30 seconds until fragrant. This awakens the essential oils and deepens the flavor significantly.
Cold butter is crucial: Keep your butter very cold—even pop it in the freezer for 10 minutes before using. Cold butter creates steam pockets as it bakes, resulting in a more tender, flaky crust. If your kitchen is warm, work quickly or chill the dough for 15 minutes before assembling.
Don’t overmix the dough: When adding the egg to your crust mixture, pulse just until combined. Overmixing develops gluten and creates a tough, chewy crust instead of a tender, crumbly one.
Cool the filling completely: A hot filling will melt the butter in your bottom crust and make it soggy. Always let your filling cool to room temperature before assembling, or make it the day before and refrigerate.
Score before baking: Lightly score the top crust into squares before baking—this makes cutting much easier and creates cleaner lines in your finished bars.
Use parchment paper strategically: Create a parchment “sling” with overhang on two opposite sides. This makes removal from the pan effortless and prevents the bars from breaking.
Quality matters: Use high-quality dried figs that are soft and pliable. Hard, dried-out figs won’t rehydrate properly and will create a grainy filling.
Common Mistakes to Avoid
Even simple recipes can go wrong if you’re not careful. Here are the pitfalls to watch for:
Mistake #1: Using a hot fig filling. This melts the bottom crust and makes it soggy instead of crisp. Always let your filling cool to room temperature before spreading it on the crust, or better yet, make it the day before.
Mistake #2: Not lining your pan with parchment. Without parchment paper, getting the bars out cleanly is nearly impossible, and you’ll likely end up with a crumbly mess. Always line your pan with overhang on two sides.
Mistake #3: Cutting the bars too soon. Warm bars are soft and will fall apart when you cut them. Patience is essential—let them cool completely, or even chill them in the refrigerator for 30 minutes before cutting for the cleanest edges.
Mistake #4: Overbaking. Fig bars continue to firm up as they cool, so if they seem hard when you pull them from the oven, they’ll be rock-solid once cool. Remove them when they’re just light golden brown, even if they seem slightly underdone in the center.
Mistake #5: Uneven dough layers. If your bottom or top crust layer is uneven, you’ll have thick, doughy spots and thin, overcooked spots. Take time to press the bottom layer evenly, and crumble or roll the top layer uniformly for consistent baking.
Storage & Meal Prep
One of the best things about fig bars is how well they store, making them perfect for meal prep and make-ahead baking:
Room Temperature Storage: Store completely cooled fig bars in an airtight container with parchment or wax paper between layers to prevent sticking. They’ll stay fresh at room temperature for up to 2 weeks. In fact, they actually improve in texture and flavor after the first day as the moisture from the filling softens the crust slightly.
Refrigerator Storage: For longer storage, keep them in an airtight container in the refrigerator for up to 3 weeks. Bring them to room temperature before eating, or warm briefly in the microwave for 10-15 seconds if you prefer them slightly warm.
Lunchbox-Friendly: These bars are perfect for school or work lunches. Wrap individual bars in plastic wrap or parchment paper, then store in a container. They won’t get soggy or messy, and they don’t require refrigeration, making them ideal for on-the-go snacking.
Reheating: While fig bars are delicious at room temperature, you can warm them slightly in a 300°F oven for 5 minutes or microwave for 10-15 seconds per bar. This brings out the aroma and makes the filling slightly gooey again.
Make-Ahead & Freezer Notes
These fig bars are incredibly freezer-friendly and perfect for advance preparation:
Make-Ahead Options:
- Filling in advance: Make the fig filling up to 3 days ahead and store it covered in the refrigerator. This actually helps the flavors develop even more. Bring to room temperature before assembling.
- Dough in advance: Prepare the crust dough up to 2 days ahead, wrap tightly in plastic wrap, and refrigerate. Let it sit at room temperature for 10 minutes before pressing into the pan to make it easier to work with.
- Fully assembled but unbaked: You can assemble the entire pan of fig bars, cover tightly with plastic wrap, and refrigerate for up to 24 hours before baking. Add 5 minutes to the baking time if baking directly from the refrigerator.
Freezing Instructions:
- Freeze baked bars: Let the bars cool completely, then cut into individual servings. Wrap each bar tightly in plastic wrap, then place all wrapped bars in a freezer-safe bag or container. Freeze for up to 3 months. Thaw at room temperature for 1-2 hours or overnight in the refrigerator.
- Freeze unbaked: You can also freeze the assembled but unbaked bars. Wrap the entire pan tightly with plastic wrap, then aluminum foil. Freeze for up to 2 months. Thaw overnight in the refrigerator, then bake as directed, adding 5-7 minutes to the baking time.
Best Reheating Method from Frozen: For the best texture, thaw frozen bars at room temperature for 1-2 hours. If you want them warm, reheat thawed bars in a 300°F oven for 5-7 minutes or microwave for 15-20 seconds.
Serving Suggestions
Fig bars are wonderfully versatile and can be served in many delightful ways:
Classic Pairings:
- Morning coffee or tea – The not-too-sweet flavor makes these perfect for breakfast or brunch alongside your favorite hot beverage
- Cold milk – Just like the classic commercials—fig bars and milk are a timeless combination
- Vanilla ice cream – Serve warm bars with a scoop of vanilla ice cream for an elegant but easy dessert
- Whipped cream and berries – Dress them up with fresh whipped cream and fresh berries for a dinner party dessert
Beverage Pairings:
- Hot apple cider in fall
- Chai lattes for a spiced complement
- Dessert wines like Port or Sherry
- Espresso or cappuccino for a sophisticated afternoon treat
Create a Snack Board: Build a Mediterranean-inspired snack board with fig bars alongside:
- Assorted cheeses (goat cheese, aged cheddar, brie)
- Mixed nuts (almonds, walnuts, pistachios)
- Fresh or dried fruits
- Honey for drizzling
- Dark chocolate squares
Lunchbox Accompaniments: Pack fig bars with cheese cubes, apple slices, and crackers for a balanced snack that kids will love.
FAQs Section
Q: Can I use fresh figs instead of dried figs?
A: While you can use fresh figs, dried figs are preferable for this recipe because they’re more concentrated in flavor and create a better jam-like consistency. Fresh figs have too much moisture and will make the filling watery. If you want to use fresh figs, you’ll need about 1 pound, and you’ll need to cook them much longer (20-25 minutes) to reduce the liquid and concentrate the flavors.
Q: My dough is too crumbly and won’t hold together. What did I go wrong?
A: This usually means the dough needs more moisture. Add cold water one tablespoon at a time, pulsing between additions, until the dough just holds together when pressed. Humidity, flour brand, and even the size of your egg can affect moisture content, so don’t be afraid to adjust. The dough should be slightly crumbly but hold together when squeezed.
Q: Can I make these bars gluten-free?
A: Absolutely! Use a 1:1 gluten-free flour blend (like Bob’s Red Mill or King Arthur Measure for Measure) in place of all-purpose flour. The texture will be slightly more delicate, but they’ll still be delicious. Make sure all other ingredients (like vanilla extract) are certified gluten-free if you have celiac disease.
Q: How do I know when the bars are done baking?
A: Look for a light golden brown color on top with slightly darker edges. The center should look set and no longer shiny. The bars will firm up as they cool, so don’t wait until they look completely solid in the oven, or they’ll be overbaked. When in doubt, it’s better to slightly underbake than overbake.
Q: My fig filling is too thick/too thin. How do I fix it?
A: If your filling is too thick and paste-like, add a tablespoon of water or orange juice at a time and pulse until you reach the desired consistency. If it’s too thin and runny, return it to the saucepan and simmer for a few more minutes to evaporate excess liquid. The filling should be spreadable but not runny—think thick jam consistency.
Q: Can I halve this recipe?
A: Yes! Halve all ingredients and use a smaller pan, like a loaf pan (9×5 inches) or a small square pan (6×6 inches). Check for doneness a few minutes earlier since smaller bars will bake faster.
Q: Why are my bars falling apart when I cut them?
A: This usually happens when the bars are cut too soon while still warm. Always let them cool completely—this allows the filling to set and the crust to firm up. For the cleanest cuts, refrigerate the bars for 30 minutes before cutting, use a sharp knife, and wipe the blade clean between cuts.
Conclusion
There’s truly nothing like pulling a pan of golden, fragrant homemade fig bars from your oven, knowing they’re made with real ingredients and lots of love. These bars capture all the nostalgic comfort of the store-bought version we grew up with, but with so much more flavor and satisfaction. Whether you’re baking them for your family’s lunchboxes, sharing them at a potluck, or simply treating yourself to something sweet with your afternoon coffee, these fig bars deliver every single time.
The beauty of this recipe is its simplicity—you don’t need to be an expert baker to create something that tastes absolutely bakery-worthy. Plus, with their long shelf life and freezer-friendly nature, you can bake once and enjoy these delicious treats for weeks to come. I hope you’ll give this homemade fig bars recipe a try and discover just how easy and rewarding it is to make your own.
Ready to bake? Save this recipe to your Pinterest boards so you can find it whenever that fig bar craving hits! And after you make them, I’d love to hear how they turned out—drop a comment below with your thoughts, variations, or any questions. Happy baking!