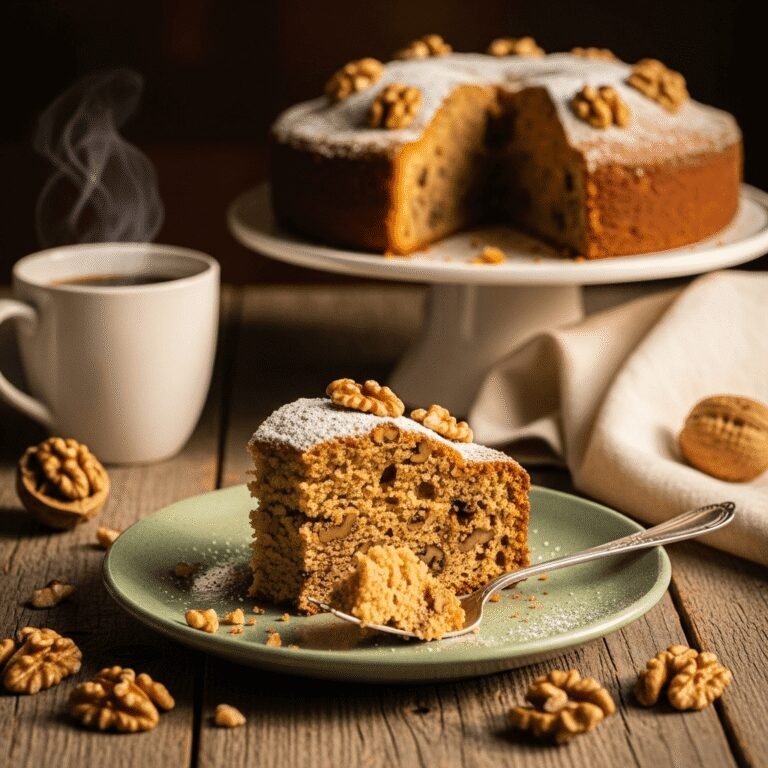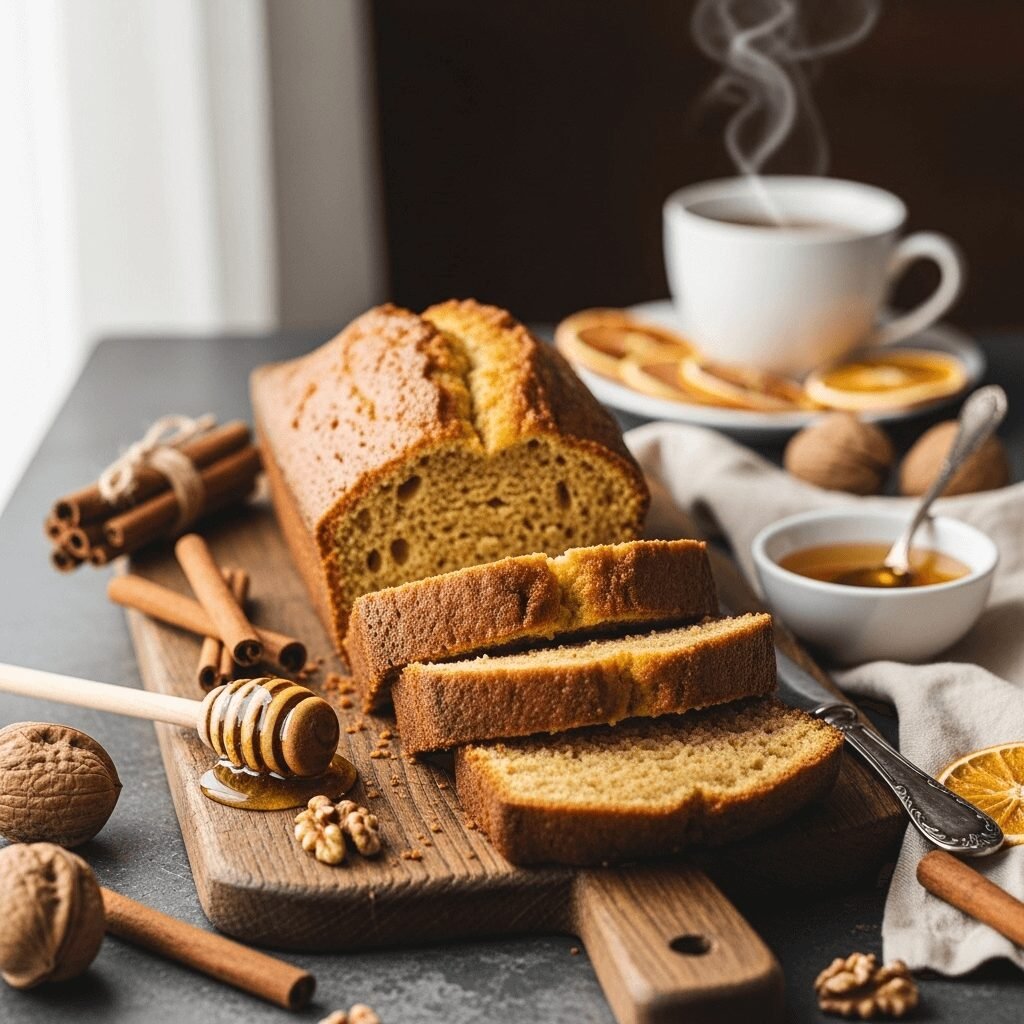
The Best Honey Cake Recipe – Moist, Spiced & Perfect for Any Occasion

There’s something truly magical about honey cake. It’s not your everyday dessert – it’s warmly spiced, deeply aromatic, and has this incredible moist texture that keeps you coming back for slice after slice. This honey cake recipe creates a beautifully golden, tender cake that’s perfect for holiday gatherings, Sunday brunches, or anytime you want to fill your kitchen with the most incredible smell. Whether you’re celebrating Rosh Hashanah, hosting a fall gathering, or simply craving something sweet and comforting, this honey cake delivers every single time.
The best part? This recipe is surprisingly simple. You don’t need fancy techniques or hard-to-find ingredients. Just a few pantry staples, some good quality honey, and about an hour of your time will give you a cake that tastes like it came from a artisan bakery. The combination of honey, warm spices like cinnamon and cloves, and a hint of coffee creates layers of flavor that are absolutely irresistible. It’s the kind of cake that makes people ask for the recipe, and I’m so excited to share it with you today.
History / Background
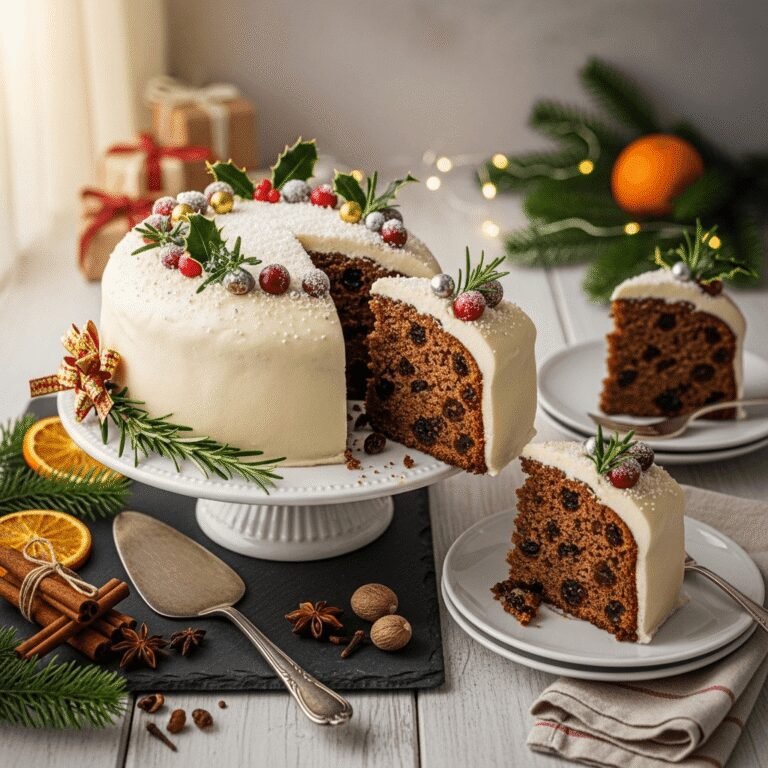
Honey cake, known as “lekach” in Yiddish or “medovik” in Russian traditions, has a rich history spanning multiple cultures and centuries. The most well-known version in America comes from Eastern European Jewish traditions, where honey cake became deeply associated with Rosh Hashanah, the Jewish New Year. Eating honey during this holiday symbolizes the hope for a sweet new year ahead, and honey cake became the perfect embodiment of this beautiful tradition.
The roots of honey cake go back even further, though. Medieval European bakers created early versions of honey-sweetened cakes, as honey was one of the primary sweeteners before sugar became widely available. These cakes were dense, spiced, and often made with rye flour, creating hearty desserts that could last for weeks – an important quality before refrigeration existed.
In Jewish communities across Poland, Russia, Ukraine, and Germany, each family developed their own honey cake recipe, passing it down through generations. Some versions were dark and molasses-rich, others lighter and more delicate. When Jewish immigrants came to America in the late 1800s and early 1900s, they brought these cherished recipes with them, adapting them with ingredients available in their new home.
What makes honey cake so special is how it improves with time. Unlike most cakes that are best fresh from the oven, honey cake actually tastes better after a day or two. The flavors meld together, the crumb becomes even more tender, and the honey’s sweetness deepens. This quality made it practical for holiday preparation – you could bake it days ahead, and it would be perfect when guests arrived.
Today, honey cake has evolved beyond its religious and cultural origins to become a beloved recipe for anyone who appreciates deeply flavored, aromatic baked goods. It’s found its place on fall dessert tables, afternoon tea spreads, and cozy winter gatherings across America.
Why You’ll Love This Recipe
This honey cake recipe is a absolute game-changer for home bakers. I’ve tested and perfected this recipe countless times to get the texture just right – moist but not dense, flavorful but not overwhelming. The result is a cake that’s sophisticated enough to serve at special occasions but easy enough to make on a regular weeknight.
Here’s what makes this recipe truly special:
- Incredibly moist texture – Thanks to the honey, oil, and strong coffee, this cake stays tender for days
- Deep, complex flavor – The combination of honey, warm spices, and coffee creates amazing depth
- Simple one-bowl method – No mixer required, just a whisk and a bowl
- Gets better with age – Unlike most cakes, this one actually improves after 24-48 hours
- Perfect for meal prep – Bakes ahead beautifully and freezes wonderfully
- Budget-friendly – Uses affordable pantry staples you probably already have
- Crowd-pleaser – Appeals to people who don’t usually like overly sweet desserts
- Versatile serving options – Delicious plain, with whipped cream, or alongside coffee or tea
- Beautiful presentation – That gorgeous golden color looks stunning on any dessert table
Ingredient Notes
Let me walk you through the key ingredients in this honey cake and why each one matters. Understanding your ingredients helps you bake with confidence and make smart substitutions when needed.
Honey: This is the star of the show! Use a good quality honey with flavor you enjoy. Mild honeys like clover or orange blossom create a lighter, more delicate cake, while darker honeys like buckwheat or wildflower give you deeper, more robust flavor. Avoid artificial honey or honey blends – pure honey makes all the difference here.
All-Purpose Flour: Provides structure to the cake. You can substitute with a 1:1 gluten-free baking flour if needed, though the texture will be slightly different.
Granulated Sugar: Balances the honey’s sweetness and helps create the cake’s tender crumb. Don’t reduce the sugar too much or the cake will be dense.
Vegetable Oil: Keeps the cake incredibly moist. You can use canola oil, avocado oil, or even light olive oil. Don’t substitute with butter – the oil is key to this cake’s signature texture.
Eggs: Provide structure and richness. Use large eggs at room temperature for best results.
Strong Brewed Coffee: This might surprise you, but coffee is essential! It doesn’t make the cake taste like coffee – instead, it deepens all the other flavors and enhances the honey and spices beautifully. Use decaf if caffeine is a concern.
Warm Spices: Cinnamon, ginger, cloves, and allspice create that classic honey cake warmth. If you’re missing one or two spices, don’t worry – the cake will still be delicious.
Baking Powder & Baking Soda: These leavening agents work together to give the cake its rise and tender texture.
Salt: Never skip the salt! It balances the sweetness and makes all the flavors pop.
Vanilla Extract: Adds warmth and rounds out the flavors beautifully.
Equipment Needed
You don’t need a professional kitchen to make this honey cake! Here’s what you’ll want to have on hand:
- 9×5-inch loaf pan or 9-inch square baking pan – Either works beautifully
- Large mixing bowl – For combining all your ingredients
- Medium mixing bowl – For the dry ingredients
- Whisk – No electric mixer needed!
- Measuring cups and spoons – Accuracy matters in baking
- Spatula – For scraping down the bowl and spreading batter
- Parchment paper – Makes removing the cake from the pan foolproof
- Cooling rack – Allows air to circulate around the cake as it cools
- Toothpick or cake tester – For checking doneness
Honey Cake Recipe

This classic honey cake is wonderfully moist, perfectly spiced, and tastes even better the next day. With warm notes of cinnamon, ginger, and honey, it’s the perfect dessert for fall gatherings, holiday celebrations, or anytime you want something special.
- Prep Time: 15 minutes
- Cook Time: 50 minutes
- Total Time: 1 hour 5 minutes
- Yield: 10-12 servings 1x
- Category: Dessert
- Method: Baking
- Cuisine: Jewish / Eastern European
Ingredients
Dry Ingredients:
- 2 cups all-purpose flour
- 1 teaspoon baking powder
- 1 teaspoon baking soda
- 1/2 teaspoon salt
- 2 teaspoons ground cinnamon
- 1/2 teaspoon ground ginger
- 1/4 teaspoon ground cloves
- 1/4 teaspoon ground allspice
Wet Ingredients:
- 3/4 cup honey (preferably mild-flavored)
- 3/4 cup granulated sugar
- 1 cup vegetable oil
- 3 large eggs, room temperature
- 1 teaspoon vanilla extract
- 1 cup strong brewed coffee, cooled to room temperature
- 1/4 cup fresh orange juice (optional but recommended)
Instructions
- Preheat and Prepare: Preheat your oven to 350°F (175°C). Line a 9×5-inch loaf pan with parchment paper, leaving overhang on the sides for easy removal. You can also grease and flour the pan instead.
- Mix Dry Ingredients: In a medium bowl, whisk together the flour, baking powder, baking soda, salt, cinnamon, ginger, cloves, and allspice until well combined. Set aside.
- Combine Wet Ingredients: In a large mixing bowl, whisk together the honey and sugar until well blended. The mixture will be thick. Add the vegetable oil and whisk vigorously for about 1 minute until smooth and slightly lightened in color.
- Add Eggs: Add the eggs one at a time, whisking well after each addition. The mixture should look glossy and well combined. Stir in the vanilla extract.
- Alternate Adding Liquids and Dry Ingredients: Add about one-third of the dry ingredients to the wet mixture and stir gently with a spatula until just combined. Pour in half of the coffee and stir until incorporated. Continue alternating, ending with the dry ingredients. If using orange juice, add it with the last addition of coffee.
- Stir Until Just Combined: Mix until you no longer see dry flour streaks, but be careful not to overmix. The batter will be quite thin – this is normal! A slightly lumpy batter is better than an overmixed one.
- Bake: Pour the batter into your prepared pan. Tap the pan gently on the counter a few times to release any large air bubbles. Bake for 50-60 minutes, or until a toothpick inserted into the center comes out with just a few moist crumbs attached.
- Cool Completely: Let the cake cool in the pan for 15 minutes, then use the parchment paper overhang to lift it onto a cooling rack. Allow it to cool completely before slicing – this takes about 1-2 hours.
- Let it Rest (Important!): For the best flavor and texture, wrap the cooled cake tightly in plastic wrap and let it sit at room temperature for 24 hours before serving. This allows the flavors to develop and the crumb to become even more tender.
Notes
- The cake batter will be thin and pourable – this is correct! It creates the moist texture.
- Don’t skip the coffee – it enhances the honey and spice flavors without making the cake taste like coffee.
- This cake actually tastes better on day 2 and 3, so plan to bake it ahead if possible.
- If the top is browning too quickly, tent it loosely with aluminum foil for the last 15 minutes of baking.
- Room temperature eggs incorporate more easily and create better texture.
Nutrition
- Serving Size: 1 slice (1/12 of recipe)
- Calories: 285
- Sugar: 28g
- Sodium: 195mg
- Fat: 13g
- Saturated Fat: 1.5g
- Unsaturated Fat: 11g
- Trans Fat: 0g
- Carbohydrates: 41g
- Fiber: 1g
- Protein: 3g
- Cholesterol: 47mg
Tips & Variations
Make it Your Own:
Chocolate Honey Cake: Add 1/4 cup cocoa powder to the dry ingredients and reduce flour by 1/4 cup. The result is a rich, deep chocolate cake with honey undertones.
Citrus Honey Cake: Add 2 tablespoons of orange or lemon zest to the batter. The bright citrus notes pair beautifully with the honey and spices.
Nutty Honey Cake: Fold in 1/2 cup of toasted chopped walnuts, pecans, or sliced almonds into the batter before baking for added texture and flavor.
Glazed Honey Cake: Make a simple glaze with 1 cup powdered sugar, 2 tablespoons honey, and 2-3 tablespoons milk or orange juice. Drizzle over the cooled cake.
Individual Honey Cakes: Divide the batter among muffin tins lined with paper liners. Bake at 350°F for 20-25 minutes. Perfect for parties and portion control!
Spice It Up: Add 1/4 teaspoon cardamom or increase the ginger to 1 teaspoon for more warmth.
Tea-Infused Version: Replace the coffee with strong brewed chai tea or earl grey tea for a different but equally delicious flavor profile.
Pro Chef Tips
Bloom Your Spices: Toast your ground spices in a dry skillet over medium heat for 30-60 seconds before adding them to the batter. This intensifies their flavor and aroma dramatically.
Warm Your Honey: If your honey is thick or crystallized, warm it gently in the microwave for 10-15 seconds. Warmer honey incorporates more smoothly into the batter.
Use the Right Honey Temperature: While warm honey mixes better, make sure all your wet ingredients are roughly the same temperature before combining. This prevents the batter from seizing up.
Don’t Overbake: Honey cakes can go from perfectly moist to dry quickly. Start checking at 45 minutes, and remember that the cake will continue cooking slightly as it cools in the pan.
The Toothpick Test: You want the toothpick to come out with a few moist crumbs, not completely clean. A few crumbs = perfectly baked. Clean toothpick = slightly overbaked.
Wrap While Warm: Once the cake is out of the pan and on the cooling rack, wrap it while it’s still slightly warm (not hot). This traps moisture and makes the cake even more tender.
Score Before Slicing: Use a sharp serrated knife and make a gentle scoring cut on top before slicing all the way through. This prevents the top from cracking.
Common Mistakes to Avoid
1. Using Imitation Honey: Those honey-flavored syrups or blends don’t have the same depth of flavor or moisture properties as real honey. Always use 100% pure honey for best results.
2. Overmixing the Batter: Once you add the flour, mix just until combined. Overmixing develops too much gluten, resulting in a tough, dense cake instead of a tender one.
3. Skipping the Resting Time: I know it’s tempting to cut into it right away, but honey cake truly needs that 24-hour rest period. The flavors meld, the crumb becomes more tender, and the honey sweetness deepens beautifully.
4. Using Cold Ingredients: Room temperature eggs and liquids incorporate much more smoothly than cold ones. Cold eggs can cause the batter to seize or separate.
5. Not Measuring Accurately: Baking is chemistry! Use proper measuring cups (dry for dry, liquid for liquid) and level off your flour with a knife. Too much flour makes the cake dry and crumbly.
6. Opening the Oven Door Too Early: Resist peeking for at least the first 40 minutes. Opening the door causes temperature fluctuations that can make the cake sink in the middle.
7. Cutting It Too Soon: Let the cake cool completely before slicing, or it will be gummy and fall apart. Patience is key with honey cake!
Storage & Meal Prep
Room Temperature Storage: This is where honey cake really shines! Wrapped tightly in plastic wrap or stored in an airtight container, honey cake keeps beautifully at room temperature for up to 5 days. In fact, it gets better with each passing day as the flavors develop and the texture becomes even more tender.
Refrigerator Storage: You can refrigerate honey cake for up to 10 days, though I don’t recommend it unless you live in a very hot, humid climate. The cold temperature can dry out the cake slightly. If you do refrigerate it, let it come to room temperature before serving for the best texture and flavor.
Reheating: Honey cake is typically served at room temperature, but if you’d like to warm a slice, microwave it for 10-15 seconds or wrap slices in foil and warm in a 300°F oven for 5-7 minutes.
Storing Cut Cake: Once you’ve sliced into the cake, press a piece of plastic wrap directly against the cut surface before wrapping the whole cake. This prevents it from drying out.
Make-Ahead & Freezer Notes
Make-Ahead Instructions: Honey cake is one of the best make-ahead desserts! In fact, it’s recommended. Bake it 2-3 days before you need it, wrap it tightly in plastic wrap, and store at room temperature. The flavor and texture will be absolutely perfect when you’re ready to serve.
Freezing Instructions: Honey cake freezes beautifully for up to 3 months. Let the cake cool completely, wrap it tightly in two layers of plastic wrap, then wrap again in aluminum foil. Label with the date and freeze. This double-wrapping prevents freezer burn and preserves the cake’s moisture.
Thawing: Remove the cake from the freezer and let it thaw in the refrigerator overnight, still wrapped. Then bring it to room temperature for 1-2 hours before serving. Never microwave frozen honey cake to thaw it – it will become gummy.
Freezing Slices: You can also freeze individual slices! Wrap each slice in plastic wrap, then place them in a freezer-safe container or bag. This way, you can take out just one or two slices at a time for a quick treat. Thaw at room temperature for about 30 minutes.
Best Reheating Method After Freezing: Once thawed, if you want to freshen up the cake slightly, warm it in a 300°F oven (wrapped loosely in foil) for about 10 minutes. This brings back that just-baked aroma and softness.
Serving Suggestions
Honey cake is wonderfully versatile when it comes to serving options. Here are my favorite ways to enjoy it:
Classic Accompaniments:
- A cup of hot black coffee or espresso – the slight bitterness balances the cake’s sweetness perfectly
- Strong black tea or chai tea for an afternoon tea experience
- A glass of cold milk for a more casual, comforting pairing
Dressed Up Options:
- A dollop of lightly sweetened whipped cream or mascarpone
- A scoop of vanilla ice cream or cinnamon ice cream
- Greek yogurt with a drizzle of extra honey
- Cream cheese frosting for a more decadent presentation
- Fresh berries (raspberries or blackberries add a lovely tartness)
Complementary Sides:
- Fresh apple slices or poached pears
- Toasted nuts (walnuts or pecans) sprinkled on top
- A fruit compote made with apples, pears, or stone fruits
- Candied orange peel for an elegant touch
For Special Occasions:
- Dust with powdered sugar just before serving for a beautiful presentation
- Serve with a cheese board featuring mild cheeses like mascarpone or ricotta
- Pair with a dessert wine like Moscato or a late harvest Riesling
- Create a honey cake trifle by layering cake pieces with whipped cream and fruit
FAQs Section
Can I make honey cake without coffee? Yes! While coffee enhances the flavors beautifully, you can substitute it with an equal amount of strong black tea, apple juice, or even water. The cake will still be delicious, though you’ll miss some of that depth of flavor the coffee provides.
Why is my honey cake dense instead of light? The most common causes are overmixing the batter (which develops too much gluten) or using expired leavening agents. Make sure your baking powder and baking soda are fresh – they lose potency after about 6 months. Also, mix just until the ingredients are combined, not longer.
Can I use a different type of pan? Absolutely! This recipe works in a 9×5-inch loaf pan, a 9-inch square pan, or even a 10-inch Bundt pan. Just adjust the baking time – a Bundt pan may need 5-10 minutes longer, while a wider, shallower pan might bake faster. Always use the toothpick test to check doneness.
My honey cake cracked on top – did I do something wrong? No worries! A crack on top is actually very common with honey cake and doesn’t affect the taste or texture at all. It happens when the top sets before the cake is fully risen. If aesthetics matter, you can slice off the domed top to create a flat surface, or simply dust it with powdered sugar before serving.
Can I reduce the sugar in this recipe? I don’t recommend reducing the sugar by more than 1/4 cup, as it affects both the sweetness and the cake’s texture. Sugar contributes to moisture retention and helps create that tender crumb. If you’re concerned about sweetness, remember that this isn’t an overly sweet cake despite the honey and sugar.
What’s the best honey to use for honey cake? A mild, floral honey like clover, orange blossom, or wildflower works beautifully and lets the spices shine. Avoid very strong honeys like buckwheat unless you want a more assertive, almost molasses-like flavor. Whatever you choose, make sure it’s pure honey, not a honey blend or imitation honey.
Can I make this cake gluten-free or vegan? For gluten-free, substitute with a 1:1 gluten-free baking flour blend – the texture will be slightly different but still delicious. For vegan, replace the eggs with flax eggs (3 tablespoons ground flaxseed mixed with 9 tablespoons water, let sit 5 minutes) and ensure your sugar is vegan. The texture will be denser but the flavor will still be wonderful.
Conclusion
I hope you’re as excited to bake this honey cake as I am to share it with you! There’s truly something special about this recipe – it’s one of those timeless cakes that brings comfort, warmth, and a little bit of magic to any occasion. Whether you’re honoring a beautiful tradition, looking for the perfect fall dessert, or simply want to fill your home with the most amazing aroma, this honey cake delivers on every level.
The beauty of this recipe is in its simplicity and its wonderful ability to improve with time. It’s perfect for busy home cooks who want to bake ahead, and it’s forgiving enough for beginners while still impressive enough for experienced bakers. Once you try it, I have a feeling it will become one of those recipes you turn to again and again, maybe even passing it down to the next generation.
I’d absolutely love to hear how your honey cake turns out! Leave a comment below with your results, any variations you tried, or questions you might have. And if you loved this recipe, please share it on Pinterest so other home cooks can discover it too. There’s nothing better than spreading a little sweetness, right?
Happy baking, and here’s to many sweet years ahead! 🍯