The Best Italian Cookies Recipe – Soft, Buttery & Irresistible!

If you’ve ever wandered past an Italian bakery and been drawn in by the intoxicating aroma of butter, vanilla, and freshly baked cookies, then you already know the magic of authentic Italian cookies. These delicate, melt-in-your-mouth treats are a staple at Italian celebrations, holiday gatherings, and Sunday family dinners. Whether you’re making them for Christmas, Easter, a wedding shower, or simply because your soul needs something sweet and comforting, these Italian cookies are the perfect choice.
What makes Italian cookies so special? They’re incredibly versatile—you can dress them up with colorful sprinkles for a festive occasion or keep them simple with a delicate glaze for an elegant afternoon tea. They’re not overly sweet, which makes them dangerously addictive (trust me, you’ll reach for “just one more” at least five times). And the best part? This recipe is surprisingly easy to make at home, even if you’ve never attempted Italian baking before. With just a handful of pantry staples and about 30 minutes of your time, you’ll have a batch of bakery-quality cookies that’ll make everyone think you secretly trained in a Tuscan kitchen.
History / Background
Italian cookies have a rich and storied history that spans centuries and regions across Italy. Known as “biscotti” in their homeland (which literally translates to “twice-baked”), Italian cookies come in countless varieties, each with its own regional flair and family traditions. The style of Italian cookie we’re making today is most similar to what Italian-Americans call “Italian wedding cookies” or “Italian butter cookies”—soft, tender cookies that became popular in Italian-American communities in the early 20th century.
These cookies trace their roots back to Southern Italy, particularly regions like Sicily, Calabria, and Campania, where resourceful Italian grandmothers (nonnas) perfected the art of creating simple yet delicious treats with minimal ingredients. When Italian immigrants came to America in the late 1800s and early 1900s, they brought their cherished recipes with them, adapting them to available American ingredients like vanilla extract and powdered sugar.
The tradition of serving these cookies at weddings, baptisms, and religious holidays became deeply embedded in Italian-American culture. They were often made in massive batches—we’re talking dozens and dozens of cookies—because no Italian celebration was complete without an abundant dessert table. Each family had their own secret touch: some added almond extract, others used citrus zest, and many topped them with pastel-colored glazes and festive sprinkles that would make any celebration feel more joyous.
Today, Italian cookies remain a beloved tradition, passed down through generations. They’re the cookies that appear in decorative tins during the holidays, the treats that grandmothers send home with you in carefully wrapped packages, and the dessert that instantly transports you back to childhood memories of family gatherings. Making them yourself connects you to this beautiful culinary heritage—and honestly, once you taste a homemade version, you’ll never go back to store-bought.
Why You’ll Love This Recipe
This Italian cookies recipe is everything you want in a dessert: elegant enough for special occasions yet simple enough for a casual weekend baking project. The texture is absolutely perfect—soft and tender with a delicate crumb that practically dissolves on your tongue. They’re buttery without being greasy, sweet without being cloying, and have that subtle vanilla flavor that makes them incredibly sophisticated.
Here’s why this recipe will become your new favorite:
- Beginner-friendly and foolproof – No fancy techniques or complicated steps required
- Uses simple pantry ingredients – No hunting down specialty items at gourmet stores
- Perfect for gift-giving – These cookies look beautiful and travel well in decorative tins
- Highly customizable – Add different extracts, food coloring, or toppings to match any occasion
- Makes a large batch – Perfect for parties, potlucks, or feeding a crowd
- Freezer-friendly – Make ahead and have homemade cookies ready anytime
- Kid-approved – Great activity to do with children (they’ll love decorating them)
- Budget-friendly – Costs a fraction of what you’d pay at an Italian bakery
- Nostalgic and comforting – Tastes like memories of family gatherings and celebrations
- Impressive presentation – Looks like you spent hours in the kitchen (but didn’t)
Ingredient Notes
Let’s talk about what makes these cookies so irresistibly delicious. Each ingredient plays a specific role in creating that perfect tender texture and subtle sweetness.
All-purpose flour is the foundation of these cookies, providing structure without making them heavy or dense. Don’t substitute with cake flour (too delicate) or bread flour (too tough)—all-purpose is the Goldilocks choice that’s just right.
Unsalted butter is absolutely crucial for that rich, melt-in-your-mouth texture. It must be softened to room temperature so it creams properly with the sugar. If you only have salted butter, reduce the added salt in the recipe by half. European-style butter with higher fat content will make them even more luxurious.
Granulated sugar provides sweetness and helps create a tender crumb by interfering with gluten development (science is delicious!). It also helps the cookies hold their shape during baking.
Eggs bind everything together and add richness. They should be at room temperature for better incorporation into the batter. Large eggs are standard in this recipe.
Vanilla extract is the star flavoring here. Use pure vanilla extract, not imitation—you’ll taste the difference. For a more traditional Italian flavor, you can substitute half the vanilla with almond extract.
Baking powder gives the cookies a gentle lift, creating that tender, cake-like texture. Make sure yours is fresh (less than 6 months old) for optimal results.
Salt enhances all the other flavors and balances the sweetness. Even though it’s a small amount, don’t skip it!
Milk adds moisture and helps create a smooth dough. Whole milk works best, but 2% is fine. For a richer cookie, substitute with heavy cream.
Powdered sugar (for the glaze) creates that classic smooth, sweet coating. It dissolves beautifully and dries to a perfect finish.
Equipment Needed
You don’t need a fancy Italian kitchen to make these cookies! Here’s what you’ll need:
- Stand mixer or hand mixer – For creaming butter and sugar (you can do this by hand, but it’ll take some muscle)
- Large mixing bowls – At least two (one for dry ingredients, one for wet)
- Measuring cups and spoons – For accurate measurements
- Baking sheets – Two or three for efficient baking
- Parchment paper or silicone baking mats – Prevents sticking and makes cleanup easier
- Cookie scoop or tablespoon – For uniformly sized cookies
- Wire cooling racks – Essential for cooling cookies properly
- Small bowl – For mixing the glaze
- Whisk or fork – For glaze preparation
- Offset spatula or butter knife – For spreading glaze smoothly
- Sifter – Optional but helpful for lump-free flour
Italian Cookies Recipe

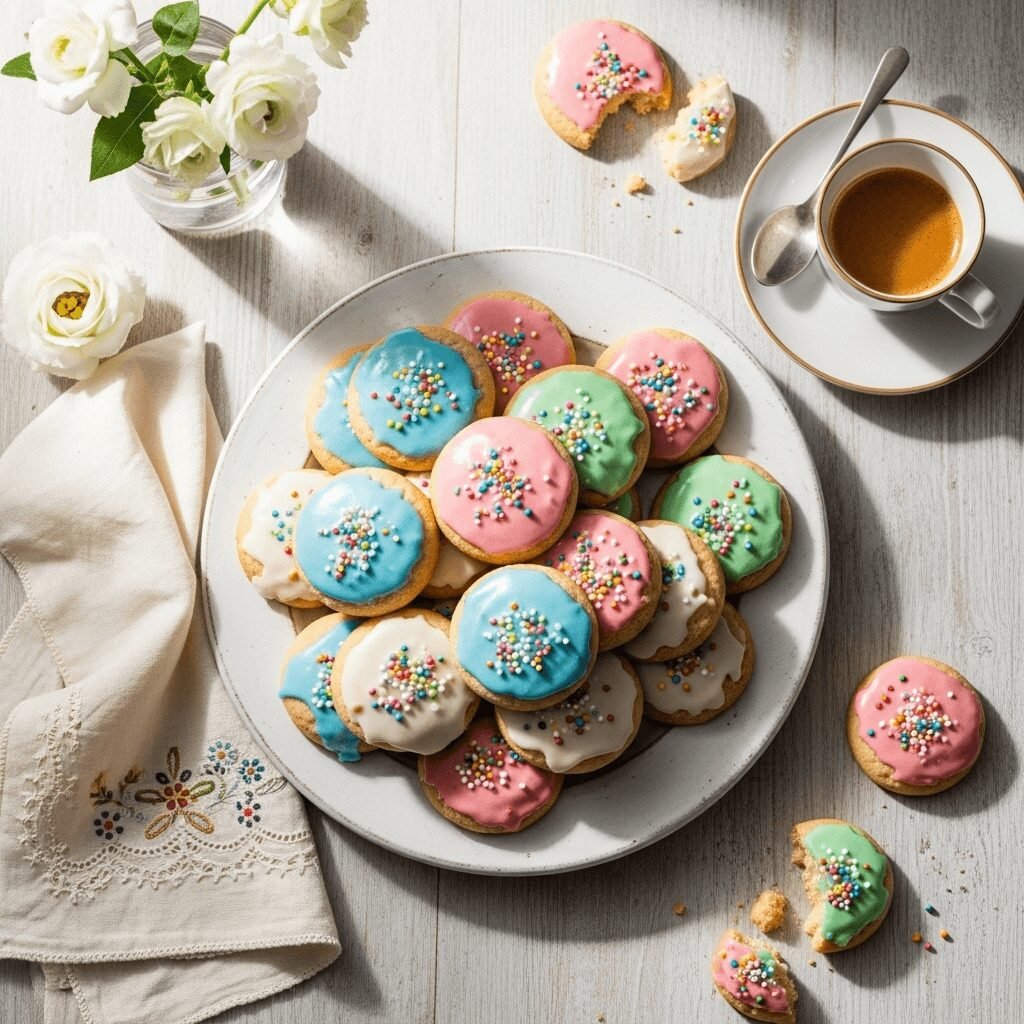
Soft, buttery Italian cookies with a sweet vanilla glaze and colorful sprinkles. These classic cookies are perfect for holidays, celebrations, or anytime you need a taste of Italian tradition. Easy to make and absolutely delicious!
- Prep Time: 15 minutes
- Cook Time: 12 minutes
- Total Time: 27 minutes
- Yield: 48 cookies 1x
- Category: Dessert
- Method: Baking
- Cuisine: Italian
- Diet: Vegetarian
Ingredients
For the Cookies:
- 4 cups all-purpose flour
- 1 cup (2 sticks) unsalted butter, softened to room temperature
- 1 cup granulated sugar
- 3 large eggs, room temperature
- 2 teaspoons pure vanilla extract
- 4 teaspoons baking powder
- ½ teaspoon salt
- ½ cup whole milk
For the Glaze:
- 3 cups powdered sugar, sifted
- 4-6 tablespoons milk (adjust for desired consistency)
- 1 teaspoon vanilla extract
- Food coloring (optional)
- Sprinkles for decoration (optional)
Instructions
- Preheat and prepare: Preheat your oven to 350°F (175°C). Line two baking sheets with parchment paper or silicone baking mats and set aside.
- Cream butter and sugar: In a large mixing bowl using a stand mixer or hand mixer, cream together the softened butter and granulated sugar on medium-high speed for 3-4 minutes until light, fluffy, and pale in color. This step is crucial for creating tender cookies, so don’t rush it!
- Add eggs and vanilla: Beat in the eggs one at a time, mixing well after each addition. Add the vanilla extract and mix until fully incorporated. Scrape down the sides of the bowl to ensure everything is evenly mixed.
- Combine dry ingredients: In a separate bowl, whisk together the flour, baking powder, and salt. This ensures the leavening agent is evenly distributed throughout the flour.
- Alternate adding dry and wet ingredients: With your mixer on low speed, add about one-third of the flour mixture to the butter mixture, mixing just until combined. Add half of the milk, mix briefly, then add another third of flour, the remaining milk, and finally the last third of flour. Mix just until no dry streaks remain—overmixing will create tough cookies.
- Shape the cookies: Using a cookie scoop or tablespoon, drop rounded portions of dough onto your prepared baking sheets, spacing them about 2 inches apart (they’ll spread slightly). For more uniform cookies, you can roll each portion into a smooth ball with your hands.
- Bake to perfection: Bake for 10-12 minutes, or until the bottoms are very lightly golden but the tops remain pale. The cookies should look slightly underdone on top—they’ll continue cooking as they cool. Don’t overbake or they’ll be dry!
- Cool completely: Remove from the oven and let cookies cool on the baking sheet for 3-4 minutes, then transfer to a wire cooling rack to cool completely. This is important—if you glaze warm cookies, the glaze will melt right off.
- Prepare the glaze: In a medium bowl, whisk together the powdered sugar, 4 tablespoons of milk, and vanilla extract until smooth. The glaze should be thick but pourable—add more milk one teaspoon at a time if needed. If using food coloring, divide the glaze into separate bowls and tint each portion as desired.
- Glaze and decorate: Once cookies are completely cool, dip the top of each cookie into the glaze, letting excess drip off. Place back on the wire rack and immediately add sprinkles if using (they need to go on while the glaze is still wet). Let glaze set for at least 30 minutes before stacking or storing.
Notes
- Room temperature ingredients matter: Butter, eggs, and milk should all be at room temperature for the best texture. Cold ingredients won’t incorporate properly.
- Don’t overbake: These cookies should remain pale on top. Overbaking creates a dry, crumbly texture instead of soft and tender.
- Glaze consistency is key: The glaze should be thick enough to coat the cookies but thin enough to settle into a smooth finish. Adjust milk as needed.
- Multiple glaze colors: Divide your glaze into 2-3 bowls and tint with different food coloring for a festive cookie platter.
- Flavor variations: Try adding ½ teaspoon almond extract to the dough, or use lemon zest for a citrus twist.
Nutrition
- Serving Size: 1 cookie
- Calories: 112
- Sugar: 11g
- Sodium: 48mg
- Fat: 4g
- Saturated Fat: 2.5g
- Unsaturated Fat: 1.3g
- Trans Fat: 0g
- Carbohydrates: 18g
- Fiber: 0.3g
- Protein: 1.5g
- Cholesterol: 20mg
Tips & Variations
Make them chocolate: Add ¼ cup of cocoa powder to the flour mixture for chocolate Italian cookies. You might need to add an extra tablespoon of milk to the dough.
Citrus burst: Replace the vanilla extract with lemon or orange extract, or add 1 tablespoon of fresh citrus zest to the dough for a bright, refreshing flavor.
Almond lovers: Substitute ½ teaspoon of the vanilla with almond extract for that classic Italian almond flavor. You can also add ½ cup of finely chopped almonds to the dough.
Dipped, not glazed: Instead of glazing, dip half of each cooled cookie in melted chocolate and let set on parchment paper. White chocolate, milk chocolate, or dark chocolate all work beautifully.
Anise flavor: For a traditional Italian touch, add ½-1 teaspoon of anise extract to the dough. This creates that distinctive licorice-like flavor found in many authentic Italian cookies.
Mini cookies: Use a smaller cookie scoop to make bite-sized versions perfect for cookie trays or dessert buffets. Reduce baking time to 8-10 minutes.
Sandwich cookies: Spread a thin layer of Nutella, raspberry jam, or lemon curd between two unglazed cookies for an elegant sandwich cookie.
Espresso enhancement: Add 1 tablespoon of instant espresso powder to the dough for a subtle coffee flavor that pairs perfectly with the vanilla.
Pro Chef Tips
The butter temperature is crucial: Your butter should be soft enough that you can press your finger into it easily, but it shouldn’t be so soft that it’s greasy or melted. Perfectly softened butter creams beautifully with sugar, creating the air pockets that make cookies tender. If you forgot to take it out ahead of time, cut it into small cubes and let it sit for 15 minutes—don’t microwave it or you’ll ruin the texture.
Measure flour correctly: Too much flour is the number one reason homemade cookies turn out dry and crumbly. Use the spoon-and-level method: spoon flour into your measuring cup and level off the top with a knife. Don’t scoop directly from the bag or you’ll pack in way too much flour.
Chill the dough if it’s too soft: If your kitchen is warm and the dough feels sticky or overly soft, refrigerate it for 15-20 minutes before scooping. This helps the cookies maintain their shape better during baking.
Rotate your pans: Halfway through baking, rotate your baking sheets from front to back and switch racks if you’re baking multiple sheets at once. This ensures even baking and prevents some cookies from getting too brown while others stay undercooked.
The pale top is intentional: Resist the urge to bake these until they’re golden brown on top! Italian cookies should remain pale and soft. The only color should be a light golden hue on the very bottom. This is what keeps them tender and cake-like instead of crispy.
Let glaze fully set before stacking: It’s tempting to pack up these beauties right away, but patience pays off. Give the glaze at least 45 minutes to an hour to fully harden before you stack cookies in a container. Otherwise, you’ll end up with a sticky mess.
Use gel food coloring: If you’re tinting your glaze, use gel or paste food coloring instead of liquid. Liquid food coloring can thin out your glaze too much and create a less vibrant color. Gel gives you brilliant colors with just a tiny amount.
Common Mistakes to Avoid
Overmixing the dough: Once you add the flour, mix just until it’s incorporated. Overmixing develops the gluten in flour, which makes cookies tough and dense instead of tender and delicate. Your mixer should be on the lowest speed when adding flour.
Baking on dark pans without adjusting: Dark-colored baking sheets absorb more heat and can cause the bottoms of your cookies to brown too quickly. If you’re using dark pans, reduce the oven temperature by 25°F and check for doneness a minute or two earlier than the recipe suggests.
Glazing warm cookies: This is perhaps the most common mistake! If your cookies are even slightly warm when you glaze them, the heat will melt the glaze and it’ll slide right off or soak into the cookie instead of creating that beautiful coating. Be patient and let them cool completely—touch them to make sure they’re room temperature.
Not sifting the powdered sugar: Lumpy glaze is never fun to work with and doesn’t look professional. Always sift your powdered sugar before mixing it with liquid ingredients. Those lumps won’t dissolve, they’ll just create an uneven, bumpy glaze.
Crowding the baking sheet: Give your cookies room to breathe! If you place them too close together, they might bake unevenly or merge together. Two inches of space between each cookie is perfect—they’ll spread just slightly, and you want to make sure they stay as individual cookies.
Storage & Meal Prep
These Italian cookies are actually excellent keepers, which is why they’re so perfect for holiday gift-giving and making ahead for parties.
Room temperature storage: Store completely cooled and glazed cookies in an airtight container at room temperature for up to 5 days. Place parchment paper or wax paper between layers to prevent them from sticking together. They’ll stay soft and delicious the entire time—some people even say they taste better after a day or two as the flavors meld.
Refrigerator storage: If your kitchen is very warm or humid, you can refrigerate the cookies in an airtight container for up to 1 week. Bring them to room temperature before serving for the best flavor and texture. The cold can dull the vanilla flavor slightly, so letting them warm up is important.
Reheating tips: These cookies are delicious at room temperature and don’t typically need reheating. However, if you want to serve them slightly warm (which brings out the butter flavor beautifully), place unglazed cookies in a 300°F oven for 3-4 minutes. Don’t reheat glazed cookies or the glaze will melt.
Refreshing older cookies: If your cookies start to dry out after several days, place a slice of bread in the container with them overnight. The cookies will absorb moisture from the bread and soften right up—it’s an old baker’s trick that works like magic!
Make-Ahead & Freezer Notes
One of the best things about Italian cookies is how wonderfully they freeze, making them perfect for stress-free entertaining.
Freezing the dough: Scoop the cookie dough into portions and place them on a parchment-lined baking sheet. Freeze until solid (about 2 hours), then transfer to a freezer bag or airtight container. Frozen dough balls will keep for up to 3 months. Bake directly from frozen, adding 1-2 minutes to the baking time.
Freezing baked, unglazed cookies: This is actually my preferred method! Bake the cookies completely and let them cool. Place them in a single layer on a baking sheet and freeze until solid, then transfer to freezer bags. They’ll keep for up to 3 months. When you’re ready to serve, thaw at room temperature for about 30 minutes, then glaze them fresh. This way, the glaze is always bright and beautiful.
Freezing glazed cookies: You can freeze glazed cookies, though the glaze may lose some of its luster. Place them in a single layer in an airtight container with parchment paper between layers. Freeze for up to 2 months. Thaw in the refrigerator overnight, then bring to room temperature before serving.
Best reheating method: Thaw frozen cookies at room temperature for 30-45 minutes. If you froze unglazed cookies and want them slightly warm before glazing, place them in a 300°F oven for 3-5 minutes until just warmed through, then let cool completely before glazing.
Make-ahead timeline: You can prepare these cookies up to 3 days in advance of an event. Store them in an airtight container at room temperature and they’ll stay perfectly fresh. In fact, many bakers swear that Italian cookies taste even better after resting for a day—the flavors deepen and become more complex.
Serving Suggestions
Italian cookies are incredibly versatile and fit beautifully into so many occasions. Here’s how to serve them for maximum enjoyment:
Coffee and tea time: These cookies are traditionally served alongside espresso or cappuccino in Italy. The subtle sweetness pairs perfectly with strong coffee, and they’re excellent for dunking! Serve them on a pretty plate with demitasse cups of espresso or your favorite afternoon tea.
Dessert platters: Create a stunning Italian cookie platter by making multiple batches with different colored glazes—pastel pink, light blue, mint green, and classic white look gorgeous together. Add some pizzelles, biscotti, and chocolate-dipped amaretti for a complete Italian dessert spread.
Holiday entertaining: During Christmas, use red and green glazes with festive sprinkles. For Easter, go with pastel colors and spring-themed decorations. These cookies are also perfect for Valentine’s Day (pink and red), baby showers (coordinate with party colors), and weddings (elegant white or champagne-colored glaze).
With gelato: Serve these cookies alongside a scoop of vanilla, pistachio, or lemon gelato for an authentically Italian dessert experience. The textures complement each other beautifully.
Gift-giving: Package these cookies in decorative tins, cellophane bags tied with ribbon, or stacked in mason jars with a pretty label. They ship well and make thoughtful homemade gifts for teachers, neighbors, hosts, or anyone who appreciates delicious homemade treats.
Pairing beverages: Beyond coffee, these cookies pair wonderfully with cold milk (obviously!), hot chocolate, Italian sweet wine like Moscato d’Asti, or a dessert liqueur like Limoncello or Frangelico.
Kids’ parties: Let children decorate their own cookies! Set out bowls of different colored glazes and various sprinkles, and let them create edible art. It’s a fun activity and a delicious party favor all in one.
FAQs Section
Can I use salted butter instead of unsalted?
Yes, you can! Just reduce the added salt in the recipe to ¼ teaspoon instead of ½ teaspoon. Unsalted butter gives you more control over the saltiness, but salted butter will work in a pinch and still produce delicious cookies.
Why are my cookies spreading too much during baking?
This usually happens because the butter was too soft or melted, or the dough was too warm when you put it in the oven. Make sure your butter is softened but not greasy, and if your dough feels very soft or sticky, refrigerate it for 15-20 minutes before scooping and baking. Also check that your baking powder is fresh—old leavening agents can cause spreading issues.
Can I make these cookies without a mixer?
Absolutely! You can make these by hand with a wooden spoon and some elbow grease. The creaming step will take longer (about 8-10 minutes of vigorous stirring), but it’s definitely doable. Your arm might get a workout, but the cookies will turn out just as delicious.
My glaze is too thick/too thin—how do I fix it?
For glaze that’s too thick, add milk ½ teaspoon at a time, mixing well after each addition until you reach the right consistency. For glaze that’s too thin, add more sifted powdered sugar 1 tablespoon at a time. The perfect glaze should slowly drip off a spoon and settle into a smooth coating on the cookie.
Can I make these gluten-free?
You can try substituting the all-purpose flour with a 1:1 gluten-free flour blend that’s designed for baking. Look for one that contains xanthan gum. The texture might be slightly different (possibly more crumbly), but many readers have had success with this substitution. I recommend King Arthur or Bob’s Red Mill gluten-free flour blends.
Do I have to glaze these cookies?
Not at all! While the glaze is traditional and adds beautiful presentation, unglazed Italian cookies are delicious on their own. You could dust them with powdered sugar instead, or leave them plain and serve with coffee for a less sweet option. Some people actually prefer them without the glaze!
How do I know when the cookies are done?
These cookies should remain very pale on top—that’s the secret to keeping them soft! The bottoms should be just barely golden, and the tops should look almost underbaked. They’ll firm up as they cool. If you wait until they look golden brown on top, they’ll be overbaked and dry.
Can I add mix-ins like chocolate chips or nuts?
Yes, you can fold in up to 1 cup of mix-ins like mini chocolate chips, finely chopped nuts, or dried fruit. Add them at the very end after all the other ingredients are incorporated. Keep in mind this will change the traditional texture slightly, making them a bit more rustic.
Conclusion
There’s something truly special about making Italian cookies from scratch. Whether you grew up with these cookies at every family celebration or you’re discovering them for the first time, this recipe connects you to a beautiful tradition of Italian baking that’s all about love, family, and sharing something delicious with the people you care about.
These soft, buttery cookies with their sweet vanilla glaze aren’t just a dessert—they’re an experience. They’re the cookies you’ll make for your child’s first birthday party, the ones you’ll bring to the office holiday party and receive rave reviews, the ones you’ll pack up in pretty tins as Christmas gifts, and eventually, the ones you’ll teach your own children or grandchildren to make someday.
The best part? While they look and taste like they came from an expensive Italian bakery, you now have the recipe to make them anytime the craving strikes. And trust me, once you make them once, you’ll be making them again and again. They’re that good.
So preheat that oven, pull out your mixing bowls, and get ready to fill your kitchen with the incredible aroma of freshly baked Italian cookies. Don’t forget to snap a picture of your beautiful creation and share it on Pinterest—I can’t wait to see your gorgeous cookie platters! And if you loved this recipe, drop a comment below and let me know. Happy baking, friends! 🍪💕