The Ultimate Italian Cream Cake Recipe – Rich, Nutty, and Absolutely Divine!
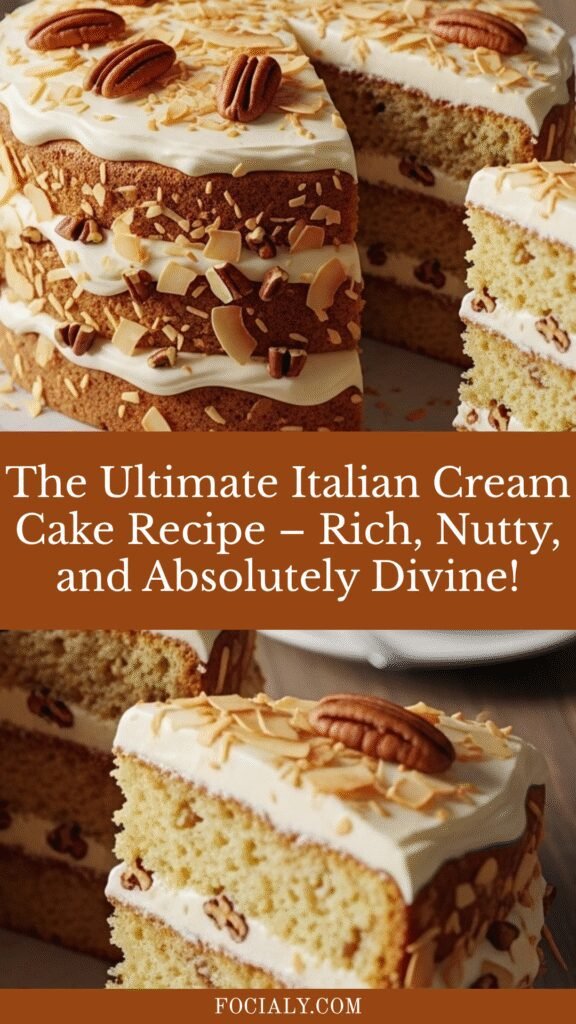
If you’ve ever tasted authentic Italian Cream Cake, you know it’s not just another dessert—it’s an experience. This show-stopping layer cake features tender, moist cake studded with toasted pecans and coconut, all smothered in luscious cream cheese frosting. Despite its name, this isn’t actually from Italy, but it’s been a beloved Southern tradition for generations, gracing tables at weddings, holidays, Easter celebrations, and special family gatherings.
What makes Italian Cream Cake so irresistible is the perfect balance of textures and flavors. The cake itself is incredibly moist thanks to buttermilk, while shredded coconut adds chewiness and pecans provide that satisfying crunch. Then there’s the cream cheese frosting—tangy, sweet, and impossibly creamy—that ties everything together. This is the kind of cake that makes people ask for seconds and beg for the recipe.
Whether you’re celebrating a milestone birthday, hosting Easter brunch, planning a bridal shower, or simply want to impress your loved ones with your baking skills, this Italian Cream Cake delivers every single time. It looks elegant enough for formal occasions but tastes like home, comfort, and pure indulgence.
History / Background
Despite its Italian-sounding name, Italian Cream Cake is actually a Southern United States creation with somewhat mysterious origins. Most food historians trace it back to the mid-20th century, with the earliest known printed recipes appearing in Southern newspapers and community cookbooks during the 1960s and 1970s.
There are several theories about how this cake got its name. Some believe it was called “Italian” because of the use of buttermilk (which Italian immigrants commonly used in baking), while others suggest the name simply sounded exotic and sophisticated for marketing purposes. The coconut and pecan combination was already popular in Southern baking, and clever home bakers may have elevated these ingredients into something that felt special and worthy of a fancy name.
The cake gained massive popularity throughout the South, particularly in Texas, where it became a staple at church socials, county fairs, and wedding receptions. By the 1980s and 1990s, Italian Cream Cake had achieved legendary status as the cake to serve when you wanted to really impress someone. Bakeries across the South added it to their standard offerings, and it became one of those recipes that every Southern grandmother seemed to have perfected.
What’s particularly interesting is how the recipe has remained remarkably consistent over the decades. Unlike many recipes that evolve drastically over time, Italian Cream Cake has maintained its classic combination of buttermilk cake, coconut, pecans, and cream cheese frosting. This consistency speaks to the perfection of the original formula—when something is this good, you don’t mess with it.
Today, Italian Cream Cake continues to be one of the most requested celebration cakes in the South and has gained fans nationwide. It represents Southern hospitality, culinary tradition, and the kind of baking that brings families together around the table.
Why You’ll Love This Recipe
This Italian Cream Cake recipe is absolutely worth the effort, and here’s why it’s going to become your go-to celebration cake. First, it’s incredibly impressive—this is a bakery-quality cake you can make at home, and your guests will be amazed that you made it yourself. The combination of flavors and textures is simply unbeatable, with every bite offering something delightful.
Here’s what makes this recipe special:
- Incredibly moist and tender – The buttermilk and proper creaming method create a cake that stays moist for days
- Perfect balance of flavors – Not too sweet, with tangy cream cheese frosting complementing the nutty cake layers
- Beautiful presentation – This is a stunning three-layer cake that photographs beautifully for your blog or Instagram
- Make-ahead friendly – You can bake the layers in advance and assemble when ready, perfect for party planning
- Feeds a crowd – One cake serves 12-16 people, making it ideal for gatherings and celebrations
- Traditional Southern recipe – You’re making an authentic piece of culinary heritage
- Customizable – Easy to adapt with different nuts or extracts to suit your preferences
- Room temperature stable – The cake holds up well at room temperature during parties, unlike some delicate desserts
- Freezer-friendly – Both the unfrosted layers and fully assembled cake freeze beautifully
- Not overly complicated – While it requires attention to detail, the techniques are straightforward for intermediate bakers
Ingredient Notes
Let’s break down what makes this cake so special, ingredient by ingredient, so you understand why each component matters.
Buttermilk is absolutely essential for this recipe. It provides tanginess, tenderizes the cake by reacting with baking soda, and keeps everything incredibly moist. Don’t skip it or substitute regular milk—the acidity is crucial. If you don’t have buttermilk, you can make a quick substitute by adding 1 tablespoon of lemon juice or white vinegar to 1 cup of milk and letting it sit for 5 minutes.
Cream cheese (for the frosting) must be full-fat and at room temperature. Low-fat versions won’t give you the right consistency or rich flavor. Room temperature is critical—cold cream cheese creates lumpy frosting no matter how long you beat it.
Butter should be unsalted so you can control the salt level. For the cake, you want it at room temperature (around 65-70°F) so it creams properly with the sugar. For the frosting, slightly softer is fine.
Sweetened shredded coconut adds moisture, chewiness, and tropical flavor. Don’t use unsweetened coconut unless you increase the sugar in the cake. The Baker’s Angel Flake style works perfectly. Some bakers toast half the coconut for deeper flavor—this is optional but delicious.
Pecans provide nutty flavor and textural contrast. Toast them lightly before adding to the batter to intensify their flavor. You can substitute walnuts if preferred, though pecans are traditional. Chop them medium-fine so they distribute evenly throughout the cake.
Cake flour creates a more tender crumb than all-purpose flour because of its lower protein content. If you don’t have cake flour, you can substitute by removing 2 tablespoons from each cup of all-purpose flour and replacing it with 2 tablespoons of cornstarch, then sifting together five times.
Eggs should be large and at room temperature. Room temperature eggs incorporate more easily and create better structure. Separate them carefully—even a tiny bit of yolk in the whites will prevent them from whipping properly.
Vanilla extract should be pure, not imitation, for the best flavor. Some bakers add a hint of almond extract (1/2 teaspoon) for additional depth, though this is optional.
Baking soda is the leavening agent that reacts with the acidic buttermilk to create lift and tenderness. Make sure yours is fresh (test it by adding a pinch to vinegar—it should fizz vigorously).
Equipment Needed
Having the right tools makes this recipe much easier and ensures better results. Here’s what you’ll need:
- Three 9-inch round cake pans – For creating beautiful layers (or bake in batches if you only have two pans)
- Parchment paper – For lining pan bottoms to prevent sticking
- Stand mixer or hand mixer – Essential for creaming butter and whipping egg whites
- Multiple mixing bowls – You’ll need separate bowls for egg whites, dry ingredients, and wet ingredients
- Rubber spatula – For folding ingredients gently and scraping bowls
- Whisk – For combining dry ingredients
- Measuring cups and spoons – Accurate measurements are crucial in baking
- Kitchen scale (optional but recommended) – For the most precise measurements
- Cooling racks – To cool cake layers completely before frosting
- Offset spatula – Makes frosting layers much easier and creates a professional look
- Cake turntable (optional) – Helpful for smooth, even frosting application
- Toothpicks – For testing cake doneness
- Small saucepan – For toasting pecans
- Sifter or fine-mesh strainer – For aerating flour and removing lumps
- Cake board or serving plate – Sturdy base for your finished cake
Italian Cream Cake Recipe
This classic Southern Italian Cream Cake features three moist, tender layers studded with coconut and toasted pecans, all covered in rich, tangy cream cheese frosting. It’s the perfect celebration cake that looks impressive but is surprisingly achievable for home bakers.
- Prep Time: 30 minutes
- Cook Time: 25 minutes
- Total Time: 55 minutes (plus cooling time)
- Yield: 12-16 servings 1x
- Category: Dessert
- Method: Baking
- Cuisine: Southern American
- Diet: Vegetarian
Ingredients
For the Cake:
- 2 cups (240g) cake flour, sifted
- 1 teaspoon baking soda
- 1/2 teaspoon salt
- 1/2 cup (115g) unsalted butter, room temperature
- 1/2 cup (120ml) vegetable oil or canola oil
- 2 cups (400g) granulated sugar
- 5 large eggs, separated, room temperature
- 1 cup (240ml) buttermilk, room temperature
- 1 teaspoon pure vanilla extract
- 1 cup (85g) sweetened shredded coconut
- 1 cup (120g) pecans, toasted and chopped
For the Cream Cheese Frosting:
- 1/2 cup (115g) unsalted butter, softened
- 8 ounces (225g) cream cheese, softened to room temperature
- 4 cups (480g) powdered sugar, sifted
- 2 teaspoons pure vanilla extract
- Pinch of salt
- 2-3 tablespoons heavy cream (if needed for consistency)
For Garnish:
- 1/2 cup toasted coconut flakes
- 1/2 cup chopped pecans
Instructions
Prepare the Pans:
- Preheat your oven to 350°F (175°C). Grease three 9-inch round cake pans with butter or baking spray, line the bottoms with parchment paper circles, then grease the parchment. Lightly dust with flour and tap out excess.
Toast the Pecans: 2. Spread pecans in a single layer on a baking sheet and toast in the preheated oven for 5-7 minutes until fragrant. Watch carefully to prevent burning. Remove, let cool, and chop into medium-small pieces. Set aside.
Mix Dry Ingredients: 3. In a medium bowl, whisk together the sifted cake flour, baking soda, and salt. Set aside.
Cream Butter and Sugar: 4. In a large mixing bowl or stand mixer fitted with the paddle attachment, beat the butter, oil, and sugar together on medium-high speed for 4-5 minutes until light, fluffy, and pale in color. This step is crucial for a tender cake.
Add Egg Yolks: 5. Add the egg yolks one at a time to the butter mixture, beating well after each addition until fully incorporated. Scrape down the sides and bottom of the bowl between additions.
Alternate Wet and Dry: 6. With the mixer on low speed, add the flour mixture in three additions, alternating with the buttermilk in two additions, beginning and ending with flour. Mix just until combined after each addition—don’t overmix. Stir in the vanilla extract.
Fold in Coconut and Pecans: 7. Using a rubber spatula, gently fold in the shredded coconut and toasted pecans until evenly distributed throughout the batter.
Whip Egg Whites: 8. In a separate clean, grease-free bowl, beat the egg whites with clean beaters on medium-high speed until stiff peaks form, about 3-4 minutes. The whites should be glossy and hold their shape when you lift the beaters.
Fold in Egg Whites: 9. Gently fold one-third of the beaten egg whites into the batter using a rubber spatula, using a circular motion and cutting through the center. This lightens the batter. Then fold in the remaining egg whites in two additions until no white streaks remain. Be gentle to preserve the airiness.
Bake: 10. Divide the batter evenly among the three prepared pans (use a kitchen scale for precision—approximately 620g per pan). Smooth the tops with a spatula. Bake for 23-27 minutes, until a toothpick inserted in the center comes out clean and the cakes spring back when lightly touched.
Cool: 11. Remove from oven and let cakes cool in pans on wire racks for 10 minutes. Run a knife around the edges, then carefully invert onto cooling racks. Peel off parchment paper and let cool completely before frosting, at least 1 hour.
Make the Frosting: 12. In a large bowl with a hand mixer or stand mixer with paddle attachment, beat the softened butter and cream cheese together on medium speed until completely smooth and creamy, about 2-3 minutes.
- Add the sifted powdered sugar one cup at a time, beating on low speed initially to prevent a sugar cloud, then increasing to medium speed. Add vanilla and salt. Beat for 3-4 minutes on medium-high speed until light and fluffy. If the frosting is too thick, add heavy cream one tablespoon at a time until you reach desired spreading consistency.
Assemble the Cake: 14. Place the first cake layer on your serving plate or cake board. Spread about 1 cup of frosting evenly over the top, going almost to the edges. Place the second layer on top and repeat. Add the third layer and spread a thin “crumb coat” of frosting over the entire cake to seal in crumbs. Refrigerate for 15-20 minutes to set.
- Apply the remaining frosting in a thicker layer over the top and sides of the cake, smoothing with an offset spatula. For a rustic look, create swirls and peaks. For a smooth finish, use a bench scraper or offset spatula dipped in hot water.
Garnish: 16. Press toasted coconut around the bottom edge of the cake and sprinkle chopped pecans over the top. Refrigerate the cake for at least 30 minutes before slicing for cleaner cuts.
Notes
- Room Temperature Ingredients: This is crucial for proper mixing and texture. Take eggs, buttermilk, butter, and cream cheese out 60-90 minutes before baking.
- Don’t Overmix: Once flour is added, mix just until combined to prevent tough, dense cake.
- Egg White Tips: Make sure your bowl and beaters are completely clean and grease-free. Even a trace of fat will prevent egg whites from whipping properly.
- Frosting Consistency: If your frosting is too soft, refrigerate for 15 minutes. If too stiff, add cream one tablespoon at a time.
- Leveling Layers: If your cakes domed during baking, use a serrated knife or cake leveler to create flat, even layers for better stacking.
- Make It a Two-Layer Cake: If you prefer, divide batter between two 9-inch pans and bake 30-35 minutes. Adjust frosting amounts accordingly.
Nutrition
- Serving Size: 1 slice (1/14 of cake)
- Calories: 625
- Sugar: 58g
- Sodium: 285mg
- Fat: 35g
- Saturated Fat: 14g
- Unsaturated Fat: 18g
- Trans Fat: 0g
- Carbohydrates: 72g
- Fiber: 2g
- Protein: 7g
- Cholesterol: 115mg
Note: Nutrition information is calculated based on the ingredients and amounts specified in the recipe. Values are approximate and may vary based on specific brands used and portion sizes.
Tips & Variations
Flavor Variations:
- Add 1/2 teaspoon almond extract to the cake batter for a subtle almond flavor that complements the coconut beautifully
- Replace half the vanilla in the frosting with coconut extract for extra coconut intensity
- Add 2 tablespoons of bourbon to the frosting for a Southern twist (reduce cream accordingly)
- Fold 1/2 cup of mini chocolate chips into the batter for a chocolate-coconut version
Nut Alternatives:
- Swap pecans for walnuts, macadamia nuts, or toasted almonds
- Use a combination of half pecans and half walnuts for varied texture
- For nut-free version, substitute with toasted sunflower seeds (though texture and flavor will differ)
Coconut Options:
- Use unsweetened coconut and increase sugar by 1/4 cup if you prefer less sweetness
- Toast half the coconut before adding to batter for deeper, nuttier flavor
- Add coconut milk to the cake batter in place of half the buttermilk for more pronounced coconut taste
Frosting Alternatives:
- Make a traditional buttercream instead of cream cheese frosting (though cream cheese is classic)
- Add 2 tablespoons of cream of coconut to the frosting for tropical flavor
- Create a white chocolate cream cheese frosting by melting 4 ounces white chocolate and beating it into the frosting
Size Adjustments:
- Make as a 9×13-inch sheet cake (bake 35-40 minutes) for easier serving at potlucks
- Create cupcakes instead—fills about 28-30 cupcakes, bake 18-22 minutes
- Double the recipe for a towering 6-layer show-stopper cake for weddings
Pro Chef Tips
Temperature Control is Everything: Professional bakers know that ingredient temperature dramatically affects texture. All dairy (buttermilk, butter, cream cheese, eggs) should be between 65-70°F. Cold ingredients don’t emulsify properly, creating a dense, tough cake. Set ingredients out 60-90 minutes before baking, or quick-warm eggs in a bowl of warm water for 5-10 minutes.
Properly Cream Your Fats: When the recipe says to cream butter and sugar until “light and fluffy,” this isn’t just descriptive—it’s chemistry. You’re incorporating air bubbles that expand during baking, creating lift. This takes a full 4-5 minutes on medium-high speed. The mixture should be noticeably paler and increased in volume. Under-creaming results in dense cake.
Master the Folding Technique: When incorporating whipped egg whites, many home bakers deflate them by stirring too vigorously. Use a large rubber spatula and cut down through the center of the batter, sweep along the bottom, and up the side in a circular motion. Rotate the bowl a quarter turn and repeat. This preserves the air bubbles that make your cake light and tender.
The Toothpick Test Isn’t Always Accurate: Professional bakers also test doneness by gently pressing the center of the cake—it should spring back. The cake should also be pulling away slightly from the pan sides. An instant-read thermometer inserted in the center should read 205-210°F for perfectly baked cake.
Layer Cakes Need a Crumb Coat: Always apply a thin first layer of frosting (the crumb coat) and refrigerate before adding the final frosting layer. This seals in crumbs and creates a smooth base for your final frosting. It’s the difference between homemade-looking and bakery-quality presentation.
Stabilize Your Frosting: If you’re making this cake in warm weather or it needs to sit out for several hours, add 2 tablespoons of cornstarch to your cream cheese frosting. This helps prevent softening and sliding. Beat it in after the powdered sugar is incorporated.
Use a Cake Strip for Even Layers: Professional bakers use damp cake strips around pans to ensure even baking with flat tops. You can make these at home by soaking cloth strips in water, wringing out excess, and pinning them around your pans. This prevents doming and eliminates the need to level layers.
Common Mistakes to Avoid
Mistake #1: Using Cold Ingredients
When butter, eggs, buttermilk, or cream cheese are cold, they don’t incorporate smoothly. This creates a lumpy batter and dense cake texture. Always bring ingredients to room temperature—this is non-negotiable for professional results.
Mistake #2: Overmixing After Adding Flour
Once flour is added to wet ingredients, gluten development begins. Overmixing creates tough, chewy cake instead of tender crumb. Mix on low speed just until you can’t see dry flour streaks—some small lumps are fine and will smooth out during baking.
Mistake #3: Deflating the Egg Whites
Roughly stirring beaten egg whites into batter destroys the air bubbles that make your cake light. Always fold gently using the proper technique, and accept that it takes patience—rushing this step ruins your cake’s texture.
Mistake #4: Frosting Warm Cake Layers
This is perhaps the most common mistake home bakers make. Warm cake + cold frosting = melted, sliding mess. Cake layers must be completely cool (touch the bottom—if it’s even slightly warm, wait longer). Patience here makes all the difference in presentation.
Mistake #5: Not Sifting Powdered Sugar for Frosting
Powdered sugar contains lumps that won’t break down during mixing, creating gritty, lumpy frosting. Always sift it first, even if the bag says “pre-sifted.” This extra 30 seconds gives you silky-smooth, professional frosting.
Mistake #6: Skipping the Parchment Paper
Even with greased and floured pans, cake layers can stick, especially in humid climates. Parchment paper circles in the pan bottoms guarantee easy release. Don’t skip this insurance policy.
Mistake #7: Opening the Oven Door Too Early
Resist the urge to check your cakes before 20 minutes of baking. Opening the oven releases heat and causes cakes to sink in the middle. Wait until the minimum baking time has passed before taking a peek.
Storage & Meal Prep
Room Temperature Storage:
Italian Cream Cake can sit at room temperature for up to 8 hours, making it perfect for parties and gatherings. Keep it under a cake dome or loosely covered with plastic wrap (don’t let plastic touch the frosting—use toothpicks as spacers if needed). In hot or humid weather, reduce this to 3-4 hours maximum.
Refrigerator Storage:
Store leftover cake in the refrigerator, covered with a cake dome or loosely covered with plastic wrap. The cream cheese frosting contains dairy and must be refrigerated. The cake will stay fresh for 4-5 days. For best texture, let refrigerated cake sit at room temperature for 20-30 minutes before serving—cold cake is dense and less flavorful.
Preventing Dry Cake:
To prevent your cake from drying out in the fridge, place a piece of bread (yes, really!) on the cut side of the cake. The bread will dry out instead of your cake. Replace daily. Alternatively, press plastic wrap directly against the cut surfaces before covering the whole cake.
Portioning for Storage:
If you know you won’t eat the whole cake within a few days, slice it into individual portions and store separately. This makes grab-and-go servings easier and prevents the entire cake from being exposed to air repeatedly.
Leftover Frosting Storage:
If you have extra frosting, store it separately in an airtight container in the refrigerator for up to one week or freeze for up to three months. Thaw overnight in the fridge and re-whip before using to restore creamy texture.
Make-Ahead & Freezer Notes
Advance Baking Timeline:
You can bake the cake layers up to two days ahead. Wrap cooled, unfrosted layers tightly in plastic wrap, then aluminum foil. Store at room temperature (if assembling within 24 hours) or refrigerate (if assembling in 48 hours). Bring to room temperature before frosting.
Freezing Unfrosted Layers:
For maximum make-ahead convenience, freeze unfrosted cake layers. Wrap each cooled layer individually in plastic wrap, then aluminum foil, then place in a freezer bag. Freeze for up to three months. Thaw overnight in the refrigerator still wrapped (this prevents condensation from making the cake soggy), then bring to room temperature before frosting.
Freezing Frosted Cake:
You can absolutely freeze the fully assembled and frosted cake. First, freeze it uncovered for 1-2 hours until the frosting is firm. Then wrap carefully in plastic wrap and aluminum foil. Freeze for up to two months. Thaw overnight in the refrigerator, still wrapped. Remove wrapping and let sit at room temperature for 30 minutes before serving.
Best Reheating Method:
Italian Cream Cake is best served at room temperature or slightly cool, not warm. Simply remove from refrigerator 20-30 minutes before serving. Don’t microwave, as this can make the cake gummy and melt the frosting unevenly.
Frosting Ahead:
Make cream cheese frosting up to three days ahead and store in an airtight container in the refrigerator. Before using, let it come to room temperature (2-3 hours), then beat briefly with a mixer to restore smooth, spreadable consistency.
Party Planning Strategy:
For stress-free entertaining, bake layers 1-2 days ahead (or freeze weeks ahead), make frosting 1-2 days ahead, and assemble the cake the morning of your event. This spreads out the work and ensures you’re not baking and frosting on the same day as your party.
Serving Suggestions
Italian Cream Cake is rich and decadent, so it pairs beautifully with simple accompaniments that don’t compete with its complex flavors.
Beverage Pairings:
Serve with freshly brewed coffee—the slight bitterness balances the sweetness perfectly. Sweet tea is a classic Southern pairing. For evening celebrations, try dessert wines like Moscato, Riesling, or even a cream sherry. Sparkling wine or champagne cuts through the richness beautifully at weddings and anniversaries.
Fresh Fruit Sides:
A simple berry compote or fresh raspberry sauce adds bright, tart contrast. Serve slices with a few fresh raspberries, strawberries, or blackberries on the plate. Macerated strawberries (strawberries tossed with a little sugar and left to release juices) are particularly lovely.
Ice Cream or Whipped Cream:
For true indulgence, add a small scoop of vanilla bean ice cream or a dollop of fresh whipped cream. The cold, creamy element complements the cake’s texture. Coconut ice cream makes this extra special.
Special Occasion Presentation:
For Easter, surround the cake base with jelly beans or chocolate eggs. For weddings, add fresh flowers (make sure they’re food-safe and pesticide-free). For Christmas, dust with powdered sugar “snow” and add sugared cranberries. For spring gatherings, top with edible flowers like pansies or violas.
Portion Sizes:
Because this is such a rich cake, cut smaller slices than you would for a regular layer cake. A 9-inch cake comfortably serves 14-16 people with proper portions. Use a long, sharp knife dipped in hot water and wiped clean between cuts for neat, professional-looking slices.
Plating Tips:
For elegant presentation, place each slice on a dessert plate slightly off-center. Add a small pool of raspberry sauce on the side, three fresh raspberries, and a tiny sprig of fresh mint. Dust the plate edge lightly with powdered sugar. This restaurant-style plating elevates home baking to special-occasion status.
FAQs Section
Q: Can I make Italian Cream Cake without coconut?
A: While coconut is traditional and contributes to the cake’s signature texture and moisture, you can omit it if necessary. However, the cake will taste different and be slightly less moist. If omitting coconut, consider adding an extra 1/4 cup of buttermilk to maintain moisture. You could also substitute the same amount of finely chopped pecans or almonds for texture, though the flavor profile will change significantly.
Q: Why is my cream cheese frosting too runny?
A: The most common cause is that your cream cheese or butter was too soft when you started. They should be at cool room temperature—softened but still holding shape, not warm or melted. Also, make sure you’re using full-fat cream cheese (not whipped or light varieties) and real butter, not margarine. If your frosting is too soft, refrigerate it for 15-20 minutes, then re-whip. You can also add an extra 1/4-1/2 cup of powdered sugar to thicken it.
Q: Can I use all butter instead of butter and oil?
A: While you can substitute all butter (use 1 cup total butter instead of 1/2 cup butter + 1/2 cup oil), your cake will be less moist and tender. Oil contributes moisture and keeps the cake tender longer because it stays liquid at room temperature, while butter solidifies. The combination is intentional for optimal texture. If you do substitute all butter, your cake may dry out faster.
Q: My cake layers came out dense instead of light and fluffy. What happened?
A: Dense cake usually results from one of these issues: not properly beating the egg whites to stiff peaks, deflating the egg whites when folding them in, overmixing the batter after adding flour, or using expired or insufficient baking soda. Also check that ingredients were at proper room temperature—cold ingredients create dense cake. Make sure you’re measuring flour correctly (spoon and level, don’t scoop directly from the bag).
Q: How do I prevent my cake layers from sticking to the pans?
A: The foolproof method is to grease the pans well with butter or baking spray, line the bottoms with parchment paper circles, then grease the parchment and dust everything lightly with flour. The parchment ensures easy release even if the greasing isn’t perfect. Also, let cakes cool in pans for exactly 10 minutes—too short and they’ll fall apart, too long and they’ll stick.
Q: Can I reduce the sugar in this recipe?
A: Sugar isn’t just for sweetness in cakes—it also affects texture, moisture, browning, and structure. Reducing sugar significantly will result in a different cake texture that may be dense, dry, or pale. You could reduce sugar by up to 1/4 cup (from 2 cups to 1 3/4 cups) without major issues, but more than that will compromise the recipe. Remember that the tangy cream cheese frosting already balances the sweetness.
Q: Do I really need cake flour, or can I use all-purpose?
A: Cake flour creates a more tender, delicate crumb because it has less protein than all-purpose flour. If you must substitute all-purpose flour, remove 2 tablespoons from each cup of all-purpose flour and replace with 2 tablespoons of cornstarch. Sift this mixture at least 5 times to aerate it and distribute the cornstarch evenly. This mimics the texture of cake flour reasonably well.
Q: Why did my frosting have a grainy texture?
A: Grainy frosting usually means the powdered sugar wasn’t sifted before adding it. Always sift powdered sugar to remove lumps. If you forgot and your frosting is already grainy, you can sometimes fix it by beating on medium-high speed for an additional 3-4 minutes—the friction can break down some lumps. For prevention, always sift your powdered sugar even if the bag claims it’s pre-sifted.
Conclusion
There’s something truly special about making an Italian Cream Cake from scratch. Yes, it takes time and attention, but the reward is absolutely worth it—a stunning, bakery-quality cake that tastes like celebration, tradition, and pure indulgence. Every bite offers something wonderful: the tender, moist cake, the satisfying crunch of toasted pecans, the subtle sweetness of coconut, and that incomparable tangy cream cheese frosting that brings everything together perfectly.
Whether you’re baking this for Easter Sunday, a milestone birthday, a wedding shower, or simply because you want to treat your family to something extraordinary, this recipe delivers every single time. And here’s a little secret: once you make this cake and see how impressed everyone is, it’ll become your go-to celebration cake. People will request it by name, ask for the recipe, and remember it long after the party ends.
So gather your ingredients, clear your kitchen counter, and give yourself the gift of an afternoon of baking. The scent of vanilla and toasted pecans filling your kitchen, the satisfaction of creating those perfect layers, and the joy on faces when you present your masterpiece—that’s what home baking is all about.
I’d absolutely love to hear how your Italian Cream Cake turns out! Drop a comment below with your experience, any creative variations you tried, or questions that came up during baking. And if you loved this recipe as much as I do, please share it with your friends, save it to your Pinterest boards, and bookmark it for your next celebration. Happy baking, friends!