Perfect French Macarons Recipe – Delicate, Colorful & Absolutely Delicious!

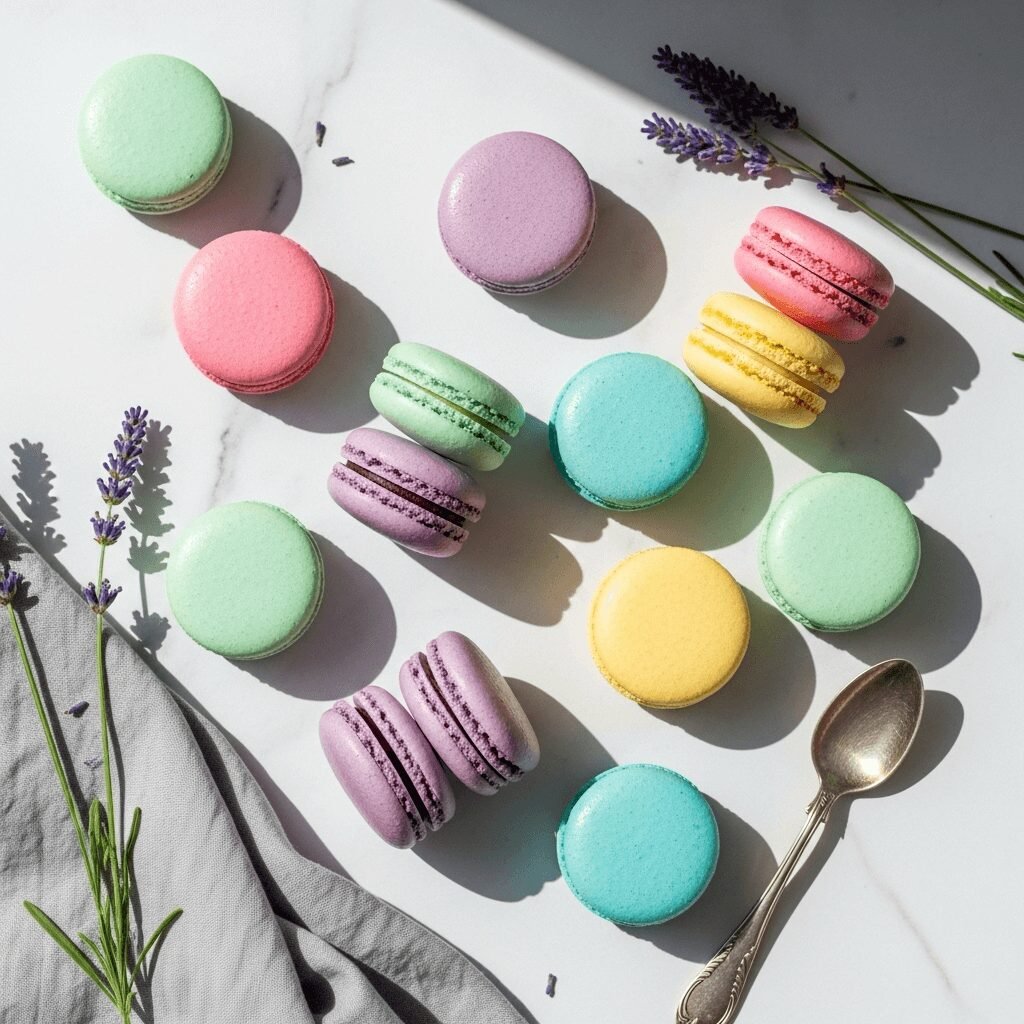
If there’s one treat that embodies elegance, sophistication, and pure bakery magic, it’s the French macaron. These delicate, colorful sandwich cookies with their signature smooth tops, ruffled “feet,” and creamy filling have captured hearts (and taste buds) around the world. Whether you’re celebrating a special occasion, hosting an afternoon tea party, or simply want to impress your friends and family, homemade macarons are the ultimate showstopper dessert.
Despite their fancy reputation, macarons are surprisingly achievable at home with the right technique and a little patience. Yes, they require attention to detail, but once you master the process, you’ll find yourself making batch after batch in every flavor and color imaginable. Perfect for bridal showers, baby showers, birthday parties, Valentine’s Day, or even as edible gifts, these charming little treats are as versatile as they are beautiful. The crisp outer shell gives way to a soft, chewy interior, while the buttercream, ganache, or jam filling adds the perfect touch of sweetness and flavor.
What makes macarons truly special is their endless customization potential. From classic flavors like vanilla, chocolate, and raspberry to more adventurous combinations like lavender honey, pistachio, or salted caramel, you can create a rainbow of flavors to suit any palate or theme. They’re naturally gluten-free (made with almond flour instead of wheat), making them accessible to many people with dietary restrictions. Today, I’m sharing my foolproof macaron recipe that will guide you through every step, from preparing your ingredients to achieving those perfect feet and glossy shells.
History / Background
The macaron has a fascinating history that spans several centuries and countries. While these delicate cookies are now synonymous with French patisserie, their origins actually trace back to Italy during the Renaissance period. Italian monks are believed to have created early versions of almond-based cookies as far back as the 8th century, but the macaron as we know it began to take shape in the Italian monasteries of the 1500s.
The cookie made its way to France in 1533 when Catherine de Medici, an Italian noblewoman, married King Henry II of France and brought her Italian pastry chefs to the French court. The French embraced these almond meringue cookies, and they became popular in various regions of France, particularly in monasteries and convents. The town of Nancy became famous for its macarons in the 17th century, and the “Macaron Sisters,” two nuns who baked and sold the cookies to support themselves during the French Revolution, helped spread their popularity.
However, the macaron we recognize today—the smooth, colorful sandwich cookie with a creamy filling—didn’t emerge until the early 20th century. This innovation is credited to Pierre Desfontaines, a cousin of the famous French pastry chef Louis Ernest Ladurée, who had the brilliant idea of taking two macaron shells and joining them with a ganache filling around 1930. The Parisian pastry house Ladurée popularized this version, and it quickly became an icon of French luxury and refinement.
In the 21st century, macarons experienced a global renaissance, thanks in part to pastry chefs like Pierre Hermé, who elevated the macaron to an art form with innovative flavor combinations and impeccable technique. Today, macarons are a symbol of celebration, sophistication, and culinary craftsmanship. They’ve become a social media sensation, adorning Instagram feeds and Pinterest boards with their jewel-like colors and picture-perfect presentation. The journey from simple Italian monastery cookies to Instagram-worthy French delicacies is a testament to how a recipe can evolve and capture imaginations across cultures and generations.
Why You’ll Love This Recipe
Making macarons at home might seem intimidating at first, but this recipe breaks down the process into manageable steps that anyone can follow. Once you taste your first batch of homemade macarons, you’ll understand why they’re worth every minute of effort.
Here’s why this macaron recipe will become your new favorite baking project:
- Impressive yet achievable – These cookies look like they came from an expensive French bakery, but you can make them in your own kitchen with basic equipment
- Naturally gluten-free – Made with almond flour instead of wheat, they’re perfect for friends and family who avoid gluten
- Endless flavor possibilities – Once you master the basic technique, you can experiment with any flavor combination you can imagine
- Perfect for gifting – Homemade macarons make incredibly thoughtful, elegant gifts for holidays, birthdays, or hostess presents
- Great for celebrations – Their beautiful appearance makes them ideal for weddings, showers, tea parties, and special occasions
- Surprisingly stable – Unlike many delicate pastries, macarons actually improve after a day in the refrigerator and can be frozen for months
- Fun and rewarding – There’s something magical about watching those signature “feet” develop in the oven and achieving that perfect smooth shell
- Customizable colors – Create a rainbow of hues to match any party theme or color scheme
- Restaurant-quality results – With proper technique, your homemade macarons will rival anything from a high-end patisserie
- Therapeutic baking experience – The precise, methodical process of making macarons can be wonderfully meditative and stress-relieving
Ingredient Notes
The beauty of macarons lies in their simplicity—just a handful of basic ingredients create something truly extraordinary. However, quality and technique matter immensely, so let’s talk about each component:
Almond Flour (Almond Meal) – This is the foundation of your macarons and must be super-fine. I highly recommend purchasing blanched almond flour specifically labeled for macarons, or sifting your almond flour multiple times. Bob’s Red Mill makes a good commercial version, but specialty brands like Honeyville are even finer. Avoid almond meal with skins, as it creates a speckled, less smooth appearance. If your almond flour feels even slightly damp or clumpy, spread it on a baking sheet and dry it in a 200°F oven for 5-10 minutes, then cool completely before using.
Powdered Sugar (Confectioners’ Sugar) – This sweetens the cookies and helps create that smooth, crisp shell. The cornstarch in powdered sugar also helps absorb any moisture. Always sift it with the almond flour to prevent lumps. Don’t substitute with granulated sugar—the texture will be completely wrong.
Egg Whites – Fresh egg whites work perfectly, but many professional bakers swear by “aged” egg whites. To age them, separate your eggs 24-48 hours before baking and leave the whites in a covered bowl at room temperature. This allows some moisture to evaporate, creating more stable meringue. If you’re concerned about leaving eggs out, refrigerate them and bring to room temperature before using. You need the whites at room temperature for maximum volume when whipping. Each large egg white weighs about 30-35 grams, and precision matters in macaron making.
Granulated Sugar – This goes into your meringue to stabilize it and create structure. Superfine or caster sugar dissolves more quickly, but regular granulated works fine if you beat the meringue long enough.
Cream of Tartar – This optional ingredient stabilizes the egg whites and helps create a stronger meringue that’s less likely to deflate. If you don’t have it, you can use a tiny drop of lemon juice or white vinegar, or simply omit it altogether.
Food Coloring – Gel or powder food coloring works best because liquid can add too much moisture to your batter. Start with a tiny amount—you can always add more. Remember that colors lighten slightly during baking.
Vanilla Extract or Other Flavorings – Pure vanilla extract is classic, but you can also use almond extract, rose water, lemon extract, or any concentrated flavor you love. Add it to the meringue or filling.
Filling Ingredients – Classic French buttercream, ganache, jam, or cream cheese frosting all work beautifully. The filling should be thick enough to hold its shape but soft enough to create a cohesive cookie when sandwiched together.
Equipment Needed
Having the right tools makes macaron-making much more manageable and increases your chances of success:
- Kitchen Scale – Absolutely essential! Macarons require precise measurements, and weighing ingredients in grams is far more accurate than volume measurements
- Fine-Mesh Sieve or Sifter – For sifting the almond flour and powdered sugar together multiple times to eliminate lumps
- Stand Mixer or Hand Mixer – A stand mixer with a whisk attachment is ideal for achieving perfect meringue, though a powerful hand mixer works too
- Silicone Spatula – For folding the dry ingredients into the meringue (macaronage) without deflating it
- Piping Bags – Disposable or reusable piping bags for piping uniform circles
- Round Piping Tip – A plain round tip, about ½ inch (Wilton 1A or 2A) works perfectly
- Baking Sheets – Heavy, flat baking sheets that won’t warp in the oven; you’ll need at least two
- Parchment Paper or Silicone Baking Mats – Silicone mats are reusable and create consistent results; parchment works great too
- Macaron Template – Optional but helpful—you can print circles on paper and place under parchment as a guide
- Oven Thermometer – Oven temperature accuracy is crucial; most ovens run hot or cold
- Timer – For tracking baking time precisely
- Cooling Racks – For cooling your macarons after baking
- Airtight Container – For storing finished macarons
Perfect French Macarons Recipe – Delicate, Colorful & Absolutely Delicious!

Delicate, colorful French macarons with crisp shells, chewy centers, and perfect ruffled feet. This foolproof recipe guides you through creating bakery-quality macarons at home with classic vanilla buttercream filling.
- Prep Time: 30 minutes
- Cook Time: 15 minutes
- Total Time: 1 hour 45 minutes
- Yield: 24-30 sandwich cookies (48-60 shells) 1x
- Category: Dessert
- Method: Baking
- Cuisine: French
- Diet: Vegetarian
Ingredients
For the Macaron Shells:
- 100g almond flour (about 1 cup), very finely ground
- 100g powdered sugar (about 1 cup)
- 100g granulated sugar (about ½ cup)
- 100g egg whites (from about 3 large eggs), aged and at room temperature
- ¼ teaspoon cream of tartar (optional)
- Gel food coloring (optional)
- ½ teaspoon vanilla extract (optional)
For the Vanilla Buttercream Filling:
- ½ cup (115g) unsalted butter, softened to room temperature
- 1½ cups (180g) powdered sugar, sifted
- 1 teaspoon vanilla extract
- 1-2 tablespoons heavy cream or milk
- Pinch of salt
Instructions
Step 1: Prep Your Ingredients
Sift the almond flour and powdered sugar together at least twice through a fine-mesh sieve into a large bowl. Discard any large pieces that won’t go through the sieve. Set aside. Bring egg whites to room temperature (this is crucial for proper meringue).
Step 2: Make the French Meringue
In a stand mixer fitted with the whisk attachment (or using a hand mixer), beat the egg whites and cream of tartar on medium speed until foamy, about 1 minute. Gradually add the granulated sugar, one tablespoon at a time, while continuing to beat. Once all sugar is added, increase speed to medium-high and beat until stiff, glossy peaks form, about 3-5 minutes. The meringue should be thick, shiny, and hold a stiff peak when you lift the whisk. Add gel food coloring and vanilla extract during the last 30 seconds of mixing if using.
Step 3: Fold in Dry Ingredients (Macaronage)
Add the sifted almond flour and powdered sugar mixture to the meringue all at once. Using a silicone spatula, fold the mixture together using a technique called macaronage. Press the batter against the side of the bowl and fold it over itself, rotating the bowl as you go. This should take 35-50 strokes. The batter is ready when it flows like thick lava, forms a ribbon that disappears back into the batter within 10-15 seconds, and you can make a figure-8 without the ribbon breaking. This is the trickiest part—undermixed batter creates lumpy, cracked shells; overmixed batter spreads too thin and won’t form feet.
Step 4: Pipe the Macarons
Line two baking sheets with parchment paper or silicone mats. Transfer the batter to a piping bag fitted with a round tip. Hold the bag perpendicular to the baking sheet and pipe 1.5-inch circles, spacing them about 1 inch apart. Don’t worry if there are little peaks—they’ll settle. Once all circles are piped, firmly tap the baking sheet on the counter 5-6 times to release air bubbles. Use a toothpick to pop any visible bubbles.
Step 5: Rest the Macarons
Let the piped macarons sit uncovered at room temperature for 30-60 minutes until a skin forms on top. You should be able to lightly touch the surface without any batter sticking to your finger. This creates that beautiful smooth shell. In humid weather, this may take longer.
Step 6: Bake
Preheat your oven to 300°F (150°C). Use an oven thermometer to verify the temperature. Bake one sheet at a time on the middle rack for 14-16 minutes. The macarons should not brown. They’re done when they’ve developed “feet” (the ruffled bottom edge) and don’t wobble when gently touched. If they slide on their feet, bake another 1-2 minutes.
Step 7: Cool
Let the macarons cool completely on the baking sheet, about 30 minutes. They should peel off easily when completely cool. If they stick, they needed more baking time or weren’t fully rested before baking.
Step 8: Make the Buttercream
Beat the softened butter on medium speed until creamy and light, about 2 minutes. Add the sifted powdered sugar, vanilla extract, and salt. Beat on low until combined, then increase to medium-high and beat for 3-4 minutes until light and fluffy. Add cream one tablespoon at a time until you reach your desired consistency.
Step 9: Assemble
Match up macaron shells of similar size. Pipe or spread about 1 teaspoon of buttercream onto the flat side of one shell. Gently press the matching shell on top to create a sandwich. Don’t overfill, or the filling will squish out.
Step 10: Mature
Place assembled macarons in an airtight container and refrigerate for 24 hours. This “maturing” process allows the filling to slightly soften the shells, creating that perfect texture. Bring to room temperature before serving for best flavor.
Notes
- Humidity is the enemy of macarons. Avoid making them on very humid or rainy days.
- Oven temperature varies widely between ovens. An oven thermometer is essential.
- The macaronage (folding) step is crucial—practice makes perfect.
- Colors appear lighter after baking, so make your batter slightly darker than your desired final shade.
- Macarons actually taste better after 24 hours of maturation in the refrigerator.
- All ingredients should be measured by weight for best results.
Nutrition
- Serving Size: 2 sandwich cookies
- Calories: 180
- Sugar: 20g
- Sodium: 25g
- Fat: 8g
- Saturated Fat: 3g
- Unsaturated Fat: 4.5g
- Trans Fat: 0g
- Carbohydrates: 24g
- Fiber: 1g
- Protein: 3g
- Cholesterol: 10mg
Tips & Variations
Flavor Variations:
- Chocolate Macarons – Add 2 tablespoons of unsweetened cocoa powder to the almond flour mixture and fill with chocolate ganache
- Lemon Macarons – Add lemon zest to the batter and fill with lemon curd and buttercream
- Raspberry Macarons – Color shells pink and fill with raspberry jam and white chocolate ganache
- Salted Caramel – Fill with salted caramel buttercream or caramel sauce
- Coffee Macarons – Add 1 tablespoon instant espresso powder to the almond flour mixture
- Lavender – Add food-grade dried lavender to the batter and fill with honey buttercream
- Pistachio – Replace 25g of almond flour with pistachio flour and add green coloring
- Cookies and Cream – Add crushed Oreos to vanilla buttercream
- Strawberry – Add freeze-dried strawberry powder to shells and fill with strawberry buttercream
Texture Adjustments:
- For chewier macarons, underbake by 1-2 minutes
- For crispier shells, bake an extra minute and don’t refrigerate as long
Color Customization:
- Create ombré effects by adding more color to portions of your batter
- Make marbled macarons by gently swirling two colors together
- Use natural colorings like beet powder (pink), matcha powder (green), or butterfly pea powder (blue)
Pro Chef Tips
Tip #1: Master the Macaronage
The folding technique is what separates successful macarons from failures. Use confident, deliberate strokes. Press the spatula firmly against the bowl and fold over, turning the bowl as you work. Count your strokes—most batters need 35-50 folds. Test frequently by letting the batter fall from your spatula—it should create a ribbon that disappears within 10-15 seconds.
Tip #2: Control Your Environment
Humidity is macaron enemy number one. Never attempt macarons on a rainy day or in a humid kitchen. If you live in a humid climate, use a dehumidifier in your kitchen or make macarons early in the morning when humidity is lowest. Some bakers swear by drying the shells in front of a fan to speed up skin formation.
Tip #3: Temperature Matters Everywhere
Room temperature egg whites whip to greater volume. Room temperature butter creates silkier buttercream. Properly calibrated oven temperature prevents browning and cracking. Use that oven thermometer and adjust your temperature accordingly—I found my oven runs 25°F hot, so I set it to 275°F when the recipe calls for 300°F.
Tip #4: The Tap and Rest
After piping, that aggressive tap on the counter isn’t optional—it releases air bubbles that would otherwise create cracked tops. The resting period forms a skin that allows the batter to rise evenly during baking, creating those signature feet. Be patient with this step.
Tip #5: Let Them Mature
Don’t eat your macarons fresh from the oven. After assembly, they need 24 hours in the refrigerator for the magic to happen. The filling slightly softens the shells, creating that perfect texture—crisp on the outside, soft and chewy inside. They’re even better on day two or three.
Tip #6: Freeze for Future
Unfilled shells freeze beautifully for up to 3 months. Make a big batch, freeze half, and you’ll always have impressive desserts ready to fill and serve with minimal effort.
Common Mistakes to Avoid
Mistake #1: Skipping the Sifting
Large almond flour particles create lumpy, grainy shells with rough tops. Always sift your almond flour and powdered sugar together at least twice, even if your almond flour claims to be “superfine.” This step ensures smooth, professional-looking tops.
Mistake #2: Over or Under-Mixing the Batter
This is where most beginners struggle. Undermixed batter is thick and won’t settle properly, leading to peaked tops, no feet, and cracked shells. Overmixed batter is too thin, spreads too much, creates flat cookies without feet. Learn what properly mixed batter looks like—thick lava that slowly flows and ribbons smoothly.
Mistake #3: Not Testing Your Oven
If your oven runs hot, your macarons will brown, crack, and develop hollow shells. If it runs cool, they won’t develop feet properly. An oven thermometer is a $10 investment that will save you countless failed batches. Also, bake one sheet at a time on the middle rack for even heat distribution.
Mistake #4: Rushing the Resting Period
I know it’s tempting to bake immediately, but that 30-60 minute rest is crucial. If your macarons don’t form a dry skin before baking, they’ll crack in the oven. Test by gently touching the surface—if batter sticks to your finger, they need more time. On humid days, point a fan at them to speed up the process.
Mistake #5: Opening the Oven Door
Resist the urge to check on your macarons mid-bake. Opening the oven door releases heat and steam, causing temperature fluctuations that lead to cracked, uneven shells. Set your timer and trust the process.
Mistake #6: Filling Them Too Soon
Warm shells will cause buttercream to melt and create a mess. Always let shells cool completely before filling. And don’t skip the 24-hour maturation period—that’s when your macarons transform from good to extraordinary.
Storage & Meal Prep
Room Temperature Storage:
Unfilled macaron shells can be stored in an airtight container at room temperature for up to 3 days. Place parchment paper between layers to prevent sticking. However, shells are quite delicate and can become soft in humid conditions.
Refrigerator Storage:
Filled macarons should be stored in an airtight container in the refrigerator for up to 7 days. In fact, they taste better after 24-48 hours as the filling softens the shells and flavors meld together. Arrange them in a single layer or separate layers with parchment paper. Always bring macarons to room temperature 30 minutes before serving for the best flavor and texture.
Freezer Storage:
Macarons freeze exceptionally well! You can freeze unfilled shells for up to 3 months or filled macarons for up to 1 month. To freeze shells, arrange them in a single layer in an airtight container with parchment between layers. To freeze filled macarons, do the same and ensure your container is truly airtight to prevent freezer burn. Thaw overnight in the refrigerator, still in the container, then bring to room temperature before serving.
Reheating Tips:
Never reheat macarons—they’re meant to be served at room temperature or chilled. Simply remove from the refrigerator 20-30 minutes before serving to let them come to room temperature, which brings out their optimal texture and flavor.
Make-Ahead & Freezer Notes
Macarons are actually ideal for make-ahead preparation, which makes them perfect for parties and special events:
Make-Ahead Schedule:
- 2-3 months ahead: Make and freeze unfilled shells
- 1 week ahead: Make and refrigerate filled macarons
- 2-3 days ahead: Make shells and store at room temperature (fill 1-2 days before serving)
- 1 day ahead: Assemble macarons and refrigerate (ideal timing for best texture)
Freezing Shells Only:
This is my preferred make-ahead method. Bake your macaron shells, let them cool completely, and freeze them unfilled. When you’re ready to serve, thaw them at room temperature for 30 minutes, prepare fresh filling, and assemble. This gives you maximum flexibility with flavors and ensures the freshest possible filling.
Freezing Assembled Macarons:
Fill your macarons as directed, then freeze them in an airtight container. This works beautifully for buttercream or ganache fillings (avoid freezing jam or curd fillings as they can make shells soggy). Thaw overnight in the refrigerator, then bring to room temperature before serving.
Best Reheating Method:
As mentioned above, macarons should never be reheated. Simply allow them to come to room temperature naturally. The shells should feel slightly crisp on the outside with a soft, chewy interior, while the filling should be soft and creamy.
Pro Tip for Parties:
Make several batches of shells in different colors and freeze them. When your event approaches, thaw and fill with seasonal flavors. This allows you to create impressive variety without the stress of last-minute baking.
Serving Suggestions
Macarons are incredibly versatile and can be served in numerous delightful ways:
Classic French Presentation:
Arrange macarons on a tiered dessert stand or elegant platter for afternoon tea. Serve alongside hot tea, coffee, or champagne for a sophisticated gathering.
Dessert Pairings:
- Fresh berries and whipped cream
- Vanilla or chocolate ice cream
- Crème brûlée or panna cotta
- Fresh fruit tart
- Chocolate fondue with macarons as dippers
Beverage Pairings:
- Earl Grey or jasmine tea
- French press coffee or espresso
- Champagne or prosecco
- Hot chocolate
- Dessert wines like Sauternes
- Milk (especially for kids!)
Special Occasion Ideas:
- Create a “macaron tower” (croquembouche-style) as a wedding or baby shower centerpiece
- Package in clear boxes with ribbon as party favors or gifts
- Match colors to your party theme (pink for baby showers, pastels for Easter, red and green for Christmas)
- Stack them on a cake as elegant decorations
- Create a dessert board with macarons, chocolates, fruits, and nuts
Side Dishes and Accompaniments:
While macarons are typically served as standalone desserts, they pair beautifully with:
- Light salads at brunch
- Cheese boards (the sweetness contrasts nicely with savory cheeses)
- Fresh fruit platters
- Sorbet or gelato
- Petit fours and other French pastries
FAQs Section
Q: Why did my macarons crack on top?
A: Cracking is usually caused by one of three issues: (1) oven temperature too high—use an oven thermometer; (2) insufficient resting time—the shells need to form a skin before baking; (3) air bubbles in the batter—make sure to firmly tap the baking sheet after piping to release trapped air.
Q: My macarons didn’t develop “feet.” What went wrong?
A: Feet form when the shell rises during baking. Lack of feet usually indicates undermixed batter (it was too stiff to rise properly), oven temperature too low, or insufficient resting time before baking. Make sure your batter reaches the proper lava-like consistency and that you’ve allowed adequate skin formation time.
Q: Can I make macarons without a stand mixer?
A: Yes! A powerful hand mixer works well for making French meringue. It may take slightly longer to achieve stiff peaks, and your arm will get a workout, but the results are just as good. Make sure your bowl is completely clean and grease-free for maximum meringue volume.
Q: Why are my macarons hollow inside?
A: Hollow shells typically result from oven temperature that’s too high, causing the outsides to set too quickly while the insides remain undercooked. The shells puff up rapidly, creating an air pocket, then collapse slightly as they cool. Use an oven thermometer and consider lowering your temperature by 25°F. Also, avoid overmixing the batter.
Q: How can I tell if my batter is properly mixed?
A: The batter should flow like thick lava or molten honey. When you lift your spatula, it should form a ribbon that slowly dissolves back into the batter within 10-15 seconds. You should be able to draw a figure-8 with the falling batter without the ribbon breaking. This is called the “ribbon stage” and it’s crucial for success.
Q: Can I use a different nut flour instead of almond flour?
A: While almond flour is traditional, you can experiment with other nut flours like hazelnut, pistachio, or walnut. However, these may slightly alter the texture and flavor. Make sure any substitute is ground to the same superfine consistency as almond flour, and sift it thoroughly.
Q: My macarons stuck to the parchment paper. How do I prevent this?
A: Sticking usually means the shells were underbaked. They should be completely set and easily peel off when cooled. Make sure to bake long enough—they should not wobble on their feet when gently touched. Silicone baking mats can also help prevent sticking. If using parchment, let the shells cool completely before attempting to remove them.
Q: Can I make macarons in advance for a party?
A: Absolutely! Macarons are perfect make-ahead desserts. Make and freeze unfilled shells up to 3 months ahead, or make filled macarons up to 1 week in advance and refrigerate. They actually taste better after 24-48 hours of maturation in the fridge. Just remember to bring them to room temperature before serving.
Conclusion
Congratulations—you’re now equipped with everything you need to create gorgeous, delicious French macarons right in your own kitchen! While these delicate cookies may seem intimidating at first, remember that every pastry chef started exactly where you are now. The key to macaron success is patience, precision, and practice. Don’t be discouraged if your first batch isn’t perfect; even professional bakers had to master the technique over time.
The wonderful thing about macarons is that once you’ve mastered the basic shell, a whole world of flavors, colors, and creativity opens up to you. You can customize them for any occasion, match them to any color scheme, and experiment with endless flavor combinations. From classic vanilla to adventurous lavender honey, from simple chocolate to sophisticated salted caramel—your macaron journey is just beginning.
I hope this detailed guide has demystified the macaron-making process and given you the confidence to try these beautiful cookies at home. There’s something truly special about presenting a homemade platter of colorful macarons to friends and family—the looks of amazement and the compliments never get old!
Now it’s your turn! Gather your ingredients, set aside an afternoon, and create your own batch of French macaron magic. I’d absolutely love to hear about your macaron-making adventures, see photos of your beautiful creations, and answer any questions you might have along the way. Drop a comment below sharing your experience, and don’t forget to save this recipe to your Pinterest boards so you can find it whenever the macaron mood strikes!
Happy baking, and remember—even imperfect macarons taste absolutely delicious! 🥰