The Perfect Marble Cake Recipe – Moist, Beautiful & Absolutely Delicious!
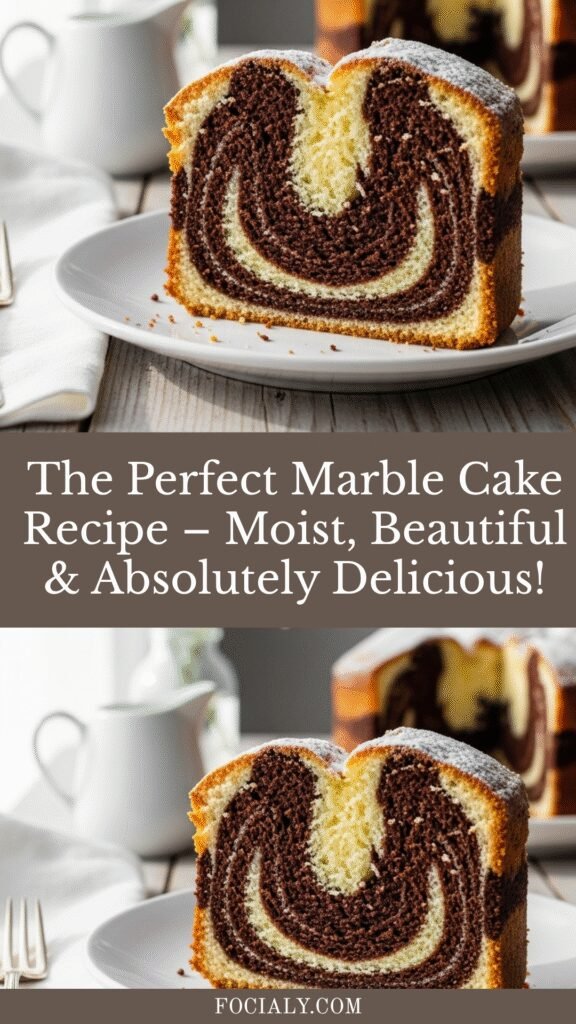
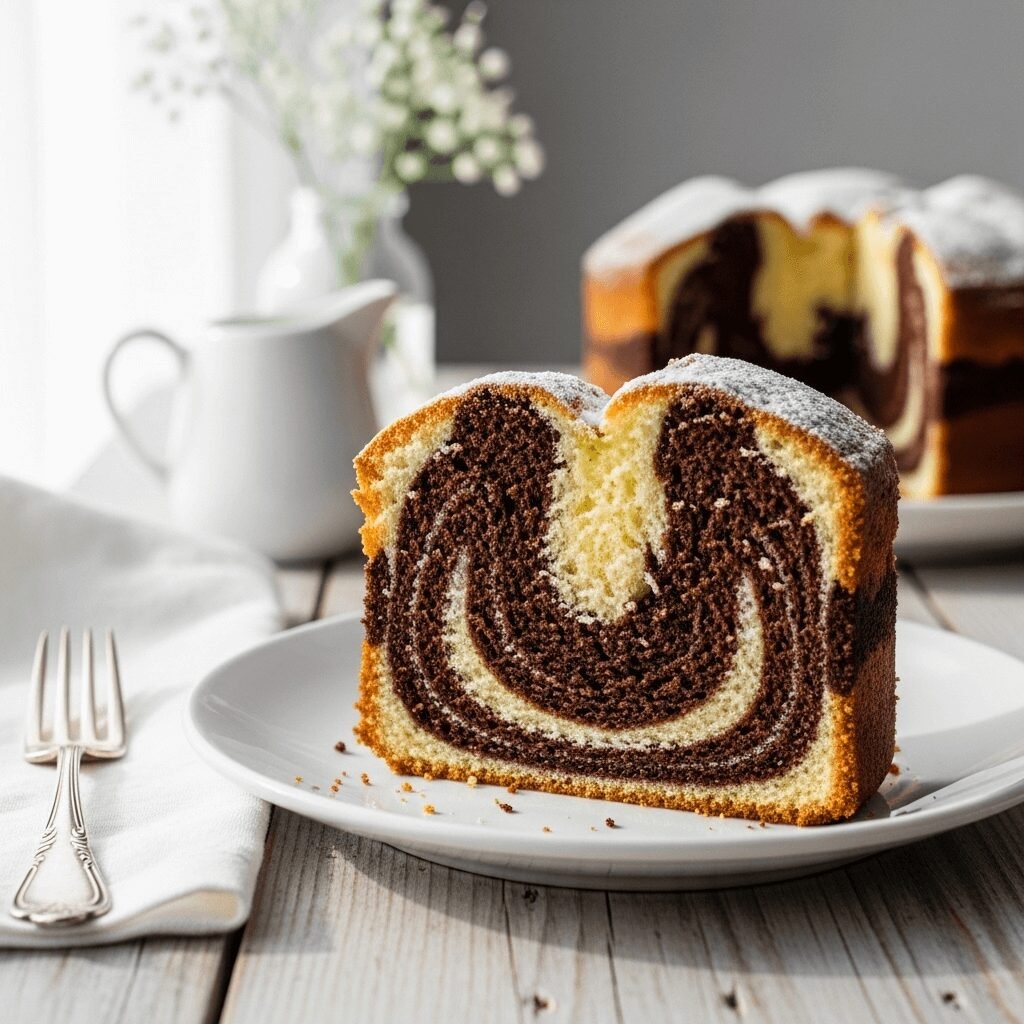
Get ready to fall in love with the most stunning dessert you’ll ever bake! This Marble Cake is a timeless classic that never goes out of style—a gorgeous swirl of vanilla and chocolate batter baked into one incredibly moist, tender cake that looks as impressive as it tastes. Every slice reveals those beautiful marbled patterns that make this cake so iconic and Instagram-worthy.
What makes marble cake so special is its versatility and universal appeal. It’s the perfect compromise when you can’t decide between chocolate and vanilla—why choose when you can have both? This cake is ideal for absolutely any occasion: birthday parties, afternoon tea, potlucks, holidays, or simply a weekend baking project with the kids. The beauty of this recipe is that while it looks fancy and complicated, it’s actually surprisingly simple. You’re essentially making one batter, dividing it, flavoring half with cocoa, and creating those gorgeous swirls.
The texture of this marble cake is what dreams are made of—soft, buttery, and incredibly moist with a fine, delicate crumb that melts in your mouth. It’s not too sweet, making it perfect for any time of day, whether you’re serving it as dessert with ice cream or enjoying a slice with your morning coffee. Trust me, once you master this recipe, it’ll become your go-to cake for every celebration!
History / Background
Marble cake has a fascinating history that spans multiple continents and centuries! The technique of marbling batters dates back to 19th century Germany and Austria, where bakers created “Marmorkuchen” (marble cake). The Germans were masters at creating visually stunning cakes, and the marble cake was considered a showpiece that demonstrated a baker’s skill and artistry.
The concept became popular during a time when cocoa powder was becoming more accessible and affordable in Europe. Before that, spices like cinnamon or molasses were sometimes used to create the contrasting dark swirls. The chocolate-vanilla combination we know and love today really took off in the mid-1800s when chocolate became more widely available.
Marble cake made its way to America with German immigrants in the 1800s, and it quickly became a beloved staple in American home baking. By the early 20th century, it was featured in countless American cookbooks and was considered an essential recipe that every home baker should master. The cake gained even more popularity in the 1950s and 60s when bundt pans became common in American kitchens—the distinctive shape showed off those beautiful marble swirls even more dramatically.
What’s particularly interesting is that marble cake has remained essentially unchanged for over a century. While baking trends come and go, this classic has stood the test of time because it’s simply perfect as it is. The visual appeal of cutting into a seemingly ordinary cake and revealing those gorgeous swirls inside never gets old. It’s like a surprise with every slice!
Today, marble cake is enjoyed worldwide with countless variations—from marble pound cakes to marble bundt cakes, marble cupcakes, and even marble cheesecakes. But the traditional loaf or layer version remains the most beloved, cherished for its simplicity, beauty, and that perfect balance of chocolate and vanilla flavors.
Why You’ll Love This Recipe
This marble cake recipe is about to become your new favorite for so many wonderful reasons! It’s one of those recipes that makes you look like a professional baker without requiring professional skills. The “wow factor” when you slice into it and reveal those gorgeous swirls is unmatched, yet the actual technique is so simple.
Here’s why this marble cake will steal your heart:
- Stunning visual appeal – Those beautiful chocolate-vanilla swirls are naturally gorgeous and photogenic
- Best of both worlds – Perfect for people who can’t choose between chocolate and vanilla
- Incredibly moist and tender – Stays fresh for days without drying out
- Easy to make – One simple batter, split and swirled—no complicated techniques required
- Kid-friendly baking project – Children love creating the marble swirls!
- Budget-friendly – Uses basic pantry staples you probably already have
- Versatile for any occasion – Works beautifully for birthdays, tea parties, or casual weekends
- No special equipment needed – Just a standard loaf pan or bundt pan
- Freezes beautifully – Make ahead for stress-free entertaining
- Crowd-pleaser guaranteed – Universally loved by kids and adults alike
- Adaptable – Easy to dress up with glaze, frosting, or serve plain
The magic of marble cake lies in its simplicity and elegance. There’s something so satisfying about creating those swirls and then cutting into the finished cake to see the beautiful pattern you’ve created. Plus, the flavor combination is absolutely timeless—the rich chocolate perfectly complements the sweet vanilla, creating a taste experience that’s comforting and familiar yet always feels special.
Ingredient Notes
Understanding your ingredients is the key to baking success! Let’s break down what goes into this beautiful marble cake and why each component matters.
Butter – Use unsalted butter at room temperature for the best texture. The butter creates that tender, melt-in-your-mouth crumb. Make sure it’s truly softened (should leave an indent when pressed gently) but not melted. Can substitute with margarine in a pinch, but butter gives superior flavor.
Granulated Sugar – Provides sweetness and helps create that light, fluffy texture when creamed with butter. Don’t substitute with powdered sugar or the texture will be different.
Eggs – Room temperature eggs are crucial! They incorporate better into the batter, creating a more uniform texture. Take them out of the fridge 30 minutes before baking, or place them in warm water for 5 minutes.
All-Purpose Flour – The foundation of our cake structure. Measure accurately by spooning into the measuring cup and leveling off—don’t pack it down. For extra tender results, you can substitute 2 tablespoons of the flour with cornstarch (cake flour substitute method).
Milk – Adds moisture and creates that tender crumb. Whole milk works best, but 2% is fine. Room temperature is important for even mixing. Can substitute with buttermilk for extra tang and moisture (reduce baking powder by ¼ teaspoon).
Vanilla Extract – Use pure vanilla extract, not imitation, for the best flavor. This is where the vanilla portion of your marble cake gets its flavor, so quality matters!
Cocoa Powder – Use unsweetened cocoa powder (not hot cocoa mix!). Dutch-processed cocoa gives a deeper, darker color, while natural cocoa is slightly more acidic. Either works beautifully.
Baking Powder – The leavening agent that helps your cake rise and creates that light, fluffy texture. Make sure it’s fresh (less than 6 months old) for best results.
Salt – Enhances all the flavors and balances the sweetness. Don’t skip it!
Hot Water or Coffee – Mixed with the cocoa to “bloom” it, which intensifies the chocolate flavor. Coffee enhances chocolate without making it taste like coffee—trust me on this! But plain hot water works perfectly fine too.
Equipment Needed
Having the right tools makes baking so much easier! Here’s what you’ll need:
- 9×5-inch loaf pan (or 10-inch bundt pan)
- Large mixing bowls (at least two)
- Electric hand mixer or stand mixer
- Measuring cups and spoons
- Rubber spatula or wooden spoon
- Whisk
- Small bowl for cocoa mixture
- Butter knife or skewer for creating swirls
- Wire cooling rack
- Parchment paper (optional but helpful)
- Toothpick or cake tester
- Sifter or fine-mesh strainer (for cocoa powder)
The Perfect Marble Cake Recipe – Moist, Beautiful & Absolutely Delicious!
This classic Marble Cake features beautiful swirls of vanilla and chocolate batter baked into one incredibly moist, tender cake. It’s easy to make, visually stunning, and absolutely delicious—the perfect dessert for any occasion!
- Prep Time: 20 minutes
- Cook Time: 55 minutes
- Total Time: 1 hour 45 minutes
- Yield: 10-12 slices 1x
- Category: Dessert
- Method: Baking
- Cuisine: American/German
- Diet: Vegetarian
Ingredients
For the Cake:
- 1 cup (2 sticks) unsalted butter, softened
- 1¾ cups granulated sugar
- 4 large eggs, room temperature
- 2¾ cups all-purpose flour
- 2½ teaspoons baking powder
- ½ teaspoon salt
- 1 cup whole milk, room temperature
- 2 teaspoons pure vanilla extract
For the Chocolate Swirl:
- 3 tablespoons unsweetened cocoa powder
- 3 tablespoons hot water (or hot coffee)
- 1 tablespoon granulated sugar
Optional Chocolate Glaze:
- 1 cup powdered sugar
- 2 tablespoons unsweetened cocoa powder
- 2-3 tablespoons milk
- ½ teaspoon vanilla extract
Instructions
Step 1: Prepare Your Pan and Oven
Preheat your oven to 350°F (175°C). Thoroughly grease a 9×5-inch loaf pan with butter or cooking spray, then dust lightly with flour (tap out excess). For extra insurance against sticking, line the bottom with parchment paper. This prep work ensures your beautiful cake releases perfectly!
Step 2: Cream Butter and Sugar
In a large mixing bowl, beat the softened butter and 1¾ cups sugar together with an electric mixer on medium-high speed for 4-5 minutes. The mixture should become light, fluffy, and pale in color. This step incorporates air into the batter, which creates that light, tender crumb, so don’t rush it!
Step 3: Add Eggs One at a Time
Reduce mixer speed to medium and add eggs one at a time, beating well after each addition (about 30 seconds per egg). Make sure each egg is fully incorporated before adding the next. The mixture should look smooth and glossy.
Step 4: Combine Dry Ingredients
In a separate bowl, whisk together the flour, baking powder, and salt. This ensures the leavening agent is evenly distributed throughout your cake.
Step 5: Alternate Adding Wet and Dry
With the mixer on low speed, add the flour mixture in three additions, alternating with the milk (begin and end with flour). The pattern is: flour, milk, flour, milk, flour. Mix just until combined after each addition—don’t overmix! Stir in the vanilla extract until just incorporated.
Step 6: Prepare the Chocolate Batter
In a small bowl, whisk together the cocoa powder, hot water (or coffee), and 1 tablespoon sugar until smooth and completely lump-free. Let it cool slightly. Transfer about ⅓ of the vanilla batter (roughly 2 cups) to another bowl. Fold the chocolate mixture into this portion until fully combined and evenly colored.
Step 7: Create the Marble Effect
Spoon alternating dollops of vanilla and chocolate batter into your prepared pan. Start with vanilla, add chocolate, then vanilla, and so on, layering them randomly throughout the pan. Once all batter is in the pan, use a butter knife or skewer to create swirls. Insert the knife all the way to the bottom and make figure-eight patterns or S-curves through the batter 5-6 times. Don’t overdo it—you want distinct swirls, not a muddy mixture!
Step 8: Bake to Perfection
Place the pan in the preheated oven and bake for 50-60 minutes (bundt pan: 45-50 minutes). The cake is done when a toothpick inserted into the center comes out clean or with just a few moist crumbs, and the top springs back when lightly touched. The top should be golden brown.
Step 9: Cool the Cake
Let the cake cool in the pan on a wire rack for 15 minutes. This cooling time allows the structure to set so it won’t fall apart. Run a knife around the edges, then carefully invert onto the wire rack. If you used parchment paper, peel it off. Let the cake cool completely before slicing or glazing.
Step 10: Optional Glaze
If using the chocolate glaze, whisk together powdered sugar, cocoa powder, milk, and vanilla until smooth. The consistency should be thick but pourable—add more milk if needed. Drizzle over the cooled cake and let set for 10 minutes before serving.
Notes
- Room temperature ingredients are essential for proper mixing and texture.
- Don’t overmix the batter after adding flour—this develops gluten and creates a tough cake.
- For more distinct swirls, don’t over-swirl the batter. Just 5-6 gentle motions with your knife is perfect.
- Every oven is different! Start checking your cake at 50 minutes to prevent overbaking.
- The cake tastes even better the next day as the flavors meld together.
- Can be made in a bundt pan, two 8-inch round pans, or as cupcakes (adjust baking time accordingly).
Nutrition
- Serving Size: 1 slice (1/12 of cake)
- Calories: 385
- Sugar: 28g
- Sodium: 195mg
- Fat: 18g
- Saturated Fat: 11g
- Unsaturated Fat: 6g
- Trans Fat: 0g
- Carbohydrates: 51g
- Fiber: 1g
- Protein: 6g
- Cholesterol: 110mg
Tips & Variations
Flavor Variations:
- Marble Pound Cake – Add an extra ½ cup butter and reduce milk to ¾ cup for a denser, richer pound cake version
- Chocolate-Orange Marble – Add 1 tablespoon orange zest to the vanilla batter and 1 teaspoon orange extract to the chocolate portion
- Mocha Marble – Add 1 tablespoon instant espresso powder to the chocolate mixture
- Marble Bundt – Use a bundt pan and add a chocolate glaze for an elegant presentation
- Strawberry Marble – Replace half the vanilla batter with strawberry puree and pink food coloring
Texture Tweaks:
- For extra moisture, replace 2 tablespoons of milk with sour cream
- Add ½ cup mini chocolate chips to the chocolate batter for extra chocolatey goodness
- Mix in ½ cup chopped nuts (walnuts or pecans) for crunch
Frosting & Topping Options:
- Dust with powdered sugar for simple elegance
- Top with cream cheese frosting for extra richness
- Drizzle with chocolate ganache for a decadent finish
- Spread with vanilla buttercream between layers if making a layer cake
- Add fresh berries and whipped cream for a lighter option
Special Dietary Modifications:
- Gluten-Free: Use 1:1 gluten-free flour blend (add ½ teaspoon xanthan gum if blend doesn’t include it)
- Dairy-Free: Substitute butter with vegan butter and use almond or oat milk
- Reduced Sugar: Reduce sugar by ¼ cup (texture will be slightly denser)
Pro Chef Tips
Master the Swirl Technique: The key to beautiful marble patterns is restraint! Many people over-swirl and end up with muddy brown cake instead of distinct swirls. Make just 5-6 figure-eight motions with your knife through the batter, going all the way to the bottom of the pan. Less is more here!
Temperature Control is Critical: Room temperature ingredients are non-negotiable for this recipe. Cold eggs and milk won’t incorporate properly, and cold butter won’t cream well. Everything should be around 70°F. Set ingredients out 45-60 minutes before baking, or warm eggs in a bowl of warm water for 5 minutes.
Cream Butter and Sugar Properly: This step creates the air pockets that make your cake light and fluffy. Beat for the full 4-5 minutes until the mixture is noticeably lighter in color and increased in volume. It should look almost white and very fluffy.
Don’t Overmix After Adding Flour: Once flour goes in, mix only until you can’t see dry flour anymore. Overmixing develops gluten strands, which create a tough, dense cake instead of that tender crumb we want.
Bloom Your Cocoa: Mixing cocoa powder with hot liquid before adding it to the batter “blooms” the cocoa, intensifying its flavor and ensuring it dissolves completely without lumps. This simple step makes a huge difference in chocolate flavor!
Use the Toothpick Test Correctly: Insert a toothpick into the thickest part of the cake (center). It should come out clean or with a few moist crumbs—not wet batter. A few crumbs are actually ideal; completely clean means the cake might be slightly overbaked.
Cool Properly: Letting the cake cool in the pan for 15 minutes allows the structure to set. Trying to remove it too early can cause it to fall apart. But don’t leave it in the pan too long or steam will make the bottom soggy!
Common Mistakes to Avoid
Mistake #1: Over-Swirling the Batter
This is the most common error! Too much swirling turns your beautiful marble cake into a uniformly brown chocolate cake. Remember: just 5-6 gentle motions with a knife is perfect. You want to see distinct vanilla and chocolate sections, not a completely blended mixture.
Mistake #2: Using Cold Ingredients
Cold butter won’t cream properly, and cold eggs and milk can cause the batter to curdle or mix unevenly. This results in a dense, heavy cake with poor texture. Always bring everything to room temperature first—it makes all the difference!
Mistake #3: Overmixing the Batter
Once you add flour, treat the batter gently! Vigorous mixing develops gluten, creating a tough, chewy cake instead of that tender, melt-in-your-mouth texture. Mix just until the flour disappears, then stop immediately.
Mistake #4: Not Preparing the Pan Properly
Nothing is more heartbreaking than a cake that sticks to the pan and falls apart! Grease thoroughly, dust with flour, and consider using parchment paper on the bottom. This extra minute of prep saves so much frustration.
Mistake #5: Opening the Oven Door Too Early
Resist the temptation to check on your cake before the 45-minute mark! Opening the door causes temperature fluctuations that can make your cake sink in the middle. Trust the process and wait until near the end of baking time.
Storage & Meal Prep
Marble cake stores beautifully, actually improving in flavor and moisture over the first few days!
Room Temperature Storage: Once completely cooled, wrap the cake tightly in plastic wrap or store in an airtight container at room temperature for up to 4 days. The cake stays incredibly moist this way. Keep it away from direct sunlight or heat sources.
Refrigerator Storage: If you’ve added a cream cheese frosting or if your kitchen is very warm, refrigerate the wrapped cake for up to 1 week. Bring to room temperature before serving (about 30 minutes on the counter) for the best flavor and texture.
Individual Slices: Cut the cake into slices, wrap each piece individually in plastic wrap, and store in an airtight container. This is perfect for grab-and-go snacks or lunch boxes! Refrigerated slices stay fresh for up to a week.
Maintaining Moisture: If the cut end of your cake is exposed, press a piece of plastic wrap directly against the cut surface before storing to prevent it from drying out.
Make-Ahead & Freezer Notes
This marble cake is an excellent make-ahead dessert, perfect for stress-free entertaining!
Make-Ahead Timeline:
- 2 Days Before: Bake the cake, cool completely, wrap tightly, and store at room temperature. The flavor actually improves after a day!
- Day Of: Add any glaze or frosting 2-3 hours before serving.
Freezing Whole Cake: Once completely cooled, wrap the cake tightly in plastic wrap, then wrap again in aluminum foil (double wrapping prevents freezer burn). Label with the date and freeze for up to 3 months. Thaw in the refrigerator overnight, then bring to room temperature before unwrapping. This prevents condensation from making the cake soggy.
Freezing Slices: This is my favorite method! Slice the cake, wrap each piece individually in plastic wrap, then place all wrapped slices in a freezer-safe zip-top bag. Remove as much air as possible. You can pull out individual slices whenever you want a treat! Thaw at room temperature for 1-2 hours or microwave for 20-30 seconds.
Freezing in Pan Form: You can freeze the baked cake right in the loaf pan! Wrap the entire pan (with cake inside) in plastic wrap and foil. When ready to use, thaw in the refrigerator overnight, then remove from pan.
Best Reheating Method: While marble cake is delicious at room temperature, you can warm individual slices in the microwave for 10-15 seconds for that fresh-from-the-oven experience. Don’t overheat or it will dry out!
Freezing Batter (Not Recommended): Unlike some recipes, I don’t recommend freezing the unbaked batter as the leavening agents can lose effectiveness and you won’t get the same rise and texture.
Serving Suggestions
Marble cake is wonderfully versatile and can be dressed up or down depending on the occasion!
Beverages:
- Hot coffee or espresso (the classic pairing!)
- Cold milk (perfect for kids and nostalgic adults)
- Hot tea—Earl Grey or English Breakfast work beautifully
- Hot chocolate for double chocolate indulgence
- Dessert wine like Moscato or Port
Accompaniments:
- Vanilla ice cream or gelato
- Fresh whipped cream
- Berries—strawberries, raspberries, or blueberries
- Chocolate sauce or caramel drizzle
- Vanilla custard or crème anglaise
- Mascarpone cream
Occasion Ideas:
- Birthday parties (works for all ages!)
- Afternoon tea or coffee with friends
- Bake sales and potlucks
- Weekend breakfast or brunch
- After-school snacks
- Holiday gatherings
- Just because it’s Tuesday!
Plating Suggestions:
- Dust individual slices with powdered sugar and add fresh mint
- Serve warm with a scoop of vanilla ice cream melting on top
- Layer with whipped cream and berries for a trifle-style dessert
- Cut into cubes for elegant petit fours
- Toast slices in butter for a decadent breakfast treat
Making it Extra Special: For a truly impressive presentation, top each slice with a dollop of whipped cream, a few fresh raspberries, a mint sprig, and a light dusting of cocoa powder. Serve on white plates for maximum contrast and visual impact!
FAQs Section
Q: Why is my marble cake dense instead of fluffy?
A: The most common causes are overmixing the batter after adding flour (which develops too much gluten), using cold ingredients (which don’t incorporate properly), or expired baking powder. Make sure all ingredients are room temperature, mix gently after adding flour, and check that your baking powder is fresh and bubbly when mixed with hot water.
Q: Can I make this marble cake in a different pan?
A: Absolutely! This recipe works in a 10-inch bundt pan (bake 45-50 minutes), two 8-inch round pans for a layer cake (bake 30-35 minutes), or 24 cupcakes (bake 18-22 minutes). Just adjust the baking time accordingly and use the toothpick test to check doneness.
Q: My swirls disappeared—what went wrong?
A: This usually happens from over-swirling the batter. Remember, less is more! Make just 5-6 gentle swirling motions with your knife. Also, make sure your chocolate batter is thick enough—if it’s too thin, it will blend completely with the vanilla batter during baking.
Q: Can I use cocoa powder mixed into the batter instead of the hot water method?
A: You can, but blooming the cocoa in hot liquid first intensifies the chocolate flavor and ensures it’s completely lump-free. If you skip this step, sift the cocoa powder very well and expect a slightly less pronounced chocolate flavor.
Q: Why did my cake sink in the middle?
A: Common causes include opening the oven door too early, underbaking (test with a toothpick), overmixing the batter (which creates too much air that collapses), or your oven temperature being too high (invest in an oven thermometer). Also, make sure your baking powder is fresh!
Q: How do I get clean slices without the cake crumbling?
A: Use a long, sharp serrated knife and wipe it clean between each slice. Let the cake cool completely before cutting—warm cake always crumbles more. For ultra-clean slices, chill the cake for 20 minutes before cutting, and use a gentle sawing motion rather than pressing straight down.
Q: Can I make this without eggs for a vegan version?
A: Yes, but the texture will be different. Replace each egg with a “flax egg” (1 tablespoon ground flaxseed + 3 tablespoons water, let sit 5 minutes) or use a commercial egg replacer. Also substitute vegan butter and plant-based milk. The cake will be slightly denser but still delicious!
Conclusion
There you have it—everything you need to create the most beautiful, delicious marble cake that’ll have everyone asking for seconds and the recipe! This classic dessert is one of those timeless recipes that never goes out of style, and now you have all the tips, tricks, and techniques to make it absolutely perfect every time.
Whether you’re baking this gorgeous cake for a special celebration, bringing it to a potluck, making it for an afternoon tea, or simply treating yourself to some weekend baking therapy, this marble cake delivers on every level. The stunning swirls make every slice a work of art, and that perfect balance of vanilla and chocolate satisfies every craving.
I truly hope you love this marble cake recipe as much as my family and I do! There’s something so magical about slicing into that first piece and seeing those beautiful swirls you created. It’s baking satisfaction at its finest!
I’d absolutely love to see your marble cake creations! When you bake this beauty, snap a photo and tag me—I get so excited seeing your gorgeous cakes and hearing about how they turned out. And if you have any questions while you’re baking, drop them in the comments below. Happy baking, and enjoy every delicious, beautiful slice!