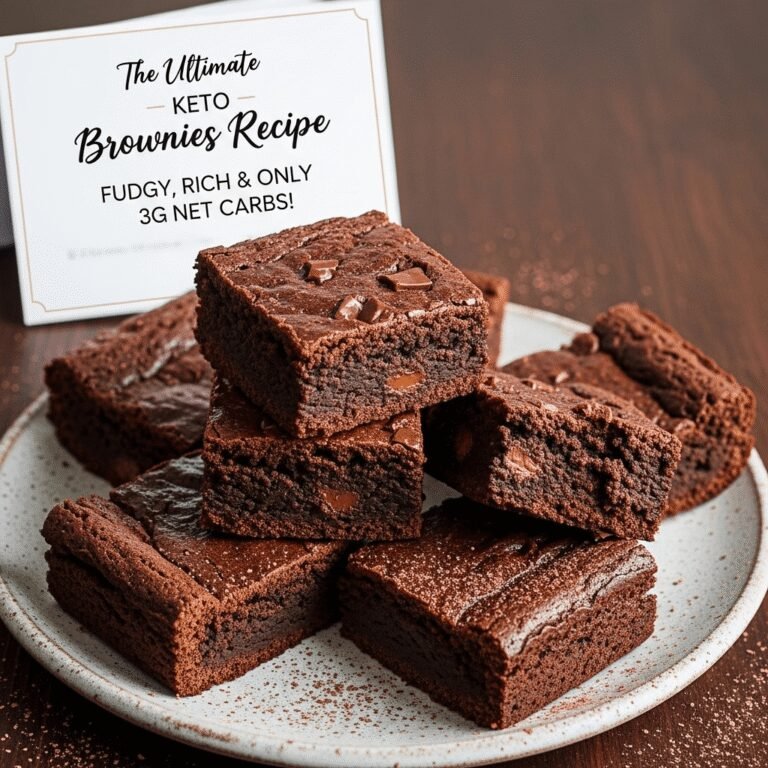
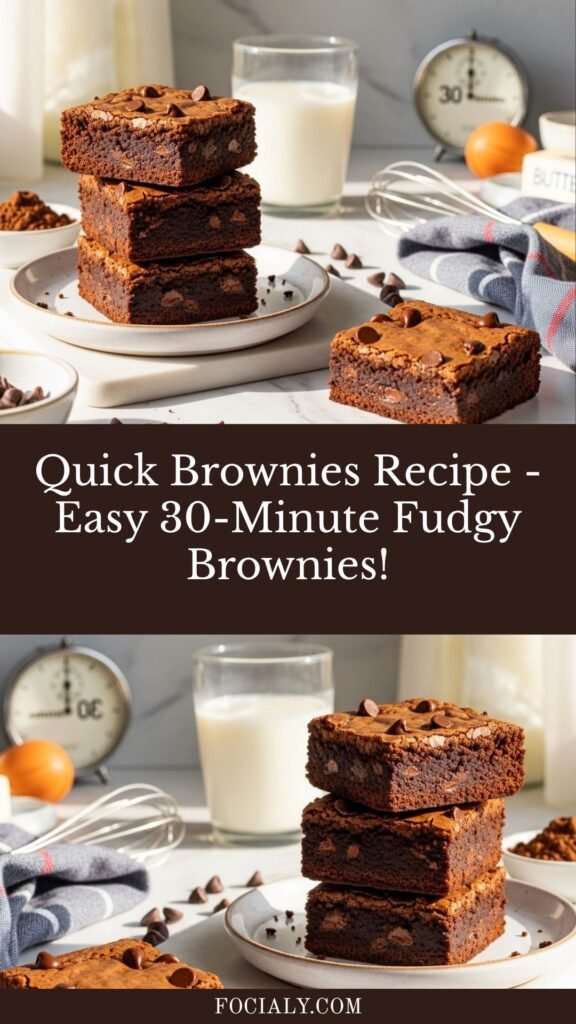
Quick Brownies Recipe – Easy 30-Minute Fudgy Brownies!
Get ready to whip up the most amazing quick brownies recipe that delivers rich, fudgy, chocolatey perfection in just 30 minutes from start to finish! These incredible brownies are made from scratch with simple pantry staples, require just one bowl, and taste infinitely better than any boxed mix. Whether you need a last-minute dessert for unexpected guests, want to satisfy an urgent chocolate craving, or simply love homemade treats without the fuss, these easy homemade brownies are about to become your go-to recipe.
What makes these 30-minute brownies so spectacular? They deliver that perfect fudgy texture with crackly tops, intense chocolate flavor, and that melt-in-your-mouth quality that makes brownies irresistible – all without any waiting, chilling, or complicated steps. These brownies are perfect for busy weeknights, bake sales, potlucks, kids’ lunchboxes, or anytime you need a crowd-pleasing dessert fast. Plus, they’re so simple that kids can help make them, making this a wonderful family baking project that doesn’t take all afternoon!
History / Background
Brownies are a quintessentially American dessert with a fascinating, somewhat mysterious origin story that has been debated by food historians for over a century.
The exact invention of brownies is unclear, with several competing origin stories. The most widely accepted version credits the Palmer House Hotel in Chicago, where brownie-like desserts were created for the 1893 World’s Columbian Exposition. Bertha Palmer, a prominent Chicago socialite, requested a dessert for ladies attending the fair that would be smaller than a cake but more elegant than cookies. The hotel’s pastry chef created a dense chocolate bar with walnuts and an apricot glaze – a precursor to modern brownies.
Another popular origin story credits a housewife in Bangor, Maine, who supposedly forgot to add baking powder to her chocolate cake batter in 1905, accidentally creating the first brownie. While charming, this story is less documented than the Palmer House tale.
The name “brownie” first appeared in print in the 1896 Boston Cooking-School Cook Book by Fannie Farmer, though that recipe was for molasses cookies, not the chocolate treat we know today. The first true chocolate brownie recipe appeared in the 1906 edition of the same cookbook, and chocolate brownies quickly gained popularity across America.
What made brownies particularly appealing was their simplicity and versatility. Unlike layered cakes that required frosting expertise or delicate cookies that needed precise timing, brownies were forgiving, required minimal equipment, and delivered rich chocolate satisfaction every time. They became a staple of American home baking throughout the 20th century.
The concept of quick brownies or easy brownies from scratch gained prominence in the mid-20th century as American home cooking increasingly valued convenience. While boxed brownie mixes were introduced in the 1950s and became popular, many home bakers discovered that making brownies from scratch was actually just as quick and simple – with far superior taste and texture.
Today, the quick brownies recipe represents the best of American baking: unpretentious, accessible, reliably delicious, and fast enough to satisfy even the most impatient chocolate cravings. These brownies prove that homemade doesn’t have to mean time-consuming or complicated.
Why You’ll Love This Recipe
These fast homemade brownies are absolutely phenomenal, and once you make them, you’ll never reach for a boxed mix again!
Here’s why this recipe will become your favorite:
- Ready in just 30 minutes – From ingredients to oven to cooling, done in half an hour
- One-bowl simplicity – Minimal dishes and easy cleanup
- No mixer required – Just a whisk and a bowl, perfect for spontaneous baking
- Perfectly fudgy texture – Dense, moist, and intensely chocolatey
- Better than boxed mix – Superior taste with simple ingredients
- Pantry staples only – No specialty ingredients needed
- Kid-friendly baking – Simple enough for children to help
- Budget-friendly – Costs less than buying a mix
- Customizable – Easy to add your favorite mix-ins
- Perfect every time – Foolproof recipe that never fails
- Great for any occasion – Weeknight desserts to special celebrations
- Freezer-friendly – Make ahead and freeze for future cravings
Whether you’re a busy parent, a college student, or anyone who wants delicious homemade brownies without spending hours in the kitchen, this recipe is pure magic!
Ingredient Notes
Let’s break down the simple ingredients that create these simple brownies from scratch:
Unsalted Butter – Provides rich flavor and creates fudgy texture. Use melted butter for easiest mixing. Substitution: For dairy-free, use melted coconut oil or vegan butter (flavor will be slightly different).
Granulated Sugar – Sweetens and helps create that signature crackly top. Essential for proper texture. Substitution: Can use part white, part brown sugar for deeper flavor (up to ½ cup brown sugar).
Eggs – Bind ingredients and provide structure. Use large eggs at room temperature if possible. Substitution: For vegan brownies, try flax eggs (1 tablespoon ground flaxseed + 3 tablespoons water per egg, let sit 5 minutes), though texture will differ.
Vanilla Extract – Enhances chocolate flavor. Use pure vanilla extract, not imitation. Substitution: Vanilla bean paste adds lovely specks; almond extract creates interesting depth.
All-Purpose Flour – Creates structure. Don’t use too much or brownies become cakey. Substitution: For gluten-free, use 1:1 gluten-free baking flour blend.
Unsweetened Cocoa Powder – The chocolate star! Use good quality cocoa for best flavor. Dutch-process creates darker, richer flavor; natural cocoa is slightly more acidic. Substitution: Cannot substitute with hot chocolate mix (contains sugar and milk powder).
Salt – Essential! Enhances chocolate flavor and balances sweetness. Substitution: Can use flaky sea salt for finishing to add extra dimension.
Baking Powder – Optional, creates slightly lighter texture. Can omit for denser brownies. Substitution: Don’t substitute with baking soda.
Chocolate Chips (optional) – Adds pockets of melted chocolate throughout. Substitution: Chopped chocolate bars, white chocolate chips, peanut butter chips, or nuts all work beautifully.
Equipment Needed
You’ll need minimal equipment for these brownies!
Essential:
- 8×8-inch square baking pan (or 9×9-inch for thinner brownies)
- Large mixing bowl (for one-bowl mixing)
- Whisk (no mixer needed!)
- Rubber spatula (for scraping and spreading)
- Measuring cups and spoons (for accuracy)
- Parchment paper (for easy removal)
- Toothpick (for testing doneness)
- Wire cooling rack (for cooling)
Optional but helpful:
- Kitchen scale (for most precise measuring)
- Offset spatula (for spreading batter evenly)
- Microwave (for melting butter quickly)
Quick Brownies Recipe
Quick and easy homemade brownies ready in just 30 minutes! These fudgy, chocolatey brownies are made from scratch in one bowl with simple pantry ingredients. No mixer required – just mix, bake, and enjoy!
- Prep Time: 10 minutes
- Cook Time: 20 minutes
- Total Time: 30 minutes
- Yield: 16 brownies 1x
- Category: Dessert
- Method: Baking
- Cuisine: American
- Diet: Vegetarian
Ingredients
For the Brownies:
- ½ cup (115g) unsalted butter, melted
- 1 cup (200g) granulated sugar
- 2 large eggs, room temperature
- 1 teaspoon vanilla extract
- ⅓ cup (40g) unsweetened cocoa powder
- ½ cup (60g) all-purpose flour
- ¼ teaspoon salt
- ¼ teaspoon baking powder (optional, for slightly lighter texture)
- ½ cup (85g) chocolate chips (optional but recommended)
Optional Toppings:
- Extra chocolate chips
- Flaky sea salt
- Powdered sugar for dusting
Instructions
Step 1: Preheat and Prepare Pan
Preheat oven to 350°F (175°C). Line an 8×8-inch square baking pan with parchment paper, leaving overhang on two sides for easy removal. Lightly grease the parchment with butter or cooking spray. Set aside.
Step 2: Melt Butter and Mix with Sugar
In a large mixing bowl, combine melted butter and granulated sugar. Whisk together vigorously for about 30 seconds until well combined and smooth. The mixture should look glossy.
Step 3: Add Eggs and Vanilla
Add eggs and vanilla extract to the butter-sugar mixture. Whisk energetically for about 1 minute until the mixture becomes thick, smooth, and slightly lighter in color. This step incorporates air and creates that nice crackly top!
Step 4: Add Dry Ingredients
Add cocoa powder, flour, salt, and baking powder (if using) directly to the wet ingredients. Using a rubber spatula or wooden spoon, fold and stir just until no dry streaks remain. Don’t overmix! The batter should be thick, smooth, and glossy. If using chocolate chips, fold them in now, reserving a few for topping if desired.
Step 5: Pour into Pan
Pour batter into prepared pan, spreading evenly with a spatula to reach all corners. Tap the pan gently on the counter 2-3 times to release any air bubbles. If desired, sprinkle a few extra chocolate chips on top.
Step 6: Bake
Bake for 20-25 minutes. Brownies are done when the edges look set and the center has just a slight jiggle. A toothpick inserted in the center should come out with a few moist crumbs – not wet batter, but definitely not clean. Don’t overbake! For 8×8 pan, start checking at 20 minutes. For 9×9 pan (thinner brownies), check at 18 minutes.
Step 7: Cool
Remove from oven and let cool in the pan on a wire rack for at least 15-20 minutes. The brownies will continue to set as they cool. For cleanest cuts, cool completely (about 45 minutes to 1 hour) before cutting.
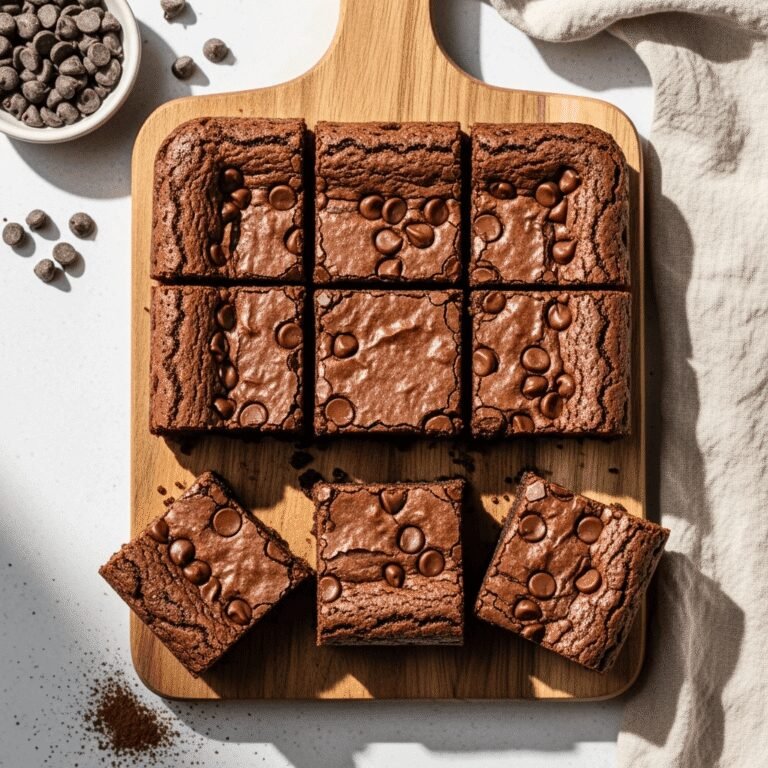
Step 8: Cut and Serve
Use the parchment overhang to lift brownies out of the pan. Place on cutting board and cut into 16 squares with a sharp knife, wiping blade clean between cuts. Serve and enjoy!
Notes
- Don’t overbake: Brownies should look slightly underdone in center when removed. They firm up as they cool.
- Room temperature eggs: They incorporate better, but cold eggs work too.
- One bowl wonder: Mix everything in the same bowl for easy cleanup.
- Melting butter: Microwave in 30-second intervals or melt on stovetop.
- Pan size: 8×8 creates thick brownies, 9×9 creates thinner ones. Adjust time accordingly.
- Make them extra fudgy: Use ½ cup flour for ultra-fudgy texture.
- Add-ins: Fold in nuts, candy pieces, or different chips!
Nutrition
- Serving Size: 1 brownie (1/16 of recipe)
- Calories: 135
- Sugar: 14g
- Sodium: 50mg
- Fat: 7g
- Saturated Fat: 4g
- Unsaturated Fat: 2g
- Trans Fat: 0g
- Carbohydrates: 17g
- Fiber: 1g
- Protein: 2g
- Cholesterol: 35mg
Tips & Variations
The beauty of quick brownies is how wonderfully customizable they are!
Double Chocolate Brownies: Fold in 1 cup of chocolate chips for extra chocolate pockets throughout.
Nutty Brownies: Add ½ cup chopped walnuts, pecans, or almonds for crunch and flavor.
Peanut Butter Swirl: Drop spoonfuls of peanut butter on top and swirl with a knife before baking.
Mint Chocolate Brownies: Add ½ teaspoon peppermint extract and fold in chopped Andes mints.
Espresso Brownies: Add 1 teaspoon instant espresso powder to intensify chocolate flavor.
S’mores Brownies: Top with mini marshmallows and crushed graham crackers during last 5 minutes of baking.
Salted Caramel Brownies: Swirl caramel sauce into batter and sprinkle with flaky sea salt.
White Chocolate Raspberry: Fold in white chocolate chips and fresh raspberries.
Brown Butter Brownies: Brown the butter first for nutty, caramelized flavor (cool before using).
Vegan Quick Brownies: Use coconut oil, flax eggs, and dairy-free chocolate chips.
Gluten-Free: Use 1:1 gluten-free flour blend. Results are nearly identical!
Healthier Version: Replace half the butter with unsweetened applesauce (texture will be different but still good).
Pro Chef Tips
Want bakery-quality brownies? Here are professional secrets:
Whisk vigorously when adding eggs. This step is crucial! Beating eggs and sugar together for a full minute incorporates air, which creates that gorgeous shiny, crackly top that makes brownies so appealing. Don’t skip or rush this step.
Use high-quality cocoa powder. Since cocoa is the primary chocolate flavor source, quality matters enormously. Ghirardelli, Valrhona, or Guittard cocoa powders create richer, more complex brownies than generic store brands.
Don’t overmix after adding flour. Once you add flour, stir just until combined. Overmixing develops gluten, creating tough, cakey brownies instead of tender, fudgy ones. Some small lumps are fine – they’ll disappear during baking.
Underbake slightly for perfect texture. The single most important tip! Brownies should look slightly underdone when you remove them from the oven. The center should jiggle just slightly, and a toothpick should have moist crumbs, not wet batter but not clean either. They continue cooking from residual heat as they cool.
Line your pan with parchment “handles.” Cut parchment to fit the bottom with 2-inch overhang on two opposite sides. This creates handles for lifting the entire brownie slab out, making cutting infinitely easier and preventing sticking.
Let them cool before cutting. I know it’s tempting to dig in immediately, but brownies need at least 15-20 minutes to set properly. For the absolute cleanest cuts, wait until completely cool (45 minutes to 1 hour). Patience pays off!
Warm your knife for clean cuts. Run your knife under hot water, wipe it dry, then cut. Clean and warm the knife between each cut for perfect, professional-looking squares.
Add a pinch of instant espresso. Even ½ teaspoon of instant espresso powder or coffee enhances chocolate flavor dramatically without making brownies taste like coffee. This is a professional baker’s secret!
Use room temperature ingredients. While not absolutely necessary for this quick recipe, room temperature eggs incorporate more smoothly and create better texture.
Don’t skip the salt. Salt enhances and balances the chocolate flavor. You can even sprinkle a tiny bit of flaky sea salt on top before baking for that trendy sweet-salty combination.
Common Mistakes to Avoid
Even simple recipes can go wrong. Here are pitfalls to watch for:
Overbaking the brownies: This is mistake #1! Overbaked brownies are dry, crumbly, and cakey instead of fudgy and moist. Remember, brownies continue cooking after you remove them from the oven due to residual heat. Pull them when they still look slightly underdone in the center with moist crumbs on the toothpick. Better slightly underbaked than overbaked!
Overmixing after adding flour: Once flour hits the batter, mix ONLY until just combined. Aggressive stirring or prolonged mixing develops gluten, creating tough, dense brownies. Use a gentle folding motion and stop as soon as no dry flour streaks remain.
Using cold eggs in melted butter: If your butter is very hot and eggs are refrigerator-cold, the temperature shock can cause the eggs to partially cook or the mixture to curdle. Let melted butter cool for 2-3 minutes, or let eggs sit at room temperature for 10 minutes before using.
Not greasing the parchment paper: Even with parchment, these fudgy brownies can stick if you don’t lightly grease the paper. A quick spray of cooking spray or light butter rub prevents frustration when removing brownies.
Cutting brownies too soon: Warm brownies are delicious but they’re too soft to cut cleanly. They’ll crumble and fall apart instead of creating neat squares. Wait at least 15-20 minutes for them to set, or refrigerate for 30 minutes if you’re in a rush.
Measuring flour incorrectly: Scooping flour directly from the bag packs it down, and you’ll end up with too much flour, creating dry, cakey brownies. Always spoon flour into your measuring cup and level it with a knife, or better yet, weigh it (60g per ½ cup).
Storage & Meal Prep
Quick brownies store beautifully!
Room Temperature Storage: Store brownies in an airtight container at room temperature for up to 4 days. Layer parchment paper between stacks to prevent sticking. They stay moist and fudgy naturally!
Refrigerator Storage: For longer storage, refrigerate in airtight container for up to 1 week. Let brownies come to room temperature 15-20 minutes before eating for best texture, or enjoy them cold (some people love cold fudgy brownies!).
Individual Wrapping: Wrap individual brownies in plastic wrap or wax paper, then store in container or bag. Perfect for lunchboxes, grab-and-go snacks, or portion control!
Keeping Brownies Fresh: The key is preventing air exposure. Always store in airtight container or wrap tightly with plastic wrap. Brownies dry out quickly when exposed to air.
Best Storage Container: Use a container with a tight-fitting lid, or cover the pan tightly with plastic wrap or aluminum foil.
Make-Ahead & Freezer Notes
These brownies are incredibly freezer-friendly!
Freezing Whole Pan: Cool brownies completely, wrap entire uncut pan tightly in two layers of plastic wrap, then aluminum foil. Freeze up to 3 months. Thaw overnight at room temperature, still wrapped. Cut and serve!
Freezing Individual Brownies: Cut into squares, wrap each individually in plastic wrap, place all wrapped brownies in freezer bag or container. Freeze up to 3 months. Thaw at room temperature for 30-45 minutes, or microwave for 15-20 seconds for warm brownie experience.
Flash-Freezing for Best Results: Arrange cut brownies on baking sheet, freeze until solid (1-2 hours), then transfer to freezer bags. This prevents them from sticking together and preserves shape.
Make-Ahead Strategy: These brownies are so quick that there’s rarely a need to make them far ahead, but you can bake up to 2 days before serving. Store covered at room temperature.
Reheating Frozen Brownies: Microwave individual frozen brownies for 20-30 seconds for fresh-from-the-oven warmth. For whole pan, thaw completely, then warm in 300°F oven for 10 minutes if desired (though they’re delicious at room temperature).
Emergency Dessert Stash: Keep individually wrapped brownies in the freezer for unexpected guests or sudden chocolate cravings. They thaw quickly and taste freshly baked!
Serving Suggestions
Quick brownies are delicious alone but here are wonderful serving ideas:
Classic Style: Serve at room temperature with a glass of cold milk – the perfect combination!
À La Mode: Top warm brownies with vanilla ice cream, hot fudge sauce, and whipped cream for ultimate indulgence.
Elegant Plating: Dust with powdered sugar, add a scoop of ice cream, drizzle with chocolate or caramel sauce, garnish with fresh berries.
Brownie Sundae Bar: Set out brownies with various ice cream flavors, sauces, whipped cream, nuts, sprinkles, and cherries. Let everyone build their own creation!
With Coffee or Tea: Serve alongside afternoon coffee or tea for a sophisticated treat.
Birthday Brownies: Top with candles and serve instead of cake for casual birthday celebrations.
Perfect Accompaniments:
- Vanilla ice cream or gelato
- Coffee ice cream
- Fresh whipped cream
- Chocolate sauce or hot fudge
- Caramel sauce
- Fresh berries (strawberries, raspberries)
- Chopped nuts
- Whipped cream
- Sea salt
Beverage Pairings:
- Cold milk (classic!)
- Hot coffee or espresso
- Hot chocolate
- Iced coffee
- Tea
Occasion Ideas:
- After-school snacks
- Lunchbox treats
- Potluck desserts
- Bake sales
- Movie nights
- Casual dinners
- Emergency desserts
- Last-minute parties
FAQs Section
Why are these brownies so quick to make?
This recipe uses melted butter (no creaming required), simple one-bowl mixing, and doesn’t require any chilling or resting time. Everything comes together in about 10 minutes of active prep, then they bake for just 20-25 minutes!
Can I make these without eggs?
Yes! For vegan brownies, use flax eggs (1 tablespoon ground flaxseed + 3 tablespoons water per egg, let sit 5 minutes before using). The texture will be slightly different – a bit denser and less fluffy – but still delicious.
Why are my brownies cakey instead of fudgy?
Usually from overbaking or using too much flour. Make sure you’re measuring flour correctly (spoon and level, don’t scoop), and pull brownies from the oven when the center still looks slightly underdone. Also, you can reduce flour to a scant ½ cup for extra-fudgy texture.
Can I use melted chocolate instead of cocoa powder?
This recipe is specifically designed for cocoa powder. If you want to use melted chocolate, you’d need a different recipe with adjusted proportions of fat, sugar, and flour.
How do I know when brownies are done?
The edges should look set and possibly pulling away slightly from the pan. The center should have just a slight jiggle when you gently shake the pan. A toothpick inserted near the center (not dead center) should come out with moist crumbs – not wet batter, but not completely clean.
Can I double this recipe?
Absolutely! Double all ingredients and bake in a 9×13-inch pan for 25-30 minutes. Start checking at 25 minutes. This makes about 24 brownies.
Why do my brownies stick to the pan?
Always line your pan with parchment paper and lightly grease the parchment. Let brownies cool for at least 15-20 minutes before attempting to remove them – they need time to set. If they still stick, the oven may have been too hot or they may have overbaked slightly.
Conclusion
And there you have it – everything you need to make the most incredible quick brownies that prove homemade doesn’t have to be time-consuming! These fudgy, chocolatey treats come together faster than running to the store for a boxed mix, taste infinitely better, and use simple ingredients you probably already have in your pantry.
Whether you’re a busy parent looking for fast desserts, a student studying late and craving chocolate, or simply someone who believes brownies should be easy and delicious, this 30-minute brownies recipe delivers pure magic without the wait. The best part? You’ll feel accomplished making something from scratch that your whole family will devour!
I’d love to hear about your quick brownie adventures! Did you add any fun mix-ins? How fast did they disappear? Did anyone believe you made them from scratch in just 30 minutes? Drop a comment below and share your experience – I read every one and love connecting with fellow chocolate lovers! If this recipe saved your dessert emergency (or just satisfied your brownie craving), please save it to your Pinterest boards and share it with friends who need easy homemade treats in their lives!
Now grab that cocoa powder and preheat your oven – the fastest, most delicious brownies of your life are just 30 minutes away! Happy baking!