
5-Minute No-Bake Chocolate Mug Cake – The Ultimate Quick Dessert Recipe!
Craving something sweet but don’t want to wait hours for a traditional cake to bake? Enter the magical world of the 5-Minute No-Bake Chocolate Mug Cake – your new best friend when dessert emergencies strike! This quick dessert recipe is exactly what it sounds like: a rich, decadent, chocolate cake that comes together in a single mug, requires zero baking, and is ready to devour in just five minutes flat.
Perfect for late-night sweet tooth attacks, unexpected guests, or when you simply want to treat yourself without making a mess of your entire kitchen, this no-bake mug cake delivers all the satisfaction of a traditional dessert with a fraction of the effort. It’s incredibly versatile too – serve it as a quick weeknight treat, whip it up for a solo indulgence during your favorite Netflix binge, or make multiple mugs for an impromptu dessert party with friends. The best part? You probably already have everything you need sitting in your pantry right now.
This recipe has become a viral sensation on Pinterest and for good reason. It’s foolproof, endlessly customizable, and produces consistent results every single time. Whether you’re a complete beginner in the kitchen or a seasoned home baker looking for convenience, this quick dessert recipe will quickly become your go-to when chocolate cravings hit.
History / Background
The concept of mug cakes exploded onto the culinary scene in the early 2000s with the rise of microwave cooking and single-serve convenience culture. However, this no-bake version puts an innovative twist on the traditional microwaved mug cake by eliminating cooking altogether, making it even faster and more accessible.
The evolution of quick dessert recipes actually has deep roots in American home cooking. During the post-World War II era, convenience cooking became hugely popular as women entered the workforce in greater numbers and families sought faster meal solutions. The 1950s saw the rise of “dump cakes,” no-bake cheesecakes, and refrigerator desserts that required minimal effort but maximum flavor.
Fast forward to the digital age, and the mug cake phenomenon took Pinterest and food blogs by storm around 2010. Home cooks were looking for instant gratification desserts that didn’t require preheating ovens, dirtying multiple bowls, or waiting for something to cool. The traditional microwave mug cake was revolutionary, but it still had its challenges – overcooked edges, rubbery textures, and uneven heating.
This no-bake chocolate mug cake takes the concept even further by using a clever combination of instant pudding mix, whipped cream, and cream cheese to create a mousse-like texture that’s incredibly rich and satisfying without any cooking required. It’s a beautiful marriage of old-school no-bake dessert techniques with modern single-serve convenience, creating something truly special that speaks to today’s busy lifestyles.
The recipe has particularly resonated with college students, busy parents, and anyone living in small spaces without full kitchen access. It’s become a staple in dorm rooms, office break rooms, and tiny apartments across America, proving that you don’t need fancy equipment or hours of free time to enjoy homemade dessert.
Why You’ll Love This Recipe
This no-bake chocolate mug cake isn’t just another dessert recipe – it’s a game-changer for anyone who loves chocolate but doesn’t love spending hours in the kitchen. Let me tell you why this quick dessert recipe is about to become your new obsession.
Imagine having a rich, creamy, restaurant-quality chocolate dessert ready in less time than it takes to order takeout. That’s the magic we’re working with here. This recipe delivers pure chocolate bliss with minimal effort, and the texture is absolutely divine – think somewhere between chocolate mousse, cheesecake, and the creamiest pudding you’ve ever tasted.
Here’s why you’ll absolutely love making this:
- Lightning-fast preparation – Seriously, 5 minutes from start to finish, with zero cooking required
- One-bowl (or should we say one-mug?) wonder – Minimal cleanup means more time enjoying your dessert
- Perfect portion control – Single-serve format means no temptation to overindulge (or make multiple if you want to!)
- Budget-friendly ingredients – Uses simple pantry staples that won’t break the bank
- Foolproof method – Literally impossible to mess up; no baking skills required
- Endlessly customizable – Add your favorite toppings, mix-ins, or flavor variations
- Kid-friendly and fun – Children love making their own personalized mug cakes
- No special equipment needed – If you have a mug and a spoon, you’re golden
- Impressive presentation – Looks fancy enough to serve to guests despite being incredibly easy
- Allergy-friendly adaptable – Easy to modify for various dietary needs
This recipe also saves you from the dreaded “I made too much dessert” problem. There’s no leftover cake sitting on your counter tempting you for days. You make exactly what you need, when you need it, and everyone’s happy.
Ingredient Notes
The beauty of this quick dessert recipe lies in its simplicity. Each ingredient plays a specific role in creating that perfect creamy, chocolatey texture we’re after. Let’s break down what you’ll need and why it matters.
Cream Cheese – This is the foundation of our no-bake magic. Use full-fat cream cheese that’s been softened to room temperature for the smoothest texture. The cream cheese provides richness, tang, and that luxurious mouthfeel. In a pinch, you can substitute with mascarpone for an even richer version, or use Neufchâtel (reduced-fat cream cheese) if you’re watching calories – just know the texture will be slightly less decadent.
Instant Chocolate Pudding Mix – This single ingredient does the heavy lifting when it comes to chocolate flavor and creating that mousse-like consistency without cooking. The instant version is key here – regular pudding mix won’t work for this no-bake method. You can experiment with different flavors like chocolate fudge, white chocolate, or even butterscotch if you want to switch things up. Sugar-free versions work beautifully if you’re reducing sugar intake.
Heavy Whipping Cream – This creates the airy, fluffy texture that makes this dessert feel so luxurious. Make sure it’s cold for best results. You can substitute with coconut cream for a dairy-free version, though the flavor will have a subtle coconut note.
Powdered Sugar – Adds sweetness and helps stabilize the whipped cream. Confectioner’s sugar dissolves easily and creates a smooth texture. You can reduce the amount if you prefer less-sweet desserts or use a powdered sugar substitute for keto-friendly versions.
Vanilla Extract – A splash of pure vanilla enhances all the chocolate flavors and adds depth. Don’t skip this! The vanilla makes everything taste more “homemade” and rounded.
Cocoa Powder – For extra chocolate intensity. Use unsweetened cocoa powder (Dutch-processed gives a deeper, darker chocolate flavor, while natural cocoa is slightly more acidic and bright). This is optional but highly recommended for true chocolate lovers.
Equipment Needed
One of the best things about this recipe is how little equipment you actually need. No stand mixers, no baking pans, no complicated tools – just a few basics that every kitchen already has.
- Large Coffee Mug or Dessert Cup (12-16 oz capacity) – This is your mixing bowl and serving dish all in one. Choose something microwave-safe even though we’re not cooking, just in case you decide to experiment with warm variations later.
- Electric Hand Mixer or Whisk – For whipping the cream and beating the cream cheese mixture until smooth. A hand mixer makes this incredibly quick and easy, but a good old-fashioned whisk works too if you don’t mind a little arm workout.
- Medium Mixing Bowl – For whipping the cream separately before folding it in. You could technically do everything in one bowl with careful technique, but using two bowls ensures better results.
- Rubber Spatula – Essential for folding the whipped cream into the cream cheese mixture gently without deflating all those beautiful air bubbles you just created.
- Measuring Cups and Spoons – Accuracy matters for the perfect texture, though this recipe is quite forgiving.
- Small Fine-Mesh Strainer (optional) – If you’re adding cocoa powder, sifting it prevents lumps and creates an ultra-smooth finish.
That’s it! No oven, no stovetop, no fancy equipment. This is dessert-making at its most accessible and user-friendly.
PrintQuick Dessert Recipe

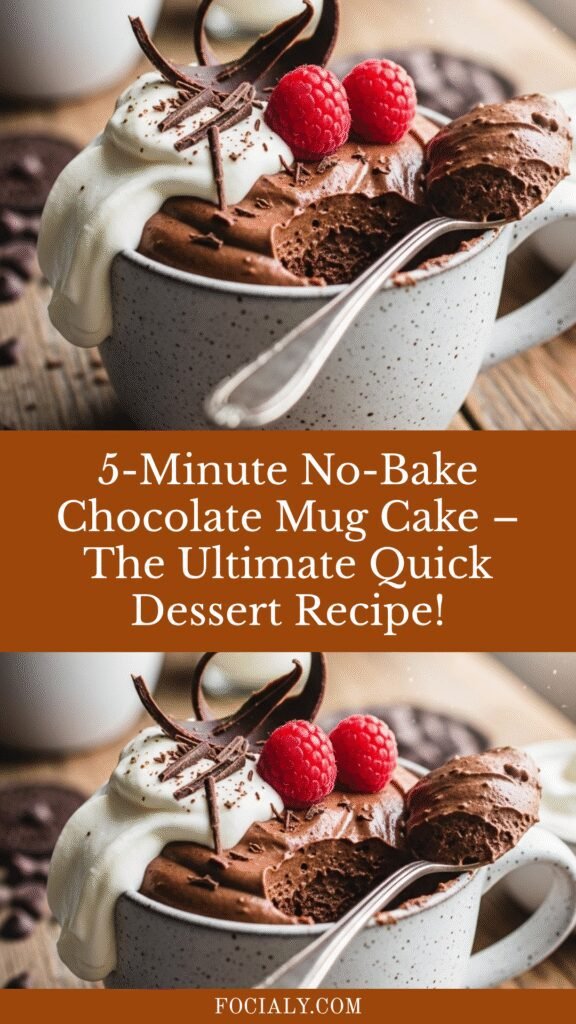
A rich, creamy, no-bake chocolate mug cake that’s ready in just 5 minutes! This quick dessert recipe combines cream cheese, chocolate pudding mix, and whipped cream for a decadent mousse-like treat that requires zero cooking. Perfect for satisfying those late-night chocolate cravings or impressing guests with minimal effort.
- Prep Time: 5 minutes
- Cook Time: 0 minutes
- Total Time: 5 minutes
- Yield: 1 serving (easily multiplied) 1x
- Category: Dessert
- Method: No Bake
- Cuisine: American
- Diet: Vegetarian
Ingredients
- 2 oz cream cheese, softened to room temperature (about ¼ of an 8-oz package)
- 2 tablespoons instant chocolate pudding mix (from a 3.9-oz package)
- 3 tablespoons heavy whipping cream, cold
- 2 tablespoons powdered sugar
- ¼ teaspoon vanilla extract
- 1 tablespoon unsweetened cocoa powder (optional, for extra chocolate intensity)
- Toppings: whipped cream, chocolate shavings, crushed cookies, fresh berries, or mini chocolate chips
Instructions
- Prepare your workspace. Take the cream cheese out of the refrigerator 15-20 minutes before starting so it softens properly. Ensure your heavy cream is very cold for best whipping results.
- Beat the cream cheese base. In your large coffee mug, add the softened cream cheese and beat with a hand mixer (or vigorously with a fork) for about 30 seconds until smooth and creamy with no lumps remaining.
- Add the chocolate pudding mix. Sprinkle the instant chocolate pudding mix over the cream cheese. Beat together for another 30-45 seconds until completely combined and the mixture becomes thick and fudgy. If adding cocoa powder, sift it in now and mix until incorporated.
- Whip the cream separately. In a medium bowl, combine the cold heavy whipping cream, powdered sugar, and vanilla extract. Using a hand mixer, whip on medium-high speed for 1-2 minutes until soft peaks form. The cream should hold its shape but still have a silky, pourable quality.
- Fold it all together. Add the whipped cream to your mug with the chocolate mixture. Using a rubber spatula or spoon, gently fold the whipped cream into the chocolate base using a figure-eight motion. Be gentle to keep the mixture light and airy – you want to see some streaks of cream marbling through the chocolate. Don’t overmix or you’ll deflate the cream.
- Chill briefly (optional). For best texture, pop the mug in the refrigerator for 2-3 minutes to firm up slightly, though it’s delicious eaten immediately as well.
- Top and serve. Add your favorite toppings – a dollop of whipped cream, chocolate shavings, crushed Oreos, fresh raspberries, or mini chocolate chips all work beautifully. Grab a spoon and dig in!
Notes
- Cream cheese must be softened or you’ll have lumps. If you forgot to take it out ahead, microwave it for 8-10 seconds to soften quickly.
- Use instant pudding mix only – cook-and-serve varieties won’t work for this no-bake method.
- Cold cream whips better – ensure your heavy cream is refrigerator-cold for maximum volume.
- Don’t overfold – some streaks of white cream in the chocolate mixture are actually desirable and create a beautiful marbled effect.
- Recipe multiplies easily – make multiple mugs for a crowd or double the recipe in a larger serving bowl for sharing.
Nutrition
- Serving Size: 1 mug cake (without additional toppings)
- Calories: 285 kcal
- Sugar: 18g
- Sodium: 240mg
- Fat: 22g
- Saturated Fat: 14g
- Unsaturated Fat: 6g
- Trans Fat: 0g
- Carbohydrates: 20g
- Fiber: 1g
- Protein: 3g
- Cholesterol: 70mg
Nutritional information is approximate and calculated per single serving without additional toppings. Values may vary based on specific brands and ingredient substitutions used.
Tips & Variations
The beauty of this quick dessert recipe is how easily you can customize it to suit your preferences, dietary needs, or whatever you happen to have in your pantry. Here are some of my favorite ways to mix things up:
Flavor Variations:
- Mint Chocolate – Add ¼ teaspoon peppermint extract and top with crushed Andes mints or candy canes
- Peanut Butter Chocolate – Swirl in 1 tablespoon of creamy peanut butter before adding the whipped cream
- Mocha Magic – Mix in ½ teaspoon instant espresso powder with the pudding mix for a coffee-chocolate combo
- Cookies & Cream – Use vanilla pudding mix instead of chocolate and fold in crushed Oreo cookies
- Salted Caramel Chocolate – Drizzle with caramel sauce and sprinkle with flaky sea salt
- Triple Chocolate – Add mini chocolate chips and top with chocolate syrup for maximum decadence
Dietary Modifications:
- Sugar-Free/Keto-Friendly – Use sugar-free pudding mix, sugar-free powdered sweetener, and you’ve got a low-carb treat
- Dairy-Free – Substitute dairy-free cream cheese and use coconut cream in place of heavy cream (chill a can of full-fat coconut milk overnight and scoop off the thick cream)
- Reduced Fat – Use Neufchâtel cheese (⅓ less fat cream cheese) and substitute half the heavy cream with Greek yogurt
- Vegan – Use vegan cream cheese and coconut cream with vegan-friendly pudding mix
Texture Tweaks:
- For a thicker, more mousse-like consistency, add an extra tablespoon of pudding mix
- For a lighter, fluffier texture, increase the whipped cream to 4 tablespoons
- For a denser, cheesecake-style result, reduce the whipped cream and add more cream cheese
Fun Add-Ins:
- Crushed graham crackers layered at the bottom for a “crust”
- Fresh berries folded in for fruity bursts
- Chopped nuts for crunch
- A swirl of Nutella or cookie butter
- Marshmallow fluff mixed in for extra sweetness
Pro Chef Tips
Want to take your no-bake mug cake from delicious to absolutely restaurant-quality? Here are some professional secrets that will elevate your quick dessert recipe game:
Temperature is Everything – The single most important factor in achieving the perfect texture is using properly softened cream cheese and cold heavy cream. Softened cream cheese (not melted, just pliable) whips up smoothly without lumps, while cold cream whips to maximum volume. This temperature contrast is what creates that magical mousse-like consistency.
The Folding Technique Matters – When combining the whipped cream with the chocolate mixture, use a gentle folding motion rather than stirring. Cut down through the center, sweep across the bottom, and bring the spatula up the side. This preserves the air bubbles in the whipped cream, keeping your dessert light and fluffy rather than dense. Think of it like you’re tucking the ingredients together rather than mixing them aggressively.
Quality Chocolate Makes a Difference – While instant pudding mix is convenient and delicious, using high-quality cocoa powder (like Valrhona or Ghirardelli) for that extra boost of chocolate will transform this from good to extraordinary. Dutch-processed cocoa gives you a smoother, more sophisticated chocolate flavor.
Layer for Visual Appeal – If you’re serving this to guests, create layers in a clear glass mug for that “wow” factor. Start with a layer of crushed cookies or graham crackers, add half the chocolate mixture, sprinkle more cookie crumbs, then top with the remaining chocolate mixture and finish with generous toppings. The visual presentation makes it feel like a fancy parfait from a high-end café.
Whip to Soft Peaks Only – When whipping your cream, stop at soft peaks (when the cream holds its shape but the peaks gently fold over). If you overwhip to stiff peaks, the cream becomes grainy and can even start to separate into butter. Soft peaks fold into the chocolate base more easily and create a silkier final texture.
Bloom Your Cocoa – For extra-intense chocolate flavor, “bloom” your cocoa powder by mixing it with a tiny bit of hot water (about 1 teaspoon) before adding it to the cream cheese. This awakens the chocolate compounds and deepens the flavor significantly – a trick used by professional pastry chefs.
Chill Your Bowl – For the fluffiest whipped cream possible, pop your mixing bowl and beaters in the freezer for 10 minutes before whipping. The cold equipment helps the cream whip faster and to greater volume.
Common Mistakes to Avoid
Even though this is one of the most foolproof dessert recipes out there, there are a few pitfalls that can trip up first-time makers. Here’s what to watch out for:
Using Cold Cream Cheese – This is the number one mistake! Cold, hard cream cheese won’t blend smoothly no matter how much you beat it. You’ll end up with frustrating lumps throughout your dessert that ruin the silky texture. Always let cream cheese sit at room temperature for at least 15-20 minutes before starting. If you’re in a rush, microwave it for 8-10 seconds (no more!) to soften quickly.
Overmixing the Final Combination – When you fold the whipped cream into the chocolate mixture, resist the urge to keep stirring until it’s completely uniform. Overmixing deflates all the air you worked to incorporate, resulting in a dense, heavy dessert instead of the light, mousse-like texture you’re after. A few streaks of white cream marbled through the chocolate are perfectly fine – they actually look beautiful and ensure you’ve kept the mixture airy.
Using Regular Pudding Mix Instead of Instant – Cook-and-serve pudding mix requires heat and time to activate properly. It won’t thicken in this no-bake recipe, leaving you with a runny, soup-like mess. Always double-check that you’re grabbing the instant pudding mix box – it should say “instant” clearly on the package.
Not Chilling the Heavy Cream – Room temperature cream won’t whip properly. It needs to be cold (refrigerator temperature) for the fat molecules to trap air bubbles effectively. If your cream isn’t whipping, it’s probably too warm. Pop it in the freezer for 5 minutes and try again.
Skipping the Softening Time – I know you’re excited to eat this quick dessert, but if you try to rush through without letting cream cheese soften or without whipping the cream properly, you’ll be disappointed in the results. Those 5 minutes of prep time really do matter for achieving the perfect texture. The good news? Even “rushed” versions of this recipe still taste amazing – they just might not have that professional mousse-like quality.
Storage & Meal Prep
One of the questions I get most often about this quick dessert recipe is whether it can be stored and enjoyed later. Great news – yes, it absolutely can!
Refrigerator Storage: This no-bake mug cake keeps beautifully in the refrigerator for up to 3 days when covered tightly. Simply press a piece of plastic wrap directly against the surface of the dessert (this prevents a skin from forming) or cover your mug with a lid or another piece of plastic wrap. The texture actually improves slightly after a few hours in the fridge as it firms up and the flavors meld together. It’s like having personal chocolate mousse cups ready to grab whenever you want a sweet treat!
Make-Ahead Friendly: You can prepare these up to 24 hours in advance, which makes them perfect for dinner parties or meal prepping your weekly desserts. Just hold off on adding fresh toppings like berries or whipped cream until serving time, as these can get soggy or watery if added too far in advance. Cookies, chocolate shavings, and nuts can be added anytime.
Reheating Tips: Here’s the thing – this dessert is meant to be enjoyed cold, so “reheating” isn’t really applicable. However, if you prefer your chocolate desserts slightly less chilled, simply let the mug sit at room temperature for 10-15 minutes before eating. It will soften to a more pudding-like consistency that’s equally delicious.
Portion Control Strategy: If you’re meal prepping or watching portions, consider making several individual mugs at once and storing them in the refrigerator. Having pre-portioned desserts ready to go helps with portion control (no accidentally eating half a cake because it’s sitting there!) and makes grabbing a treat super convenient.
Signs It’s Gone Bad: While this dessert is quite stable thanks to the cream cheese and sugar preserving it, you’ll know it’s past its prime if you notice any off odors, mold (unlikely within 3 days but possible), or if liquid starts separating from the mixture. Always use clean utensils when scooping from your mug to avoid introducing bacteria.
Make-Ahead & Freezer Notes
Planning ahead? This quick dessert recipe is surprisingly freezer-friendly, opening up even more possibilities for convenient dessert options.
Freezing Instructions: Yes, you can freeze these chocolate mug cakes! The texture changes slightly (it becomes more frozen-mousse-like, similar to chocolate semifreddo), but many people actually prefer this icier, frozen version on hot summer days. To freeze, prepare the recipe as directed, cover tightly with plastic wrap followed by aluminum foil, and freeze for up to 2 months.
Best Freezing Practices: For optimal results, freeze in individual portions using freezer-safe mugs or small containers. Glass mugs can crack in the freezer if they’re not freezer-safe, so consider using plastic or ceramic mugs specifically designed for freezer storage. Leave a little space at the top of the container as the mixture may expand slightly when frozen.
Thawing Method: The beauty of these frozen treats is that you don’t really need to fully thaw them! They’re delicious eaten semi-frozen, like a soft-serve chocolate mousse ice cream. For this consistency, let them sit at room temperature for 5-10 minutes before eating. If you prefer them in their original mousse-like state, transfer to the refrigerator and let thaw for 2-3 hours or overnight.
Make-Ahead for Parties: Planning a dinner party or special event? You can prepare a batch of these up to 2 days in advance. Make them in small, individual dessert cups or fancy glasses, cover tightly, and refrigerate. About an hour before serving, add your toppings and any garnishes. They’ll look professionally made and your guests will never guess how little effort was required!
Flavor Development: Like many desserts, the flavors in this no-bake mug cake actually improve with a little time. The chocolate becomes more pronounced and the cream cheese adds a subtle tanginess that balances the sweetness beautifully. Making it the night before and letting it chill overnight often produces the best-tasting results.
Serving Suggestions
While this chocolate mug cake is absolutely perfect enjoyed on its own, pairing it with complementary flavors and textures can create a more complete dessert experience. Here are some delicious serving ideas:
Classic Accompaniments:
- Fresh berries – Raspberries, strawberries, or blackberries provide tart contrast to the rich chocolate and add beautiful color
- Whipped cream – A generous dollop of freshly whipped cream (or Cool Whip for convenience) adds extra indulgence
- Coffee or espresso – A hot cup of coffee alongside creates that café-style dessert experience
- Ice cream – Add a small scoop of vanilla or coffee ice cream to make it an extra-special treat
Textural Additions:
- Crushed cookies – Oreos, graham crackers, Biscoff cookies, or gingersnaps add satisfying crunch
- Toasted nuts – Chopped almonds, pecans, or hazelnuts provide contrast and sophisticated flavor
- Chocolate shavings – Use a vegetable peeler on a chocolate bar for elegant, professional-looking garnish
- Cookie butter or Nutella drizzle – Creates beautiful presentation and adds complementary flavors
Beverage Pairings:
- Hot chocolate – Double down on chocolate flavor for the ultimate comfort dessert
- Cold milk – Classic and nostalgic, perfect for dunking a spoon
- Dessert wine – Port or chocolate wine pairs beautifully for adult entertaining
- Irish cream liqueur – A splash of Baileys on top transforms this into a grown-up indulgence
Make It a Sundae: Transform your mug cake into a decadent sundae by adding a scoop of vanilla ice cream, drizzling with hot fudge and caramel sauce, sprinkling with crushed peanuts, and topping with a cherry. It’s like having a fancy restaurant dessert at home!
Presentation Ideas for Guests: If you’re serving these to company, consider making them in clear glass cups or mason jars so the beautiful chocolate color shows through. Garnish with mint leaves, a light dusting of cocoa powder, and a fancy wafer cookie stuck into the top at an angle for that professional bakery look.
FAQs Section
Q: Can I make this without a hand mixer?
A: Absolutely! While a hand mixer makes the process super quick and easy, you can definitely make this with just a whisk and a little elbow grease. The cream cheese mixture might take 2-3 minutes of vigorous stirring instead of 30 seconds with a mixer, and whipping the cream by hand will give you an arm workout (3-4 minutes of steady whisking), but the results will be just as delicious. Make sure your cream cheese is very soft and your cream is very cold for best results when mixing by hand.
Q: Why is my dessert runny instead of thick?
A: The most common cause is using regular cook-and-serve pudding mix instead of instant pudding mix. Instant pudding contains modified cornstarch that thickens without heat, while regular pudding requires cooking. Another possibility is that your heavy cream wasn’t cold enough to whip properly, or you didn’t whip it to soft peaks before folding it in. Make sure you’re using instant pudding and that your cream forms peaks that hold their shape when you lift the beaters.
Q: Can I use milk instead of heavy cream?
A: Unfortunately, regular milk won’t work for this recipe because it doesn’t contain enough fat to whip into peaks. Heavy cream (also called heavy whipping cream) has a fat content of 36-40%, which is what allows it to trap air and become fluffy when whipped. You could use half-and-half in a pinch, though it won’t whip as well and your dessert will be denser. For a lighter version, you could substitute Greek yogurt for some of the cream cheese, but keep the heavy cream for whipping.
Q: Is this recipe really ready in just 5 minutes?
A: Yes, the active preparation time is truly about 5 minutes once your cream cheese is softened! However, softening the cream cheese takes 15-20 minutes (or 10 seconds in the microwave if you’re careful), and for optimal texture, chilling it for 2-3 minutes before serving is ideal. So while the hands-on work is minimal and quick, the total time from start to finish could be closer to 10-25 minutes depending on whether you plan ahead. Still incredibly fast for homemade dessert!
Q: Can I double or triple this recipe?
A: Definitely! This recipe scales beautifully. Simply multiply all ingredients by the number of servings you want. If making multiple servings, you might find it easier to prepare the mixture in a mixing bowl and then divide it among several mugs or dessert cups rather than trying to make everything in individual mugs. It’s perfect for serving at small gatherings or making a week’s worth of desserts at once.
Q: What’s the difference between this and regular chocolate mousse?
A: Traditional chocolate mousse typically requires melting chocolate, separating eggs, and carefully folding whipped egg whites into the chocolate base – a more time-consuming and technique-heavy process. This quick dessert recipe uses instant pudding mix and cream cheese to achieve a similar mousse-like texture with zero cooking and much less technical skill required. The result is slightly denser than classic French mousse but equally delicious and much more accessible for home cooks.
Q: Can I make this dairy-free or vegan?
A: Yes, with a few substitutions! Use dairy-free cream cheese (brands like Kite Hill or Tofutti work well), coconut cream in place of heavy whipping cream (the thick cream from a can of chilled full-fat coconut milk), and make sure your pudding mix is vegan-friendly (check labels as some contain dairy derivatives). The texture will be slightly different – coconut cream has a distinct flavor and doesn’t whip quite as fluffy as dairy cream – but it’s still absolutely delicious.
Conclusion
And there you have it – the ultimate quick dessert recipe that proves you don’t need hours in the kitchen or fancy culinary skills to create something absolutely spectacular! This 5-Minute No-Bake Chocolate Mug Cake has everything you could want in a dessert: rich chocolate flavor, creamy mousse-like texture, minimal cleanup, and the satisfaction of making something from scratch without any stress.
Whether you’re a busy parent sneaking a sweet moment after the kids go to bed, a college student surviving on dorm room cooking, or simply someone who believes chocolate emergencies are real and need immediate solutions, this recipe has got your back. The beauty of this dessert is that it meets you exactly where you are – beginner-friendly enough for first-time cooks yet customizable and delicious enough that experienced bakers will keep coming back to it again and again.
I hope this recipe brings a little extra sweetness to your everyday routine. There’s something genuinely joyful about being able to whip up homemade dessert in the time it takes to scroll through Pinterest, and the smile on your face (or your family’s faces) when you present these chocolate mug cakes will be absolutely worth those five minutes of effort.
So grab your mug, your cream cheese, and that tub of pudding mix hiding in your pantry, and give this recipe a try! I’d absolutely love to hear how it turns out for you. Drop a comment below sharing your experience, any fun variations you tried, or just to say hi! And if you loved this recipe as much as I think you will, please save it to your Pinterest boards and share it with your chocolate-loving friends. We all need more quick, delicious dessert solutions in our lives, and this one definitely deserves to be shared!
Happy dessert making, friends! May your spoon always be ready and your chocolate cravings always satisfied. 🍫✨