Red Velvet Cupcakes Recipe – Moist, Fluffy & Perfectly Sweet
There’s something truly magical about red velvet cupcakes – that gorgeous crimson color, the incredibly tender crumb, and that signature hint of cocoa paired with tangy cream cheese frosting. These stunning cupcakes are more than just a dessert; they’re a celebration in every bite. Whether you’re baking for Valentine’s Day, Christmas, a birthday party, or just because you’re craving something special, these homemade red velvet cupcakes deliver bakery-quality results right from your own kitchen.
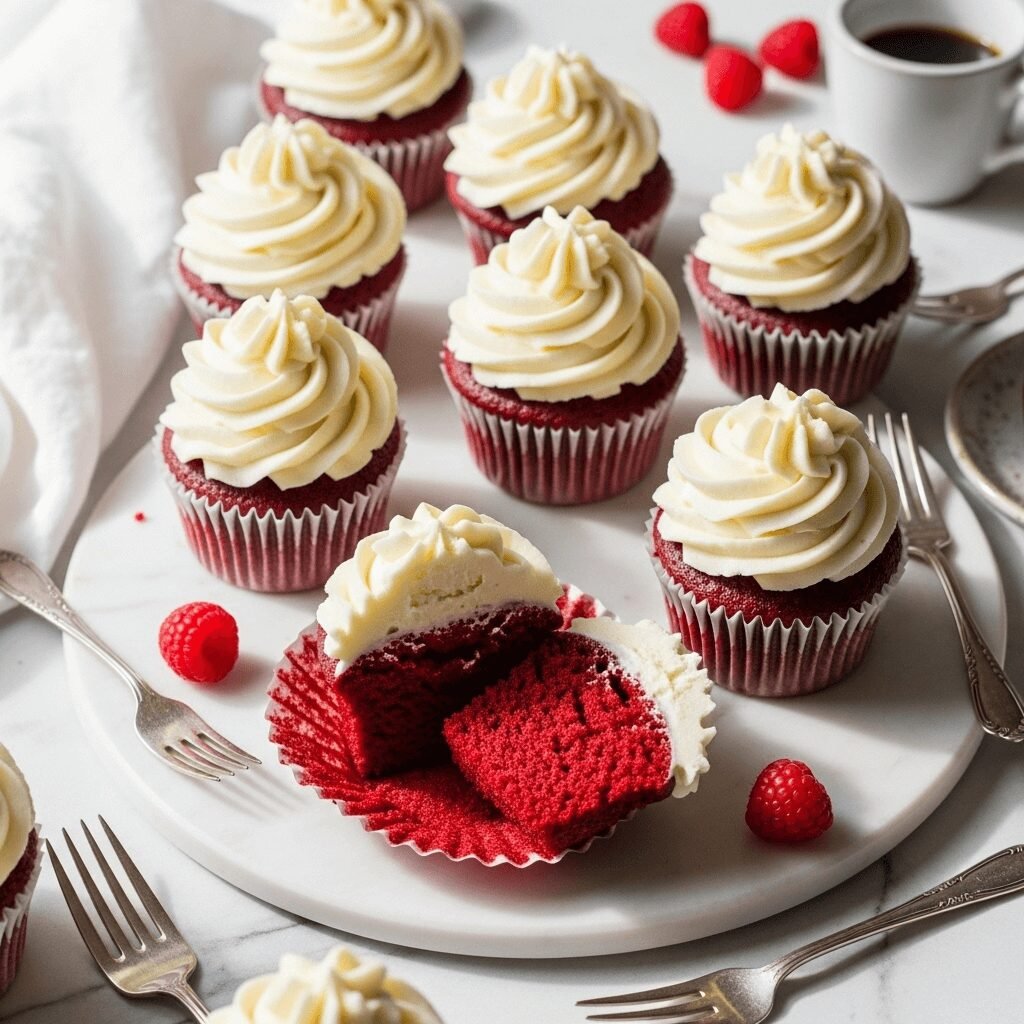
What makes red velvet cupcakes so irresistible is their unique flavor profile. They’re not quite chocolate cupcakes, but they’re not vanilla either – they exist in this perfect middle ground with a subtle cocoa flavor, a hint of tanginess from buttermilk, and an incredibly soft, velvety texture that literally melts in your mouth. Top them with luscious cream cheese frosting, and you’ve got a dessert that looks as spectacular as it tastes.
These cupcakes are perfect for any occasion when you want to impress. They’re elegant enough for weddings and sophisticated dinner parties, yet fun and festive enough for kids’ birthdays and casual gatherings. The best part? They’re surprisingly easy to make at home, and this foolproof recipe ensures perfect results every single time.
History / Background
The fascinating history of red velvet cake dates back to the Victorian era, when the term “velvet” was used to describe cakes with an exceptionally fine, soft crumb. Bakers discovered that using particular ingredients like vinegar, buttermilk, and cocoa powder created a chemical reaction that produced both a tender texture and a subtle reddish tint in the finished cake.
The iconic bright red color we associate with red velvet today became popular during the Great Depression and World War II era. During this time, a company called Adams Extract developed a red food coloring and began marketing it specifically for red velvet cake, complete with recipe cards. The trend took off, particularly in the American South, where red velvet cake became a staple at churches, social gatherings, and special celebrations.
The Waldorf-Astoria Hotel in New York City also claims a connection to red velvet’s fame, as their version of the cake became legendary among guests. Throughout the decades, red velvet evolved from a full-sized layer cake into various forms, including the beloved cupcake version we’re making today.
The cupcake adaptation gained massive popularity in the early 2000s with the cupcake boom, particularly after appearing in popular culture and at trendy bakeries across America. Today, red velvet cupcakes remain one of the most requested desserts for celebrations, combining nostalgia with undeniable visual appeal and incredible flavor.
Why You’ll Love This Recipe
This red velvet cupcake recipe has been tested, perfected, and loved by thousands of home bakers. It creates cupcakes that are impossibly moist, perfectly sweet, and crowned with the most incredible cream cheese frosting you’ve ever tasted. Unlike some red velvet recipes that turn out dry or lack that signature flavor, this one delivers consistent, bakery-quality results every time.
Here’s why you’ll absolutely love these cupcakes:
- Perfect texture every time – Super moist, tender crumb that stays fresh for days
- Stunning visual appeal – That gorgeous red color makes them Instagram and Pinterest-worthy
- Easy to make – Simple ingredients and straightforward steps, perfect for beginners
- Crowd-pleaser – Everyone loves red velvet, from kids to adults
- Make-ahead friendly – Bake in advance for stress-free entertaining
- Customizable – Easy to adapt for different occasions and dietary needs
- Budget-friendly – Uses everyday pantry staples without breaking the bank
- Portion-controlled – Individual cupcakes are easier to serve than slicing a layer cake
- Cream cheese frosting – The tangy, creamy frosting is absolutely addictive
- Versatile for any occasion – Perfect for holidays, birthdays, weddings, or Tuesday night dessert
Ingredient Notes
Understanding your ingredients is key to baking perfect red velvet cupcakes. Here’s what you’ll need and why each component matters:
All-Purpose Flour – The foundation of your cupcakes. All-purpose provides the perfect structure without making them dense. For best results, spoon and level your flour rather than scooping directly from the bag.
Cocoa Powder – Use unsweetened cocoa powder for that subtle chocolate flavor. Don’t skip this – it’s essential to authentic red velvet flavor. Dutch-process or natural cocoa both work beautifully.
Buttermilk – This is the secret to ultra-tender cupcakes. The acidity reacts with baking soda to create lift and a soft crumb. No buttermilk? Make your own by adding 1 tablespoon of white vinegar or lemon juice to regular milk and letting it sit for 5 minutes.
Red Food Coloring – Liquid or gel food coloring both work, though gel provides more vibrant color with less liquid. You’ll need about 1-2 tablespoons for that classic red velvet look.
White Vinegar – Works with the buttermilk and baking soda to create a tender texture and enhance the red color. Don’t worry – you won’t taste it in the finished cupcakes.
Vegetable Oil – Keeps cupcakes incredibly moist for days. You can substitute with melted coconut oil or canola oil if preferred.
Granulated Sugar – Sweetens and helps create that tender crumb texture. Don’t reduce the amount or your cupcakes may turn out dry.
Eggs – Room temperature eggs incorporate better into the batter. Let them sit on the counter for 30 minutes before baking.
Vanilla Extract – Enhances all the other flavors. Use pure vanilla extract for the best results.
Baking Soda – The leavening agent that helps cupcakes rise. Make sure it’s fresh for optimal results.
Salt – A small amount enhances all the flavors and balances the sweetness.
Cream Cheese – For the frosting, use full-fat brick-style cream cheese (not spreadable). It must be softened to room temperature for smooth, lump-free frosting.
Butter – Unsalted butter gives you control over the salt level in your frosting. Always use real butter, not margarine.
Powdered Sugar – Creates smooth, sweet frosting that pipes beautifully. Sift it to avoid lumps.
Equipment Needed
Having the right tools makes baking so much easier. Here’s everything you’ll need to make perfect red velvet cupcakes:
- Muffin/Cupcake Pan – Standard 12-cup pan (you’ll need 2 pans or bake in batches for 24 cupcakes)
- Cupcake Liners – Paper or foil liners prevent sticking and make cleanup easy
- Large Mixing Bowl – For combining dry ingredients
- Medium Mixing Bowl – For wet ingredients
- Whisk – For thoroughly mixing ingredients
- Measuring Cups and Spoons – Accurate measurements are crucial for baking
- Electric Mixer – Stand mixer or hand mixer for making frosting
- Rubber Spatula – For scraping bowls and folding ingredients
- Ice Cream Scoop or Large Spoon – For evenly portioning batter into liners
- Cooling Rack – Allows cupcakes to cool properly and prevents soggy bottoms
- Piping Bag and Tips – For beautiful frosting (or use a ziplock bag with the corner cut off)
- Toothpick or Cake Tester – For checking doneness
Red Velvet Cupcakes Recipe

These classic Red Velvet Cupcakes are incredibly moist, tender, and topped with tangy cream cheese frosting. Perfect for any celebration, these bakery-style cupcakes feature that signature red color and subtle cocoa flavor that everyone loves.
- Prep Time: 20 minutes
- Cook Time: 18 minutes
- Total Time: 38 minutes (plus cooling time)
- Yield: 24 cupcakes 1x
- Category: Dessert
- Method: Baking
- Cuisine: American
- Diet: Vegetarian
Ingredients
For the Cupcakes:
- 2½ cups all-purpose flour
- 2 tablespoons unsweetened cocoa powder
- 1 teaspoon baking soda
- ½ teaspoon salt
- 1½ cups granulated sugar
- 1 cup vegetable oil
- 2 large eggs, room temperature
- 1 cup buttermilk, room temperature
- 2 tablespoons red food coloring (liquid or gel)
- 1 teaspoon white vinegar
- 2 teaspoons vanilla extract
For the Cream Cheese Frosting:
- 16 ounces cream cheese, softened to room temperature
- ¾ cup unsalted butter, softened to room temperature
- 5 cups powdered sugar, sifted
- 2 teaspoons vanilla extract
- Pinch of salt
Instructions
For the Cupcakes:
- Preheat and Prepare: Preheat your oven to 350°F (175°C). Line two 12-cup muffin pans with cupcake liners. This recipe makes 24 cupcakes, so you’ll need both pans ready or plan to bake in batches.
- Mix Dry Ingredients: In a large mixing bowl, whisk together the flour, cocoa powder, baking soda, and salt until well combined. Set this bowl aside – you’ll add it to the wet ingredients later.
- Combine Wet Ingredients: In a separate medium bowl, whisk together the sugar and vegetable oil until well blended. Add the eggs one at a time, whisking well after each addition until the mixture is smooth and creamy.
- Add Buttermilk Mixture: Pour in the buttermilk, red food coloring, vinegar, and vanilla extract. Whisk until everything is completely combined and the color is uniform. The mixture should be a vibrant red color at this point.
- Combine Wet and Dry: Pour the wet ingredients into the bowl with the dry ingredients. Using a rubber spatula or whisk, gently fold everything together until just combined. Be careful not to overmix – a few small lumps are okay. Overmixing develops gluten and creates tough cupcakes.
- Fill Cupcake Liners: Using an ice cream scoop or large spoon, divide the batter evenly among the cupcake liners, filling each about ⅔ to ¾ full. This ensures they rise nicely without overflowing.
- Bake: Bake for 18-20 minutes, or until a toothpick inserted into the center of a cupcake comes out clean or with just a few moist crumbs. The tops should spring back lightly when touched.
- Cool Completely: Remove cupcakes from the oven and let them cool in the pan for 5 minutes. Then transfer them to a wire cooling rack to cool completely before frosting. This is crucial – frosting warm cupcakes will cause the frosting to melt and slide off.
For the Cream Cheese Frosting:
- Beat Cream Cheese and Butter: In a large bowl using an electric mixer, beat the softened cream cheese and butter together on medium speed for 2-3 minutes until smooth, creamy, and fluffy. Make sure there are no lumps.
- Add Powdered Sugar: Reduce mixer speed to low and gradually add the sifted powdered sugar, about 1 cup at a time, mixing well after each addition. This prevents a powdered sugar cloud in your kitchen.
- Add Flavorings: Add the vanilla extract and a pinch of salt. Increase mixer speed to medium-high and beat for 2-3 minutes until the frosting is light, fluffy, and perfectly smooth.
- Frost Cupcakes: Once cupcakes are completely cool, frost them generously using a piping bag fitted with your favorite tip, an offset spatula, or even a butter knife. Swirl the frosting in decorative peaks for that professional bakery look.
- Garnish (Optional): Add a sprinkle of red velvet cake crumbs, a light dusting of cocoa powder, or festive sprinkles if desired.
Notes
- Food Coloring: The amount of food coloring can be adjusted based on how vibrant you want the color. Gel food coloring provides more intense color than liquid.
- Room Temperature Ingredients: Bringing eggs and buttermilk to room temperature ensures better mixing and a more tender cupcake.
- Don’t Overmix: Mix the batter until just combined to avoid dense, tough cupcakes.
- Frosting Consistency: If your frosting is too thick, add 1-2 teaspoons of milk. If it’s too thin, add more powdered sugar ¼ cup at a time.
- Make Ahead: Unfrosted cupcakes can be made 1 day ahead. Store at room temperature in an airtight container.
Nutrition
- Serving Size: 1 cupcake
- Calories: 385
- Sugar: 42g
- Sodium: 180mg
- Fat: 18g
- Saturated Fat: 8g
- Unsaturated Fat: 9g
- Trans Fat: 0g
- Carbohydrates: 54g
- Fiber: 0.5g
- Protein: 3g
- Cholesterol: 55mg
Tips & Variations
Flavor Variations:
- Red Velvet Cream Cheese Swirl: Add a cream cheese filling by piping a small amount of frosting into the center of each cupcake before baking
- Chocolate Lovers: Increase cocoa powder to ¼ cup for a more pronounced chocolate flavor
- Mint Red Velvet: Add ½ teaspoon peppermint extract to the batter for a holiday twist
- Orange Red Velvet: Add 1 tablespoon orange zest to the batter for a sophisticated citrus note
Dietary Adaptations:
- Gluten-Free: Use a 1:1 gluten-free flour blend in place of all-purpose flour
- Dairy-Free: Substitute buttermilk with dairy-free milk mixed with vinegar, and use vegan cream cheese and butter for frosting
- Lower Sugar: Reduce granulated sugar to 1¼ cups (though texture may be slightly affected)
Frosting Alternatives:
- Vanilla Buttercream: Swap cream cheese frosting for classic vanilla buttercream
- Whipped Cream Frosting: Use stabilized whipped cream for a lighter option
- White Chocolate Ganache: Drizzle with white chocolate for elegance
Fun Additions:
- Mix in mini chocolate chips to the batter
- Add crushed Oreos to the frosting
- Top with fresh raspberries or strawberries
- Drizzle with chocolate or caramel sauce
Pro Chef Tips
1. Temperature Matters: Room temperature ingredients are crucial for red velvet cupcakes. Cold eggs and buttermilk don’t incorporate properly, leading to dense cupcakes with an uneven texture. Set ingredients out 30-60 minutes before baking.
2. Quality Cocoa Makes a Difference: While red velvet isn’t chocolate-forward, the cocoa you use impacts the overall flavor. Dutch-process cocoa creates a milder, smoother taste, while natural cocoa provides a slightly tangy note that complements the buttermilk.
3. The Vinegar Trick: Don’t skip the vinegar! It reacts with the baking soda to create extra lift and tenderness. It also helps set the red color, preventing it from turning brownish during baking.
4. Fill Liners Consistently: Use an ice cream scoop to portion batter evenly. This ensures all cupcakes bake at the same rate and look uniform when presented. They should be about ⅔ full for perfect domed tops.
5. Test for Doneness Properly: Insert a toothpick into the center of a cupcake – it should come out with a few moist crumbs, not wet batter. Overbaking creates dry cupcakes, so check at the 18-minute mark.
6. Frosting Perfection: Make sure cream cheese and butter are truly softened (they should leave an indent when pressed lightly). Cold frosting ingredients create lumpy frosting, while too-warm ingredients create runny frosting.
7. The Cool-Down Rule: Never frost warm cupcakes. The residual heat will melt your beautiful frosting into a puddle. Be patient and let them cool completely – it’s worth the wait.
Common Mistakes to Avoid
1. Using Cold Ingredients: This is the number one mistake home bakers make. Cold eggs, buttermilk, and dairy products don’t emulsify properly, resulting in dense, heavy cupcakes with poor texture. Always bring ingredients to room temperature before starting.
2. Overmixing the Batter: Once you combine wet and dry ingredients, mix only until just combined. Overmixing develops gluten strands, making cupcakes tough and chewy instead of tender and soft. Some small lumps are completely fine.
3. Opening the Oven Too Early: Resist the urge to check on your cupcakes before the 15-minute mark. Opening the oven door causes temperature fluctuations that can make cupcakes sink in the center or bake unevenly.
4. Incorrect Oven Temperature: Use an oven thermometer to verify your actual oven temperature. Many ovens run hot or cold, which dramatically affects baking times and results. An oven that’s too hot causes cupcakes to dome excessively and crack; too cool makes them flat and dense.
5. Skipping the Sifting: Not sifting cocoa powder leads to lumps of cocoa in your cupcakes. While you don’t need to sift flour, definitely sift (or whisk thoroughly) the cocoa powder to break up clumps.
6. Using Spreadable Cream Cheese: Always use brick-style, full-fat cream cheese for frosting. Spreadable cream cheese contains stabilizers and has too much moisture, resulting in runny frosting that won’t hold its shape.
7. Under-Softening Butter and Cream Cheese: If your frosting ingredients aren’t properly softened, you’ll have lumps no amount of beating will smooth out. They should be soft enough to leave an indent when pressed, but not melting or greasy.
Storage & Meal Prep
Room Temperature Storage:
Frosted red velvet cupcakes can be stored at room temperature in an airtight container for up to 2 days. However, because of the cream cheese frosting, refrigeration is recommended if your kitchen is warm or humid. Place cupcakes in a single layer in a container with a tight-fitting lid.
Refrigerator Storage:
Store frosted cupcakes in an airtight container in the refrigerator for up to 5 days. The cream cheese frosting keeps beautifully when chilled. Before serving, let cupcakes sit at room temperature for 20-30 minutes to bring them back to their best flavor and texture – cold cupcakes can taste dense.
Unfrosted Cupcakes:
If you’ve baked cupcakes but haven’t frosted them yet, store them at room temperature in an airtight container for up to 3 days. This is actually ideal if you’re making them ahead, as unfrosted cupcakes maintain their texture better than frosted ones.
Reheating Tips:
While red velvet cupcakes are typically served at room temperature or cool, if you prefer them slightly warm, remove the frosting and microwave the cupcake for 8-10 seconds. Then top with the cream cheese frosting that was stored separately.
Frosting Storage:
Extra cream cheese frosting can be refrigerated in an airtight container for up to 1 week. Before using, let it come to room temperature and re-whip it with an electric mixer to restore its fluffy texture.
Make-Ahead & Freezer Notes
Make-Ahead Baking:
Red velvet cupcakes are perfect for advance preparation. Bake the cupcakes up to 2 days ahead, let them cool completely, and store them unfrosted in an airtight container at room temperature. Make the frosting 1 day ahead and refrigerate it. When ready to serve, let the frosting come to room temperature, re-whip it briefly, and frost your cupcakes fresh.
Freezing Unfrosted Cupcakes:
Unfrosted cupcakes freeze beautifully for up to 3 months. Let cupcakes cool completely, then wrap them individually in plastic wrap. Place wrapped cupcakes in a freezer-safe ziplock bag or airtight container. To thaw, leave them on the counter for 1-2 hours at room temperature, still wrapped, to prevent condensation from making them soggy.
Freezing Frosted Cupcakes:
You can freeze fully frosted cupcakes, though the presentation may not be quite as perfect after thawing. Place frosted cupcakes on a baking sheet and freeze for 1 hour until the frosting is firm. Then wrap each cupcake in plastic wrap and place in a freezer container. Freeze for up to 2 months. Thaw in the refrigerator overnight, then bring to room temperature before serving.
Freezing Frosting:
Cream cheese frosting can be frozen for up to 3 months in an airtight container. Thaw overnight in the refrigerator, then bring to room temperature and re-whip with an electric mixer until smooth and fluffy before using.
Best Thawing Method:
For optimal results, always thaw cupcakes at room temperature while still wrapped. This prevents moisture from accumulating on the surface. Plan for 1-2 hours thawing time for individual cupcakes.
Serving Suggestions
Red velvet cupcakes are versatile enough to serve in countless ways. Here are some delicious ideas to create a complete dessert experience:
Beverage Pairings:
Serve with hot coffee or espresso for a classic combination. The slight bitterness of coffee balances the sweetness perfectly. Cold milk is always a winner, especially with kids. For adult celebrations, pair with champagne, dessert wine, or Irish cream coffee.
Plated Dessert:
Create a restaurant-style plated dessert by serving a cupcake with a scoop of vanilla ice cream, a drizzle of chocolate or raspberry sauce, and fresh berries on the side. Dust the plate with cocoa powder for an elegant presentation.
Dessert Bar:
Set up a cupcake decorating station at parties with various toppings: sprinkles, mini chocolate chips, crushed cookies, fresh berries, chocolate shavings, and edible glitter. Let guests customize their cupcakes.
Holiday Presentation:
For Valentine’s Day, top with conversation hearts or pink and red sprinkles. For Christmas, add crushed candy canes or festive red and green decorations. For weddings, use elegant white chocolate curls and edible flowers.
Accompaniments:
Serve alongside fresh strawberries, raspberries, or sliced bananas. The fruit’s tartness complements the sweet frosting beautifully. A small cup of hot chocolate or warm vanilla sauce for drizzling adds an extra indulgent touch.
Party Display:
Arrange cupcakes on a tiered stand for impressive presentation at parties and celebrations. Alternate with mini fruit tarts or macarons for a beautiful dessert spread.
FAQs Section
Q: Why are my red velvet cupcakes not red enough?
A: The intensity of red color depends on your food coloring. Gel food coloring produces more vibrant results than liquid coloring. You may need 1-2 tablespoons of liquid or 1-2 teaspoons of gel coloring. Also, the type of cocoa affects color – natural cocoa reacts with acids to maintain red color better than Dutch-process. If your cupcakes turned brown, your oven temperature might be too high, which can darken the color.
Q: Can I make these cupcakes without buttermilk?
A: Absolutely! Make a buttermilk substitute by adding 1 tablespoon of white vinegar or lemon juice to 1 cup of regular milk. Let it sit for 5 minutes until it curdles slightly, then use it just like buttermilk. This acidic mixture is essential for tender texture and proper color, so don’t skip this step even if using a substitute.
Q: Why did my cream cheese frosting turn out runny?
A: Runny frosting happens when the butter and cream cheese are too warm, or if you used spreadable cream cheese instead of brick-style. Make sure your butter and cream cheese are softened but still cool to the touch. If your frosting is already too soft, refrigerate it for 15-20 minutes, then re-whip it. You can also gradually add more powdered sugar (¼ cup at a time) to thicken it up.
Q: How can I get professional-looking swirls on my cupcakes?
A: Use a piping bag fitted with a large star tip (Wilton 1M is popular). Hold the bag perpendicular to the cupcake and start from the outer edge, piping in a circular motion toward the center while applying steady pressure. Finish with a slight pull-up motion in the center. Practice on parchment paper first if you’re nervous!
Q: Can I use natural food coloring instead of artificial dye?
A: Yes, though the color won’t be as vibrant. Beet powder or beet juice creates a more subtle reddish-brown color. Use about 2-3 tablespoons of beet juice or 1-2 tablespoons of beet powder. Keep in mind this may slightly alter the flavor. Some brands make natural red food coloring from vegetables that work well too.
Q: My cupcakes sank in the middle. What happened?
A: Cupcakes sink for several reasons: opening the oven door too early (before 15 minutes), oven temperature too low, overmixing the batter, or using expired leavening agents. Make sure your baking soda is fresh (test it by adding a little to vinegar – it should fizz vigorously), and avoid opening the oven until cupcakes are nearly done.
Q: How do I prevent cupcake liners from peeling away?
A: This frustrating problem usually happens when cupcakes are too moist or haven’t cooled completely. Make sure to bake cupcakes until a toothpick comes out with just moist crumbs. Let them cool completely in the pan for 5 minutes, then transfer to a wire rack. Using quality cupcake liners also helps – foil-lined paper liners tend to stick less than plain paper ones.
Conclusion
There’s nothing quite like biting into a perfectly baked red velvet cupcake – that stunning color, the incredibly tender crumb, and the luscious cream cheese frosting create a dessert experience that’s truly unforgettable. Whether you’re celebrating a special occasion or simply treating yourself to something wonderful, these homemade red velvet cupcakes deliver bakery-quality results that will have everyone asking for your recipe.
The beauty of this recipe is how approachable it is for bakers of all skill levels. With simple pantry ingredients and straightforward steps, you can create impressive cupcakes that look and taste like they came from a professional bakery. The detailed instructions and pro tips ensure your success every single time.
I hope you absolutely love these red velvet cupcakes as much as my family and I do. They’ve become our go-to dessert for everything from casual weekend treats to elegant celebrations. Don’t forget to snap a photo of your beautiful creations and share it on Pinterest – I’d love to see your baking success!