Classic Homemade Rhubarb Pie Recipe – Sweet, Tart & Absolutely Delicious!

There’s something magical about slicing into a homemade rhubarb pie with its flaky, buttery crust giving way to a filling that’s the perfect balance of sweet and tart. This classic rhubarb pie recipe celebrates one of spring’s most beloved ingredients, transforming those gorgeous pink-red stalks into a dessert that’s been gracing American tables for generations.
Rhubarb pie is the quintessential spring dessert, typically made when rhubarb is at its peak from April through June. While rhubarb is technically a vegetable, it’s treated as a fruit in the kitchen, and when baked into a pie with just the right amount of sugar, it creates a filling that’s simultaneously tangy and sweet with a beautiful jammy texture. This pie is perfect for Easter dinners, Mother’s Day celebrations, spring potlucks, or anytime you want to bring a taste of nostalgia to your table.
What makes this rhubarb pie truly special is its simplicity. Unlike complicated desserts that require special techniques, this pie relies on good ingredients and a little ppatience. The result is a stunning dessert with a gorgeous ruby-red filling that tastes like spring itself. Whether you’re a seasoned baker or trying your hand at pie-making for the first time, this recipe will guide you through creating a show-stopping dessert that’ll have everyone asking for seconds.
History / Background
Rhubarb has a fascinating history that dates back thousands of years. Originally cultivated in China around 2700 BC, rhubarb was prized for its medicinal properties long before anyone thought to bake it into a pie. The plant made its way along the Silk Road to Europe, where it remained an expensive luxury item until the 18th century.
The story of rhubarb pie is deeply intertwined with American history, particularly in the Northeast and Midwest. When rhubarb cultivation became more widespread in America during the 1800s, resourceful homemakers discovered that this hardy perennial plant—which thrives in cooler climates and springs up reliably each year—could be transformed into delicious desserts. Since rhubarb is one of the first plants to emerge in spring gardens, often before strawberries and other fruits are available, it became known as the “pie plant.”
In rural America, rhubarb pie became a symbol of spring’s arrival and the end of long winters when fresh produce was scarce. Housewives would eagerly await the first rhubarb stalks, and the first rhubarb pie of the season was often a celebrated event. The plant’s ability to grow abundantly with minimal care made it a staple in American gardens, and recipes were passed down through generations like treasured heirlooms.
Regional variations developed over time. In the Midwest, rhubarb pie is often called “pie plant pie” and might include a lattice top. New Englanders sometimes add a touch of orange zest, while some Southern cooks incorporate a custard-style filling. The tradition of combining rhubarb with strawberries—creating the beloved strawberry-rhubarb pie—emerged as a way to temper rhubarb’s tartness and is now equally popular.
Today, rhubarb pie remains a nostalgic favorite that connects us to simpler times and reminds us of the importance of seasonal cooking. It’s a testament to American ingenuity and the beautiful things that happen when we work with what nature provides.
Why You’ll Love This Recipe
This classic rhubarb pie recipe strikes the perfect balance between traditional methods and modern convenience, making it accessible for bakers of all skill levels while delivering absolutely spectacular results. The filling achieves that ideal consistency—not too runny, not too thick—with a gorgeous color that looks as good as it tastes.
Here’s why this recipe will become your go-to rhubarb pie:
- Perfectly balanced flavor – The sugar-to-rhubarb ratio creates a filling that highlights rhubarb’s natural tartness while being sweet enough to satisfy any dessert lover
- Foolproof instructions – Clear, detailed steps ensure your pie turns out beautifully every single time, even if you’re a beginner baker
- Impressive presentation – This pie looks absolutely stunning with its golden, flaky crust and jewel-toned filling that practically begs to be photographed
- Uses simple ingredients – No exotic or hard-to-find items required; everything you need is available at your regular grocery store
- Make-ahead friendly – Perfect for entertaining since you can prepare components in advance and even freeze the finished pie
- Crowd-pleaser – Even people who claim they don’t like rhubarb fall in love with this pie’s perfect sweet-tart balance
- Celebrates seasonal produce – Using fresh spring rhubarb means you’re getting the best flavor and supporting the farm-to-table movement
- Versatile serving options – Delicious warm, at room temperature, or chilled, with endless topping possibilities from vanilla ice cream to whipped cream
- Budget-friendly – Rhubarb is inexpensive when in season, and if you grow it yourself, this becomes an incredibly economical dessert
- Creates memories – There’s something about homemade pie that brings people together and creates lasting food memories
Ingredient Notes
Understanding your ingredients is key to baking success, and this rhubarb pie relies on a handful of simple but important components that work together to create magic.
Fresh Rhubarb: The star of the show! Look for firm, crisp stalks with vibrant color—the redder the stalks, the more beautiful your filling will be. Avoid any stalks that are limp or have brown spots. Always remove and discard the leaves, as they’re toxic. You’ll need about 4-5 cups of sliced rhubarb (roughly 1.5 to 2 pounds). If fresh rhubarb isn’t available, frozen rhubarb works well; just thaw it completely and drain excess liquid before using.
Granulated Sugar: Essential for balancing rhubarb’s tartness. The amount (typically 1¼ to 1½ cups) might seem like a lot, but rhubarb is incredibly tart and needs adequate sweetening. You can reduce sugar slightly if you prefer a more tart pie, but I don’t recommend going below 1 cup.
All-Purpose Flour or Cornstarch: Acts as a thickening agent for the filling. Cornstarch creates a clearer, more gel-like consistency, while flour gives a slightly more opaque, traditional filling. Tapioca starch is another excellent option that creates a beautiful glossy filling without any chalky aftertaste.
Butter: Small cubes of butter dotted over the filling add richness and help create that luscious, jammy texture. Use unsalted butter so you can control the salt level in your pie.
Pie Crust: You can use homemade or store-bought; both work beautifully. If making homemade, a butter-based crust offers the best flavor. For a double-crust pie, you’ll need dough for both bottom and top crusts. The key is keeping everything cold for the flakiest results.
Egg Wash: A beaten egg brushed over the top crust creates that gorgeous golden-brown finish and helps seal the edges. You can substitute with milk or cream if needed.
Salt: Just a pinch enhances all the flavors and balances the sweetness. Don’t skip it!
Optional Flavor Enhancers: A teaspoon of vanilla extract, a dash of cinnamon, or a bit of orange zest can add wonderful depth without overwhelming the rhubarb flavor.
Equipment Needed
Having the right tools makes pie-baking significantly easier and more enjoyable. Here’s what you’ll need to create your perfect rhubarb pie:
- 9-inch pie dish – Glass or ceramic works best as they conduct heat evenly; you can see through glass dishes to check bottom crust browning
- Rolling pin – For rolling out your pie dough to the perfect thickness and size
- Large mixing bowl – To combine your rhubarb filling ingredients
- Sharp knife and cutting board – For slicing rhubarb into even pieces (½-inch pieces work perfectly)
- Measuring cups and spoons – Accurate measurements are crucial in baking
- Pastry brush – For applying egg wash to the top crust
- Fork – To crimp the edges and dock the bottom crust (poke holes to prevent bubbling)
- Pie crust shield or aluminum foil – To protect the edges from over-browning during baking
- Parchment paper or plastic wrap – For rolling out dough without sticking
- Cooling rack – Essential for allowing your pie to cool properly and preventing a soggy bottom
- Optional: Bench scraper – Helpful for transferring rolled dough and cutting decorative shapes for the top crust
- Optional: Pastry blender – If making homemade crust, this tool helps cut butter into flour efficiently
Rhubarb Pie Recipe

This classic homemade rhubarb pie features a flaky, buttery crust filled with perfectly sweetened tart rhubarb. It’s the ultimate spring dessert that celebrates seasonal produce and traditional American baking.
- Prep Time: 30 minutes
- Cook Time: 50 minutes
- Total Time: 1 hour 20 minutes (plus cooling time)
- Yield: 8 servings 1x
- Category: Dessert
- Method: Baking
- Cuisine: American
- Diet: Vegetarian
Ingredients
For the Filling:
- 4 to 5 cups fresh rhubarb, cut into ½-inch pieces (about 1.5-2 lbs)
- 1¼ cups granulated sugar (adjust to 1½ cups if you prefer sweeter)
- ⅓ cup all-purpose flour (or ¼ cup cornstarch for a clearer filling)
- ¼ teaspoon salt
- 1 teaspoon vanilla extract (optional)
- 2 tablespoons unsalted butter, cut into small pieces
- ½ teaspoon ground cinnamon (optional)
For the Crust:
- 1 double pie crust (homemade or store-bought)
- 1 egg, beaten (for egg wash)
- 1 tablespoon milk or cream (for egg wash)
- 1 tablespoon coarse sugar (optional, for sprinkling on top)
Instructions
- Preheat your oven to 400°F (200°C). Position the rack in the lower third of your oven to ensure the bottom crust bakes through completely.
- Prepare the rhubarb filling: In a large mixing bowl, combine the sliced rhubarb, granulated sugar, flour (or cornstarch), salt, and optional vanilla extract and cinnamon. Toss everything together gently until the rhubarb is evenly coated. Let this mixture sit for about 10-15 minutes while you prepare the crust. This allows the sugar to begin drawing out the rhubarb’s juices.
- Roll out the bottom crust: On a lightly floured surface or parchment paper, roll out one disc of pie dough into a 12-inch circle, about ⅛-inch thick. Carefully transfer it to your 9-inch pie dish by rolling it around your rolling pin and unrolling it over the dish. Gently press the dough into the bottom and sides of the dish, allowing excess to hang over the edges. Use a fork to poke several holes (dock) in the bottom of the crust to prevent bubbling.
- Fill the pie: Pour the rhubarb mixture into the prepared pie shell, spreading it evenly. Dot the top of the filling with small pieces of butter, distributing them across the surface.
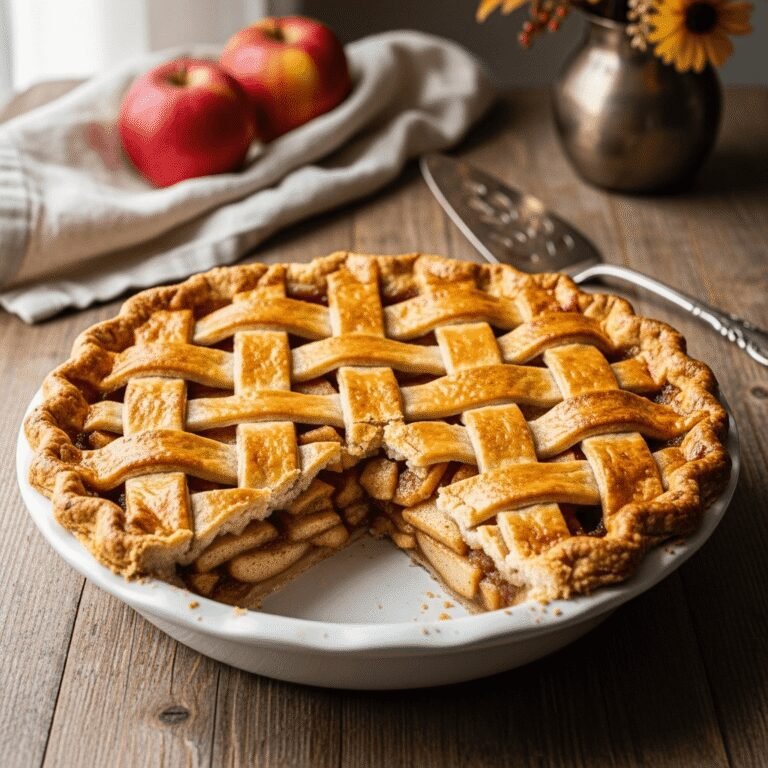
- Add the top crust: Roll out the second disc of dough into another 12-inch circle. You can either place it whole over the filling (cutting decorative vents for steam to escape) or create a lattice pattern for a more decorative look. If using a whole top crust, cut 4-5 slits in the center to allow steam to vent.
- Seal and crimp the edges: Trim any excess dough to about 1 inch beyond the pie dish edge. Fold the top crust edge under the bottom crust edge and crimp decoratively using your fingers or a fork to seal the two crusts together. This creates a beautiful edge and prevents filling from bubbling out.
- Apply egg wash: In a small bowl, whisk together the beaten egg and milk. Brush this mixture generously over the top crust and crimped edges. Sprinkle with coarse sugar if desired for extra sparkle and crunch.
- Protect the edges: Cover the crimped edges with a pie crust shield or strips of aluminum foil to prevent over-browning. You’ll remove this during the last 15-20 minutes of baking.
- Bake the pie: Place the pie on a baking sheet (to catch any drips) and bake at 400°F for 20 minutes. Then reduce the temperature to 350°F (175°C) and continue baking for 30-40 minutes more, removing the foil shield during the last 15-20 minutes. The pie is done when the crust is deep golden brown and you can see the filling bubbling through the vents.
- Cool completely: Remove the pie from the oven and place it on a cooling rack. This is crucial: let the pie cool for at least 3-4 hours (preferably overnight) before slicing. This allows the filling to set properly. I know it’s hard to wait, but trust me—it’s worth it!
Notes
- The cooling time is not optional. Cutting into a warm rhubarb pie will result in runny filling that hasn’t had time to set properly.
- If your pie edges brown too quickly, don’t wait until the scheduled time to add foil—cover them immediately.
- For a deeper flavor, add a tablespoon of fresh lemon juice to the filling mixture.
- If using frozen rhubarb, thaw completely and drain well before measuring to prevent excess liquid in your filling.
- Store leftover pie covered in the refrigerator for up to 4 days.
Nutrition
- Serving Size: 1 slice (⅛ of pie)
- Calories: 365
- Sugar: 28g
- Sodium: 255mg
- Fat: 16g
- Saturated Fat: 7g
- Unsaturated Fat: 8g
- Trans Fat: 0g
- Carbohydrates: 52g
- Fiber: 2g
- Protein: 4g
- Cholesterol: 45mg
Note: Nutrition information is approximate and will vary based on specific ingredients used, particularly whether using homemade or store-bought crust.
Tips & Variations
This classic rhubarb pie is wonderfully versatile and can be customized to suit different tastes and dietary needs.
Strawberry-Rhubarb Variation: Replace 1-2 cups of rhubarb with fresh strawberries for the classic combination. The strawberries add natural sweetness and a beautiful color contrast.
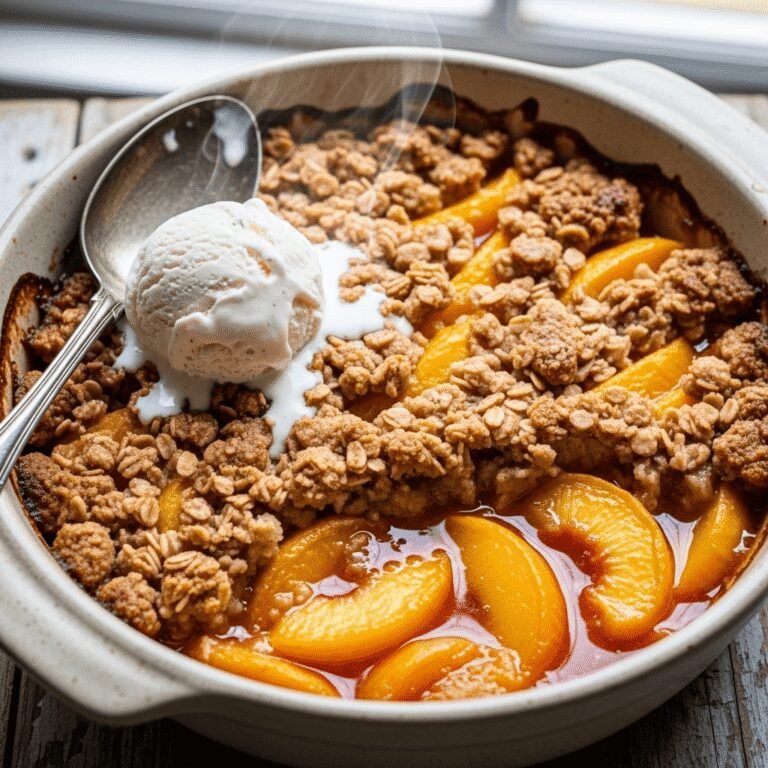
Crumb-Top Version: Skip the top crust and make a streusel topping instead by combining ¾ cup flour, ½ cup brown sugar, ½ cup oats, and 6 tablespoons cold butter. This creates a delightful crunchy texture.
Reduce Sugar for Tart Lovers: If you enjoy a more pronounced tart flavor, reduce sugar to 1 cup, but be warned—this creates a very tart pie that isn’t for everyone.
Add Citrus Brightness: Include the zest of one orange or lemon in the filling for a subtle citrus note that enhances the rhubarb’s natural flavor.
Spice It Up: Beyond cinnamon, try adding ¼ teaspoon nutmeg, a pinch of cardamom, or ½ teaspoon fresh grated ginger for complex flavor.
Make It Gluten-Free: Use your favorite gluten-free pie crust and substitute the flour in the filling with cornstarch or tapioca starch.
Individual Pies: Divide the filling among 6-8 small ramekins topped with pie crust circles for personal-sized pies perfect for parties.
Rustic Galette Style: Skip the pie dish entirely and create a free-form galette by folding crust edges over the filling for a more casual, rustic presentation.
Pro Chef Tips
Taking your rhubarb pie from good to absolutely exceptional requires understanding a few professional techniques that make all the difference.
Temperature is everything: Keep your pie dough cold throughout the entire process. If it starts warming up while you’re working with it, pop it back in the refrigerator for 10-15 minutes. Cold butter in the dough creates steam pockets during baking, resulting in that coveted flaky texture. Some professionals even chill the assembled pie for 15 minutes before baking.
Layer your thickeners: For the most reliable filling consistency, use a combination of flour and cornstarch (2 tablespoons of each instead of ⅓ cup flour alone). This provides insurance against a runny filling while maintaining great texture.
Macerate your rhubarb: After combining the filling ingredients, let the mixture sit for 15-30 minutes. This allows the sugar to draw out excess liquid from the rhubarb. You can then drain off some of this liquid if it seems excessive, preventing a soggy bottom crust.
Blind bake for perfection: For the crispiest bottom crust, blind bake it (bake empty with pie weights) for 10 minutes before adding the filling. This pre-baking creates a barrier that prevents the crust from becoming soggy.
Embrace the overnight rest: Professional bakers know that rhubarb pie actually tastes better the day after baking. The flavors meld together beautifully, and the filling achieves the perfect consistency.
Brush the bottom crust: Before adding the filling, brush the bottom crust with a thin layer of beaten egg white. This creates a protective seal that prevents the filling’s juices from making the crust soggy.
Use a pizza stone: Baking your pie on a preheated pizza stone or baking steel ensures the bottom crust gets enough direct heat to crisp up beautifully, even with a juicy filling.
Common Mistakes to Avoid
Even experienced bakers can fall into these common rhubarb pie pitfalls. Here’s how to sidestep them:
Slicing into the pie too soon: This is the number one mistake. Rhubarb filling needs substantial cooling time to set properly. Cutting into a warm pie results in a soupy mess. Wait at least 3-4 hours, or ideally overnight. Use this time to build anticipation—it’ll taste even better!
Using rhubarb leaves: This can’t be overstated—rhubarb leaves contain toxic oxalic acid and should never be consumed. Always trim leaves completely and discard them. Only the stalks are edible.
Over-mixing the filling: Once you’ve combined the rhubarb with sugar and thickener, stop. Over-mixing breaks down the rhubarb too much before baking, leading to a mushy texture instead of distinct, tender pieces.
Skipping the egg wash: The egg wash isn’t just for appearance—it also helps seal the crust and creates a barrier that prevents the top crust from becoming soggy from steam. Don’t skip this step if you want a professional-looking, golden pie.
Not adjusting for frozen rhubarb: Frozen rhubarb contains significantly more water than fresh. If using frozen, thaw completely, drain thoroughly, and consider increasing your thickener by 1-2 tablespoons to compensate for the extra moisture.
Baking at too high temperature throughout: Starting at a high temperature (400°F) helps set the crust, but maintaining that heat will burn your crust before the filling cooks through. Always reduce to 350°F after the first 20 minutes.
Forgetting to vent the top crust: Steam needs somewhere to escape. Without adequate vents, pressure builds up and can cause your pie to burst open in unexpected places, creating a mess in your oven.
Storage & Meal Prep
Proper storage ensures your rhubarb pie stays delicious for days, and understanding make-ahead options makes entertaining stress-free.
Room Temperature Storage: Once completely cooled, rhubarb pie can sit at room temperature, loosely covered with foil or plastic wrap, for up to 2 days. This is ideal if you’ll be eating it within that timeframe and prefer the crust to maintain maximum crispness.
Refrigerator Storage: For longer storage, cover the pie (once completely cooled) with plastic wrap or aluminum foil and refrigerate for up to 4-5 days. The crust will soften slightly in the refrigerator, but the filling maintains its quality beautifully. Let slices come to room temperature for 20-30 minutes before serving for best flavor, or warm them gently in a 300°F oven for 10-15 minutes.
Reheating Individual Slices: Place a slice on a microwave-safe plate and heat for 20-30 seconds, or reheat in a 300°F oven for 10-12 minutes until warmed through. The oven method maintains better texture.
Reheating Whole Pie: Cover the entire pie loosely with foil and warm in a 300°F oven for 20-25 minutes until heated through. Remove foil for the last 5 minutes if you want to crisp up the crust.
Preventing Soggy Crust: If storing in the refrigerator, place a paper towel under the pie to absorb any condensation. You can also reheat slices briefly to restore some crispness to the crust.
Make-Ahead & Freezer Notes
Rhubarb pie is incredibly freezer-friendly and perfect for make-ahead preparation, making it ideal for holiday planning or preserving spring’s rhubarb bounty for later enjoyment.
Freezing Unbaked Pie: This is the best method for maintaining quality. Assemble the entire pie (don’t apply egg wash yet), wrap it tightly in plastic wrap, then in aluminum foil. Freeze for up to 3 months. When ready to bake, brush with egg wash and bake directly from frozen, adding 15-20 extra minutes to the baking time. No thawing necessary!
Freezing Baked Pie: Let the pie cool completely, then wrap tightly in plastic wrap followed by aluminum foil. Freeze for up to 3 months. Thaw overnight in the refrigerator, then bring to room temperature or warm gently in a 300°F oven for 15-20 minutes.
Freezing Rhubarb Filling: Prepare the filling mixture, place it in a freezer-safe container or bag, and freeze for up to 6 months. Thaw in the refrigerator overnight before using. This is perfect for times when you have abundant rhubarb but not time to bake.
Make-Ahead Pie Dough: Pie dough freezes beautifully for up to 3 months. Wrap discs tightly in plastic wrap, then place in a freezer bag. Thaw overnight in the refrigerator before using. You can also roll out the dough, fit it into the pie dish, and freeze the shell for up to 1 month.
Prep-Ahead Timeline: Up to 2 days before serving, make and refrigerate your pie dough. The day before, roll out crusts, assemble the pie, and refrigerate overnight (don’t bake yet). On serving day, apply egg wash and bake. This spreads the work out and actually improves flavor as the filling macerates overnight.
Best Reheating Method for Frozen Pie: For baked frozen pie, let it thaw in the refrigerator overnight, then bring to room temperature for 30 minutes. Warm in a 325°F oven for 20-25 minutes to restore the fresh-baked quality and crisp up the crust.
Serving Suggestions
Rhubarb pie is delicious on its own, but the right accompaniments can elevate it to an unforgettable dessert experience.
Classic À La Mode: Nothing beats a warm slice of rhubarb pie topped with a generous scoop of vanilla ice cream. The cold, creamy ice cream melting into the warm, tart filling is pure magic. Try French vanilla, butter pecan, or even strawberry ice cream for variation.
Whipped Cream Perfection: Freshly whipped cream (slightly sweetened with vanilla) provides a lighter alternative to ice cream. For extra elegance, fold in a tablespoon of Grand Marnier or amaretto into the whipped cream.
Custard or Crème Anglaise: A pool of vanilla custard sauce underneath a slice of rhubarb pie creates an elegant, restaurant-style presentation perfect for dinner parties.
Sharp Cheddar Cheese: This might sound unusual, but it’s a traditional pairing in some regions. A slice of sharp cheddar alongside rhubarb pie provides a savory contrast that’s surprisingly delicious.
Coffee or Tea Service: Serve your rhubarb pie with freshly brewed coffee, Earl Grey tea, or chamomile tea for an afternoon tea experience. The beverages complement the pie’s tartness beautifully.
Beverage Pairings: Beyond coffee and tea, consider serving with sparkling lemonade, iced tea, cold milk, or even a dessert wine like Moscato or late-harvest Riesling.
Complete Meal Ideas: After a spring dinner of roasted chicken, asparagus, and new potatoes, rhubarb pie makes the perfect seasonal finale. It’s also wonderful following a lighter meal of grilled fish and fresh salad.
Brunch Addition: Slice up leftover rhubarb pie for a special weekend brunch alongside quiche, fresh fruit salad, and mimosas.
FAQs Section
Can I use frozen rhubarb instead of fresh?
Absolutely! Frozen rhubarb works well in pie. Thaw it completely, then drain off excess liquid before measuring. You may need to increase the thickener (flour or cornstarch) by 1-2 tablespoons since frozen rhubarb releases more liquid than fresh. Pat the thawed rhubarb dry with paper towels for best results.
Why is my rhubarb pie filling runny?
The most common cause is not using enough thickener or cutting into the pie before it’s completely cooled. Rhubarb releases a lot of juice, so adequate thickener is essential. Also, the filling needs several hours to set as it cools—this isn’t optional. If you consistently have runny filling, increase cornstarch by 1 tablespoon next time.
Do I need to peel rhubarb before using it in pie?
No, there’s no need to peel rhubarb for pie. The skin is perfectly edible and softens during baking. Simply wash the stalks, trim the ends, and slice. Peeling would be unnecessarily time-consuming and waste precious rhubarb.
How do I prevent a soggy bottom crust?
Several techniques help: dock (poke holes in) the bottom crust with a fork, brush it with egg white before adding filling, bake on the lowest oven rack, use a pizza stone for extra bottom heat, and ensure your oven is fully preheated. You can also blind bake the bottom crust for 10 minutes before adding the filling.
Can I reduce the sugar in rhubarb pie?
You can, but proceed cautiously. Rhubarb is extremely tart, and sugar doesn’t just sweeten—it also helps draw out juices that combine with the thickener to create the proper filling texture. Going below 1 cup of sugar will create a very tart pie that most people find too sour. If reducing sugar, consider replacing some with a natural sweetener like maple syrup or honey.
What’s the difference between using flour versus cornstarch as a thickener?
Flour creates a more opaque, traditional-style filling with a slightly cloudy appearance. Cornstarch produces a clearer, more gel-like, glossy filling. Cornstarch is also a more powerful thickener—you need less of it. Tapioca starch is another excellent option that creates a beautiful translucent filling without any starchy aftertaste.
Can I make rhubarb pie ahead of time?
Yes! Rhubarb pie actually improves after sitting overnight as the flavors meld. You can bake it up to 2 days ahead and store at room temperature, or up to 4 days ahead if refrigerated. For longer storage, freeze the unbaked assembled pie and bake it directly from frozen when needed.
Conclusion
There’s something deeply satisfying about pulling a beautiful rhubarb pie from the oven—the golden crust, the bubbling ruby-red filling visible through the vents, and that incredible aroma that fills your kitchen. This classic recipe celebrates spring’s most underrated ingredient and transforms it into a dessert that’s both nostalgic and timeless.
Whether you’re continuing a family tradition, creating new memories, or simply embracing seasonal baking, this rhubarb pie delivers on every level. The combination of tart rhubarb and sweet filling encased in flaky, buttery crust is simply irresistible. It’s comfort food at its finest—the kind of dessert that brings people together around the table and inspires conversations about grandma’s kitchen and simpler times.
I hope this recipe becomes a springtime staple in your home, just as it has in mine. Don’t be intimidated by pie-making; with these detailed instructions and helpful tips, you’ll be amazed at how achievable and rewarding it is to create this beautiful dessert from scratch.
Now it’s your turn! Give this rhubarb pie recipe a try and let me know how it turns out. Did you make any fun variations? Serve it with something creative? I’d love to hear about your experience in the comments below. And if you love this recipe as much as I do, please share it with your friends and save it to your Pinterest boards so you can find it again when rhubarb season arrives. Happy baking!