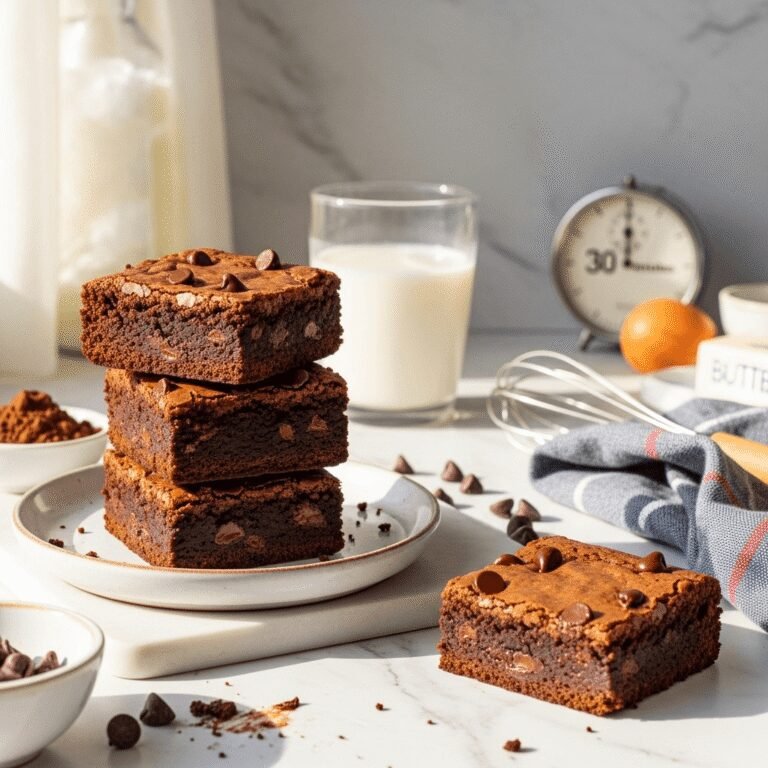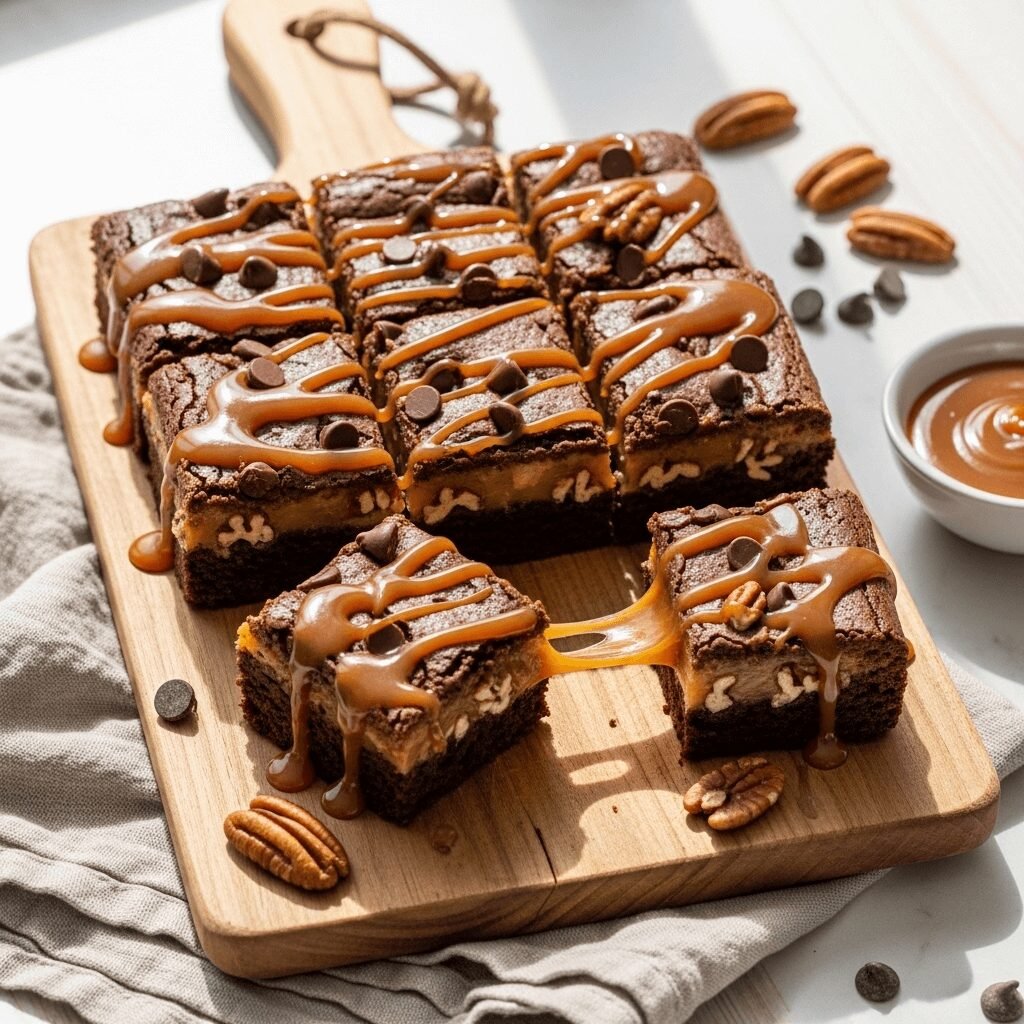
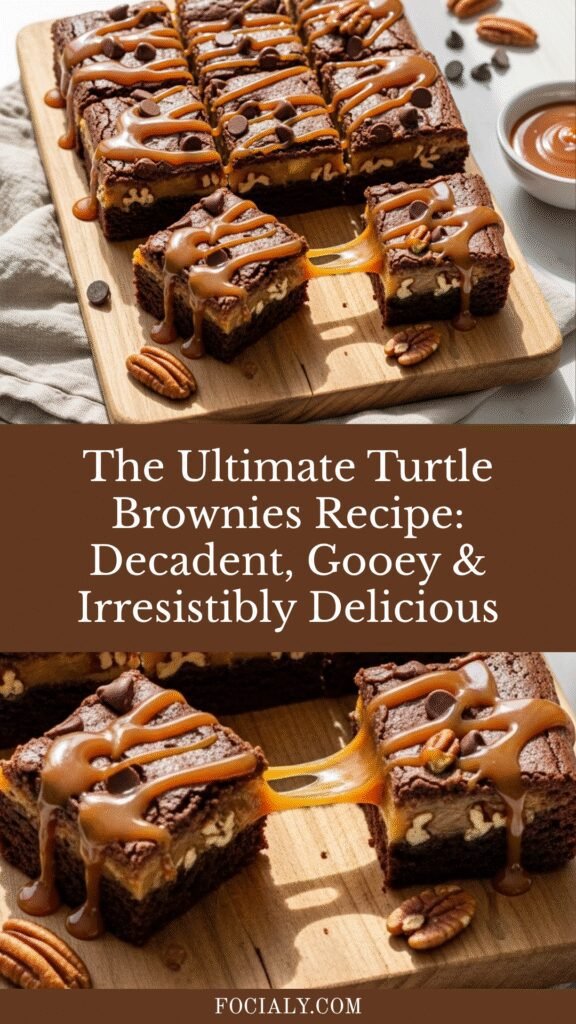
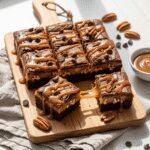
The Ultimate Turtle Brownies Recipe: Decadent, Gooey & Irresistibly Delicious
If you’ve ever wondered what happens when rich, fudgy brownies meet the iconic flavors of turtle candies, you’re about to find out. Turtle brownies are a show-stopping dessert that combines everything we love about classic brownies with layers of gooey caramel, crunchy pecans, and melted chocolate. These aren’t your ordinary brownies—they’re an indulgent treat that tastes like you spent hours in the kitchen, but they’re surprisingly easy to make at home.
Perfect for potlucks, holiday gatherings, bake sales, or whenever you need to impress guests without breaking a sweat, turtle brownies deliver bakery-quality results every single time. The combination of textures—from the dense, chocolatey brownie base to the sticky-sweet caramel layer and the satisfying crunch of toasted pecans—makes every bite an experience. Whether you’re serving them at a birthday party, bringing them to a church social, or simply treating yourself after a long week, these brownies are guaranteed to disappear fast.
History / Background
The story of turtle brownies begins with turtle candies, a beloved American confection that dates back to 1918. The DeMet’s Candy Company in Chicago created the original “Turtles” candy—clusters of pecans covered in caramel and dipped in chocolate. The name comes from their appearance: when you look at these candies from the side, the pecans poking out resemble a turtle’s head and legs.
Turtle candies became wildly popular throughout the 20th century, especially in the Midwest and Southern states where pecans grow abundantly. They were a staple in candy shops, movie theaters, and holiday gift boxes. The flavor combination of chocolate, caramel, and pecans proved so irresistible that bakers started incorporating these elements into other desserts.
Turtle brownies emerged as home bakers began experimenting with layering these classic turtle candy flavors into brownie recipes. By the 1980s and 1990s, turtle brownies had become a staple at church potlucks, school bake sales, and family gatherings across America. The recipe gained even more popularity with the rise of food blogs and Pinterest in the 2000s, where the photogenic layers and dripping caramel made them a viral sensation.
Today, turtle brownies represent the perfect marriage of convenience and decadence. They honor the nostalgia of traditional turtle candies while offering the comfort and familiarity of homemade brownies. In many Southern families, they’ve become as traditional as pecan pie during the holidays, and they continue to be one of the most requested desserts at bake sales nationwide.
Why You’ll Love This Recipe
This turtle brownies recipe delivers everything you want in a dessert without any of the fussy techniques or hard-to-find ingredients. The layers come together beautifully, creating a professional-looking dessert that tastes even better than it looks. The brownie base stays perfectly fudgy, the caramel layer adds that signature gooey sweetness, and the pecans provide just enough crunch to balance all that richness.
Here’s what makes this recipe a keeper:
- Easy enough for beginners – No tempering chocolate, no candy thermometer required, just straightforward mixing and layering
- Tastes like gourmet – People will think you ordered these from an expensive bakery
- Perfect for crowds – Makes 16 generous squares, ideal for feeding a group
- Make-ahead friendly – Actually tastes better the next day once the flavors meld together
- Customizable – Swap nuts, add extra chocolate, or drizzle with more caramel to make it your own
- Budget-friendly – Uses pantry staples and affordable ingredients you probably already have
- Always impressive – The layered look and dripping caramel make these Pinterest-perfect every time
- Kid-approved – Even picky eaters love the sweet, chocolatey flavor combination
- Freezer-friendly – Make a double batch and freeze some for later
Ingredient Notes
Unsalted Butter – The foundation of rich, fudgy brownies. Using unsalted butter lets you control the salt level in the recipe. Make sure it’s fully melted and slightly cooled before mixing with the other ingredients to prevent the eggs from cooking.
Granulated Sugar – Provides sweetness and helps create that signature crackly top on your brownies. Don’t reduce the amount, as sugar also contributes to the texture.
Eggs – These bind everything together and give brownies their dense, fudgy texture. Room temperature eggs incorporate more smoothly into the batter. You’ll need large eggs for this recipe.
Vanilla Extract – Use pure vanilla extract rather than imitation for the best flavor. It enhances the chocolate and adds depth to the overall taste.
All-Purpose Flour – Provides structure to the brownies. Don’t overmix once you add the flour, or your brownies will become tough and cakey instead of fudgy.
Unsweetened Cocoa Powder – Choose a good quality cocoa powder for the richest chocolate flavor. Dutch-process cocoa creates a darker, more intense brownie, while natural cocoa powder offers a lighter, more traditional taste.
Salt – Just a pinch enhances all the flavors and balances the sweetness. Don’t skip it!
Caramel Sauce – You can use store-bought caramel sauce or homemade. Thick, high-quality caramel works best for creating distinct layers. Ice cream topping or caramel bits both work beautifully.
Pecans – Toasting the pecans before adding them intensifies their flavor and adds extra crunch. You can substitute with walnuts if you prefer, or use a mix of both. Roughly chopped pecans distribute better than whole ones.
Semi-Sweet Chocolate Chips – These melt into pockets of gooey chocolate throughout the brownie. You can use milk chocolate for a sweeter result or dark chocolate for a more sophisticated, less-sweet version.
Heavy Cream (optional) – If you’re making homemade caramel or want to thin out thick caramel sauce, a splash of heavy cream helps create the perfect drizzling consistency.
Equipment Needed
- 9×13-inch baking pan
- Parchment paper or aluminum foil (for easy removal)
- Large mixing bowl
- Medium mixing bowl
- Whisk or electric mixer
- Rubber spatula
- Measuring cups and spoons
- Small saucepan (if making homemade caramel)
- Sharp knife (for chopping pecans)
- Cooling rack
- Toothpick (for testing doneness)
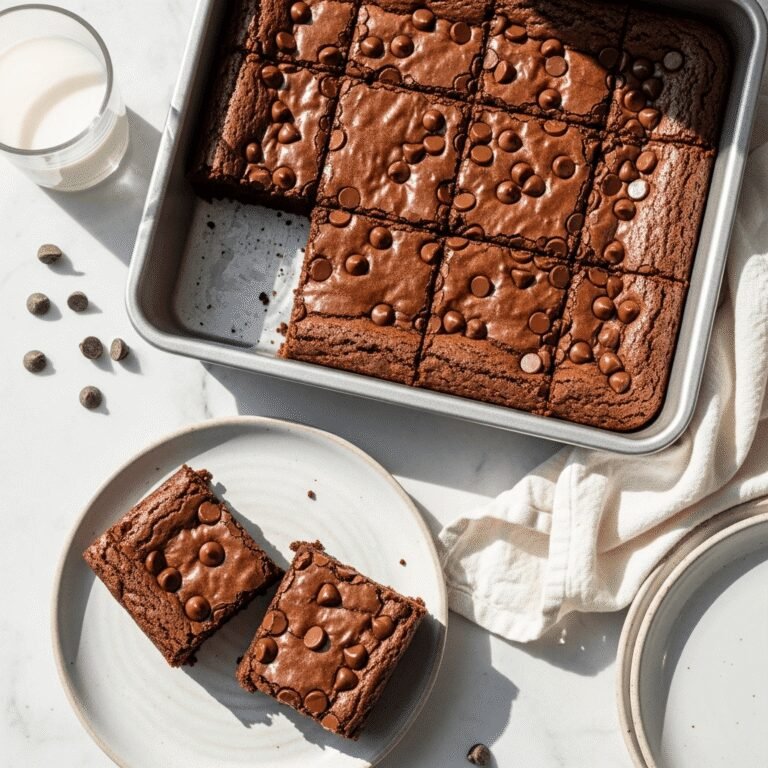
Turtle Brownies Recipe
Rich, fudgy chocolate brownies layered with gooey caramel, crunchy pecans, and melted chocolate chips. These turtle brownies combine all the flavors of classic turtle candies in one irresistible dessert that’s perfect for any occasion.
- Prep Time: 15 minutes
- Cook Time: 35 minutes
- Total Time: 50 minutes (plus cooling time)
- Yield: 16 brownies 1x
- Category: Dessert
- Method: Baking
- Cuisine: American
- Diet: Vegetarian
Ingredients
For the Brownie Base:
- 1 cup (2 sticks) unsalted butter, melted
- 2 cups granulated sugar
- 4 large eggs, room temperature
- 1 tablespoon pure vanilla extract
- 1 cup all-purpose flour
- ¾ cup unsweetened cocoa powder
- ½ teaspoon salt
- ½ teaspoon baking powder
For the Turtle Topping:
- 1½ cups caramel sauce (store-bought or homemade)
- 1½ cups pecans, roughly chopped and toasted
- 1 cup semi-sweet chocolate chips
- 2 tablespoons heavy cream (optional, for thinning caramel)
- Flaky sea salt for garnish (optional)
Instructions
- Preheat and Prepare: Preheat your oven to 350°F (175°C). Line a 9×13-inch baking pan with parchment paper, leaving an overhang on the sides for easy removal later. Lightly grease the parchment with cooking spray or butter.
- Toast the Pecans: Spread the chopped pecans on a baking sheet and toast in the preheated oven for 5-7 minutes until fragrant and slightly darker. Watch carefully to prevent burning. Remove and set aside to cool.
- Make the Brownie Batter: In a large mixing bowl, whisk together the melted butter and granulated sugar until well combined and slightly glossy. Add the eggs one at a time, whisking well after each addition. Stir in the vanilla extract.
- Add Dry Ingredients: In a separate medium bowl, sift together the flour, cocoa powder, salt, and baking powder. Gradually fold the dry ingredients into the wet ingredients using a rubber spatula. Mix just until no flour streaks remain—don’t overmix or the brownies will be cakey.
- First Bake: Pour half of the brownie batter into the prepared pan and spread it evenly with a spatula. Bake for 15 minutes until the surface looks set but is still slightly glossy.
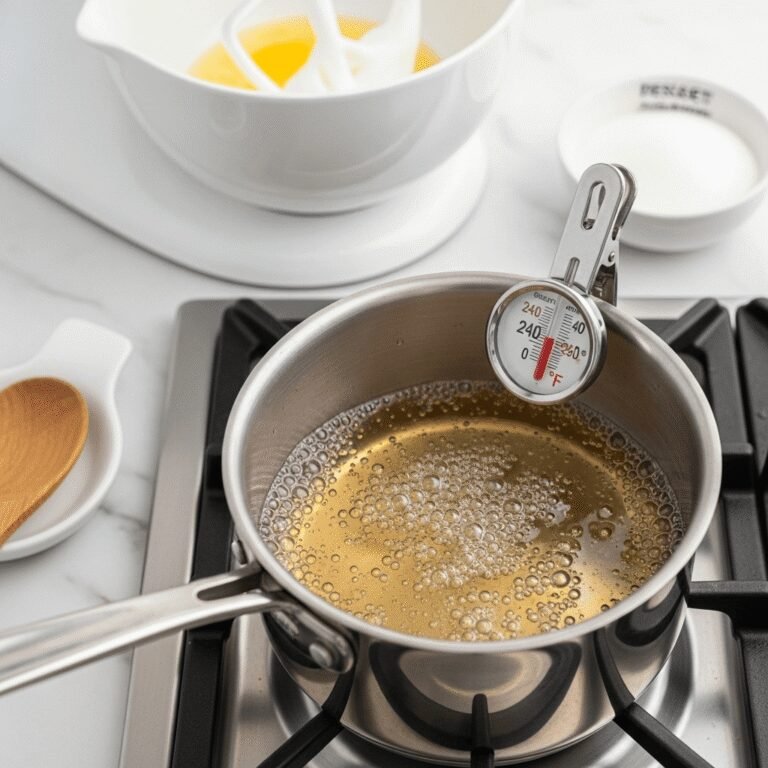
- Add Caramel Layer: Remove the pan from the oven. If your caramel sauce is very thick, warm it slightly and stir in the heavy cream to make it more pourable. Drizzle the caramel evenly over the partially baked brownie layer, leaving a small border around the edges (caramel can bubble over during baking).
- Add Toppings: Sprinkle the toasted pecans evenly over the caramel layer, then scatter the chocolate chips on top. Carefully spread the remaining brownie batter over the toppings. It doesn’t need to cover completely—some caramel and nuts peeking through is perfectly fine and looks beautiful.
- Final Bake: Return the pan to the oven and bake for an additional 30-35 minutes, until a toothpick inserted into the brownie layer (not the gooey caramel center) comes out with just a few moist crumbs. The center should still look slightly underdone—it will continue cooking as it cools.
- Cool Completely: Let the brownies cool in the pan on a wire rack for at least 2 hours, or until completely cool. For the cleanest cuts, refrigerate for 1 hour before slicing. The caramel needs time to set properly.
- Slice and Serve: Using the parchment paper overhang, lift the entire brownie slab out of the pan. Place on a cutting board. Use a large, sharp knife, wiping it clean between cuts, to slice into 16 squares. For extra indulgence, drizzle with additional caramel and sprinkle with flaky sea salt just before serving.
Notes
- For the fudgiest texture, don’t overbake. The brownies should still look slightly underdone in the center when you remove them from the oven.
- If caramel is seeping out the sides during baking, don’t worry—this is normal and adds to the rustic appearance.
- For cleaner slices, dip your knife in hot water and wipe it dry between each cut.
- Store in an airtight container to keep the brownies moist and the caramel from hardening.
Nutrition
- Serving Size: 1 brownie (1/16 of recipe)
- Calories: 385
- Sugar: 42g
- Sodium: 125mg
- Fat: 21g
- Saturated Fat: 10g
- Unsaturated Fat: 9g
- Trans Fat: 0g
- Carbohydrates: 48g
- Fiber: 3g
- Protein: 5g
- Cholesterol: 75mg
Nutrition information is approximate and may vary based on specific ingredients used.
Tips & Variations
Chocolate Variations:
- Use dark chocolate chips instead of semi-sweet for a more intense, less-sweet flavor
- Add white chocolate chips along with the semi-sweet for a marbled chocolate effect
- Stir ½ cup of chocolate chips directly into the brownie batter for extra pockets of melted chocolate
Nut Alternatives:
- Swap pecans for walnuts, which have a slightly more bitter, earthy flavor
- Use cashews for a buttery, less traditional take
- Try a mixture of pecans and almonds for complex flavor and texture
- Make them nut-free by substituting with toffee bits or pretzel pieces for crunch
Caramel Options:
- Use dulce de leche for a deeper, more complex caramel flavor
- Make salted caramel brownies by using salted caramel sauce
- Drizzle extra caramel over the finished brownies for an over-the-top presentation
- Mix caramel bits into the batter for caramel throughout
Flavor Boosters:
- Add 1 teaspoon of espresso powder to the brownie batter to intensify the chocolate flavor
- Sprinkle flaky sea salt over the top before the final bake for sweet and salty perfection
- Mix in ½ teaspoon of cinnamon for warmth and depth
- Add a tablespoon of bourbon or rum to the batter for adult-friendly brownies
Size Adjustments:
- Cut into smaller 2-inch squares for bite-sized portions (yields about 24 pieces)
- Make brownie bars by cutting into rectangular pieces instead of squares
- Use a 9×9-inch pan for thicker, fudgier brownies (increase baking time by 5-10 minutes)
Pro Chef Tips
Temperature Matters: Always let your eggs and butter come to room temperature before mixing. Room temperature ingredients emulsify better, creating a smoother batter that bakes more evenly. Cold eggs can cause the melted butter to seize up and create a grainy texture.
Don’t Overmix: Once you add the flour, mix just until combined. Overmixing develops the gluten in the flour, which creates a tough, cakey texture instead of the dense, fudgy consistency we’re after. When you can’t see any more flour streaks, stop mixing immediately.
Toast Those Pecans: This step is non-negotiable if you want maximum flavor. Toasting nuts activates their natural oils and intensifies their flavor dramatically. The difference between toasted and raw pecans in this recipe is night and day. Just watch them carefully—they can go from perfectly toasted to burned in seconds.
Embrace the Underbake: The secret to fudgy brownies is removing them from the oven when they still look slightly underdone. The center should jiggle just a tiny bit, and a toothpick should come out with moist crumbs (not wet batter, but not completely clean either). They’ll continue cooking with residual heat as they cool.
Quality Cocoa Matters: Invest in good-quality cocoa powder. Brands like Ghirardelli, Valrhona, or Guittard create richer, more complex chocolate flavor than generic brands. Dutch-process cocoa creates darker, more intensely flavored brownies, while natural cocoa powder provides a more classic brownie taste.
Line Your Pan Properly: Use parchment paper with an overhang on all sides. This creates handles that let you lift the entire brownie slab out of the pan for easier cutting. Trying to cut brownies in the pan often leads to messy edges and uneven pieces.
Cool Completely Before Cutting: I know it’s tempting to dive in while they’re still warm, but patience pays off. Warm brownies are fragile and gooey, making clean cuts nearly impossible. Fully cooled (or even chilled) brownies slice beautifully with sharp, clean edges. For the absolute cleanest cuts, refrigerate for an hour, then let them sit at room temperature for 10 minutes before slicing.
Common Mistakes to Avoid
Using Cold Ingredients: Adding cold eggs to melted butter creates a lumpy, separated batter that won’t bake evenly. Always bring eggs to room temperature (place them in warm water for 5 minutes if you forgot to take them out earlier).
Overbaking: This is the number one brownie killer. Overbaked brownies are dry, crumbly, and disappointing. Remember, they continue cooking after you remove them from the oven, so err on the side of underdone. The toothpick test should show moist crumbs, not a clean toothpick.
Skipping the Pan Preparation: If you don’t line your pan properly, you’ll struggle to remove the brownies cleanly. Even worse, caramel can permanently cement brownies to an unlined pan. Always use parchment paper with plenty of overhang.
Using Cheap Chocolate or Cocoa: Brownies are all about chocolate flavor, so using low-quality cocoa powder or chocolate chips results in flat, one-dimensional taste. Spend a little extra on good cocoa and real chocolate chips—the difference is dramatic.
Cutting Too Soon: Warm brownies fall apart, the caramel doesn’t hold, and you end up with a messy pile instead of beautiful squares. Practice patience and let them cool completely, or better yet, chill them first.
Uneven Caramel Distribution: If your caramel is too thick, it won’t spread evenly and will create some bites with too much caramel and others with none. Thin it slightly with heavy cream so it flows across the entire brownie layer, leaving just a small border at the edges.
Not Toasting the Pecans: Raw pecans taste flat and can be slightly bitter. Toasted pecans are sweeter, nuttier, and add so much more dimension to these brownies. Don’t skip this five-minute step.
Storage & Meal Prep
Room Temperature Storage: Store turtle brownies in an airtight container at room temperature for up to 4 days. Layer parchment paper between stacked brownies to prevent them from sticking together. The caramel stays soft and gooey, while the brownies maintain their fudgy texture.
Refrigerator Storage: For longer storage, keep brownies in an airtight container in the refrigerator for up to 1 week. Refrigeration makes them firmer and easier to cut into clean pieces, though the texture becomes denser. Let them sit at room temperature for 15-20 minutes before serving for the best texture and flavor.
Reheating Instructions: If you prefer warm brownies, microwave individual pieces for 10-15 seconds. This softens the caramel and makes the chocolate chips melty again. Don’t overdo it—you want them warm, not hot, or the caramel will become too runny.
Portioning for Storage: Cut the brownies before storing if you plan to grab individual pieces throughout the week. If you want to keep the whole slab fresh as long as possible, store it uncut and slice pieces as needed. The less surface area exposed to air, the longer they stay moist.
Make-Ahead & Freezer Notes
Make-Ahead Instructions: Turtle brownies are actually better the next day, making them perfect for advance preparation. Bake them completely, let them cool, then cover tightly and refrigerate overnight. The flavors meld together beautifully, and the caramel sets perfectly. Bring to room temperature or warm slightly before serving.
Freezing Whole Pan: After the brownies have cooled completely, wrap the entire uncut slab tightly in plastic wrap, then in aluminum foil. Freeze for up to 3 months. Thaw overnight in the refrigerator, then bring to room temperature before cutting and serving.
Freezing Individual Portions: Cut the brownies into squares, then wrap each piece individually in plastic wrap. Place wrapped brownies in a freezer-safe bag or container. Freeze for up to 3 months. This method is perfect if you want to grab single servings for lunches or late-night treats. Thaw individual pieces at room temperature for 30-45 minutes or microwave from frozen for 20-30 seconds.
Freezer-to-Table: Turtle brownies can be served slightly frozen for a different textural experience—the brownie becomes denser and almost fudge-like, while the caramel firms up like a candy layer. Some people actually prefer them this way!
Best Reheating from Frozen: For the best results, thaw frozen brownies in the refrigerator overnight, then bring to room temperature. If you’re in a hurry, microwave from frozen in 15-second intervals until warmed through. The caramel may need an extra few seconds to become gooey again.
Serving Suggestions
Turtle brownies are decadent enough to stand alone, but pairing them with complementary sides elevates them from delicious to unforgettable.
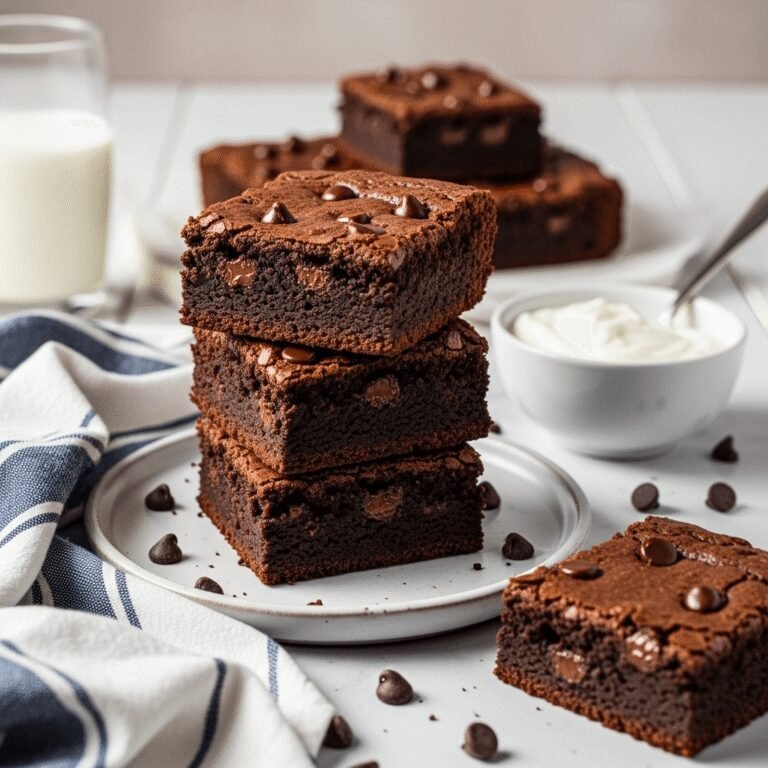
Classic Pairings: Serve warm brownies with a generous scoop of vanilla ice cream. As it melts into the warm chocolate and gooey caramel, it creates a sundae-like experience that’s absolutely heavenly. French vanilla or butter pecan ice cream are particularly excellent choices.
Coffee Shop Style: Pair with a hot cup of coffee, espresso, or a rich hot chocolate. The slight bitterness of coffee cuts through the sweetness perfectly, making each bite feel less heavy. This is the ultimate afternoon treat or after-dinner dessert.
Elegant Presentation: Plate individual brownies with a dollop of freshly whipped cream, a drizzle of extra caramel sauce, and a few whole pecans. Dust with powdered sugar and add a mint leaf for a restaurant-quality presentation.
Party Platter: Arrange brownies on a large platter surrounded by fresh berries—strawberries, raspberries, and blueberries provide a tart contrast to the sweet brownies and add beautiful color for gatherings.
Beverage Pairings:
- Cold milk (classic and perfect for kids)
- Irish cream liqueur or Baileys for adults
- Port or dessert wine for sophisticated gatherings
- Caramel macchiato or mocha latte
Dessert Board: Include turtle brownies as part of a larger dessert spread with cookies, fruit, cheese, and nuts. They’re rich enough that people will naturally take smaller portions when other options are available, making your batch go further.
FAQs Section
Can I use a boxed brownie mix instead of making brownies from scratch? Absolutely! Use a 9×13-inch brownie mix and prepare according to package directions for the first layer. After 15 minutes of baking, add the caramel, pecans, and chocolate chips, then top with the remaining batter and continue baking. This shortcut still produces delicious turtle brownies, just with slightly less rich chocolate flavor than from-scratch brownies.
Why are my brownies cakey instead of fudgy? This usually happens from overbaking, too much flour, or overmixing the batter. Make sure you’re measuring flour correctly (spoon it into the measuring cup and level it off—don’t scoop directly from the bag). Mix just until the flour disappears, and remove the brownies from the oven when a toothpick comes out with moist crumbs, not clean.
Can I make these without nuts due to allergies? Yes! Substitute the pecans with toffee bits, crushed pretzels, or Rice Krispies cereal for crunch. You could also add extra chocolate chips or simply omit the nuts entirely—the brownies will still be delicious, just missing that signature turtle crunch.
How do I prevent the caramel from burning or bubbling over? Make sure to leave a small border around the edges when spreading the caramel—about ½ inch from the sides of the pan. Don’t use more caramel than the recipe calls for, as excess caramel is more likely to bubble out. If it does bubble slightly, don’t worry—it adds to the rustic, homemade charm.
Can I use homemade caramel sauce? Homemade caramel works beautifully and adds incredible flavor. Just make sure it’s thick enough to hold its shape—it should be pourable but not runny. If your caramel is too thin, it will soak into the brownie layers instead of creating a distinct layer.
Why do my brownies fall apart when I cut them? This happens when the brownies are cut too soon, before they’ve cooled and the caramel has set. Always let them cool completely at room temperature, or refrigerate for an hour before cutting. Also, make sure to use a sharp knife and wipe it clean between cuts for the neatest squares.
Can I double this recipe? Yes, but you’ll need two 9×13-inch pans since doubling won’t fit in a single pan. Alternatively, use a large sheet pan, but watch the baking time carefully—thinner brownies in a larger pan will bake faster, while the same amount of batter in two standard pans will bake at the time specified in the recipe.
Conclusion
These turtle brownies represent everything we love about homemade desserts—they’re impressively delicious without being complicated, they use ingredients you probably have in your pantry, and they deliver that perfect combination of textures and flavors that keeps everyone coming back for seconds (and thirds). The layers of fudgy chocolate brownie, gooey caramel, crunchy pecans, and melted chocolate create a symphony of flavors that rivals any bakery creation.
Whether you’re an experienced baker or just starting your baking journey, this recipe is forgiving and flexible. Make them exactly as written, or customize them with your favorite nuts, different types of chocolate, or extra caramel drizzle. They’re perfect for holidays, potlucks, bake sales, or those days when you just need something seriously chocolatey and indulgent.
I’d love to hear how your turtle brownies turn out! Drop a comment below with your experience, any creative variations you tried, or questions you have. And if you loved this recipe, please save it to your Pinterest boards so you can find it again (and share it with your friends who love chocolate as much as you do). Don’t forget to snap a photo of your beautiful brownies and tag me—I love seeing your baking successes!
Happy baking, and enjoy every gooey, chocolatey, caramel-y bite!