Ultimate Ube Cake Recipe: The Purple Filipino Dessert Taking Pinterest by Storm
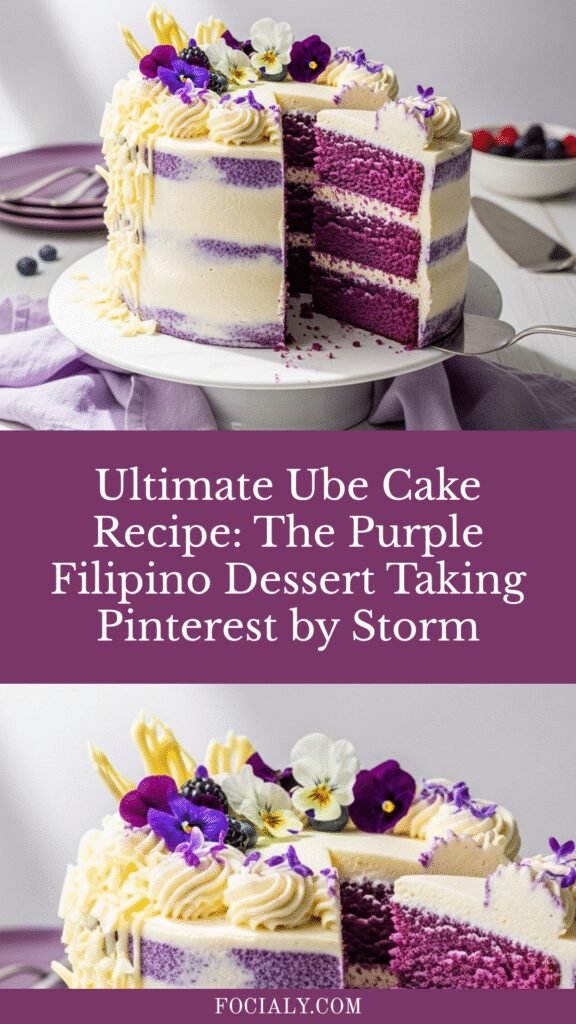
If you’ve been scrolling through Pinterest lately, you’ve probably noticed a stunning purple cake that looks almost too beautiful to eat. That’s ube cake, and it’s about to become your new favorite dessert! This Filipino-inspired treat features the naturally vibrant purple yam called ube (pronounced “OO-beh”), creating a cake that’s not only Instagram-worthy but also incredibly delicious with its unique, subtly sweet flavor.
Ube cake is perfect for birthdays, celebrations, potlucks, or any time you want to impress your guests with something truly special. The gorgeous purple hue is completely natural, and the flavor is like a delightful combination of vanilla with nutty, earthy undertones that’s unlike anything you’ve tasted before. Whether you’re hosting a baby shower, celebrating a graduation, or just treating your family to weekend baking, this ube cake recipe will have everyone asking for seconds—and the recipe!
History / Background
Ube, or purple yam (Dioscorea alata), has been a staple ingredient in Filipino cuisine for centuries, long before it became a trending flavor on social media. Native to Southeast Asia, this vibrant purple root vegetable has been cultivated in the Philippines for generations, where it’s traditionally used in beloved desserts like halo-halo, ube halaya (ube jam), and various kakanin (rice cakes).
In Filipino culture, ube represents more than just a flavor—it’s a connection to heritage and childhood memories. Many Filipinos grew up helping their grandmothers prepare ube halaya, a labor-intensive process of cooking down the purple yam with coconut milk and condensed milk until it becomes a rich, spreadable jam. This traditional preparation method has been passed down through generations, preserving not just a recipe but a cultural tradition.
The rise of ube cake in Western countries, particularly in the United States, began in Filipino-American communities and bakeries that wanted to share their culinary heritage with broader audiences. Around the 2010s, ube started gaining mainstream attention as food bloggers and social media influencers discovered its stunning appearance and unique taste. Today, ube has transcended its traditional roots to become a beloved flavor in ice cream shops, bakeries, and home kitchens across America, with ube cake leading the charge as the most popular way to showcase this incredible ingredient.
What makes ube cake particularly special is how it bridges tradition and modern baking. While respecting the authentic Filipino flavors, this cake adaptation makes the ingredient accessible to home bakers everywhere, allowing people to experience a taste of Filipino culture right from their own kitchens.
Why You’ll Love This Recipe
This ube cake recipe is designed specifically for home bakers who want professional-looking results without professional training. I’ve tested this recipe dozens of times to ensure it works perfectly every single time, and the feedback from readers has been overwhelmingly positive. The cake has a tender, moist crumb that stays fresh for days, and the striking purple color never fails to wow everyone who sees it.
Here’s why this recipe will become your go-to celebration cake:
- Stunning visual appeal – The natural purple color creates an eye-catching dessert that photographs beautifully for Pinterest and social media
- Unique, delicious flavor – Ube offers a subtle sweetness with vanilla and nutty notes that’s sophisticated yet approachable
- Easier than you think – Despite looking fancy, this cake uses straightforward techniques that beginner bakers can master
- Make-ahead friendly – The cake layers can be baked in advance and frozen, making party prep stress-free
- Versatile for any occasion – Perfect for birthdays, baby showers, weddings, Easter, or just because
- Conversation starter – Your guests will be curious about the unique flavor and impressed by your baking skills
- Cultural experience – Introduces you and your family to Filipino cuisine in the most delicious way possible
- Consistent results – The recipe is carefully balanced to produce a reliable, moist cake every time
Ingredient Notes
Understanding your ingredients is key to baking success, so let’s break down what makes this ube cake special:
Ube Halaya (Ube Jam): This is the star ingredient that gives the cake its distinctive purple color and flavor. You can find ube halaya in Asian grocery stores, especially Filipino markets, or order it online. Look for brands like Good Shepherd, Goldilocks, or Magnolia. If you can’t find ube halaya, you can use ube extract combined with purple food coloring, though the flavor won’t be quite as authentic.
All-Purpose Flour: Forms the structure of your cake. Make sure to measure correctly by spooning flour into your measuring cup and leveling off, or use a kitchen scale for precision.
Granulated Sugar: Provides sweetness and helps create the tender crumb texture. Don’t reduce the sugar too much, as it also affects the cake’s moisture and structure.
Unsalted Butter: Use room temperature butter for proper creaming. Unsalted allows you to control the salt level in your recipe.
Eggs: Bring to room temperature for better incorporation. Large eggs are standard for this recipe.
Buttermilk: Creates an incredibly tender, moist crumb and adds a subtle tang that balances the sweetness. You can make a substitute by adding 1 tablespoon of white vinegar or lemon juice to 1 cup of regular milk and letting it sit for 5 minutes.
Baking Powder & Baking Soda: These leavening agents work together to create the perfect rise. Make sure they’re fresh (not expired) for best results.
Vanilla Extract: Enhances the overall flavor. Use pure vanilla extract, not imitation, for the best taste.
Salt: A small amount enhances all the other flavors and balances the sweetness.
Ube Extract (Optional): Intensifies the ube flavor and deepens the purple color. Available at Asian markets or online.
Cream Cheese Frosting Ingredients: The tangy cream cheese pairs beautifully with the sweet ube cake, creating a perfectly balanced dessert.
Equipment Needed
Having the right tools makes baking so much easier and more enjoyable. Here’s what you’ll need for this ube cake recipe:
- Three 8-inch or 9-inch round cake pans – For creating a beautiful layered cake
- Parchment paper – To line the bottom of your pans for easy cake removal
- Stand mixer or hand mixer – For creaming butter and mixing batter
- Large mixing bowls – At least two for separating wet and dry ingredients
- Measuring cups and spoons – For accurate measurements
- Wire cooling racks – To cool cakes properly and prevent sogginess
- Rubber spatula – For scraping down bowl sides and folding ingredients
- Offset spatula – Makes frosting the cake much easier and creates a professional finish
- Cake turntable – Optional but highly recommended for easier frosting
- Toothpicks or cake tester – To check if your cakes are done baking
- Sifter or fine-mesh strainer – For sifting dry ingredients and ensuring a smooth batter
Ube Cake Recipe
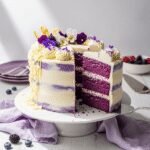
This stunning ube cake features moist, tender purple yam-flavored layers topped with tangy cream cheese frosting. A Filipino-inspired dessert that’s perfect for celebrations and guaranteed to impress with its gorgeous natural purple color and unique, delicious flavor.
- Prep Time: 25 minutes
- Cook Time: 30 minutes
- Total Time: 55 minutes (plus cooling and frosting time)
- Yield: 12-14 servings 1x
- Category: Dessert
- Method: Baking
- Cuisine: Filipino-American
- Diet: Vegetarian
Ingredients
For the Ube Cake:
- 2¾ cups all-purpose flour
- 2½ teaspoons baking powder
- ½ teaspoon baking soda
- ½ teaspoon salt
- 1 cup unsalted butter, softened to room temperature
- 2 cups granulated sugar
- 4 large eggs, room temperature
- 1 cup ube halaya (purple yam jam)
- 1 tablespoon ube extract (optional, for enhanced color and flavor)
- 1½ teaspoons vanilla extract
- 1¼ cups buttermilk, room temperature
For the Cream Cheese Frosting:
- 16 ounces cream cheese, softened to room temperature
- 1 cup unsalted butter, softened to room temperature
- 6 cups powdered sugar, sifted
- 2 teaspoons vanilla extract
- ¼ cup ube halaya (optional, for purple-tinted frosting)
- 2-3 tablespoons heavy cream, if needed for consistency
- Pinch of salt
For Decoration (Optional):
- White chocolate shavings
- Edible flowers
- Fresh berries
- Purple sprinkles
Instructions
Prepare Your Pans:
- Preheat your oven to 350°F (175°C). Grease three 8-inch or 9-inch round cake pans with butter or non-stick spray, then line the bottoms with parchment paper circles. Grease the parchment paper as well. This double-greasing ensures your cakes will release perfectly.
Mix Dry Ingredients: 2. In a large bowl, whisk together the flour, baking powder, baking soda, and salt until well combined. Set this mixture aside. Sifting these dry ingredients together ensures even distribution of the leavening agents.
Cream Butter and Sugar: 3. In your stand mixer bowl (or large mixing bowl if using a hand mixer), beat the softened butter on medium speed for about 2 minutes until it’s creamy and smooth. Gradually add the sugar and continue beating for 4-5 minutes until the mixture is light, fluffy, and pale in color. This creaming process incorporates air, which helps create a light, tender cake.
Add Eggs and Ube: 4. Add the eggs one at a time, beating well after each addition (about 30 seconds per egg). Scrape down the sides of the bowl as needed. Mix in the ube halaya, ube extract (if using), and vanilla extract until fully incorporated. The batter will turn a beautiful purple color.
Alternate Wet and Dry: 5. With your mixer on low speed, add the flour mixture in three additions, alternating with the buttermilk in two additions. Begin and end with the flour mixture. The pattern should be: flour, buttermilk, flour, buttermilk, flour. Mix just until combined after each addition—overmixing can create a tough, dense cake.
Final Mix: 6. Once all ingredients are added, give the batter a few final stirs with a rubber spatula, scraping the bottom and sides of the bowl to ensure everything is evenly mixed. The batter should be smooth, thick, and gorgeously purple.
Divide and Bake: 7. Divide the batter evenly among your three prepared pans (I recommend using a kitchen scale for precision—each pan should have about 550-600 grams of batter). Smooth the tops with your spatula and gently tap the pans on the counter 2-3 times to release any air bubbles.
Bake the Cakes: 8. Bake for 28-32 minutes, or until a toothpick inserted into the center comes out with just a few moist crumbs (not wet batter). The cakes should spring back when lightly pressed, and the edges should just start pulling away from the pan sides.
Cool Completely: 9. Let the cakes cool in their pans on wire racks for 15 minutes. Then carefully run a knife around the edges and invert the cakes onto the racks. Peel off the parchment paper and let the cakes cool completely—this is crucial! Frosting warm cakes will cause the frosting to melt.
Make the Frosting: 10. While the cakes cool, prepare your cream cheese frosting. Beat the softened cream cheese and butter together on medium speed for 3-4 minutes until completely smooth, fluffy, and no lumps remain.
Add Powdered Sugar: 11. Reduce mixer speed to low and gradually add the sifted powdered sugar, one cup at a time, mixing well after each addition. Add the vanilla extract, salt, and ube halaya if using. Once incorporated, increase speed to medium-high and beat for 2-3 minutes until light and fluffy. If the frosting is too thick, add heavy cream one tablespoon at a time until you reach your desired consistency.
Level the Cakes: 12. Once cakes are completely cool, use a serrated knife or cake leveler to trim any domed tops, creating flat, level surfaces. This ensures your cake layers stack beautifully and evenly.
Assemble the Cake: 13. Place your first cake layer on your serving plate or cake stand. If you’re worried about mess, tuck strips of parchment paper under the edges (you’ll remove these later). Spread about 1 cup of frosting evenly over the top, going all the way to the edges.
Add Second Layer: 14. Place the second cake layer on top, gently pressing down to adhere. Add another cup of frosting and spread evenly.
Add Final Layer: 15. Place the third cake layer on top, bottom-side up (for the flattest surface). Press gently.
Crumb Coat: 16. Apply a thin layer of frosting all over the cake—top and sides. This “crumb coat” seals in the crumbs. Refrigerate for 30 minutes until the frosting is firm.
Final Frosting: 17. Apply your final, generous layer of frosting over the chilled crumb coat. Use your offset spatula to create smooth sides and top, or create decorative swirls. Get creative with your design!
Decorate: 18. Add your chosen decorations—white chocolate shavings, edible flowers, fresh berries, or purple sprinkles all look stunning on ube cake.
Chill and Serve: 19. Refrigerate the cake for at least 1-2 hours before serving to allow the frosting to set and the flavors to meld. Remove from the refrigerator 30 minutes before serving for the best texture and flavor.
Notes
- Room temperature ingredients are crucial: Cold eggs and buttermilk can cause the batter to curdle and affect the cake’s texture. Set these out 1-2 hours before baking.
- Don’t overmix: Once you add the flour, mix just until combined. Overmixing develops gluten, creating a tough cake.
- Proper measuring matters: Spoon flour into your measuring cup and level off with a knife, or weigh it (2¾ cups = 345 grams). Scooping directly from the bag packs in too much flour.
- Test for doneness: Start checking at 28 minutes. Overbaking creates dry cake, so it’s better to check early.
- Frosting consistency: The frosting should be spreadable but hold its shape. If it’s too soft, chill for 15 minutes. If too stiff, add more cream.
- Make it extra purple: For deeper color, add 1-2 drops of purple gel food coloring to the batter or frosting.
Nutrition
- Serving Size: 1 slice (based on 14 servings)
- Calories: 645
- Sugar: 68g
- Sodium: 285mg
- Fat: 32g
- Saturated Fat: 20g
- Unsaturated Fat: 10g
- Trans Fat: 0g
- Carbohydrates: 85g
- Fiber: 1g
- Protein: 6g
- Cholesterol: 135mg
Note: Nutrition information is an estimate and will vary based on exact ingredients used and serving sizes.
Tips & Variations
Make it Extra Purple: If you want an even more vibrant purple color, add a few drops of purple gel food coloring to your batter. The natural color from ube halaya can vary by brand.
Coconut Variation: Add ¾ cup of sweetened shredded coconut to the batter for a tropical twist. You can also use coconut milk instead of buttermilk for enhanced coconut flavor.
Ube Cream Cheese Swirl: Reserve ¼ cup of plain cream cheese frosting, then mix the rest with ube halaya. When frosting your cake, add dollops of the plain frosting and swirl together for a beautiful marbled effect.
Mini Cake Option: This batter makes about 24 cupcakes. Bake at 350°F for 18-22 minutes. Perfect for parties!
Different Pan Sizes: You can bake this as two 9-inch layers (increase baking time to 35-40 minutes) or one 9×13-inch sheet cake (bake for 35-40 minutes).
Flavor Additions: Add ½ teaspoon of coconut extract or almond extract to the batter for extra depth of flavor.
Lighter Frosting Option: Make a Swiss meringue buttercream instead of cream cheese frosting for a lighter, less sweet option.
Vegan Adaptation: While not traditional, you can substitute vegan butter, flax eggs (1 tablespoon ground flaxseed + 3 tablespoons water per egg), and non-dairy buttermilk (plant milk + vinegar).
Pro Chef Tips
Temperature is Everything: Professional bakers know that room temperature ingredients emulsify better, creating a more uniform batter and finer crumb. Set out your butter, eggs, and buttermilk at least 2 hours before baking, or quick-warm eggs by placing them in warm (not hot) water for 5-10 minutes.
Weigh Your Ingredients: Invest in a kitchen scale. Baking is chemistry, and volume measurements can vary significantly. Weighing ensures accuracy and consistent results every single time.
The Toothpick Test Secret: Don’t wait for a completely clean toothpick—a few moist crumbs clinging to it is perfect. The cake continues cooking for a few minutes after you remove it from the oven (carryover cooking). A clean toothpick often means an overbaked, dry cake.
Create Bakery-Level Layers: Use a cake leveler or serrated knife to trim your cake layers perfectly flat. Then, create a simple syrup (equal parts sugar and water, heated until dissolved and cooled) and brush it over each layer before frosting. This adds moisture and flavor, just like professional bakeries do.
Frosting Hack for Smooth Sides: After your crumb coat is set, use a bench scraper or offset spatula dipped in hot water, wiped dry, and run along the sides in one smooth motion. The slight heat helps smooth the frosting beautifully.
Prevent Sliding Layers: Before adding your first cake layer, spread a small dollop of frosting on your cake board or serving plate. This acts as “glue” and prevents your cake from sliding around.
The Chill Factor: Chilling your cake between the crumb coat and final frosting isn’t just for neatness—it also allows the layers to settle and adhere, preventing shifting when you cut into it.
Fresher, Longer: Add 2 tablespoons of sour cream to your cake batter. The extra acidity and fat create an incredibly moist cake that stays fresh for days.
Common Mistakes to Avoid
Using Cold Ingredients: This is the most common mistake! Cold butter won’t cream properly, and cold eggs can cause the batter to curdle, resulting in a dense, uneven cake. Always bring ingredients to room temperature—this takes about 2 hours, so plan ahead.
Overmixing the Batter: Once you add flour, mix just until you can’t see any more dry streaks. Overmixing develops too much gluten, creating a tough, chewy cake instead of a tender, light one. It’s okay if the batter isn’t completely smooth—a few small lumps will disappear during baking.
Opening the Oven Door Too Early: Every time you open the oven, the temperature drops significantly, which can cause your cakes to sink in the middle. Wait until at least 25 minutes have passed before checking, and close the door gently when you do.
Frosting a Warm Cake: I know it’s tempting to frost your cake as soon as possible, but warm cakes will melt your frosting, create a crumbly mess, and can even cause your layers to slide apart. Patience is key—make sure your cakes are completely cool to the touch.
Skipping the Crumb Coat: That thin first layer of frosting isn’t optional—it’s essential! It seals in all the loose crumbs so your final layer of frosting looks smooth and professional, not speckled with purple cake crumbs.
Uneven Batter Distribution: Eyeballing the batter between three pans often results in different-sized layers and uneven baking. Use a kitchen scale to weigh your pans and ensure each has the same amount of batter.
Not Preparing Pans Properly: Even non-stick pans need greasing and parchment paper lining. A cake that sticks and tears when you try to remove it is heartbreaking after all that work. Take the extra minute to prepare your pans thoroughly.
Storage & Meal Prep
Room Temperature Storage: If you plan to serve your ube cake within 1-2 days and your kitchen isn’t too warm, you can keep it covered at room temperature. The buttermilk and butter in the cake keep it moist, while the cream cheese frosting remains stable for about 24 hours at cool room temperature (below 70°F).
Refrigerator Storage: For best results and longer storage, keep your ube cake covered in the refrigerator for up to 5 days. Store it in an airtight cake container or cover it with a cake dome. If you don’t have either, loosely tent aluminum foil over the cake (try not to let it touch the frosting). The cake will firm up when cold, so remove it from the refrigerator 30-45 minutes before serving for the best texture and flavor.
Protecting Your Cake: If your frosting has hardened in the fridge, the surface might look a bit dull. Simply let it come to room temperature, and the buttercream will return to its beautiful, smooth appearance.
Leftover Slices: Individual slices can be stored in airtight containers separated by parchment paper. They’ll keep in the refrigerator for up to 5 days. For serving, microwave individual slices for 10-15 seconds to take the chill off, but don’t overdo it or the frosting will melt.
Reheating Tips: Ube cake is delicious cold, at room temperature, or slightly warmed. If you prefer it warm, microwave individual slices for 15-20 seconds, or let refrigerated cake sit at room temperature for 30 minutes before serving.
Make-Ahead & Freezer Notes
Bake-Ahead Success: This is one of the best features of this recipe! Bake your cake layers up to 2 days in advance. Once completely cooled, wrap each layer tightly in plastic wrap, then aluminum foil. Store at room temperature if baking 1 day ahead, or refrigerate if baking 2 days ahead.
Freezing Cake Layers: For even more advance prep, freeze your unfrosted cake layers for up to 3 months. After baking and cooling completely, wrap each layer in plastic wrap twice, then wrap in aluminum foil. Label with the date. When ready to use, thaw the wrapped layers in the refrigerator overnight or at room temperature for 2-3 hours. They’ll taste freshly baked!
Freezing Assembled Cake: You can freeze an already frosted and assembled cake! Place it uncovered in the freezer for 30 minutes to firm up the frosting, then wrap it carefully in plastic wrap and aluminum foil. Freeze for up to 2 months. Thaw in the refrigerator overnight, still wrapped, then bring to room temperature before serving.
Make-Ahead Frosting: Prepare your cream cheese frosting up to 3 days ahead and store it in an airtight container in the refrigerator. Before using, let it come to room temperature and beat it again with your mixer for 1-2 minutes to restore its fluffy texture.
Best Reheating Method for Frozen Cake: Always thaw frozen cake in the refrigerator while still wrapped—this prevents condensation from forming on the cake’s surface. For slices, thaw in the fridge for 2-3 hours or at room temperature for 45-60 minutes.
Assembly Day: If you’ve frozen your layers, plan to assemble and frost the cake at least 3-4 hours before serving (or the day before) to allow time for thawing and the flavors to meld together beautifully.
Serving Suggestions
Ube cake is a showstopper on its own, but here are some wonderful accompaniments that elevate the experience:
Beverages: Serve with hot Filipino coffee (kapeng barako), chai tea latte, coconut milk Thai tea, or champagne for celebrations. The subtle sweetness of ube pairs beautifully with slightly bitter or aromatic drinks.
Ice Cream Pairing: A scoop of vanilla, coconut, or (if you can find it) ube ice cream alongside a slice creates an amazing dessert experience. The cold creaminess contrasts wonderfully with the tender cake.
Fresh Fruit: Sliced strawberries, mango, or tropical fruits like lychee and dragon fruit add freshness and color. Arrange them on the plate around your cake slice for an elegant presentation.
Coconut Whipped Cream: Make homemade coconut whipped cream by chilling a can of full-fat coconut milk overnight, scooping out the solid cream, and whipping it with powdered sugar and vanilla. Dollop this on each slice for extra tropical flavor.
Filipino Dessert Board: Create an ube-themed dessert table with ube cake as the centerpiece, surrounded by other Filipino treats like leche flan, bibingka, or ube ice cream.
Breakfast or Brunch: Yes, cake for breakfast! Ube cake makes an excellent addition to a special brunch spread alongside fresh fruit, pastries, and coffee.
Party Presentation: Serve on decorative purple or white plates with edible flowers and white chocolate shavings. Add a small card explaining what ube is—your guests will love learning about this unique ingredient!
FAQs Section
Q: What does ube taste like?
A: Ube has a unique, subtly sweet flavor that’s hard to compare to anything else. It has notes of vanilla, white chocolate, and pistachio with a slightly earthy, nutty undertone. It’s not as sweet as you might expect from its bright purple color. Many people describe it as a more sophisticated, less sweet cousin of sweet potato. The flavor is mild enough that it pairs beautifully with both sweet and creamy elements like cream cheese frosting.
Q: Where can I buy ube halaya?
A: Ube halaya is most easily found at Filipino or Asian grocery stores, often in the baking or international aisle. Popular brands include Good Shepherd, Goldilocks, and Magnolia. You can also order it online from Amazon, Walmart.com, or specialty Asian food retailers. It typically comes in jars and has a thick, jam-like consistency. If you can’t find ube halaya locally, ube extract combined with a bit of purple food coloring can work as a substitute, though the authentic flavor comes from the halaya.
Q: Can I make this cake without ube halaya or extract?
A: While you can make a purple cake using food coloring, you won’t get the distinctive ube flavor that makes this cake special. If you absolutely can’t source ube products, you could create a similar-looking cake using purple food coloring and adding a combination of vanilla and almond extracts for a unique flavor, but it won’t be authentic ube cake. I highly recommend ordering ube products online—they have a long shelf life and are worth the investment for the authentic experience.
Q: Why did my cake turn out dense instead of fluffy?
A: Dense cake usually results from one of these issues: overmixing the batter after adding flour (which develops too much gluten), using expired or insufficient leavening agents (check those expiration dates!), not properly creaming the butter and sugar (it should be light and fluffy, which takes 4-5 minutes), using cold ingredients that don’t incorporate properly, or packing too much flour into your measuring cups. Make sure you’re measuring flour correctly—spoon it into the measuring cup and level off with a knife rather than scooping directly.
Q: Can I use a different type of frosting?
A: Absolutely! While cream cheese frosting is my favorite pairing because its tanginess balances the sweet cake, you can use Swiss meringue buttercream, American buttercream, or even whipped cream frosting. For an ube-on-ube experience, you can tint any of these frostings with additional ube halaya and ube extract. Some bakers also love using a cream cheese whipped cream hybrid—just beat cream cheese until smooth, then fold in stabilized whipped cream.
Q: How do I prevent my cake layers from doming?
A: Doming happens when the edges of the cake set before the center does. To minimize this, make sure your oven isn’t too hot (use an oven thermometer to verify the temperature), use light-colored aluminum pans instead of dark ones (dark pans conduct heat faster), and consider using baking strips—wet fabric strips wrapped around your pans that insulate the edges and promote even baking. You can buy commercial cake strips or make your own from old towels. Also, don’t fill your pans more than two-thirds full.
Q: My frosting is too soft/too stiff. How do I fix it?
A: If your frosting is too soft and won’t hold its shape, it’s usually too warm or has too much liquid. Chill it in the refrigerator for 15-20 minutes, then beat again. If it’s still too soft, gradually beat in more powdered sugar (¼ cup at a time). If your frosting is too stiff and difficult to spread, it needs more liquid—add heavy cream or milk one tablespoon at a time while beating until you reach the desired consistency. Make sure your cream cheese and butter were properly softened (not melted!) before making the frosting.
Q: Can I make this as cupcakes instead?
A: Yes! This batter makes approximately 24 cupcakes. Fill cupcake liners two-thirds full and bake at 350°F for 18-22 minutes, or until a toothpick comes out with a few moist crumbs. Cupcakes are perfect for parties and easier to serve than slicing a cake. You can frost them with the same cream cheese frosting using a piping bag for beautiful swirls, and they’re just as delicious as the layer cake version!
Conclusion
Congratulations—you’re now ready to make the most stunning ube cake that will have everyone at your next gathering asking for the recipe! This gorgeous purple dessert isn’t just beautiful to look at; it’s a delicious introduction to Filipino flavors and a celebration of cultural heritage through baking.
I absolutely love hearing from readers who’ve tried my recipes, so please don’t be shy about leaving a comment below sharing how your ube cake turned out! Did you add any creative variations? Did your family love the unique flavor? What occasion did you bake it for? Your feedback helps other home bakers and creates a wonderful community of people who love trying new recipes.
If you loved this recipe, I’d be so grateful if you’d rate it with five stars and share your photos on Pinterest! Tag me so I can see your beautiful creations—there’s nothing I love more than seeing this vibrant purple cake in your kitchens. Don’t forget to save this recipe to your Pinterest boards so you can easily find it when you’re ready to bake. Happy baking, and enjoy every delicious, purple-hued bite!