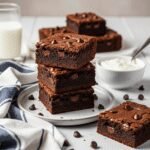
Fudgy Yogurt Brownies Recipe (Healthier & So Moist!)
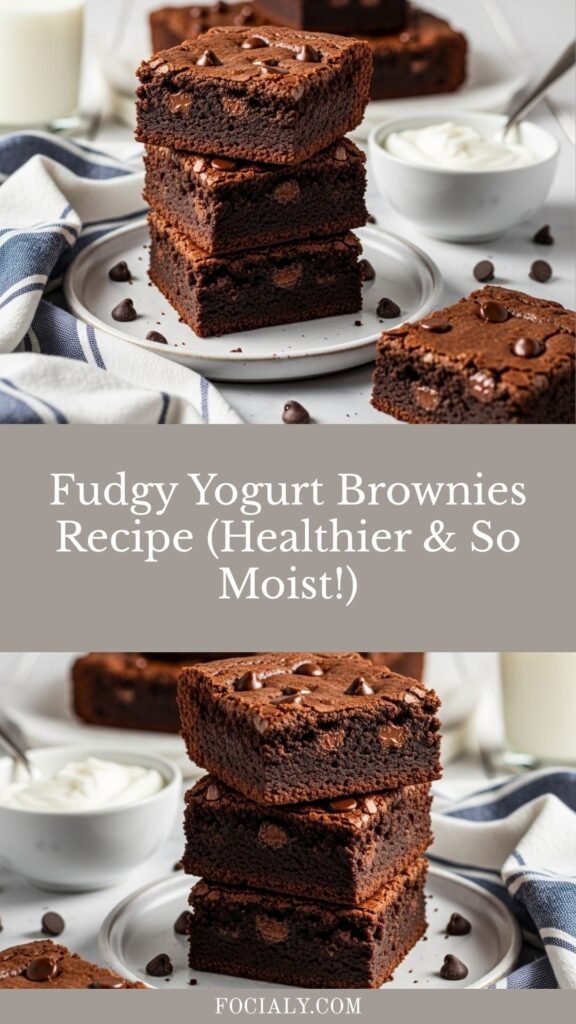
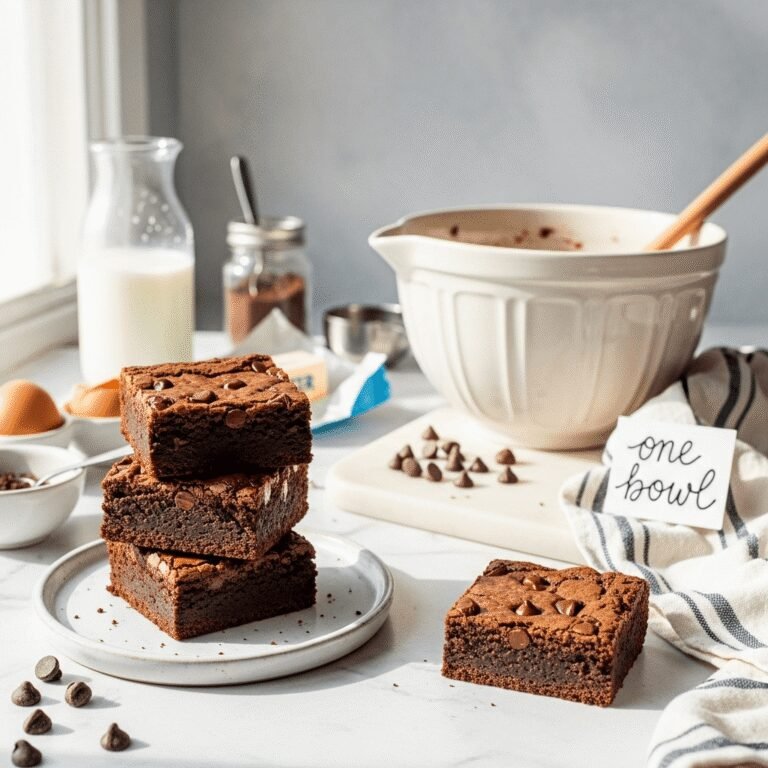
Get ready to fall in love with the most incredible yogurt brownies recipe that delivers all the fudgy, chocolatey goodness you crave with a healthier twist! These amazing brownies use Greek yogurt to create an incredibly moist, tender texture while cutting down on butter and oil. Whether you’re looking for a lighter dessert option, want to sneak extra protein into your treats, or simply love rich, decadent brownies, this healthy yogurt brownie recipe is about to become your new favorite go-to.
What makes these Greek yogurt brownies so special? The yogurt adds a subtle tanginess that perfectly complements the deep chocolate flavor while keeping the brownies ridiculously moist for days. You get that perfect fudgy center, those beautiful crackly tops, and intense chocolate satisfaction – but with less guilt and more nutrition. These brownies are perfect for after-school snacks, lunchbox treats, potluck desserts, or anytime you need a chocolate fix that won’t completely derail your healthy eating goals. Plus, they’re so easy to make with simple pantry ingredients, and no one will ever guess they’re made with yogurt!
History / Background
The concept of using yogurt in baking has roots that stretch across multiple cultures and centuries, though the specific idea of yogurt brownies is a more modern American innovation born from our ongoing quest to make beloved treats a bit healthier.
Yogurt has been used in baking for thousands of years, particularly in Middle Eastern, Mediterranean, and Eastern European cuisines where it’s a dietary staple. Traditional recipes like Persian yogurt cakes, Turkish revani, and various yogurt-based quick breads demonstrate how this fermented dairy product creates incredibly moist, tender baked goods with a subtle tang that enhances other flavors.
Brownies themselves are a classic American invention, with the first recipes appearing in cookbooks around the turn of the 20th century. The exact origin is debated, but most food historians credit either the Palmer House Hotel in Chicago (1893) or a housewife in Bangor, Maine (1905) with creating the first brownie. Traditional brownies are rich, dense chocolate bars made with copious amounts of butter, sugar, and chocolate – absolutely delicious but undeniably indulgent.
The marriage of yogurt and brownies emerged in the late 20th and early 21st centuries as American home bakers became increasingly interested in healthier baking alternatives. The health food movement of the 1970s and 80s, followed by the Greek yogurt boom of the 2000s, inspired creative bakers to experiment with substituting yogurt for some of the fat in traditional recipes.
The discovery was brilliant: yogurt’s acidity tenderizes gluten (creating softer texture), its moisture content keeps baked goods from drying out, and its creamy consistency mimics some of the richness that butter provides. Greek yogurt, in particular, with its thick texture and high protein content, became a star ingredient for healthier baking.
Yogurt brownies gained serious traction on food blogs and Pinterest throughout the 2010s, particularly as people discovered that the yogurt’s slight tanginess actually enhances chocolate flavor rather than detracting from it – much like how buttermilk improves chocolate cake. Today, these brownies represent the perfect balance between indulgence and nutrition, proving that healthier desserts don’t have to taste like cardboard or sacrifice that fudgy texture we all love.
Why You’ll Love This Recipe
These easy yogurt brownies are absolutely phenomenal, and once you try them, you’ll make them on repeat!
Here’s why this recipe will win your heart:
- Healthier without sacrificing taste – Less butter and oil, plus added protein from Greek yogurt
- Incredibly moist and fudgy – The yogurt creates the perfect tender, dense texture
- Simple one-bowl method – Easy preparation with minimal cleanup required
- Extra protein boost – Greek yogurt adds about 3-4g protein per brownie
- Perfect chocolate flavor – Rich, intense cocoa taste with a subtle tangy depth
- Stays fresh for days – The moisture from yogurt keeps these brownies soft longer
- Budget-friendly – Uses affordable pantry staples you likely already have
- Kid-approved – Even picky eaters love these (and don’t detect the yogurt!)
- Versatile base – Easy to customize with mix-ins and toppings
- No mixer required – Mix by hand with just a whisk and spatula
- Lighter but still indulgent – Satisfies chocolate cravings without the heavy feeling
- Great for meal prep – Makes perfect portion-controlled snacks for the week
Whether you’re a health-conscious baker, a busy parent looking for better treats, or simply a brownie lover seeking something a bit lighter, this recipe delivers perfection!
Ingredient Notes
Let’s break down the simple ingredients that create these magnificent Greek yogurt chocolate brownies:
Greek Yogurt (Plain, Full-Fat or 2%) – The star ingredient! Greek yogurt adds moisture, creates tender crumb, and provides protein. Use plain, unsweetened yogurt – not vanilla or flavored varieties which add unwanted sweetness. Full-fat Greek yogurt creates the richest, fudgiest texture, but 2% or even non-fat works well too (texture will be slightly less rich with lower fat content). The yogurt replaces most of the butter/oil in traditional brownies. Substitution: Regular plain yogurt works but drain excess whey first. In a pinch, sour cream can substitute 1:1.
All-Purpose Flour – Provides structure. You can substitute up to half with whole wheat flour for added nutrition and nutty flavor, though texture will be denser. For gluten-free brownies, use a 1:1 gluten-free baking flour blend.
Unsweetened Cocoa Powder – Creates that rich chocolate flavor. Use Dutch-process cocoa for deeper, darker chocolate taste with less acidity, or natural cocoa powder for brighter chocolate notes. Don’t use hot cocoa mix – it contains sugar and milk powder. Quality matters here – better cocoa = better brownies!
Granulated Sugar – Sweetens the brownies and helps create that shiny, crackly top. You can reduce by ¼ cup if you prefer less sweet desserts, though this may affect the texture slightly.
Eggs – Provide structure, richness, and help bind everything together. Use large eggs at room temperature for best results. For egg-free version, use flax eggs (1 tablespoon ground flaxseed + 3 tablespoons water per egg, let sit 5 minutes).
Melted Butter or Oil – We use less than traditional brownies thanks to the yogurt! Butter adds rich flavor, while neutral oil (vegetable, canola) creates slightly fudgier texture. Melted coconut oil works wonderfully too and adds subtle flavor.
Vanilla Extract – Enhances chocolate and adds depth. Always use pure vanilla extract, not imitation.
Baking Powder – Provides slight lift without making brownies cakey. Don’t skip it even though the amount seems small!
Salt – Essential for balancing sweetness and enhancing chocolate flavor. Don’t omit!
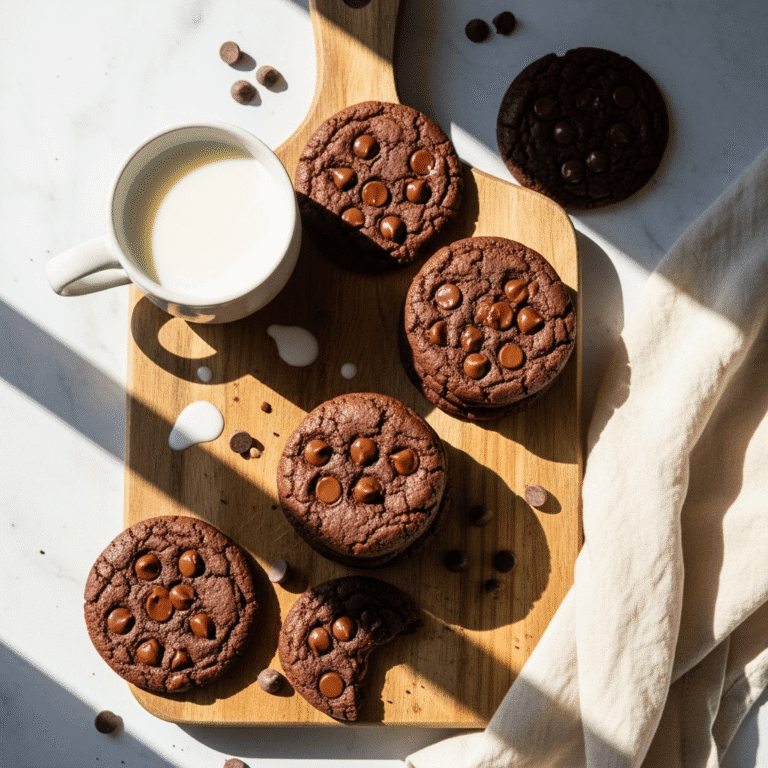
Optional: Chocolate Chips – Add ½-1 cup for extra pockets of melty chocolate throughout. Semi-sweet, dark, or milk chocolate all work beautifully.
Equipment Needed
You don’t need fancy equipment for these brownies!
Essential:
- 8×8-inch or 9×9-inch square baking pan (metal or glass)
- Large mixing bowl (for combining ingredients)
- Medium bowl (for dry ingredients)
- Whisk (no electric mixer needed!)
- Rubber spatula (for folding and scraping)
- Measuring cups and spoons (for accurate measurements)
- Small saucepan or microwave-safe bowl (for melting butter)
- Toothpick or cake tester (for checking doneness)
- Wire cooling rack (for cooling)
- Parchment paper or cooking spray (for preparing pan)
Optional but helpful:
- Fine mesh strainer or sifter (for cocoa powder, though not essential)
- Offset spatula (for spreading batter evenly)
Yogurt Brownies Recipe
Incredibly fudgy yogurt brownies made with Greek yogurt for extra moisture and protein! These healthier brownies have rich chocolate flavor, perfect texture, and stay moist for days. An easy one-bowl recipe that’s less guilt, more chocolate satisfaction!
- Prep Time: 10 minutes
- Cook Time: 30 minutes
- Total Time: 40 minutes
- Yield: 16 brownies 1x
- Category: Dessert
- Method: Baking
- Cuisine: American
- Diet: Vegetarian
Ingredients
For the Brownies:
- ¾ cup plain Greek yogurt (full-fat or 2%, room temperature)
- ¾ cup granulated sugar
- ⅓ cup melted butter or vegetable oil
- 2 large eggs, room temperature
- 1 teaspoon vanilla extract
- ⅔ cup all-purpose flour
- ½ cup unsweetened cocoa powder
- ½ teaspoon baking powder
- ¼ teaspoon salt
- ½ cup chocolate chips (optional but recommended)
Optional Toppings:
- Powdered sugar for dusting
- Extra chocolate chips
- Sea salt flakes
- Chocolate ganache
Instructions
Step 1: Preheat and Prepare
Preheat oven to 350°F (175°C). Line an 8×8-inch or 9×9-inch square baking pan with parchment paper, leaving overhang on two sides for easy removal. Alternatively, grease the pan generously with butter or cooking spray. Set aside.
Step 2: Mix Wet Ingredients
In a large mixing bowl, whisk together the Greek yogurt, sugar, melted butter (or oil), eggs, and vanilla extract until smooth and well combined. The mixture should be creamy and uniform with no lumps of yogurt visible. Whisk vigorously for about 30 seconds to incorporate some air.
Step 3: Combine Dry Ingredients
In a separate medium bowl, whisk together the flour, cocoa powder, baking powder, and salt. Whisk thoroughly to break up any lumps in the cocoa powder and ensure even distribution. If you have a sifter, you can sift the cocoa powder first for extra smoothness, though this isn’t strictly necessary.
Step 4: Combine Wet and Dry
Add the dry ingredients to the wet ingredients. Using a rubber spatula or wooden spoon, gently fold the mixture together until just combined. Don’t overmix – stir just until no dry flour streaks remain. A few small lumps are fine! Overmixing develops gluten and creates cakey, tough brownies instead of fudgy ones. The batter will be thick and somewhat glossy.
Step 5: Add Mix-Ins (Optional)
If using chocolate chips, gently fold them into the batter, reserving a small handful to sprinkle on top if desired.
Step 6: Bake
Pour the batter into your prepared pan, spreading it evenly with a spatula to reach all corners. If you reserved chocolate chips, sprinkle them over the top now. Bake for 25-30 minutes. Start checking at 23 minutes – the brownies are done when a toothpick inserted in the center comes out with a few moist crumbs (NOT wet batter, but definitely not clean). The edges should look set and possibly start pulling away from the pan slightly, while the center should still look slightly soft. Remember, brownies continue cooking from residual heat, so slightly underbaked is better than overbaked!
Step 7: Cool Completely
Remove from oven and place the pan on a wire cooling rack. Let the brownies cool in the pan for at least 15 minutes, then use the parchment overhang to lift them out onto the cooling rack. Let cool completely before cutting – this takes patience but ensures clean cuts and proper texture! At least 1 hour of cooling is ideal.
Step 8: Cut and Serve
Once completely cool, cut into 16 squares using a sharp knife. For the cleanest cuts, wipe the knife between each cut. Serve and enjoy! These are delicious on their own or with a glass of cold milk.
Notes
- Room temperature yogurt is key: Cold yogurt doesn’t mix as smoothly. Let it sit out 30 minutes before baking.
- Don’t overmix: Mix just until combined to keep brownies fudgy, not cakey.
- Don’t overbake: Pull them when slightly underdone. They firm up as they cool!
- Pan size matters: 8×8 creates thicker brownies (30 min bake time), 9×9 creates thinner brownies (25 min).
- Yogurt type: Full-fat Greek yogurt creates richest texture, but 2% or non-fat work too.
- Make them extra chocolatey: Add ½ cup chocolate chips to batter, plus sprinkle more on top.
- Gluten-free option: Use 1:1 GF baking flour blend. Texture will be nearly identical.
Nutrition
- Serving Size: 1 brownie (1/16 of recipe)
- Calories: 125
- Sugar: 12g
- Sodium: 80mg
- Fat: 5g
- Saturated Fat: 3g
- Unsaturated Fat: 2g
- Trans Fat: 0g
- Carbohydrates: 18g
- Fiber: 1g
- Protein: 3g
- Cholesterol: 32mg
Tips & Variations
The beauty of yogurt brownies is how customizable they are! Here are delicious ways to make them your own:
Chocolate Chip Yogurt Brownies: Fold in ¾-1 cup chocolate chips (semi-sweet, dark, or milk chocolate) for pockets of melty chocolate throughout. Add ¼ cup mini chocolate chips on top before baking for gorgeous presentation.
Peanut Butter Swirl Brownies: Drop spoonfuls of peanut butter over the batter and swirl with a knife for beautiful marbled effect and amazing PB-chocolate combo.
Double Chocolate Brownies: Add ½ cup chopped dark chocolate or chocolate chunks to the batter for ultra-chocolatey brownies.
Espresso Brownies: Add 1-2 teaspoons instant espresso powder or finely ground coffee to dry ingredients. Coffee enhances chocolate flavor without tasting like coffee!
Mint Chocolate Brownies: Add ½ teaspoon peppermint extract and fold in ½ cup mint chocolate chips or chopped Andes mints.
Rocky Road Brownies: Fold in ½ cup mini marshmallows, ¼ cup chocolate chips, and ¼ cup chopped walnuts for classic rocky road flavor.
Salted Caramel Brownies: Swirl 3-4 tablespoons of salted caramel sauce into batter before baking. Sprinkle sea salt flakes on top.
Raspberry Brownies: Fold in ½ cup fresh or frozen raspberries (don’t thaw frozen) for fruity chocolate combination.
Frosted Brownies: Make simple chocolate frosting by mixing ¼ cup softened butter, ⅓ cup cocoa powder, 1½ cups powdered sugar, 3 tablespoons milk, and 1 teaspoon vanilla. Spread over cooled brownies.
Protein-Boosted: Add 2 tablespoons chocolate protein powder to dry ingredients for even more protein.
Whole Wheat Version: Replace half the all-purpose flour with whole wheat pastry flour for added nutrition and nutty flavor.
Vegan Yogurt Brownies: Use dairy-free yogurt (coconut or almond-based), replace eggs with flax eggs, and use coconut oil instead of butter.
Pro Chef Tips
Want bakery-quality brownies? Here are professional techniques:
Bring all ingredients to room temperature. Room temperature yogurt, eggs, and butter mix more smoothly, creating better texture. Cold ingredients create lumps and uneven mixing. Let yogurt and eggs sit out 30-45 minutes before baking.
Use high-quality cocoa powder. Since cocoa provides the primary chocolate flavor, quality matters enormously. Dutch-process cocoa (like Droste or Valrhona) creates deeper, richer chocolate taste. It’s worth the investment!
Line pan with parchment paper creating a “sling.” Cut parchment to fit bottom with overhang on opposite sides. This creates handles for lifting brownies out cleanly, ensuring perfect presentation every time.
Don’t overmix the batter. Once you add flour, mix only until just combined – about 15-20 gentle folds. Overmixing develops gluten, creating tough, cakey brownies instead of fudgy ones. Stop when you see just a few flour streaks.
Tap pan on counter to release air bubbles. After pouring batter into pan, lift and drop it on the counter 2-3 times from about 2 inches high. This releases trapped air bubbles that can create holes.
Use the toothpick test correctly. For fudgy brownies, you want moist crumbs on the toothpick – NOT wet batter, but definitely NOT clean. The toothpick should look like damp soil, not mud or completely clean.
Resist cutting immediately! Brownies need to cool completely (at least 1 hour) for the texture to set properly. Warm brownies fall apart and look messy. Cold brownies cut cleanly and have better texture.
Score before cutting for perfect squares. Lightly score the top surface with a knife to mark where you’ll cut, then make full cuts following your guide. This creates uniform, professional-looking pieces.
Clean knife between cuts. Wipe blade with damp paper towel between each cut for clean edges without dragging brownie from one piece to another.
Add instant espresso powder even if not making espresso brownies. Just ½ teaspoon deepens chocolate flavor dramatically without tasting like coffee. Professional chocolate bakers’ secret!
Common Mistakes to Avoid
Even simple brownies can go wrong. Here are pitfalls to avoid:
Using cold yogurt straight from the fridge: Cold yogurt doesn’t incorporate smoothly into the batter, creating lumps and uneven texture. Always bring yogurt to room temperature first – let it sit out 30 minutes or microwave very gently for 10-15 seconds (just to take the chill off, not to warm it).
Overmixing the batter: This is the #1 killer of fudgy brownies! Once you add flour, mix ONLY until just combined. You should stop when you see just a few streaks of flour – it will incorporate during baking. Overmixing develops gluten, creating tough, cakey, dry brownies instead of fudgy, tender ones.
Overbaking: Brownies continue cooking from residual heat after removing from oven. If you wait until the toothpick comes out completely clean, you’ll have dry, crumbly brownies. Pull them when the toothpick has MOIST CRUMBS – not wet batter, but not clean. They’ll firm up perfectly as they cool.
Cutting while still warm: I know it’s tempting, but warm brownies are still setting! They’ll fall apart, look messy, and won’t have that perfect fudgy texture. Cool for at least 1 hour (overnight is even better for cleanest cuts and best texture).
Not preparing the pan properly: Even with non-stick pans, grease well or use parchment paper. Brownies are sticky and dense – inadequate pan prep means they’ll stick and tear when you try to remove them. Line with parchment for foolproof removal.
Using vanilla or flavored yogurt: Only use plain, unsweetened yogurt! Vanilla or fruit-flavored yogurts add unwanted sweetness and flavors that compete with chocolate. Plain Greek yogurt is essential.
Storage & Meal Prep
Healthy yogurt brownies store beautifully!
Room Temperature Storage: Store brownies in an airtight container at room temperature for up to 3 days. Layer parchment paper between stacks to prevent sticking. The yogurt keeps them incredibly moist!
Refrigerator Storage: For longer storage, refrigerate in airtight container for up to 1 week. Let brownies come to room temperature for 15-20 minutes before eating for best texture, or enjoy them cold (some people love fudgy brownies straight from the fridge!).
Individual Wrapping: Wrap individual brownies in plastic wrap, then store all wrapped brownies in a container or zip-top bag. Perfect for grab-and-go snacks, lunchboxes, or portion control!
Keeping Brownies Fresh: Place a piece of bread in the container with brownies. The brownies will absorb moisture from the bread, staying fresh even longer. Replace the bread slice every 2-3 days.
Best Storage Container: Use an airtight container or cover pan tightly with plastic wrap. Exposure to air dries brownies out quickly.
Make-Ahead & Freezer Notes
These brownies are incredibly freezer-friendly!
Freezing Whole Pan: Cool brownies completely, wrap entire uncut pan tightly in two layers of plastic wrap, then aluminum foil. Freeze up to 3 months. Thaw overnight at room temperature, still wrapped. Cut and serve!
Freezing Individual Brownies: Cut into squares, wrap each individually in plastic wrap, place all wrapped brownies in freezer bag or container. Freeze up to 3 months. Thaw individual brownies at room temperature for 30-45 minutes, or microwave for 15-20 seconds for warm brownie experience.
Flash-Freezing for Best Results: Arrange cut brownies on baking sheet, freeze until solid (2 hours), then transfer to freezer bags. This prevents them from sticking together.
Freezing Unbaked Batter: You can freeze the batter! Prepare batter, pour into prepared pan, cover tightly with plastic wrap and foil, freeze up to 1 month. Bake directly from frozen, adding 10-15 minutes to baking time.
Make-Ahead for Parties: Bake brownies up to 3 days ahead, wrap tightly, store at room temperature. Cut just before serving for freshest presentation.
Reheating Frozen Brownies: Microwave individual frozen brownies for 20-30 seconds for warm, fudgy experience. For whole pan, thaw completely, then warm in 300°F oven for 10 minutes if desired.
Serving Suggestions
Yogurt brownies are delicious alone but here are wonderful serving ideas:
Classic Style: Serve at room temperature with a cold glass of milk – the perfect after-school snack or evening treat.
À La Mode: Top warm brownies with vanilla ice cream, coffee ice cream, or frozen yogurt for temperature contrast. Drizzle with chocolate sauce or caramel.
Elegant Plating: Dust with powdered sugar, add fresh berries (raspberries or strawberries), mint leaf, and dollop of whipped cream for dinner party presentation.
Brownie Sundae: Create epic sundaes with brownies as base, topped with ice cream, whipped cream, chocolate sauce, nuts, and cherry.
Brownie Trifle: Cube brownies and layer in glasses with chocolate pudding, whipped cream, and crushed cookies for individual desserts.
Breakfast Treat: Yes, really! These have protein from yogurt and less sugar than muffins, making them acceptable breakfast alongside coffee.
Perfect Pairings:
- Vanilla ice cream or frozen yogurt
- Fresh whipped cream
- Berries (strawberries, raspberries, blackberries)
- Chocolate or caramel sauce
- Peanut butter drizzle
- Chopped nuts (walnuts, pecans, almonds)
- Fresh mint garnish
- Sea salt flakes
Beverage Pairings:
- Cold milk (classic!)
- Hot coffee or espresso
- Hot chocolate
- Cold brew coffee
- Red wine (Cabernet for adults)
Occasion Ideas:
- After-school snacks
- Lunchbox treats
- Birthday parties
- Potluck desserts
- Bake sales
- Picnics (travel well!)
- Game day treats
- Casual weeknight dessert
FAQs Section
Can you taste the yogurt in these brownies?
No! The yogurt’s flavor is completely masked by the chocolate. The yogurt adds moisture and slight tanginess that actually enhances chocolate flavor (similar to how buttermilk improves chocolate cake) without tasting like yogurt at all.
Can I use regular yogurt instead of Greek yogurt?
Yes, but Greek yogurt is better because it’s thicker. If using regular yogurt, drain excess liquid (whey) first by placing yogurt in a fine-mesh strainer over a bowl for 15-20 minutes. This prevents brownies from being too wet.
Can I make these brownies dairy-free?
Absolutely! Use dairy-free yogurt (coconut, almond, or oat-based), replace butter with coconut oil or vegetable oil, and use dairy-free chocolate chips. The texture will be similar though slightly different depending on the yogurt brand.
Why are my brownies cakey instead of fudgy?
Usually from overmixing the batter or overbaking. Mix only until just combined (don’t worry about small lumps), and pull brownies from oven when toothpick has moist crumbs, not when clean. Also ensure you’re using enough fat – don’t reduce the butter/oil further.
Can I reduce the sugar?
You can reduce by ¼ cup without major issues, though brownies will be less sweet and may not have that shiny top. Going below ½ cup total sugar significantly affects texture since sugar provides structure and moisture.
Do these brownies have fewer calories than regular brownies?
Yes! Traditional brownies have 200-250 calories each. These have about 125 calories, roughly half the fat, and added protein from yogurt. They’re lighter while still satisfying chocolate cravings.
Can I add protein powder?
Yes! Add 2-3 tablespoons of chocolate protein powder to dry ingredients for extra protein boost. Don’t add more than that or texture becomes dry and chalky. You may need to add 1-2 tablespoons extra yogurt for moisture.
Conclusion
And there you have it – everything you need to make the most incredible fudgy yogurt brownies that prove healthier desserts can be absolutely delicious! These brownies are proof that you don’t have to choose between indulgence and nutrition. The Greek yogurt creates such amazing moisture and texture while adding protein, cutting calories, and enhancing that deep chocolate flavor.
Whether you’re looking for a lighter dessert option, want to meal prep better snacks, or simply love really good brownies, this healthy Greek yogurt brownie recipe delivers every single time. They’re easy enough for kids to make, impressive enough for parties, and satisfying enough to cure any chocolate craving. Plus, the fact that they have protein and stay moist for days? That’s just winning!
I’d love to hear how your brownies turn out! Did you try any of the variations? What did your family think? Did anyone guess the secret ingredient? Drop a comment below and share your experience – I read every one and love connecting with fellow brownie enthusiasts! If these healthier brownies won you over, please save this recipe to your Pinterest boards and share it with friends looking for better dessert options. Let’s spread the word that healthy(ish) brownies can be absolutely amazing!
Now grab that Greek yogurt and let’s bake some magic! Your kitchen is about to smell like chocolate heaven. Happy baking, friends!