The Best Easy Yogurt Cake Recipe (Moist, Fluffy & Perfectly Sweet!)

If you’ve never tried yogurt cake before, you’re in for a delightful surprise! This simple, foolproof yogurt cake is a tender, moist dessert that’s been a staple in home kitchens across Europe for generations and is now winning hearts all over America. What makes this cake so special is its incredibly simple preparation method—no mixer required, minimal ingredients, and the yogurt container itself becomes your measuring cup for all the other ingredients. It’s the kind of recipe that beginner bakers dream about and experienced cooks return to again and again for its reliability and delicious results.
This yogurt cake works beautifully as an afternoon snack with tea or coffee, a simple weeknight dessert, a breakfast treat, or even dressed up with fresh berries and whipped cream for special occasions. The beauty of this recipe lies in its versatility—it’s a blank canvas that accepts flavor additions graciously, whether you want to add lemon zest, vanilla, chocolate chips, or fresh fruit. The texture is somewhere between a pound cake and a sponge cake: tender, fine-crumbed, and perfectly moist thanks to the yogurt, which keeps it fresh for days.
History / Background
Yogurt cake, known as “gâteau au yaourt” in French, has its roots firmly planted in French home cooking tradition. This beloved recipe emerged in France during the mid-20th century as a way for parents to teach children basic baking skills. The genius of the recipe lies in its simplicity—French home cooks developed it using the small yogurt containers (typically 125ml or about ½ cup) as the measuring tool for all ingredients, eliminating the need for scales or measuring cups. This made it accessible to everyone, even young children learning to bake.
The recipe quickly spread throughout Europe, with each country adding its own twist. In Greece, bakers incorporated Greek yogurt and honey. Italian versions often featured lemon and olive oil. Spanish cooks added orange zest and sometimes a touch of cinnamon. The cake became a symbol of home baking—unpretentious, approachable, and always comforting.
When yogurt cake made its way to the United States, American bakers fell in love with its forgiving nature and simple preparation. It fits perfectly into the American love for convenience without sacrificing homemade quality. Today, it’s become a favorite recipe shared on Pinterest, passed down through families, and treasured for its ability to turn a handful of pantry staples into something genuinely delicious. It represents the best of home baking: simple ingredients, minimal fuss, and maximum flavor.
Why You’ll Love This Recipe
This yogurt cake is about to become your go-to dessert recipe, and here’s why: it’s incredibly forgiving, wonderfully versatile, and delivers consistent results every single time. The yogurt creates an exceptionally moist crumb that stays fresh for days, unlike many cakes that dry out quickly. You’ll find yourself making this recipe over and over because it’s just so easy and reliable.
Here’s what makes this yogurt cake absolutely irresistible:
- Super simple preparation – No electric mixer needed! Just a bowl, a whisk, and about 10 minutes of active prep time
- Beginner-friendly – If you can stir ingredients together, you can make this cake perfectly
- Minimal cleanup – One bowl, one pan, and you’re done
- Budget-friendly – Uses basic pantry staples that cost just a few dollars total
- Incredibly moist texture – The yogurt keeps it tender and prevents dryness
- Stays fresh for days – Wrapped properly, it’s still delicious 4-5 days later
- Endlessly customizable – Add citrus zest, vanilla, chocolate chips, berries, or keep it plain
- Kid-approved – Mild, sweet flavor that children absolutely love
- Perfect for meal prep – Makes a wonderful grab-and-go breakfast or snack throughout the week
- Foolproof results – Even if you’re not an experienced baker, this cake will turn out beautifully
Ingredient Notes
The beauty of yogurt cake lies in its simplicity. Each ingredient plays an important role in creating that perfect tender crumb and subtle sweetness. Let’s talk about what you’ll need and why each component matters.
Yogurt – The star ingredient! Plain whole milk yogurt works best for the richest flavor and moistest texture. You can use Greek yogurt, but thin it slightly with a tablespoon of milk since it’s much thicker. Low-fat yogurt works too, though the cake won’t be quite as tender. Avoid flavored yogurts unless you want that specific flavor in your cake. The yogurt provides moisture, tenderness, and a subtle tang that balances the sweetness perfectly.
All-Purpose Flour – Creates the structure of the cake. You can substitute up to half the flour with whole wheat flour for a nuttier, heartier cake, but don’t replace all of it or the texture will be too dense. For a gluten-free version, use a 1:1 gluten-free baking flour blend.
Granulated Sugar – Provides sweetness and helps create a tender crumb. You can reduce the sugar by up to ¼ cup if you prefer less sweet desserts. Cane sugar works perfectly as a substitute.
Eggs – Bind everything together and add richness. Room temperature eggs incorporate more easily into the batter. Large eggs are standard for this recipe.
Vegetable Oil – Keeps the cake incredibly moist. You can substitute with melted coconut oil, light olive oil, or even melted butter. The neutral flavor of vegetable oil lets other flavors shine, but olive oil adds a lovely subtle flavor if you’re going for a more European-style cake.
Baking Powder – The leavening agent that makes the cake rise and creates that light, fluffy texture. Make sure yours is fresh (check the expiration date) for the best rise.
Salt – Just a pinch enhances all the other flavors and balances the sweetness.
Vanilla Extract – Optional but highly recommended! It adds warmth and depth to the flavor. Use pure vanilla extract for the best taste.
Lemon Zest – Another optional addition that’s extremely popular. The bright citrus notes complement the tang of the yogurt beautifully.
Equipment Needed
This recipe requires very minimal equipment, which is part of its charm! Here’s what you’ll need to gather before you begin:
- 9-inch round cake pan or 9×5-inch loaf pan – Either works beautifully. The round pan creates a more traditional cake shape, while the loaf pan makes neater slices for snacking.
- Large mixing bowl – For combining all your ingredients.
- Whisk or wooden spoon – For mixing the batter. No electric mixer necessary!
- Measuring cups and spoons – Standard measuring tools for accuracy.
- Spatula – For scraping down the bowl and spreading the batter evenly in the pan.
- Cooling rack – Allows air to circulate around the cake as it cools, preventing sogginess.
- Parchment paper – Optional but helpful for easy cake removal.
- Toothpick or cake tester – For checking doneness.
- Sifter or fine-mesh strainer – Optional, for sifting the flour and baking powder together for an extra-light texture.
Yogurt Cake Recipe

This classic French yogurt cake is incredibly moist, tender, and simple to make. With just a handful of pantry ingredients and no mixer required, it’s the perfect easy dessert or snack cake that stays fresh for days. The yogurt creates an unbelievably soft crumb while adding a subtle tang that balances the sweetness perfectly.
- Prep Time: 10 minutes
- Cook Time: 35 minutes
- Total Time: 45 minutes
- Yield: 8 servings 1x
- Category: Dessert
- Method: Baking
- Cuisine: French
- Diet: Vegetarian
Ingredients
- 1 cup (250g) plain whole milk yogurt
- 1½ cups (190g) all-purpose flour
- 1 cup (200g) granulated sugar
- 3 large eggs, room temperature
- ½ cup (120ml) vegetable oil or melted coconut oil
- 2 teaspoons baking powder
- ¼ teaspoon salt
- 1 teaspoon vanilla extract
- Zest of 1 lemon (optional but recommended)
- Powdered sugar for dusting (optional)
Instructions
- Preheat and prepare: Preheat your oven to 350°F (175°C). Grease a 9-inch round cake pan or 9×5-inch loaf pan generously with butter or non-stick spray. Line the bottom with parchment paper for easy removal, then grease the parchment as well. This ensures your beautiful cake comes out perfectly intact.
- Combine wet ingredients: In a large mixing bowl, whisk together the yogurt, sugar, and eggs until the mixture is smooth and well combined, about 1-2 minutes. You want the sugar to begin dissolving and everything to look cohesive. Add the vegetable oil and vanilla extract, whisking until fully incorporated. The mixture should look creamy and slightly thick.
- Add lemon zest (if using): If you’re adding lemon zest, stir it in now. This is when those bright citrus oils will distribute throughout the batter, infusing every bite with fresh lemon flavor.
- Mix dry ingredients: In a separate bowl, whisk together the flour, baking powder, and salt. This step is important—it ensures the baking powder is evenly distributed throughout the flour, which means even rising and consistent texture.
- Combine wet and dry: Add the flour mixture to the yogurt mixture in two additions, gently folding with a spatula or stirring with a wooden spoon just until no flour streaks remain. Don’t overmix! A few small lumps are perfectly fine. Overmixing develops gluten, which will make your cake tough instead of tender. The batter should be thick but pourable, similar to a thick pancake batter.
- Transfer to pan: Pour the batter into your prepared pan, using a spatula to spread it evenly to the edges. Gently tap the pan on the counter 2-3 times to release any air bubbles trapped in the batter.
- Bake: Place the pan in the preheated oven and bake for 35-40 minutes for a round pan, or 45-50 minutes for a loaf pan. The cake is done when the top is golden brown, the edges pull slightly away from the pan, and a toothpick inserted into the center comes out clean or with just a few moist crumbs attached. The top should spring back when lightly pressed.
- Cool: Remove the cake from the oven and let it cool in the pan for 10 minutes. This allows the structure to set so it doesn’t fall apart when removed. Run a knife around the edges if needed, then turn the cake out onto a cooling rack. Remove the parchment paper and let it cool completely before slicing.
- Serve: Once cooled, dust the top with powdered sugar if desired. Slice and serve as is, or with fresh berries, whipped cream, or a dollop of yogurt on the side.
Notes
- Yogurt temperature: For easiest mixing, let your yogurt come to room temperature for about 30 minutes before starting, or give it a quick 10-15 second zap in the microwave.
- Don’t skip the parchment: Lining the pan with parchment paper makes removing the cake foolproof and ensures clean, professional-looking results.
- Altitude adjustments: If you’re baking at high altitude (above 3,000 feet), reduce the baking powder to 1½ teaspoons and increase the oven temperature by 15-25°F.
- Testing for doneness: Oven temperatures vary, so always rely on visual cues and the toothpick test rather than just the timer.
Nutrition
- Serving Size: 1 slice (⅛ of cake)
- Calories: 315
- Sugar: 26g
- Sodium: 195mg
- Fat: 15g
- Saturated Fat: 2g
- Unsaturated Fat: 12g
- Trans Fat: 0g
- Carbohydrates: 40g
- Fiber: 1g
- Protein: 6g
- Cholesterol: 70mg
Tips & Variations
The wonderful thing about yogurt cake is how easily it adapts to different flavors and preferences. Here are some of my favorite ways to customize this recipe:
Chocolate Yogurt Cake: Replace ¼ cup of the flour with unsweetened cocoa powder, and add ½ cup of chocolate chips to the batter. You’ll have a rich, chocolatey version that’s absolutely divine.
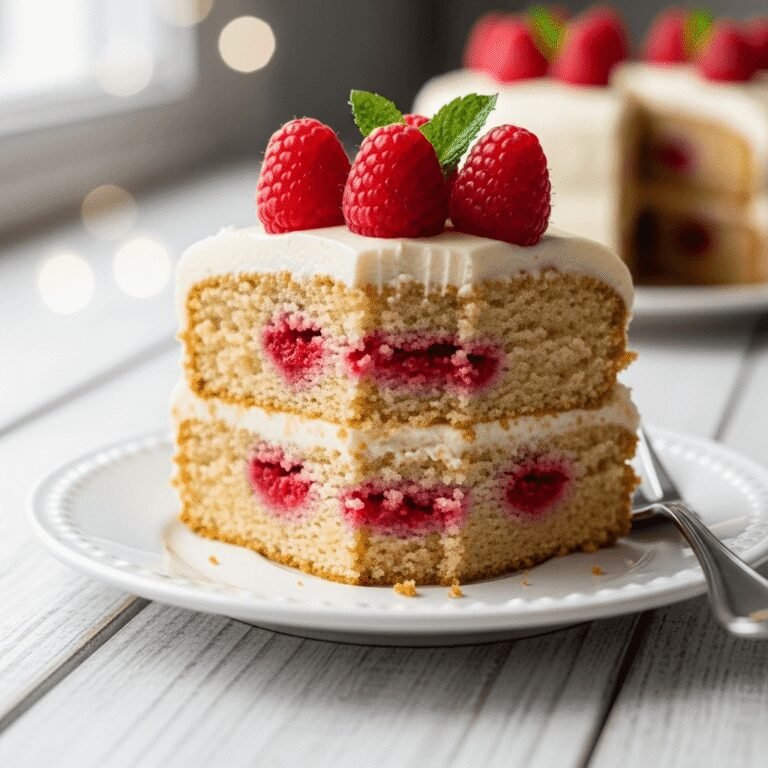
Berry Swirl: Gently fold ¾ cup of fresh blueberries, raspberries, or diced strawberries into the batter just before transferring to the pan. They’ll create beautiful pockets of fruit throughout the cake.
Orange Cardamom: Replace the lemon zest with orange zest and add ½ teaspoon of ground cardamom for a sophisticated, aromatic variation.
Almond Yogurt Cake: Replace the vanilla with almond extract and add ½ cup of sliced almonds on top before baking for a delightful crunch.
Coconut Lime: Use coconut oil instead of vegetable oil, add lime zest instead of lemon, and fold in ½ cup of shredded coconut for a tropical twist.
Healthier Version: Use half whole wheat flour, reduce sugar to ¾ cup, and use Greek yogurt for extra protein. It’s still delicious but slightly more nutritious.
Marble Cake: Reserve ⅓ of the batter and mix in 2 tablespoons of cocoa powder. Pour the plain batter into the pan, dollop the chocolate batter on top, and swirl gently with a knife for a beautiful marble effect.
Glazed Yogurt Cake: Make a simple glaze by mixing 1 cup of powdered sugar with 2-3 tablespoons of lemon juice or milk. Drizzle over the cooled cake for an elegant finish.
Pro Chef Tips
Want bakery-quality results? These professional tips will take your yogurt cake from good to absolutely phenomenal:
Room temperature ingredients are crucial: While the recipe is forgiving, room temperature eggs and yogurt incorporate much more smoothly into the batter, creating a more uniform texture. Cold ingredients can cause the batter to separate or create pockets of unmixed ingredients.
Use the folding method: When combining the wet and dry ingredients, use a gentle folding motion rather than vigorous stirring. Insert your spatula into the center, scrape along the bottom, and bring it up and over. Rotate the bowl and repeat. This technique minimizes gluten development, keeping your cake supremely tender.
The yogurt container trick: If you want to be truly authentic and make measuring even easier, use an empty yogurt container as your measuring cup for the other ingredients. One container of yogurt, one and a half containers of flour, one container of sugar, half a container of oil. It’s wonderfully simple!
Test multiple spots: When checking for doneness, insert your toothpick in several places, not just the center. Sometimes the edges cook faster, and you want to make sure the entire cake is done without overbaking the center.
Wrap while slightly warm: For the moistest possible cake, let it cool for about 30 minutes after removing from the pan, then wrap it in plastic wrap while still slightly warm. The residual steam creates moisture that the cake absorbs, making it incredibly tender. Just make sure it’s not hot, or you’ll create condensation.
Score before glazing: If you’re adding a glaze, use a toothpick to poke holes all over the top of the cake first. The glaze will sink into these holes, flavoring every bite instead of just sitting on top.
Embrace imperfection: This is a rustic, homestyle cake. A few cracks on top or an uneven rise only add to its charm. Don’t stress about making it look perfect—the beauty is in its simplicity and homemade appearance.
Common Mistakes to Avoid
Even with such a simple recipe, there are a few pitfalls that can affect your results. Here’s how to avoid them:
Overmixing the batter: This is the number one mistake that leads to tough, dense cake. Once you add the flour, mix just until you don’t see dry flour anymore. A few lumps are fine—they’ll bake out. Overmixing develops the gluten in the flour, creating a chewy texture instead of the tender crumb you want.
Using expired baking powder: Baking powder loses its potency over time. If your baking powder is more than six months old, test it by adding a teaspoon to hot water—it should fizz vigorously. If it doesn’t, your cake won’t rise properly, resulting in a dense, flat texture.
Opening the oven too early: Resist the urge to check on your cake before at least 30 minutes have passed. Opening the oven door causes temperature fluctuations that can make your cake sink in the middle. Trust the process and wait until the minimum baking time has elapsed.
Cutting it too soon: I know it’s tempting when your kitchen smells amazing, but cutting into a hot cake can cause it to fall apart or become gummy. Let it cool for at least 20-30 minutes before slicing for clean, beautiful pieces.
Not greasing the pan properly: Even non-stick pans benefit from greasing and parchment paper. Don’t skip this step or you might end up with half your cake stuck to the pan, which is heartbreaking after making such a lovely dessert.
Storage & Meal Prep
One of the best things about yogurt cake is how well it keeps, making it perfect for meal prep or making ahead for busy weeks.
Room Temperature Storage: Store the completely cooled cake wrapped tightly in plastic wrap or in an airtight container at room temperature for up to 4 days. The yogurt keeps it beautifully moist, so it actually tastes even better on day two or three as the flavors meld together.
Refrigerator Storage: If your kitchen is very warm or humid, you can refrigerate the wrapped cake for up to 1 week. Let slices come to room temperature before serving, or warm them slightly in the microwave for 10-15 seconds for that fresh-baked taste.
Individual Portions: Slice the cake and wrap individual pieces in plastic wrap, then store in an airtight container. This makes it incredibly easy to grab a slice for breakfast or pack in lunchboxes throughout the week.
Reheating Instructions: While this cake is delicious at room temperature, warming it slightly brings out the flavors beautifully. Microwave individual slices for 10-15 seconds, or warm the whole cake wrapped in foil in a 300°F oven for 10 minutes.
Make-Ahead & Freezer Notes
This yogurt cake is a fantastic make-ahead dessert that freezes exceptionally well, making it perfect for those times when you want homemade treats ready to go.
Make-Ahead Option: You can bake this cake up to 2 days in advance. Once completely cooled, wrap it tightly in plastic wrap and store at room temperature until you’re ready to serve. If you’re planning to glaze or dust it with powdered sugar, wait until just before serving for the best presentation.
Freezing Instructions: This cake freezes beautifully for up to 3 months. Once completely cooled, wrap the whole cake (or individual slices) tightly in plastic wrap, then wrap again in aluminum foil or place in a freezer-safe zip-top bag. This double wrapping prevents freezer burn and keeps the cake tasting fresh.
Thawing Method: The best way to thaw yogurt cake is slowly in the refrigerator overnight, still wrapped. This prevents condensation from forming on the surface. For faster thawing, let it sit at room temperature for 2-3 hours, still wrapped. Individual slices can be microwaved from frozen for 30-40 seconds on 50% power for a quick warm treat.
Freezing Pro Tip: Freeze individual slices on a baking sheet first, then wrap and bag them. This prevents them from sticking together, so you can pull out just one or two slices at a time without thawing the entire cake.
Serving Suggestions
Yogurt cake is wonderfully versatile and can be served simply on its own or dressed up for special occasions. Here are my favorite ways to serve it:
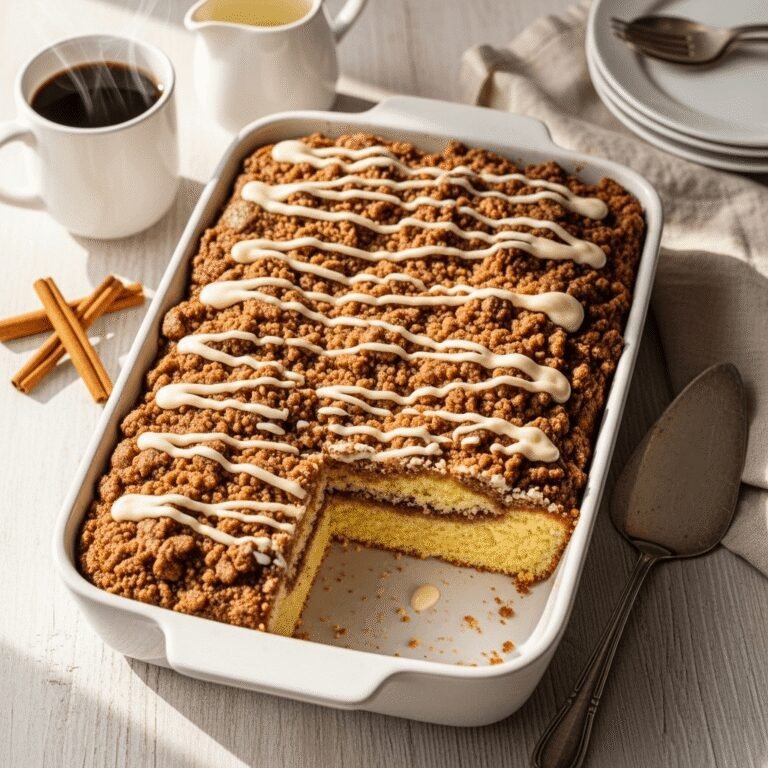
Classic Presentation: Simply dust the top with powdered sugar and serve slices on small dessert plates with a cup of coffee or tea. This is perfect for afternoon snacks or casual dessert.
Fresh Berry Accompaniment: Top slices with fresh strawberries, blueberries, raspberries, or a mixture of berries. Add a dollop of whipped cream or Greek yogurt for extra indulgence. The tartness of the berries complements the cake’s subtle sweetness perfectly.
Breakfast Style: Serve thick slices with a spoonful of yogurt and a drizzle of honey for a simple, not-too-sweet breakfast. Add fresh fruit on the side for a complete morning meal.
Elegant Plated Dessert: Place a slice on a plate, add a quenelle of lemon curd beside it, scatter some fresh berries around, and drizzle with berry coulis. Garnish with a mint leaf for a restaurant-worthy presentation.
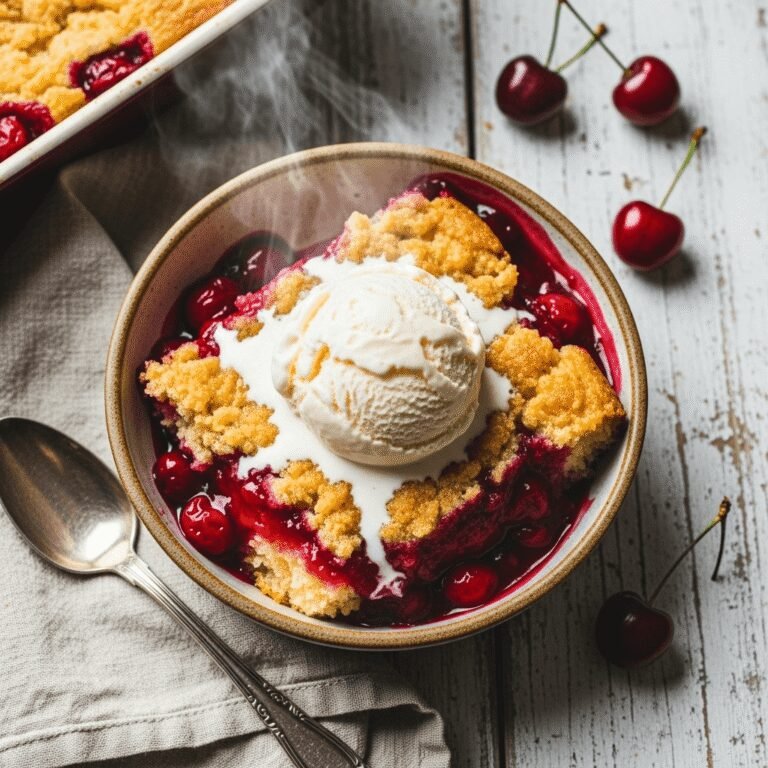
Ice Cream Pairing: Serve warm slices with a scoop of vanilla ice cream, lemon sorbet, or pistachio gelato. The temperature contrast makes this extra special.
Tea Time Treats: Cut the cake into small squares or fingers and arrange on a tiered stand with other pastries for an afternoon tea spread. Yogurt cake holds up well and doesn’t crumble, making it perfect for elegant presentations.
Holiday Variation: During the holidays, serve with cranberry compote or spiced apple butter for a seasonal twist.
Beverage Pairings: This cake pairs beautifully with coffee, black tea, earl grey tea, herbal tea, fresh lemonade, or even a glass of sweet dessert wine.
FAQs Section
Can I use Greek yogurt instead of regular yogurt?
Yes, but Greek yogurt is much thicker than regular yogurt, which can make the cake denser. To compensate, thin the Greek yogurt with 1-2 tablespoons of milk before adding it to the recipe. This will give you the same consistency as regular yogurt and ensure your cake has that perfectly tender texture.
Why did my cake sink in the middle?
A sunken center usually means one of three things: the oven temperature was too low (causing slow, uneven rising), the oven door was opened too early (causing a sudden temperature drop), or there was too much liquid in the batter. Make sure to use an oven thermometer to verify your temperature is accurate, and don’t peek until at least 30 minutes into baking.
Can I make this without eggs?
Yes, you can make an egg-free version by replacing each egg with ¼ cup of additional yogurt or by using a commercial egg replacer according to package directions. The texture will be slightly different—a bit denser and less fluffy—but still delicious. Another option is to use 3 tablespoons of aquafaba (chickpea liquid) per egg.
How do I know when the cake is done?
The cake is done when the top is golden brown and springs back when lightly pressed, the edges have pulled slightly away from the pan, and a toothpick inserted into the center comes out clean or with just a few moist crumbs. The internal temperature should reach about 200-205°F if you’re using a thermometer.
Can I halve this recipe?
Absolutely! Halve all the ingredients and bake in a 6-inch round pan or an 8×4-inch loaf pan. Reduce the baking time to 25-30 minutes and check for doneness starting at 25 minutes. This is perfect when you want a smaller cake for just a couple of people.
What if I don’t have a round cake pan?
No problem! This recipe works in a 9×5-inch loaf pan (increase baking time by 10-15 minutes), an 8×8-inch square pan (same baking time), or even a bundt pan (increase time by 5-10 minutes). You can also make cupcakes—fill muffin cups ⅔ full and bake for 18-22 minutes.
How can I make this cake more flavorful?
The beauty of yogurt cake is its mild flavor that works as a perfect canvas. Add citrus zest (lemon, lime, or orange), vanilla extract or vanilla bean paste, almond extract, spices like cinnamon or cardamom, or fold in chocolate chips, dried fruit, or nuts. You can also brush the warm cake with a simple syrup infused with vanilla or citrus for extra moisture and flavor.
Conclusion
This easy yogurt cake is truly one of those magical recipes that every home baker should have in their repertoire. It’s forgiving, versatile, absolutely delicious, and uses ingredients you probably already have in your kitchen right now. Whether you’re a complete beginner or an experienced baker looking for a reliable, fuss-free dessert, this cake delivers every single time.
The beauty of this recipe extends beyond just the finished cake—it’s about the process too. There’s something wonderfully therapeutic about whisking together simple ingredients by hand, without the noise of electric mixers or complicated techniques. It’s baking at its most accessible and pure, the way our grandmothers might have done it, with love and simplicity as the main ingredients.
I hope this yogurt cake becomes a staple in your home just as it has in mine. Whether you make it plain for an easy weeknight dessert, dress it up with berries and cream for a special occasion, or customize it with your favorite flavors, I know you’re going to love how it turns out. The first time you slice into that golden, tender cake and see the perfect crumb, you’ll understand why this recipe has been treasured for generations.
Now it’s your turn to give it a try! Bake this yogurt cake, take a picture of your beautiful creation, and share it on Pinterest so other home bakers can discover this wonderful recipe too. I’d love to hear about your experience—did you add any special flavors? What did your family think? Leave a comment below and let me know how your cake turned out!
Happy baking, friends! May your kitchen smell like vanilla and happiness, and may your cake turn out absolutely perfect. 🍰