The Ultimate Mint Brownies Recipe: Fudgy, Fresh & Irresistible

If you’ve ever craved the perfect combination of rich, fudgy chocolate and cool, refreshing mint, these mint brownies are about to become your new obsession. This decadent dessert features dense, chocolatey brownie layers topped with a smooth, creamy mint frosting and finished with a glossy chocolate ganache. They’re the kind of treat that disappears from the dessert table in minutes at parties, bake sales, and family gatherings.
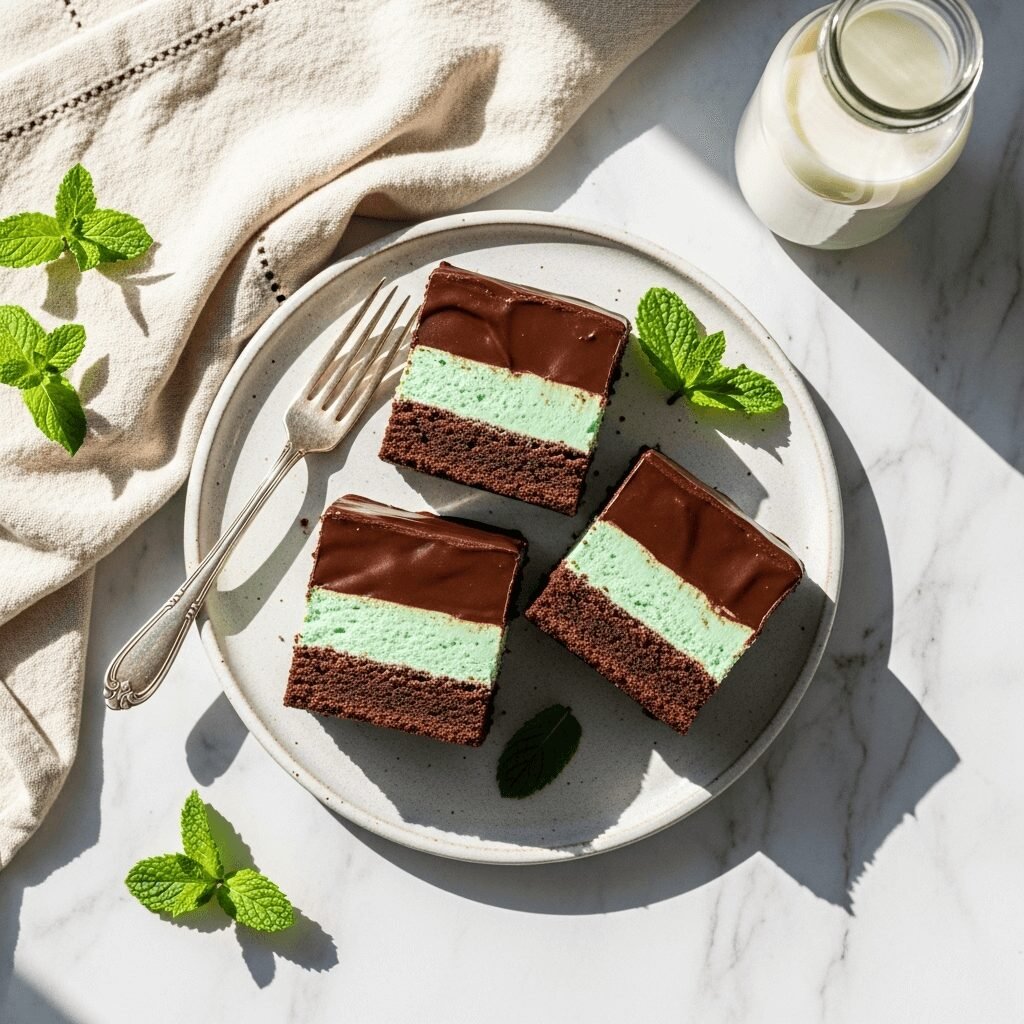
What makes these mint brownies truly special is the three-layer experience: you get that satisfying fudgy brownie base that melts in your mouth, a vibrant mint buttercream middle that adds a refreshing twist, and a rich chocolate topping that brings everything together. They’re reminiscent of those beloved mint chocolate candies we all know and love, but infinitely better because they’re homemade with real ingredients and loads of love.
These brownies are perfect for St. Patrick’s Day celebrations, holiday cookie exchanges, birthday parties, or any time you want to impress guests with minimal effort. They look professionally made but are surprisingly simple to create in your own kitchen. Plus, they can be made ahead of time, which makes them ideal for busy home cooks who want to prepare desserts without last-minute stress.
History / Background
Mint brownies, particularly the layered variety often called “grasshopper brownies” or “mint chocolate brownies,” have been an American dessert staple since the mid-20th century. The classic combination of chocolate and mint has European roots, dating back to when peppermint was first used in confections in England during the 18th century. However, the brownie itself is a distinctly American invention, with its origins traced back to the late 1800s.
The layered mint brownie we know today likely emerged in the 1950s and 1960s when home baking became increasingly popular in American households. This era saw the rise of elaborate dessert recipes featured in women’s magazines and community cookbooks, where homemakers were encouraged to create impressive treats for social gatherings. The three-layer brownie format became particularly popular because it looked sophisticated while remaining accessible to home bakers.
The “grasshopper” name comes from the famous Grasshopper cocktail, a mint-chocolate after-dinner drink created in New Orleans in the 1950s. The cocktail’s green color and mint-chocolate flavor profile inspired countless desserts, including these brownies. Throughout the 1970s and 1980s, mint brownies became a staple at church potlucks, school bake sales, and holiday parties across America.
Today, mint brownies have earned a permanent place in American dessert culture. They’re especially popular during the holiday season, particularly around Christmas and St. Patrick’s Day when the festive green color fits the occasion perfectly. The recipe has evolved over decades, with modern versions featuring better quality chocolate, natural peppermint extract, and more refined techniques, but the essence remains the same: a celebration of one of the world’s best flavor combinations.
Why You’ll Love This Recipe
These mint brownies strike the perfect balance between impressive presentation and straightforward preparation. They look like they came from a fancy bakery, but you don’t need any special baking skills to make them at home. The recipe uses simple techniques that any home cook can master, and the end result is consistently spectacular.
Here’s why this recipe deserves a spot in your permanent collection:
- Three-layer indulgence – Each layer offers a different texture and flavor experience, creating a dessert that’s far more interesting than standard brownies
- Make-ahead friendly – You can prepare these a day or two in advance, making them perfect for entertaining without stress
- Crowd-pleaser status – The chocolate-mint combination appeals to almost everyone, and these brownies consistently receive rave reviews
- Budget-friendly – Uses accessible ingredients you can find at any grocery store, with no expensive specialty items required
- Perfect for gifting – They travel well, look beautiful when packaged, and make thoughtful homemade gifts for holidays and special occasions
- Customizable intensity – You can adjust the mint flavor to be subtle or bold, depending on your preference
- Freezer-friendly – Makes a large batch that freezes beautifully, so you can always have impressive desserts on hand
- No special equipment needed – Just basic baking tools that most kitchens already have
Ingredient Notes
For the Brownie Layer:
- Unsalted butter – Provides richness and helps create that fudgy texture. Using unsalted allows you to control the salt level. Can substitute with coconut oil for a slightly different flavor profile.
- Granulated sugar – Sweetens the brownies and contributes to their shiny, crackly top. Don’t substitute with brown sugar as it will change the texture.
- Eggs – Bind everything together and provide structure. Room temperature eggs incorporate more easily.
- Vanilla extract – Enhances the chocolate flavor and adds depth. Use pure vanilla, not imitation, for best results.
- Unsweetened cocoa powder – The chocolate foundation of your brownies. Dutch-process cocoa creates a darker, more sophisticated flavor, while natural cocoa gives a more classic brownie taste.
- All-purpose flour – Provides structure without making brownies cakey. Measure carefully by spooning into the cup and leveling off.
- Salt – Balances sweetness and enhances chocolate flavor. Don’t skip it!
- Espresso powder (optional) – Intensifies chocolate flavor without making brownies taste like coffee.
For the Mint Layer:
- Unsalted butter (softened) – Creates a smooth, creamy frosting base. Must be softened to room temperature for proper consistency.
- Powdered sugar – Sweetens and thickens the frosting without graininess. Sift if lumpy.
- Peppermint extract – The star of the middle layer. Start with less and add more to taste, as brands vary in intensity.
- Heavy cream or milk – Thins the frosting to spreadable consistency. Heavy cream creates a richer frosting.
- Green food coloring (optional) – Creates that classic grasshopper look. Use gel food coloring for more vibrant color without adding extra liquid.
For the Chocolate Topping:
- Semi-sweet chocolate chips – Melts smoothly into a glossy ganache. Can use dark chocolate for a more sophisticated, less sweet topping.
- Heavy cream – Combines with chocolate to create silky ganache. The fat content is important for proper texture.
- Butter – Adds shine and helps ganache set with a perfect texture.
Equipment Needed
- 9×13-inch baking pan – Standard size for this recipe; creates brownies with ideal thickness
- Parchment paper or aluminum foil – For lining the pan to ensure easy removal and cleanup
- Large mixing bowl – For combining brownie ingredients
- Medium mixing bowl – For preparing the mint frosting layer
- Whisk – For mixing dry ingredients and incorporating eggs
- Rubber spatula – For scraping bowls and spreading layers evenly
- Electric mixer (hand or stand) – Makes the mint frosting smooth and fluffy; can also mix by hand with extra effort
- Measuring cups and spoons – For accurate ingredient measurements
- Microwave-safe bowl or small saucepan – For melting butter and chocolate
- Offset spatula (optional but helpful) – Makes spreading the mint layer easier and more even
- Sharp knife – For cutting clean brownie squares once set
- Cooling rack – Allows air circulation for proper cooling
Mint Brownies Recipe

Rich, fudgy chocolate brownies layered with smooth mint buttercream frosting and topped with a glossy chocolate ganache. These three-layer mint brownies are the perfect combination of decadent chocolate and refreshing peppermint, ideal for holidays, parties, or any special occasion.
- Prep Time: 20 minutes
- Chilling Time: 2 hours
- Cook Time: 30 minutes
- Total Time: 2 hours 50 minutes
- Yield: 24 brownies 1x
- Category: Dessert
- Method: Baking
- Cuisine: American
- Diet: Vegetarian
Ingredients
Brownie Layer:
- 1 cup (2 sticks) unsalted butter
- 2 cups granulated sugar
- 4 large eggs, room temperature
- 1 tablespoon vanilla extract
- ¾ cup unsweetened cocoa powder
- 1 cup all-purpose flour
- ½ teaspoon salt
- ½ teaspoon espresso powder (optional)
Mint Frosting Layer:
- ½ cup (1 stick) unsalted butter, softened
- 3 cups powdered sugar, sifted
- 2-3 tablespoons heavy cream or milk
- 1-1½ teaspoons peppermint extract
- 3-4 drops green food coloring (optional)
- Pinch of salt
Chocolate Ganache Topping:
- 1½ cups semi-sweet chocolate chips
- ½ cup heavy cream
- 2 tablespoons unsalted butter
Instructions
- Prepare the pan: Preheat your oven to 350°F (175°C). Line a 9×13-inch baking pan with parchment paper, leaving an overhang on two sides for easy removal. Lightly grease the parchment paper and exposed pan sides.
- Make the brownie batter: In a microwave-safe bowl, melt the butter in 30-second intervals, stirring between each, until completely melted. Let cool for 5 minutes. Whisk in the sugar until well combined. Add eggs one at a time, whisking well after each addition. Stir in the vanilla extract.
- Combine dry ingredients: In a separate bowl, whisk together cocoa powder, flour, salt, and espresso powder (if using). Gradually fold the dry ingredients into the wet ingredients using a rubber spatula. Mix just until no flour streaks remain—don’t overmix.
- Bake the brownies: Pour batter into the prepared pan and spread evenly. Bake for 28-32 minutes, until a toothpick inserted in the center comes out with a few moist crumbs (not wet batter). The top should look set and slightly crackled. Let cool completely in the pan on a wire rack, about 1 hour.
- Prepare mint frosting: In a large bowl, beat softened butter with an electric mixer until creamy and smooth, about 2 minutes. Gradually add powdered sugar, one cup at a time, beating well after each addition. Add peppermint extract, 2 tablespoons of cream, food coloring (if using), and salt. Beat on high speed for 2-3 minutes until light and fluffy. If frosting is too thick, add remaining cream one teaspoon at a time.
- Add mint layer: Once brownies are completely cool, spread the mint frosting evenly over the top using an offset spatula or butter knife. Work quickly before the frosting sets. Place the pan in the refrigerator while you prepare the chocolate topping.
- Make chocolate ganache: Place chocolate chips in a heat-proof bowl. In a small saucepan or microwave, heat heavy cream until it just begins to simmer (don’t boil). Pour hot cream over chocolate chips and let sit for 2 minutes without stirring. Add butter, then whisk until completely smooth and glossy. Let cool for 5-10 minutes to thicken slightly.
- Add chocolate layer: Remove the pan from the refrigerator. Pour the ganache over the mint layer, starting in the center and spreading outward with a spatula. Gently tap the pan on the counter to remove air bubbles and create an even surface.
- Chill and set: Refrigerate the brownies for at least 2 hours, or until the chocolate topping is completely set and firm to the touch.
- Cut and serve: Using the parchment paper overhang, lift the entire brownie block out of the pan. Place on a cutting board. Using a sharp knife (wipe clean between cuts for the neatest squares), cut into 24 pieces. Let brownies sit at room temperature for 10-15 minutes before serving for best flavor and texture.
Notes
- For the cleanest cuts, use a sharp knife warmed under hot water and dried before each cut.
- Peppermint extract strength varies by brand, so start with 1 teaspoon and add more to taste.
- If your kitchen is very warm, the chocolate layer may take longer to set. You can place brownies in the freezer for 30 minutes to speed this up.
- These brownies taste even better the next day after flavors have melded together.
- For a more intense chocolate flavor, use dark chocolate chips (60-70% cacao) in the ganache.
Nutrition
- Serving Size: 1 brownie (1/24 of recipe)
- Calories: 285
- Sugar: 32g
- Sodium: 85mg
- Fat: 15g
- Saturated Fat: 9g
- Unsaturated Fat: 4g
- Trans Fat: 0g
- Carbohydrates: 37g
- Fiber: 2g
- Protein: 3g
- Cholesterol: 60mg
Tips & Variations
Flavor Variations:
- Dark Chocolate Mint Brownies: Use dark cocoa powder in the brownie layer and dark chocolate chips in the ganache for a more sophisticated, less sweet version
- White Chocolate Mint: Replace the chocolate ganache with melted white chocolate mixed with a bit of cream for a sweeter, creamier topping
- Mint Chocolate Chip: Fold mini chocolate chips into the mint frosting layer for added texture and chocolate flavor
- Double Mint: Add a few drops of peppermint extract to the brownie batter itself for an even more intense mint experience
- Mocha Mint: Increase espresso powder to 1 tablespoon and add ½ teaspoon to the mint frosting for a coffee-mint-chocolate combination
Dietary Adaptations:
- Gluten-Free: Substitute 1:1 gluten-free baking flour for all-purpose flour; texture will be nearly identical
- Dairy-Free: Use vegan butter and coconut cream in place of dairy butter and cream throughout the recipe
- Reduced Sugar: You can reduce the sugar in the brownie layer by up to ¼ cup, though brownies will be slightly less fudgy
- Nut-Free: This recipe is naturally nut-free, making it perfect for school events and those with nut allergies
Presentation Ideas:
- Drizzle melted white chocolate in a zigzag pattern over the set chocolate layer for an elegant finish
- Sprinkle crushed candy canes or Andes mints over the wet ganache before it sets
- Dust with powdered sugar just before serving for a snowy, festive look
- Use holiday-themed sprinkles on top for seasonal celebrations
- Cut into smaller squares and serve in mini cupcake liners for parties
Pro Chef Tips
Temperature matters: Room temperature eggs incorporate more smoothly into batter and create a better texture. Set eggs out 30 minutes before baking, or place them in a bowl of warm water for 5 minutes.
Don’t overbake: The single most important factor in fudgy brownies is not overbaking them. Remove brownies when a toothpick comes out with moist crumbs, not completely clean. They’ll continue cooking slightly as they cool.
Sift your powdered sugar: Lumpy powdered sugar creates a grainy frosting. A quick sift before measuring ensures silky-smooth mint frosting that spreads like a dream.
Quality chocolate matters in ganache: Since the chocolate layer is essentially just chocolate and cream, using good quality chocolate chips makes a noticeable difference. Ghirardelli, Guittard, or similar brands create the smoothest, most flavorful ganache.
Let ganache cool before pouring: If your ganache is too hot when you pour it over the mint layer, it can melt the frosting and create a messy, mixed layer. Let it cool for 5-10 minutes until it’s just slightly warm and has thickened a bit.
Use the parchment paper trick: Lining your pan with parchment paper that overhangs the sides creates “handles” that let you lift the entire brownie block out of the pan. This makes cutting into perfect squares infinitely easier.
Score before cutting: After the brownies are fully set, use a sharp knife to lightly score the top chocolate layer where you plan to cut. This prevents the chocolate from cracking messively when you make your final cuts.
Common Mistakes to Avoid
Using melted butter in the frosting: The mint layer requires softened butter, not melted. Melted butter will create a runny frosting that won’t hold its shape. Butter should be soft enough to leave an indent when pressed but not greasy or melted.
Adding mint frosting to warm brownies: If your brownie layer isn’t completely cool, the frosting will melt and slide off or sink into the brownies. Patience is key here—let brownies cool for at least an hour at room temperature.
Overmixing brownie batter: Once you add the flour mixture to the wet ingredients, mix just until combined. Overmixing develops gluten and creates cakey rather than fudgy brownies. Some small lumps are perfectly fine.
Too much peppermint extract: Peppermint extract is potent! Start with the smaller amount called for and taste the frosting before adding more. Too much can create an overwhelming, almost medicinal flavor that overpowers the chocolate.
Cutting brownies too soon: Wait until the chocolate topping is completely set before cutting, or you’ll end up with messy, smeared layers. If you’re in a hurry, pop the pan in the freezer for 30 minutes to speed up the setting process, but let brownies come closer to room temperature before serving for best flavor.
Storage & Meal Prep
Room Temperature Storage: These brownies can be stored at room temperature for up to 2 days if your kitchen isn’t too warm. Keep them in an airtight container with parchment paper between layers to prevent sticking. However, refrigeration is generally recommended due to the buttercream frosting layer.
Refrigerator Storage: Store mint brownies in an airtight container in the refrigerator for up to 5 days. This is the best storage method as it keeps the mint frosting firm and the chocolate topping from softening. Place parchment paper between layers if stacking. Let brownies sit at room temperature for 10-15 minutes before serving, as they taste best when not ice-cold.
Preventing Sogginess: To prevent condensation from making the chocolate layer look dull or causing the brownies to become soggy, make sure brownies are completely cool before covering tightly. If condensation does occur, simply wipe the top gently with a paper towel.
Travel Tips: These brownies travel well, making them perfect for potlucks and parties. Transport them in the baking pan covered with foil, or pack individual brownies in containers with parchment paper layers between them. Keep them cool during transport if possible, especially in warm weather.
Make-Ahead & Freezer Notes
Make-Ahead Timeline:
- 2 days ahead: You can make these brownies completely, up through the final chocolate layer, and refrigerate them covered until ready to serve. They actually taste better after sitting overnight as the flavors meld together.
- 1 day ahead: Bake the brownie base, let cool completely, wrap tightly, and refrigerate. The next day, add the mint frosting and chocolate layers. This breaks up the work into more manageable steps.
- Same day: If making the same day, start at least 4 hours before serving to allow adequate cooling and setting time.
Freezing Instructions: Mint brownies freeze exceptionally well, making them perfect for advance preparation. To freeze, complete the brownies through all three layers and let them set completely in the refrigerator. Cut into squares, then freeze them on a parchment-lined baking sheet until solid (about 2 hours). Transfer frozen brownies to a freezer-safe container or freezer bags, placing parchment paper between layers. Frozen brownies will keep for up to 3 months.
Thawing Method: For best results, thaw frozen brownies in the refrigerator overnight. They can also be thawed at room temperature for 1-2 hours. Don’t microwave frozen brownies as this can make the chocolate layer look dull and change the texture of the frosting. Once thawed, let brownies sit at room temperature for 10-15 minutes before serving for optimal flavor and texture.
Component Freezing: You can also freeze just the brownie base (without frosting and ganache) for up to 3 months. Thaw completely, then add the fresh mint frosting and chocolate ganache layers. This gives you a head start while ensuring the frosting is fresh.
Serving Suggestions
Mint brownies are rich and indulgent, so they pair wonderfully with beverages and lighter accompaniments that balance their decadence.
Perfect Beverage Pairings:
- Coffee: A classic pairing—the slight bitterness of coffee balances the sweet, minty chocolate perfectly. Try it with a cappuccino or cold brew.
- Hot chocolate: Double down on chocolate for an ultra-indulgent treat, especially during winter months.
- Peppermint tea: Enhances the mint flavor while providing a lighter, refreshing complement.
- Cold milk: The traditional brownie pairing that never disappoints, especially for kids.
- Irish cream liqueur: For adult gatherings, the creamy, slightly boozy flavor complements the mint-chocolate combination beautifully.
Dessert Table Companions: Serve these brownies alongside vanilla ice cream, whipped cream, or fresh berries. The cool creaminess of ice cream or the bright acidity of raspberries or strawberries creates a delightful contrast to the rich chocolate and mint.
Party Presentation: For special occasions, serve brownies on a decorative platter garnished with fresh mint leaves, or plate individual brownies with a small scoop of vanilla ice cream and a drizzle of chocolate sauce. For holiday parties, dust with powdered sugar to create a “snowy” effect, or add festive sprinkles that match your party theme.
Portion Sizes: Because these brownies are quite rich, cutting them into smaller 1.5-inch squares makes them perfect for dessert buffets where guests are sampling multiple treats. The standard 2-inch squares are ideal for plated desserts or when brownies are the main sweet offering.
FAQs Section
Q: Can I use mint extract instead of peppermint extract?
A: While you can substitute mint extract for peppermint extract, the flavor will be slightly different. Mint extract (often spearmint-based) is milder and sweeter, while peppermint extract has that classic, sharper minty flavor that most people associate with mint chocolate desserts. If using mint extract, you may want to add slightly more to achieve the same intensity.
Q: Why are my brownies cakey instead of fudgy?
A: This usually happens from overbaking or using too much flour. Make sure you’re measuring flour correctly by spooning it into the measuring cup and leveling off—don’t pack it down. Also, remove brownies from the oven when a toothpick comes out with moist crumbs, not completely clean. Brownies continue to set as they cool, so slightly underbaking ensures a fudgy texture.
Q: Can I make these brownies without food coloring?
A: Absolutely! The food coloring is purely for aesthetics and doesn’t affect the flavor at all. Your mint layer will be white/cream-colored instead of green, but the taste will be identical. Many people actually prefer the more natural look without coloring.
Q: How do I prevent the chocolate layer from cracking when I cut the brownies?
A: Use a sharp knife and run it under very hot water between each cut, wiping it dry with a towel. The warm knife slices through the chocolate cleanly without cracking. You can also lightly score the chocolate layer before making your full cuts, which gives the chocolate a “path” to follow and prevents random cracking.
Q: My mint frosting turned out too thick/thin. How do I fix it?
A: If your frosting is too thick, add cream or milk one teaspoon at a time, mixing well after each addition until you reach the desired consistency. If it’s too thin, add more powdered sugar ¼ cup at a time. The frosting should be spreadable but hold its shape—similar to the consistency of store-bought frosting.
Q: Can I double this recipe?
A: Yes! You can double the recipe and bake it in a large sheet pan (approximately 10×15 inches or two 9×13-inch pans). Keep in mind that if using a very large pan, baking time may need to be adjusted by a few minutes. Start checking for doneness at the 25-minute mark.
Q: Do these brownies need to be refrigerated, or can I leave them out?
A: Because of the buttercream frosting layer, these brownies should be refrigerated for food safety, especially if your kitchen is warm or if you won’t be serving them within a few hours. They’re stable at room temperature for 2-4 hours during serving, but should be stored in the refrigerator otherwise. They taste best when allowed to sit at room temperature for 10-15 minutes before eating.
Conclusion
These layered mint brownies are everything a homemade dessert should be: impressive enough to wow guests but simple enough for any home baker to master. The combination of fudgy chocolate brownies, smooth mint frosting, and silky ganache creates a three-layer experience that’s greater than the sum of its parts. Every bite delivers that perfect balance of rich chocolate and refreshing mint that makes this flavor pairing a timeless classic.
Whether you’re baking for a holiday celebration, bringing treats to a potluck, or simply satisfying your own sweet tooth, this recipe delivers consistent, crowd-pleasing results. The make-ahead friendly nature and excellent freezer stability mean you can always have an impressive dessert ready when you need one. Plus, these brownies are versatile enough to customize with different variations while maintaining that classic mint-chocolate appeal that everyone loves.
I’d love to hear how your mint brownies turn out! Leave a comment below with any questions, variations you tried, or just to let me know you loved them. And if you’re feeling the Pinterest love, please save this recipe to your dessert boards and share it with your fellow chocolate-mint enthusiasts. Don’t forget to snap a photo of your beautiful three-layer creation—there’s something so satisfying about cutting into these brownies and seeing those perfect layers. Happy baking, friends!