The Ultimate Homemade Peach Pie Recipe – Sweet, Flaky & Bursting with Flavor!

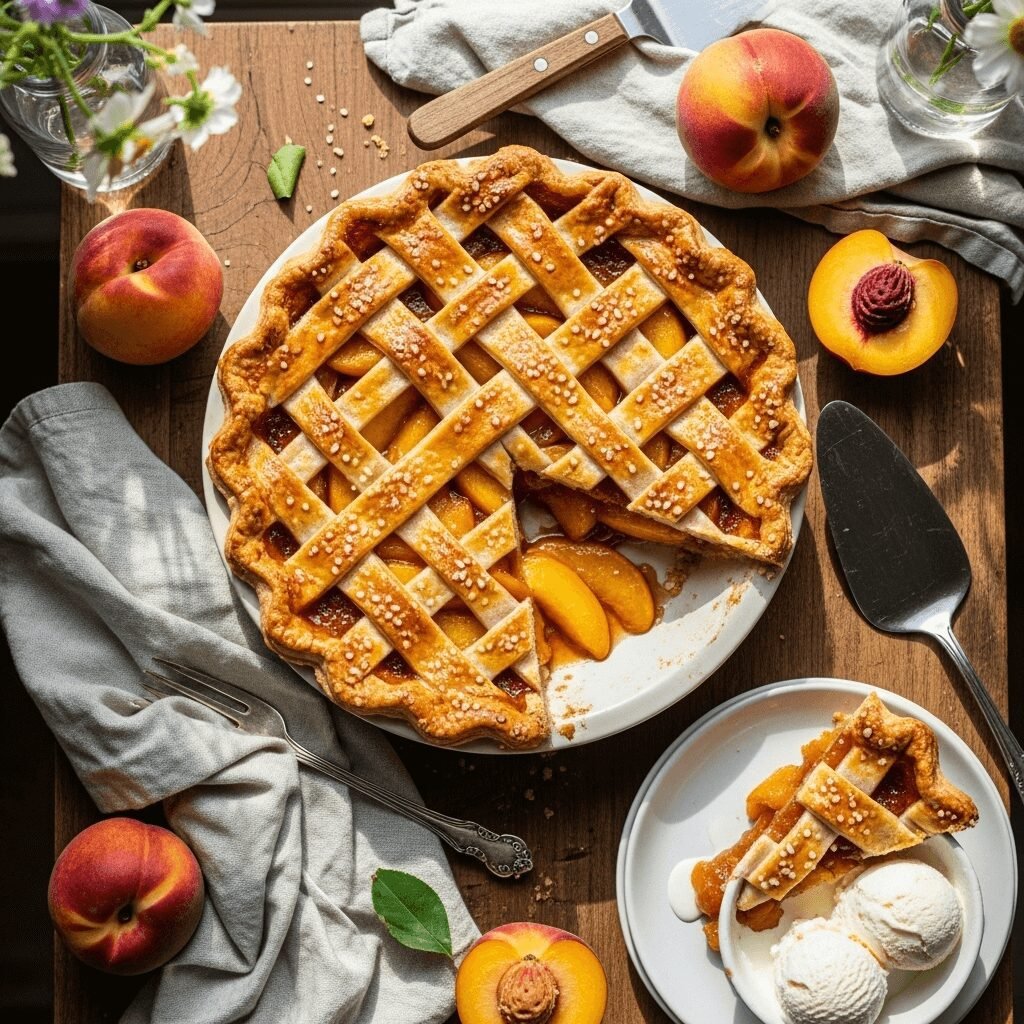
There’s something truly magical about slicing into a golden, flaky peach pie with a lattice crust that’s still warm from the oven. This homemade peach pie recipe is the quintessential summer dessert that captures the essence of ripe, juicy peaches in every single bite. Whether you’re celebrating a special occasion, hosting a backyard barbecue, or simply craving something sweet and comforting, this classic American dessert never disappoints.
This easy peach pie features tender, caramelized peach slices nestled in a buttery, flaky crust that’s both impressive and surprisingly simple to make. The filling strikes the perfect balance between sweet and slightly tart, with warm hints of cinnamon and nutmeg that complement the natural peach flavor beautifully. Serve it warm with a scoop of vanilla ice cream melting on top, and you’ve got yourself a dessert that’ll have everyone asking for seconds—and the recipe!
Perfect for summer gatherings, Fourth of July celebrations, potlucks, or Sunday family dinners, this peach pie embodies everything we love about home baking. It’s the kind of dessert that brings people together, creates lasting memories, and fills your kitchen with the most incredible aroma. Best of all, even if you’re new to pie-making, this recipe walks you through every step with confidence-building tips that guarantee success.
History / Background
Peach pie holds a cherished place in American culinary history, particularly in the Southern United States where peach cultivation has been a cornerstone of agriculture for centuries. While peaches actually originated in China over 8,000 years ago, they found their perfect American home in Georgia, which proudly claims the title of “The Peach State.” Spanish explorers introduced peaches to the New World in the 16th century, and by the 1700s, peach orchards were flourishing across the American South.
The tradition of peach pie baking became deeply rooted in American culture during the 18th and 19th centuries when fruit pies represented the pinnacle of home baking skills. Farm wives would wait eagerly for peach season—typically late June through August—to showcase their baking prowess. Peach pie became a symbol of hospitality, often served to guests as a gesture of welcome and generosity.
During the Great Depression, peach pie gained even more popularity because peaches were relatively affordable and abundant. Resourceful home cooks developed techniques to make the most of every peach, creating pies that stretched the fruit while delivering maximum flavor. The lattice-top design that many peach pies feature wasn’t just decorative—it also helped bakers use less dough during times when ingredients were scarce.
Today, peach pie remains an iconic American dessert that evokes nostalgia and captures the fleeting beauty of summer. From county fairs to grandmother’s kitchens, this beloved pie continues to be a symbol of tradition, comfort, and the simple pleasure of seasonal baking. Making a homemade fresh peach pie connects us to generations of bakers who perfected this timeless treat.
Why You’ll Love This Recipe
This best peach pie recipe combines traditional techniques with practical modern shortcuts to give you bakery-quality results without the stress. The filling is perfectly spiced and not overly sweet, allowing the natural peach flavor to shine through brilliantly. The crust bakes up golden, flaky, and buttery—the kind that shatters delicately with your fork but holds together beautifully when sliced.
Here’s what makes this recipe a must-try:
- Incredibly flavorful – Fresh peaches create an unbeatable taste that canned filling simply can’t match
- Perfectly textured – The filling thickens beautifully without becoming gummy or runny
- Foolproof crust – Even beginners can achieve a flaky, tender crust using this method
- Make-ahead friendly – Prepare components in advance for stress-free entertaining
- Customizable sweetness – Easily adjust sugar levels based on your peach variety and personal preference
- Impressive presentation – The lattice top looks stunning and professional with minimal effort
- Feeds a crowd – One pie serves 8 generous portions, perfect for gatherings
- Freezer-friendly – Freeze before or after baking for long-term storage
- Budget-friendly – Uses simple, affordable ingredients you probably already have
- Kid-approved – Even picky eaters love this classic, comforting dessert
Whether you’re an experienced baker or attempting your first pie, this recipe sets you up for success with clear instructions, helpful tips, and techniques that take the guesswork out of pie-making.
Ingredient Notes
For the Crust:
- All-purpose flour – Provides structure while keeping the crust tender. Avoid over-mixing to maintain flakiness.
- Unsalted butter – Must be cold and cubed for the flakiest texture. Cold butter creates steam pockets during baking. Can substitute half with shortening for extra flakiness.
- Ice water – Brings the dough together without warming the butter. Add gradually to avoid sticky dough.
- Sugar – Just a touch for subtle sweetness in the crust.
- Salt – Enhances overall flavor and balances sweetness.
For the Filling:
- Fresh peaches – The star ingredient! Use ripe but firm peaches for best results. Freestone varieties are easiest to pit. You’ll need about 6-8 medium peaches. Can substitute frozen peaches (thawed and drained) if fresh aren’t available.
- Granulated sugar – Sweetens the filling and helps create the syrupy texture. Adjust based on peach sweetness—very ripe peaches need less sugar.
- Brown sugar – Adds depth and a subtle caramel note that enhances the peach flavor beautifully.
- Cornstarch – Essential thickening agent that prevents a runny filling. Don’t substitute with flour as it creates a different texture.
- Lemon juice – Brightens the flavor, prevents browning, and balances sweetness with acidity.
- Cinnamon – Warm spice that complements peaches perfectly without overpowering.
- Nutmeg – A tiny amount adds complexity and classic pie flavor.
- Vanilla extract – Rounds out all the flavors and adds aromatic depth.
- Butter – Dotted on top of the filling before sealing, it adds richness and helps create a luscious sauce.
For Assembly:
- Egg – Beaten for an egg wash that creates a beautiful golden-brown, glossy finish.
- Coarse sugar – Sprinkled on top for sparkle and subtle crunch. Turbinado or sanding sugar works perfectly.
Equipment Needed
- Large mixing bowls – For preparing both crust and filling
- Pastry cutter or fork – To cut butter into flour for flaky crust texture
- Rolling pin – For rolling out pie dough to the right thickness
- 9-inch pie dish – Standard size for this recipe; glass or ceramic works beautifully
- Paring knife – For peeling and slicing peaches
- Large bowl – To toss peach filling ingredients together
- Measuring cups and spoons – For accurate ingredient measurements
- Plastic wrap – To wrap and chill pie dough
- Pastry brush – For applying egg wash evenly
- Baking sheet – Place under pie to catch any drips during baking
- Aluminum foil or pie crust shield – Protects edges from over-browning
- Sharp knife or pizza cutter – For cutting lattice strips if making a lattice top
- Wire cooling rack – Allows pie to cool evenly after baking
Peach Pie Recipe

This classic homemade peach pie features tender, juicy fresh peaches spiced with cinnamon and nestled in a buttery, flaky double crust. It’s the perfect summer dessert that showcases peak-season peaches at their finest!
- Prep Time: 30 minutes (plus 2 hours chilling time)
- Cook Time: 55 minutes
- Total Time: 3 hours 25 minutes
- Yield: 8 servings 1x
- Category: Dessert
- Method: Baking
- Cuisine: American
- Diet: Vegetarian
Ingredients
For the Pie Crust:
- 2½ cups all-purpose flour
- 1 tablespoon granulated sugar
- 1 teaspoon salt
- 1 cup (2 sticks) unsalted butter, cold and cubed
- 6-8 tablespoons ice water
For the Peach Filling:
- 6-8 medium fresh peaches, peeled, pitted, and sliced (about 5-6 cups)
- ¾ cup granulated sugar
- ¼ cup light brown sugar, packed
- ⅓ cup cornstarch
- 2 tablespoons fresh lemon juice
- 1 teaspoon ground cinnamon
- ¼ teaspoon ground nutmeg
- 1 teaspoon vanilla extract
- 2 tablespoons unsalted butter, cut into small pieces
For Assembly:
- 1 egg, beaten
- 2 tablespoons coarse sugar (turbinado or sanding sugar)
Instructions
Make the Pie Crust:
- Prepare the dough: In a large mixing bowl, whisk together flour, sugar, and salt. Add the cold cubed butter and use a pastry cutter or fork to cut the butter into the flour mixture until it resembles coarse crumbs with pea-sized butter pieces remaining. This creates those essential flaky layers.
- Add water gradually: Drizzle in ice water 1 tablespoon at a time, tossing with a fork after each addition. Add just enough water until the dough begins to come together when pressed. It should be slightly shaggy but hold together—don’t overmix or add too much water.
- Form and chill: Turn dough out onto a clean surface and gently gather it into a ball. Divide in half, shape each half into a flat disk, wrap tightly in plastic wrap, and refrigerate for at least 2 hours or overnight. This chilling step is crucial for a flaky crust.
Prepare the Filling:
- Prep the peaches: To peel peaches easily, score an X on the bottom of each peach, blanch in boiling water for 30-60 seconds, then plunge into ice water. The skins will slip right off! Slice peaches into ¼-inch thick wedges, discarding the pits.
- Mix the filling: In a large bowl, combine sliced peaches, granulated sugar, brown sugar, cornstarch, lemon juice, cinnamon, nutmeg, and vanilla extract. Toss gently until peaches are evenly coated. Let sit for 10-15 minutes to allow the juices to release slightly.
Assemble the Pie:
- Roll bottom crust: Preheat oven to 400°F (200°C). On a lightly floured surface, roll out one disk of chilled dough into a 12-inch circle about ⅛-inch thick. Carefully transfer to a 9-inch pie dish, pressing gently into the bottom and sides. Trim excess dough, leaving a 1-inch overhang.
- Add filling: Pour the peach filling into the prepared crust, spreading evenly. Dot the top with small pieces of butter.
- Create top crust: Roll out the second disk of dough. You can either place it whole over the filling and cut vents, or cut it into ¾-inch strips to create a lattice pattern. For a lattice, weave strips over and under each other in a basket-weave pattern.
- Seal edges: Trim the top crust or lattice strips, leaving a slight overhang. Fold the overhang under itself and crimp or flute the edges decoratively to seal.
- Apply egg wash: Brush the top crust and edges with beaten egg, then sprinkle generously with coarse sugar for a beautiful, sparkly finish.
Bake the Pie:
- Protect and bake: Place pie on a baking sheet to catch drips. Cover the crimped edges with aluminum foil or a pie crust shield to prevent over-browning. Bake at 400°F for 25 minutes.
- Continue baking: Reduce temperature to 350°F (175°C), remove the foil from edges, and continue baking for 30-35 minutes more until the crust is deep golden brown and the filling is bubbling vigorously through the vents or lattice.
- Cool completely: Remove from oven and let cool on a wire rack for at least 4 hours before slicing. This cooling time allows the filling to set properly. I know it’s hard to wait, but trust me—it’s worth it!
Notes
- Peach ripeness matters: Use peaches that are ripe but still firm. Overly soft peaches release too much liquid and create a soggy pie.
- Don’t skip the lemon juice: It prevents the peaches from browning and balances the sweetness perfectly.
- Thickening agent: Cornstarch creates a clearer, glossier filling than flour. Make sure to mix it thoroughly with the sugars before adding to peaches.
- Crust temperature: If your dough becomes too warm while rolling, pop it back in the fridge for 15 minutes. Cold dough = flaky crust!
- Bubbling is key: The filling must bubble throughout before removing from the oven, indicating the cornstarch has activated and thickened properly.
- Altitude adjustment: If baking at high altitude, you may need to increase baking time by 5-10 minutes.
Nutrition
- Serving Size: 1 slice (⅛ of pie)
- Calories: 445
- Sugar: 32g
- Sodium: 285mg
- Fat: 20g
- Saturated Fat: 12g
- Unsaturated Fat: 7g
- Trans Fat: 0g
- Carbohydrates: 64g
- Fiber: 3g
- Protein: 5g
- Cholesterol: 75mg
Nutrition information is approximate and based on standard ingredient measurements.
Tips & Variations
Flavor Variations:
- Peach-Berry Pie: Add 1 cup fresh blueberries or raspberries to the filling for a beautiful color and flavor combination.
- Bourbon Peach Pie: Stir 2 tablespoons bourbon into the filling for a sophisticated, grown-up twist.
- Ginger Peach Pie: Add 1 teaspoon fresh grated ginger or ½ teaspoon ground ginger for a spicy kick.
- Almond Peach Pie: Replace vanilla extract with almond extract and sprinkle sliced almonds over the filling before adding the top crust.
- Honey Peach Pie: Substitute ¼ cup of the granulated sugar with honey for a deeper, floral sweetness.
Dietary Modifications:
- Gluten-Free: Use your favorite gluten-free pie crust recipe or store-bought gluten-free crust.
- Vegan: Replace butter with plant-based butter and use a flax egg (1 tablespoon ground flaxseed + 3 tablespoons water) for the egg wash.
- Reduced Sugar: Cut the sugar by ¼ cup if using very sweet, ripe peaches. The pie will be less sweet but still delicious.
Texture Customizations:
- Crumb Topping: Skip the top crust and add a streusel topping made from butter, flour, brown sugar, and cinnamon for a Dutch peach pie variation.
- Extra Flaky Crust: Substitute half the butter with cold shortening for an ultra-flaky texture.
- Thick Filling: Add an extra tablespoon of cornstarch if you prefer a very thick, sliceable filling.
Pro Chef Tips
Tip #1: Master the peach peeling technique. The blanching method (scoring, boiling, ice bath) is foolproof and saves significant time compared to peeling with a knife. This method also preserves more peach flesh.
Tip #2: Macerate the peaches strategically. After mixing the filling, let it sit for 10-15 minutes but not longer than 30 minutes. This releases just enough juice to help the filling come together without creating excess liquid that leads to a soggy bottom crust.
Tip #3: Use the right thickener ratio. For every 5-6 cups of sliced peaches, use ⅓ cup cornstarch. Too little and your filling will be runny; too much creates a gummy texture. The cornstarch must be mixed with sugar first to prevent clumping.
Tip #4: Create a moisture barrier. Before adding the filling, brush the bottom crust with a thin layer of beaten egg white and let it dry for 2-3 minutes. This creates a seal that prevents the bottom crust from getting soggy.
Tip #5: Check for proper doneness. The pie is done when you see vigorous bubbling through the vents or lattice—not just at the edges, but in the center too. This indicates the cornstarch has reached the proper temperature to thicken. Underbaked filling will be runny once cooled.
Tip #6: Temperature management matters. Starting at a higher temperature (400°F) helps set the bottom crust quickly, preventing sogginess. Reducing to 350°F allows the pie to bake through without over-browning.
Tip #7: Patience with cooling. I know it’s tempting, but cutting into a warm pie results in a runny mess. The filling needs at least 4 hours (preferably overnight) to fully set. Room temperature pie actually tastes better than warm pie in this case!
Common Mistakes to Avoid
Mistake #1: Using underripe or overripe peaches. Underripe peaches lack flavor and don’t release enough juice, while overripe peaches turn mushy and create excess liquid. Choose peaches that yield slightly to gentle pressure and smell fragrant. If your peaches aren’t quite ripe, leave them on the counter for 1-2 days before using.
Mistake #2: Not chilling the dough long enough. Rushing the chilling process results in a tough, shrinking crust that’s difficult to work with. The butter needs time to re-solidify, and the gluten needs to relax. Always chill for at least 2 hours—overnight is even better.
Mistake #3: Overworking the pie dough. The more you handle the dough, the tougher it becomes. Mix just until it comes together, handle it minimally when rolling, and avoid re-rolling scraps multiple times. Those visible butter pieces in the dough are what create flaky layers!
Mistake #4: Cutting into the pie too soon. This is the most common mistake! When you cut into a hot or warm pie, the filling hasn’t set yet and will run all over the plate. Be patient and let it cool completely for beautiful, clean slices.
Mistake #5: Not venting properly. Whether using a full top crust or lattice, adequate venting is essential for steam to escape. Without proper ventilation, steam gets trapped and makes the bottom crust soggy. Cut generous vents or use a lattice pattern for best results.
Storage & Meal Prep
Room Temperature Storage: Once completely cooled, cover the pie loosely with aluminum foil and store at room temperature for up to 2 days. Don’t use plastic wrap as it can make the crust soggy by trapping moisture.
Refrigerator Storage: For longer storage, cover and refrigerate for up to 5 days. The crust may soften slightly in the fridge. To crisp it up, reheat slices in a 350°F oven for 10-15 minutes before serving.
Reheating Instructions: For best results, reheat individual slices in a 350°F oven for 10-12 minutes until warmed through. You can also microwave for 20-30 seconds, but the crust won’t be as crispy. For a whole pie, cover loosely with foil and warm at 325°F for 20-25 minutes.
Preventing Soggy Bottom: When storing, place a paper towel under the pie dish to absorb any excess moisture. This simple trick keeps the bottom crust crisper.
Leftover Ideas: Crumble leftover pie over vanilla ice cream for a deconstructed dessert, or warm it up and serve with whipped cream and fresh peach slices for an elevated presentation.
Make-Ahead & Freezer Notes
Make-Ahead Pie Crust: Prepare the dough up to 3 days in advance and keep refrigerated, or freeze the wrapped dough disks for up to 3 months. Thaw frozen dough overnight in the refrigerator before rolling.
Prepare Filling in Advance: You can prep the peach filling up to 24 hours ahead. Store in an airtight container in the refrigerator, but note that it will release additional liquid as it sits. Drain excess liquid before pouring into the pie shell.
Freeze Unbaked Pie: Assemble the complete pie, but don’t apply egg wash or bake. Wrap tightly in plastic wrap, then aluminum foil, and freeze for up to 3 months. When ready to bake, do not thaw—apply egg wash and bake directly from frozen, adding 15-20 minutes to the baking time.
Freeze Baked Pie: Cool the pie completely, then wrap well and freeze for up to 3 months. Thaw overnight in the refrigerator. Reheat at 350°F for 20-25 minutes until warmed through.
Best Freezing Method: I prefer freezing unbaked pies because they taste closest to fresh when baked. The crust maintains better texture, and the filling has that just-baked quality.
Individual Slices: You can also freeze individual slices wrapped separately for grab-and-go desserts. Wrap each slice in plastic wrap, then place in a freezer bag. Thaw and reheat as needed.
Serving Suggestions
Classic Pairings:
- Vanilla ice cream – The all-time favorite! The cold, creamy ice cream melting into warm pie is absolutely heavenly.
- Fresh whipped cream – Light and airy, it complements without overwhelming the peach flavor.
- Caramel sauce – Drizzle warm caramel over each slice for an extra-indulgent treat.
- Crème fraîche or Greek yogurt – For a slightly tangy contrast to the sweet filling.
Beverage Pairings:
- Coffee – A strong cup of coffee balances the sweetness perfectly for dessert or breakfast (yes, pie for breakfast!).
- Sweet tea – Keeps it Southern and refreshing, especially in summer.
- Milk – Classic and comforting, especially for kids.
- Dessert wine – A late-harvest Riesling or Moscato complements the peach beautifully.
- Bourbon or whiskey – For adults, a small pour alongside pie is a sophisticated pairing.
Occasion Ideas:
- Summer barbecues – Serve with vanilla ice cream after grilled meats
- Fourth of July – Add blueberries and raspberries to make it patriotic
- Brunch spread – Surprisingly delicious as a sweet brunch option
- Potlucks – Always a crowd-pleaser and travels well
- County fair dessert table – Embrace tradition with this classic pie
- Birthday celebrations – An alternative to cake for pie-lovers
Garnish Ideas: Fresh mint leaves, additional peach slices, a dusting of cinnamon, candied pecans, or a sprig of lavender for an elegant presentation.
FAQs Section
Q: Can I use frozen peaches instead of fresh? A: Yes! Thaw frozen peaches completely and drain excess liquid thoroughly before using. You may need to increase the cornstarch by 1-2 tablespoons since frozen peaches release more moisture. The texture will be slightly softer than fresh, but the flavor is still delicious.
Q: How do I know when my peaches are ripe enough? A: Ripe peaches should give slightly when gently pressed, have a sweet fragrance at the stem end, and show vibrant color without green undertones. Avoid peaches that are rock-hard or overly soft and bruised. If they’re not quite ripe, leave them on the counter for 1-3 days.
Q: Why is my pie filling runny even after cooling? A: This usually happens when the pie wasn’t baked long enough for the cornstarch to fully activate. The filling must bubble vigorously throughout the entire pie (not just at edges) before removing from the oven. Also ensure you’re using the correct cornstarch-to-fruit ratio and that your peaches weren’t overly juicy.
Q: Can I make this pie without a lattice top? A: Absolutely! You can use a full top crust (just remember to cut several vents for steam to escape), a crumb topping, or even leave it open-faced with just a bottom crust. Each variation is delicious—the lattice is just particularly pretty for presentation.
Q: Do I really need to peel the peaches? A: While you technically can leave the skins on, I strongly recommend peeling them. Peach skins become tough and leathery when baked and can create an unpleasant texture in the finished pie. The blanching method makes peeling incredibly quick and easy.
Q: My pie crust shrunk during baking. What happened? A: Crust shrinkage typically occurs from overworking the dough or not chilling it long enough. The gluten needs time to relax during chilling. Also, avoid stretching the dough when fitting it into the pan—gently press it in place instead. Always chill the assembled pie for 15-30 minutes before baking if possible.
Q: Can I make individual mini peach pies instead? A: Yes! Use this same recipe but divide it among 6-8 individual ramekins or mini pie pans. Reduce baking time to approximately 25-30 minutes total, watching for golden crust and bubbling filling. These make adorable personal servings for parties.
Conclusion
There’s truly nothing quite like a homemade peach pie fresh from the oven—the golden, buttery crust shattering under your fork, the warm, cinnamon-spiced filling bursting with sweet peach flavor, and that incredible aroma filling your entire kitchen. This classic peach pie recipe brings together simple ingredients and time-honored techniques to create a dessert that’s both impressive and comforting.
Whether you’re a seasoned baker or just starting your pie-making journey, I hope this detailed guide gives you the confidence to create something truly special. Remember, the key to a perfect peach pie lies in using ripe-but-firm peaches, keeping your butter cold, and having patience while it cools (the hardest part, I know!).
This pie is perfect for summer gatherings, holiday celebrations, or simply because you’re craving something sweet and homemade. Each slice carries a little bit of tradition, a whole lot of love, and the taste of summer sunshine.
I’d love to hear how your peach pie turns out! Drop a comment below with your results, any creative variations you tried, or questions you might have. And if you loved this recipe, please save it to your Pinterest boards so you can find it easily when peach season rolls around. Don’t forget to share photos of your beautiful creation—tag me so I can see your baking success!
Happy baking, friends! Here’s to flaky crusts, juicy peaches, and the joy of homemade desserts. 🍑🥧