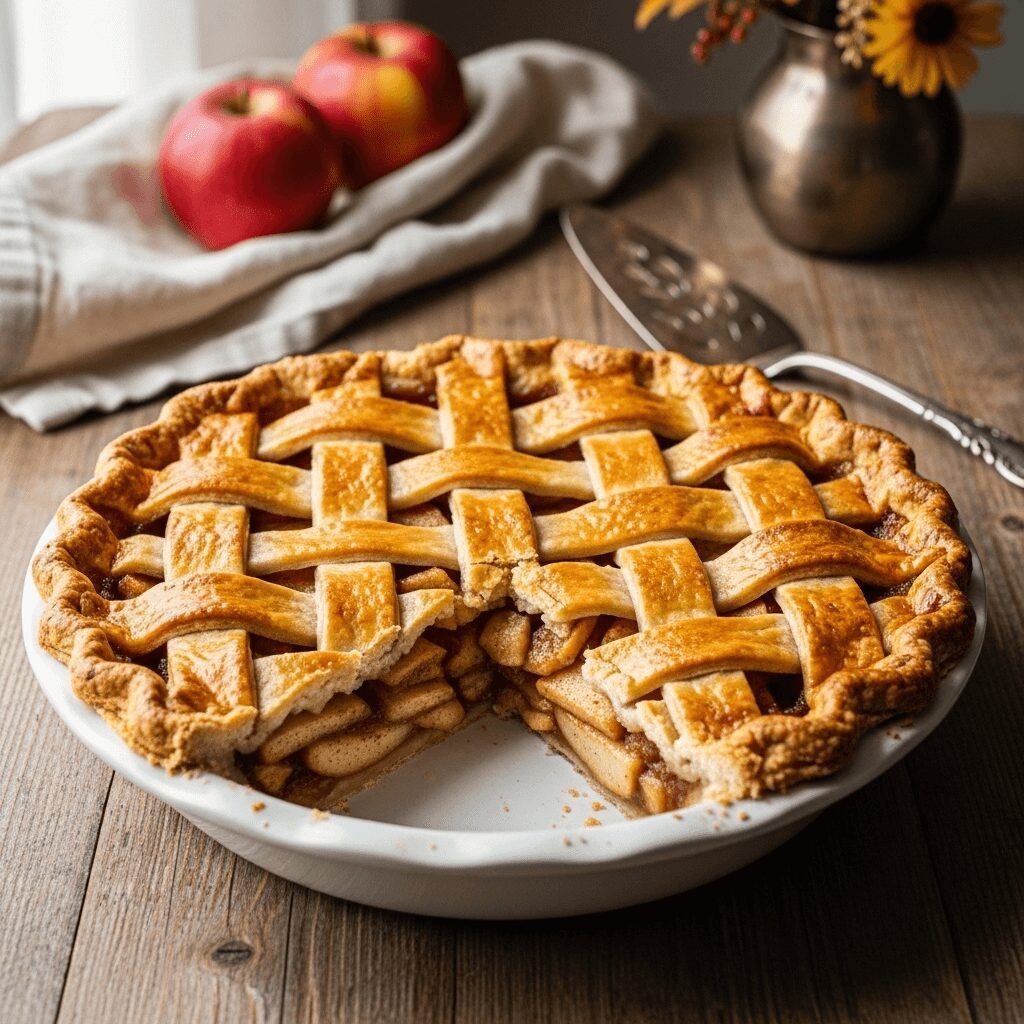
The Best Homemade Apple Pie Recipe – Classic, Flaky & Perfect Every Time

There’s nothing quite like the aroma of a homemade apple pie baking in the oven – that intoxicating blend of cinnamon, butter, and sweet apples that fills every corner of your kitchen. This classic American apple pie recipe features a buttery, flaky crust filled with tender, spiced apples that create the perfect balance of sweet and tart flavors. Whether you’re serving it at Thanksgiving dinner, bringing it to a potluck, celebrating a birthday, or simply enjoying a cozy Sunday dessert, this apple pie never fails to impress. It’s the ultimate comfort dessert that brings people together and creates lasting memories around the table.
History / Background
Apple pie has been woven into the fabric of American culture for centuries, though its origins actually trace back to medieval England. The phrase “as American as apple pie” became popular in the early 20th century, cementing this dessert’s place in American culinary tradition. However, the first apple pie recipe appeared in England in 1381, and early American settlers brought their pie-making traditions across the Atlantic.
Interestingly, apples aren’t native to North America – they were introduced by European colonists. The first apple trees were planted in the Massachusetts Bay Colony in the 1620s. Early American pies were quite different from what we enjoy today; they were often made in sturdy, inedible crusts called “coffyns” that served merely as baking vessels.
By the 18th and 19th centuries, apple pie had become a staple in American households. Apples were abundant, relatively easy to store through winter, and could be transformed into this beloved dessert. During westward expansion, apple pie became a symbol of home and comfort for pioneers. Johnny Appleseed (John Chapman) famously planted apple nurseries across the American frontier, making apples even more accessible.
Today, apple pie represents warmth, tradition, and home cooking. It’s become synonymous with American holidays, particularly Thanksgiving, and remains one of the most requested and beloved desserts across the country.
Why You’ll Love This Recipe
This homemade apple pie recipe strikes the perfect balance between traditional technique and approachable home cooking. The result is a bakery-quality pie that’ll have everyone asking for your secret.
- Flaky, buttery crust that melts in your mouth and provides the perfect foundation
- Perfectly spiced filling with just the right amount of cinnamon and warmth
- Not too sweet – lets the natural apple flavor shine through
- Great texture – apples are tender but not mushy, with a slight bite
- Impressive presentation that looks like it came from a professional bakery
- Freezer-friendly so you can make it ahead for special occasions
- Versatile recipe that works with different apple varieties
- Budget-friendly using simple, accessible ingredients
- Perfect for all skill levels with clear, detailed instructions
Ingredient Notes
All-Purpose Flour: The foundation of your pie crust. All-purpose flour provides the right protein content for a tender yet sturdy crust. For a slightly flakier crust, you can substitute up to 1/4 of the flour with cake flour.
Unsalted Butter: Cold butter is crucial for creating those beautiful flaky layers in your crust. Using unsalted allows you to control the salt level. If you only have salted butter, reduce the added salt by half. Keep it very cold – even freeze it for 15 minutes before using.
Apples: A mix of tart and sweet apples creates the best flavor complexity. Granny Smith apples provide tartness and hold their shape well, while Honeycrisp or Gala add natural sweetness. Avoid Red Delicious or McIntosh as they become too mushy. You’ll need about 6-7 medium apples.
Granulated Sugar: Sweetens the filling. The amount can be adjusted based on your apple variety – use less for sweeter apples, more for tart varieties.
Brown Sugar: Adds depth and a subtle molasses flavor that complements the apples beautifully. Light or dark brown sugar both work.
Ground Cinnamon: The signature warming spice. Use Ceylon cinnamon for a more delicate flavor or Cassia cinnamon for a bolder taste.
Ground Nutmeg: A little goes a long way. Freshly grated nutmeg provides the best flavor, but pre-ground works fine.
Lemon Juice: Brightens the filling and prevents the apples from browning. It also helps balance sweetness and enhances apple flavor.
Cornstarch: Thickens the juices released by the apples during baking, preventing a soggy bottom crust. You can substitute with tapioca starch or flour (use 50% more flour than cornstarch).
Salt: Enhances all the flavors and balances sweetness in both the crust and filling.
Ice Water: Helps bring the dough together without melting the butter. Keep it truly ice-cold.
Egg: Used for the egg wash to create that beautiful golden-brown, glossy finish on your top crust.
Equipment Needed
Cooling rack
Large mixing bowls (at least 2)
Rolling pin
9-inch pie dish (glass, ceramic, or metal)
Pastry cutter or fork (for cutting butter into flour)
Sharp knife or pizza cutter (for trimming dough)
Vegetable peeler and apple corer
Large mixing spoon or spatula
Measuring cups and spoons
Plastic wrap or parchment paper
Pastry brush (for egg wash)
Foil or pie crust shield (to prevent over-browning)
Baking sheet (to catch any drips)
PrintThe Best Homemade Apple Pie Recipe – Classic, Flaky & Perfect Every Time

This classic homemade apple pie features a buttery, flaky double crust filled with tender spiced apples. The perfect balance of sweet and tart, this timeless dessert is ideal for holidays, family gatherings, or any time you’re craving a slice of comfort.
- Prep Time: 30 minutes
- Cook Time: 50 minutes
- Total Time: 1 hour 20 minutes (plus chilling time)
- Yield: 8 servings 1x
- Category: Dessert
- Method: Baking
- Cuisine: American
- Diet: Vegetarian
Ingredients
For the Pie Crust:
- 2½ cups all-purpose flour
- 1 tablespoon granulated sugar
- 1 teaspoon salt
- 1 cup (2 sticks) unsalted butter, very cold and cubed
- 6-8 tablespoons ice water
For the Apple Filling:
- 6-7 medium apples (about 3 pounds), peeled, cored, and sliced ¼-inch thick
- ¾ cup granulated sugar
- ¼ cup light brown sugar, packed
- 2 tablespoons all-purpose flour
- 1 tablespoon cornstarch
- 1½ teaspoons ground cinnamon
- ¼ teaspoon ground nutmeg
- ¼ teaspoon salt
- 2 tablespoons lemon juice
- 1 teaspoon vanilla extract
- 2 tablespoons unsalted butter, cut into small pieces
For Assembly:
- 1 egg, beaten (for egg wash)
- 1 tablespoon milk or cream
- 1 tablespoon coarse sugar (optional, for sprinkling)
Instructions
Make the Pie Crust:
- In a large mixing bowl, whisk together flour, sugar, and salt. Add the cold cubed butter and use a pastry cutter or two forks to cut the butter into the flour until the mixture resembles coarse crumbs with some pea-sized butter pieces remaining. This should take about 3-4 minutes.
- Drizzle 6 tablespoons of ice water over the mixture and stir with a fork until the dough begins to come together. Add more water, one tablespoon at a time, if needed. The dough should hold together when pressed but not feel wet or sticky.
- Divide the dough in half, shape each half into a flat disk, wrap tightly in plastic wrap, and refrigerate for at least 1 hour or up to 2 days. This resting time allows the gluten to relax and ensures a flaky crust.
Prepare the Apple Filling:
- In a large bowl, combine sliced apples, both sugars, flour, cornstarch, cinnamon, nutmeg, and salt. Toss until apples are evenly coated. Add lemon juice and vanilla extract, then toss again. Let the mixture sit for 15-20 minutes while you roll out your dough – this allows the flavors to meld.
Assemble the Pie:
- Preheat your oven to 425°F (220°C). Place a baking sheet on the lower rack to catch any drips.
- On a lightly floured surface, roll out one disk of dough into a 12-inch circle, about ⅛-inch thick. Carefully transfer it to your 9-inch pie dish, gently pressing it into the bottom and sides. Trim any excess overhang to about ½ inch beyond the rim. Refrigerate while you prepare the top crust.
- Roll out the second disk of dough into a 12-inch circle for the top crust. You can leave it whole for a traditional double-crust pie or cut it into strips for a lattice design.
- Remove the pie dish from the refrigerator. Pour the apple filling into the bottom crust, mounding it slightly in the center. Distribute the small butter pieces over the top of the filling.
- Place the top crust over the filling. If using a full crust, cut 4-5 slits in the top for steam to escape. Trim the edges, leaving a ½-inch overhang, then fold the edges under and crimp decoratively with your fingers or a fork to seal.
- In a small bowl, whisk together the beaten egg and milk. Brush this egg wash generously over the entire top crust. Sprinkle with coarse sugar if desired for extra sparkle and crunch.
Bake the Pie:
- Place the pie on the preheated baking sheet in the oven. Bake at 425°F for 20 minutes. Then reduce the temperature to 375°F (190°C) and continue baking for 35-45 minutes, until the crust is deep golden brown and the filling is bubbling through the vents.
- If the edges begin to brown too quickly, cover them with foil or a pie crust shield after about 30 minutes of baking.
- Remove the pie from the oven and let it cool on a wire rack for at least 4 hours before slicing. This cooling time is essential – it allows the filling to set properly so you get clean slices instead of a runny mess.
Notes
- Apple varieties matter: Use a combination of tart and sweet apples for the best flavor. Granny Smith, Honeycrisp, Braeburn, and Jonagold are excellent choices.
- Don’t skip the chilling time for your dough – it’s essential for a flaky crust.
- Prevent a soggy bottom: Make sure your oven is fully preheated, and consider blind-baking the bottom crust for 10 minutes before adding the filling if you’re concerned about sogginess.
- Slice apples uniformly so they cook evenly.
- Let the pie cool completely before slicing for the cleanest cuts and best texture.
Nutrition
- Serving Size: 1 slice (1/8 of pie)
- Calories: 425
- Sugar: 32g
- Sodium: 285mg
- Fat: 18g
- Saturated Fat: 11g
- Unsaturated Fat: 6g
- Trans Fat: 0g
- Carbohydrates: 64g
- Fiber: 4g
- Protein: 4g
- Cholesterol: 70mg
Tips & Variations
Dutch Apple Pie: Skip the top crust and add a crumb topping instead. Mix ¾ cup flour, ½ cup brown sugar, ½ cup cold butter, and 1 teaspoon cinnamon until crumbly, then sprinkle over the filling before baking.
Caramel Apple Pie: Drizzle ½ cup caramel sauce over the apples before adding the top crust. Reduce the sugar slightly to compensate for the extra sweetness.
Cheddar Apple Pie: Add ½ cup shredded sharp cheddar cheese to your pie crust dough for a sweet-savory twist that’s popular in New England.
Spiced Apple Pie: Add ¼ teaspoon ground ginger, ¼ teaspoon ground allspice, and a pinch of ground cloves for a more complex spice profile.
Vegan Version: Substitute the butter with cold vegan butter or coconut oil, and use a plant-based milk for the wash instead of egg (maple syrup works great for shine).
Bourbon Apple Pie: Add 2 tablespoons of bourbon to the apple filling for a sophisticated flavor (the alcohol cooks off during baking).
Cranberry Apple Pie: Mix in 1 cup of fresh or dried cranberries with the apples for a tart, festive twist.
Gluten-Free: Use a gluten-free flour blend designed for baking (one that includes xanthan gum). The technique remains the same.
Pro Chef Tips
Keep everything cold: This is the golden rule of pie-making. Cold butter creates steam pockets as it melts, resulting in flaky layers. If your kitchen is warm, chill your mixing bowl and even your flour beforehand.
Don’t overmix the dough: Overworking develops gluten, which makes the crust tough instead of tender. Mix just until the dough comes together.
Use a mix of apple varieties: Combining tart apples (like Granny Smith) with sweeter varieties (like Honeycrisp or Gala) creates a more complex, interesting flavor profile. Different apples also have different textures and water content, which helps create the perfect filling consistency.
Macerate your apples: Letting the sliced apples sit with sugar and spices for 15-20 minutes draws out excess moisture. You can drain off some of this liquid if it seems excessive – this prevents a soggy bottom crust.
Blind bake for extra insurance: If you want guaranteed crispness, blind bake your bottom crust for 10 minutes before adding the filling. Line it with parchment and pie weights or dried beans.
Egg wash is essential: That beautiful golden-brown color comes from the egg wash. Don’t skip it! The milk or cream in the wash helps it spread smoothly and creates extra shine.
Use visual cues, not just timers: Your pie is done when the crust is deep golden brown (not pale) and you see thick, bubbling juices coming through the vents. If the filling isn’t bubbling, the cornstarch hasn’t activated and your filling will be runny.
The cooling time isn’t optional: I know it’s tempting to cut into a warm pie, but you need to let it cool for at least 4 hours (preferably overnight) for the filling to set properly. Warm pie will be soupy; cooled pie will slice beautifully.
Common Mistakes to Avoid
Using warm or softened butter in the crust: This is the number one cause of tough, greasy crusts. Your butter should be ice-cold and cut into small cubes. Some bakers even freeze their butter cubes for 10 minutes before starting.
Slicing apples too thick or too thin: Thick slices (more than ½ inch) won’t cook through properly and create gaps in your filling. Thin slices (less than ¼ inch) turn to mush. Aim for consistent ¼-inch slices so everything cooks evenly.
Adding too much thickener or not enough: Too much cornstarch or flour makes the filling gluey and pasty. Too little means your pie will be runny. Follow the measurements precisely and make sure your filling bubbles during baking to activate the thickener.
Cutting into the pie too soon: This is so hard to resist, but it’s crucial! Hot filling is liquidy. As it cools, it firms up. Cutting too early means all those delicious juices run out, leaving you with dry apples and a messy plate.
Not venting the top crust: Steam needs somewhere to escape. Without vents or a lattice top, your pie can get soggy or the crust can puff up and separate from the filling. Always cut slits or create a lattice pattern.
Skipping the egg wash: An unwashed crust looks pale and dull. The egg wash creates that gorgeous golden color and appealing shine that makes your pie look professional.
Using all the same type of apple: Single-variety pies can be one-dimensional. Granny Smith alone is too tart; Golden Delicious alone is too sweet and mushy. A blend creates better flavor and texture.
Storage & Meal Prep
Room Temperature Storage: Once completely cooled, you can cover your apple pie loosely with foil or plastic wrap and store it at room temperature for up to 2 days. This is ideal if you’re serving it within that timeframe and prefer a softer crust.
Refrigerator Storage: For longer storage, cover the cooled pie tightly with plastic wrap or aluminum foil and refrigerate for up to 5 days. The crust may lose some crispness in the fridge, but the pie will stay fresh longer.
Reheating: To restore that fresh-baked quality, reheat individual slices in a 350°F oven for about 10-15 minutes, or microwave for 20-30 seconds. For the whole pie, tent it with foil and reheat at 325°F for 20-25 minutes until warmed through.
Freezing Baked Pie: Once completely cooled, wrap the pie tightly in plastic wrap, then in aluminum foil. Freeze for up to 3 months. Thaw overnight in the refrigerator, then warm in a 325°F oven for 20-25 minutes.
Best Serving Temperature: Apple pie is delicious at room temperature or slightly warm. If you refrigerate it, let it sit at room temperature for 30 minutes before serving, or warm it gently.
Make-Ahead & Freezer Notes
Prep the Dough in Advance: Make your pie dough up to 3 days ahead and keep it wrapped in the refrigerator, or freeze it for up to 3 months. Thaw frozen dough overnight in the fridge before rolling.
Assemble and Refrigerate: You can assemble the entire unbaked pie, cover it tightly with plastic wrap, and refrigerate it for up to 24 hours before baking. Add 5-10 minutes to the baking time if baking straight from the fridge.
Freeze Unbaked Pie: This is my favorite make-ahead method! Assemble the pie completely (but don’t brush with egg wash yet), wrap it tightly in plastic wrap and foil, and freeze for up to 3 months. When ready to bake, don’t thaw – brush with egg wash and bake directly from frozen at 425°F for 25 minutes, then reduce to 375°F and bake for an additional 50-60 minutes until golden and bubbling.
Freeze Just the Filling: Prepare the apple filling, let it cool, then freeze it in a freezer bag for up to 3 months. Thaw in the refrigerator overnight before using.
Best Reheating Method: For the crispest crust, always reheat pie in the oven rather than the microwave. Cover loosely with foil to prevent over-browning and heat at 325°F until warmed through.
Pre-Slicing Tip: If you’re making pie for a party and want easy serving, bake it a day ahead, let it cool completely and set overnight, then slice it before guests arrive. This way you get clean cuts and can serve quickly.
Serving Suggestions
Apple pie is wonderfully versatile and pairs beautifully with many accompaniments:
Classic Pairings:
- Vanilla ice cream (the ultimate combination – à la mode!)
- Fresh whipped cream or whipped topping
- Vanilla custard or crème anglaise
- Sharp cheddar cheese slices (a traditional pairing in parts of America)
Hot Beverages:
- Hot coffee or espresso
- Spiced chai latte
- Hot apple cider
- Black tea with milk and honey
Creative Additions:
- Caramel sauce drizzled over the top
- Salted caramel ice cream
- Maple whipped cream
- Bourbon whipped cream for adults
- Streusel topping added during the last 15 minutes of baking
Make It a Full Dessert Spread: Serve apple pie alongside pumpkin pie, pecan pie, or chocolate cream pie for holiday gatherings. Offer multiple ice cream flavors and toppings for a DIY dessert bar.
Breakfast Option: Yes, cold apple pie with sharp cheddar and black coffee makes an indulgent breakfast treat!
FAQs Section
Q: Can I use store-bought pie crust?
A: Absolutely! While homemade crust tastes better and has superior texture, store-bought crusts work in a pinch. Look for refrigerated dough rather than frozen shells for better quality. You’ll need two rounds for a double-crust pie.
Q: Why is my apple pie filling runny?
A: This happens when the filling hasn’t cooked long enough to activate the cornstarch, when there’s too much liquid (some apple varieties release more juice), or when the pie is cut before it’s completely cooled. Make sure you see thick bubbling through the vents before removing from the oven, and always let the pie cool for at least 4 hours.
Q: How do I prevent a soggy bottom crust?
A: Several tricks help: preheat your oven thoroughly and bake on a lower rack, use a metal or glass (not ceramic) pie pan which conducts heat better, consider blind-baking the bottom crust for 10 minutes before adding filling, and make sure your filling isn’t overly wet. You can also brush the bottom crust with a thin layer of beaten egg white before adding the filling to create a moisture barrier.
Q: What are the best apples for apple pie?
A: Use a mix of varieties for the best flavor and texture. Great choices include Granny Smith (tart, holds shape), Honeycrisp (sweet, crisp), Braeburn (balanced, flavorful), Jonagold (sweet-tart balance), and Golden Delicious (sweet, soft texture). Avoid Red Delicious and McIntosh as they become too mushy.
Q: Can I make this pie dairy-free?
A: Yes! Substitute the butter in the crust with cold vegan butter or cold coconut oil. Use plant-based milk instead of the egg-milk wash (or brush with maple syrup for shine), and omit the butter pieces in the filling or replace with vegan butter.
Q: How do I know when my apple pie is done baking?
A: Look for three signs: the crust should be deep golden brown (not pale), you should see thick, bubbling juices coming through the vents or lattice, and the filling should jiggle slightly but not slosh when you gently shake the pan. If you insert a knife through a vent, the apples should be tender. The pie typically takes 55-65 minutes total.
Q: Can I freeze unbaked apple pie?
A: Absolutely! This is one of the best make-ahead strategies. Assemble the pie completely (skip the egg wash), wrap it tightly in plastic wrap and then foil, and freeze for up to 3 months. Bake directly from frozen – just add 15-20 minutes to the baking time. Brush with egg wash before baking.
Q: Why did my pie crust shrink?
A: Crust shrinkage happens when the dough is overworked (developing too much gluten) or when it’s not rested before baking. Always chill your dough for at least an hour before rolling, and let the rolled-out crust rest in the pan for 15-20 minutes before baking. Also, don’t stretch the dough when placing it in the pan – let it naturally fall into place.
Conclusion
There’s something magical about pulling a golden, bubbling apple pie from your oven – the achievement of creating something so beautiful and delicious with your own hands. This classic apple pie recipe has been perfected over generations, and now it’s yours to make, share, and create memories with. Whether you’re baking it for a holiday gathering, a Sunday dinner, or just because you’re craving that perfect combination of flaky crust and tender, spiced apples, this recipe won’t let you down.
The beauty of apple pie is that it gets better with practice. Each time you make it, you’ll learn something new about your oven, your dough, and your preferences. Don’t be intimidated if your first attempt isn’t perfect – even imperfect pie tastes amazing!
I’d love to hear about your apple pie adventures! Did you try this recipe? What apple varieties did you use? Did you go traditional or try one of the variations? Leave a comment below and let me know how it turned out. And if you loved this recipe, please pin it to your favorite Pinterest board so you can find it again and share it with others who love homemade desserts!
Happy baking, and enjoy every delicious, comforting slice! 🥧