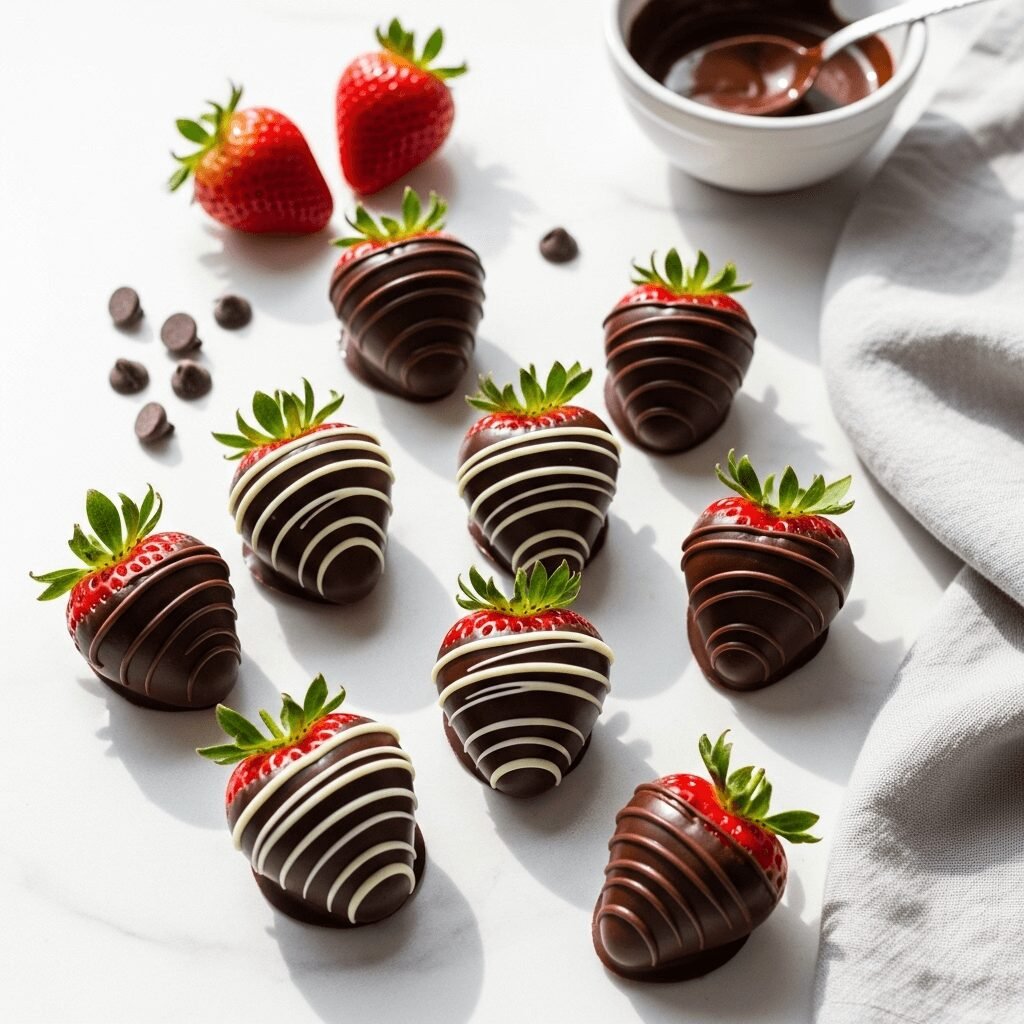
The Ultimate Chocolate Covered Strawberries Recipe: Easy, Elegant & Irresistible

There’s something absolutely magical about chocolate covered strawberries. These elegant little treats combine the juicy sweetness of fresh strawberries with rich, velvety chocolate for a dessert that feels luxurious but is surprisingly simple to make at home. Whether you’re planning a romantic Valentine’s Day surprise, putting together a stunning dessert platter for a special celebration, or simply treating yourself to something special on a Tuesday evening, chocolate covered strawberries never fail to impress.
What makes this recipe so beloved is its beautiful simplicity. With just two main ingredients and about 30 minutes of your time, you can create bakery-worthy treats that look like they came from an expensive chocolate shop. They’re perfect for wedding showers, anniversary dinners, Mother’s Day brunches, holiday parties, or any occasion where you want to add a touch of elegance without spending hours in the kitchen. The combination of the bright, fresh fruit flavor with smooth chocolate creates a balanced treat that’s sweet but not overly heavy, making it the perfect ending to any meal.
History / Background
The pairing of chocolate and strawberries has a fascinating history that spans continents and centuries. While the exact origin of chocolate covered strawberries is somewhat debated, most food historians agree that this iconic combination became popular in the United States during the 1960s. A Chicago-based gourmet food company is often credited with popularizing the treat at fancy social events and upscale gatherings.
However, the tradition of coating fruits in chocolate dates back much further. European chocolatiers have been creating chocolate-dipped fruits since at least the 18th century, with cherries and orange peels being particularly popular. When strawberries became more widely available year-round in America thanks to improved agriculture and shipping methods, they naturally became the perfect canvas for chocolate artistry.
The treat gained even more popularity in the 1980s and 1990s as gourmet chocolate shops began opening across America, and chocolate covered strawberries became synonymous with romance and luxury. They’re now a Valentine’s Day staple, appearing everywhere from high-end restaurants to grocery store displays. What started as an exclusive delicacy has transformed into a beloved treat that anyone can create at home, bringing a touch of elegance to everyday celebrations.
Why You’ll Love This Recipe
This chocolate covered strawberries recipe is truly a game-changer for home cooks who want to create something impressive without complicated techniques or expensive equipment. The beauty of this recipe lies in its simplicity – it proves that sometimes the most elegant dishes are the easiest to make.
Here’s why this recipe deserves a permanent spot in your dessert repertoire:
- Incredibly Simple: Just two main ingredients and a straightforward process that even beginners can master on the first try
- Quick to Make: From start to finish, you’ll have beautiful chocolate covered strawberries ready in about 30 minutes
- Budget-Friendly: Much cheaper than buying them from a chocolate shop or bakery, yet they taste just as luxurious
- Naturally Gluten-Free: Perfect for guests with dietary restrictions when you use pure chocolate
- Customizable: Easy to dress up with toppings, drizzles, or different chocolate varieties to match any theme or preference
- Impressive Presentation: They look like you spent hours making them, but only you’ll know how easy they really were
- No Baking Required: Perfect for hot summer days when you don’t want to heat up your kitchen
- Make-Ahead Friendly: Can be prepared the day before your event, saving you precious time
- Crowd-Pleasing: Loved by adults and children alike – there’s something universally appealing about this flavor combination
- Portion-Controlled: Each strawberry is a single serving, making them perfect for parties and gatherings
Ingredient Notes
The beauty of chocolate covered strawberries lies in their simplicity, but choosing quality ingredients makes all the difference between good and absolutely incredible results.
Fresh Strawberries: Select large, firm strawberries with bright green caps still attached. The caps not only provide a natural handle for dipping but also add to the visual appeal. Look for berries that are completely red with no white or green areas near the stem, as these underripe spots won’t taste as sweet. Avoid strawberries with soft spots, bruising, or excessive moisture. Room temperature strawberries work better than cold ones, as cold berries can cause the chocolate to seize or crack as it sets.
Chocolate: You have several excellent options here. High-quality chocolate chips (semi-sweet, dark, milk, or white chocolate) work wonderfully and are convenient for melting. For an even more luxurious result, use chocolate bars or chocolate melting wafers specifically designed for candy-making. These melting wafers contain added cocoa butter that gives a smoother, glossier finish. Avoid using chocolate chips that contain stabilizers if you want the shiniest result. For best results, use chocolate with at least 60% cacao content for dark chocolate, or quality brands like Ghirardelli, Guittard, or Callebaut.
Coconut Oil or Shortening (Optional): Adding a teaspoon of refined coconut oil or vegetable shortening to your melted chocolate helps create an even smoother, thinner coating that’s easier to work with. It also gives the finished chocolate a beautiful sheen. This is completely optional, but it’s a professional trick that makes dipping easier, especially for beginners.
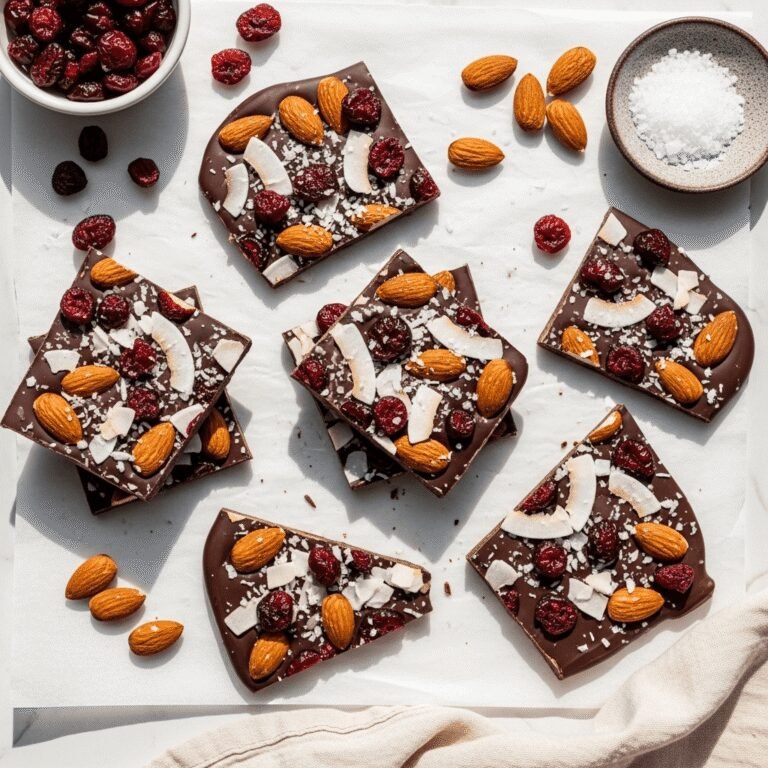
Toppings (Optional): Chopped nuts, shredded coconut, sprinkles, crushed cookies, or sea salt can transform your chocolate strawberries into customized creations. Add these while the chocolate is still wet for best adherence.
Substitutions: If you can’t find good fresh strawberries, this technique works beautifully with other fruits too – try it with pineapple chunks, banana slices, or dried apricots. For dairy-free versions, use dark chocolate or dairy-free chocolate chips. Sugar-free chocolate chips work well for those watching their sugar intake.
Equipment Needed
One of the best things about this recipe is that you don’t need any fancy equipment – just a few basic kitchen tools:
- Microwave-safe bowl or double boiler: For melting the chocolate gently and evenly
- Baking sheet: To place your finished strawberries on while the chocolate sets
- Parchment paper or wax paper: Prevents the chocolate from sticking to your baking sheet
- Fork or dipping tool: Helpful for holding strawberries while excess chocolate drips off (though you can also hold them by the stem)
- Paper towels: For drying washed strawberries thoroughly
- Small spoon or piping bag (optional): If you want to add decorative drizzles with contrasting chocolate
- Silicone spatula: For stirring chocolate smoothly without scratching your bowl
Chocolate Covered Strawberries Recipe

Learn how to make perfect chocolate covered strawberries at home with this easy recipe. These elegant treats feature fresh, juicy strawberries dipped in smooth melted chocolate for a dessert that’s as beautiful as it is delicious.
- Prep Time: 15 minutes
- Cook Time: 5 minutes
- Total Time: 30 minutes
- Yield: 12-15 chocolate covered strawberries 1x
- Category: Dessert
- Method: No Bake
- Cuisine: American
- Diet: Vegetarian
Ingredients
- 1 pound fresh strawberries (about 12-15 large berries), washed and completely dried
- 8 ounces chocolate (semi-sweet, dark, milk, or white chocolate chips or chopped chocolate bars)
- 1 teaspoon coconut oil or vegetable shortening (optional, for smoother chocolate)
- Optional toppings: chopped nuts, shredded coconut, sprinkles, crushed cookies, or flaky sea salt
Instructions
- Prepare Your Strawberries: Wash strawberries gently under cool water and pat them completely dry with paper towels. This is crucial – any moisture will cause the chocolate to seize and become grainy. Let them sit at room temperature for 30 minutes if they were refrigerated. Line a baking sheet with parchment paper or wax paper.
- Melt the Chocolate: Place chocolate and coconut oil (if using) in a microwave-safe bowl. Microwave in 30-second intervals, stirring thoroughly between each interval, until chocolate is completely smooth and melted. This usually takes 1-2 minutes total. Be careful not to overheat. Alternatively, melt chocolate using a double boiler over simmering water, stirring constantly until smooth.
- Test the Temperature: The melted chocolate should feel just slightly warm to the touch – not hot. If it’s too hot, let it cool for 2-3 minutes before dipping.
- Dip the Strawberries: Hold each strawberry by its green cap and dip it into the melted chocolate at a slight angle, rotating it to coat about three-quarters of the berry. Leave a small portion of the strawberry showing at the top for a professional look.
- Remove Excess Chocolate: Lift the strawberry and let excess chocolate drip back into the bowl. You can gently shake it or tap your wrist to encourage dripping. You want a thin, even coating rather than thick, heavy chocolate.
- Place on Prepared Sheet: Set each dipped strawberry on the parchment-lined baking sheet, gently twisting as you set it down to prevent a “foot” of chocolate from pooling at the bottom.
- Add Toppings (Optional): If using toppings, sprinkle or roll them onto the strawberry immediately after dipping, while the chocolate is still wet.
- Create Decorative Drizzles (Optional): If you want to add decorative drizzles, melt a small amount of contrasting chocolate (white chocolate on dark chocolate, or vice versa). Use a fork or transfer the melted chocolate to a small plastic bag with a tiny corner snipped off, then drizzle in a back-and-forth motion over the set strawberries.
- Let Chocolate Set: Allow the chocolate to set at room temperature for about 10-15 minutes, or refrigerate for 5-10 minutes if you’re in a hurry. Don’t leave them in the fridge too long, as condensation can form when you remove them.
- Serve and Enjoy: Once the chocolate is completely set and no longer glossy or tacky to the touch, your chocolate covered strawberries are ready to serve!
Notes
- Dry is Essential: Make absolutely sure your strawberries are completely dry. Even a drop of water can cause the chocolate to seize and become unusable.
- Room Temperature Works Best: Cold strawberries can cause the chocolate to harden too quickly and crack. Let them come to room temperature before dipping.
- Don’t Overheat Chocolate: Chocolate can scorch easily. Always melt in short intervals and stir thoroughly.
- Work Quickly: Once melted, chocolate has a limited working window. If it starts to thicken, reheat it briefly (10-15 seconds) in the microwave.
- Storage: Store finished chocolate covered strawberries in an airtight container in the refrigerator, but let them come to room temperature before serving for best flavor.
Nutrition
- Serving Size: 1 chocolate covered strawberry
- Calories: 65
- Sugar: 8g
- Sodium: 2mg
- Fat: 3.5g
- Saturated Fat: 2g
- Unsaturated Fat: 1g
- Trans Fat: 0g
- Carbohydrates: 9g
- Fiber: 1g
- Protein: 1g
- Cholesterol: 1mg
Note: Nutrition information is approximate and will vary based on the type of chocolate used and size of strawberries.
Tips & Variations
The basic recipe for chocolate covered strawberries is wonderfully versatile. Here are some creative ways to customize them for different occasions or preferences:
White Chocolate Drizzle: After dipping in dark or milk chocolate, melt white chocolate and drizzle it over the top in zigzag patterns for an elegant tuxedo look.
Triple Chocolate: Dip first in white chocolate, let it set, then dip halfway in milk chocolate, and finally add a dark chocolate drizzle. This creates beautiful layers.
Nut-Crusted: After dipping, immediately roll the bottom half of the strawberry in finely chopped almonds, pecans, pistachios, or hazelnuts for added crunch and sophistication.
Cookies and Cream: Dip in white chocolate, then sprinkle with crushed Oreo cookies before the chocolate sets.
Tropical Twist: Use white chocolate and roll in toasted coconut flakes for a tropical feel.
Salted Caramel: Dip in chocolate, then drizzle with caramel sauce and sprinkle with flaky sea salt.
S’mores Style: Dip in chocolate, then press mini marshmallows and graham cracker crumbs onto the wet chocolate.
Birthday Bash: Use white chocolate and cover with colorful sprinkles for a festive, birthday-appropriate treat.
Peanut Butter Lovers: After the chocolate sets, drizzle with melted peanut butter or press chopped peanut butter cups onto wet chocolate.
Mint Fresh: Add a few drops of peppermint extract to your melted chocolate, then top with crushed candy canes or mint chocolate chips.
Pro Chef Tips
After years of making chocolate covered strawberries, professional chocolatiers have discovered some secrets that elevate this simple treat from good to absolutely perfect:
Temperature is Everything: The ideal temperature for melting chocolate is between 88-90°F (31-32°C). Use a kitchen thermometer if you’re serious about perfection. Chocolate that’s too hot will be thin and runny; too cool and it won’t coat smoothly.
Polish Your Strawberries: Before dipping, gently polish dry strawberries with a paper towel to remove any remaining moisture and give them a slight shine. This helps the chocolate adhere better.
Use Quality Chocolate: The chocolate is half the recipe, so don’t skimp. Higher quality chocolate with more cocoa butter will give you a smoother, glossier finish with better snap.
The Twist Technique: When placing dipped strawberries on parchment, give them a slight twist as you set them down. This creates a small swirl at the base that looks professional and prevents that flat “foot” of pooled chocolate.
Watch Your Angles: Dip strawberries at a 45-degree angle rather than straight up and down. This creates the most elegant coating and prevents chocolate from pooling around the stem.
Humidity Matters: Avoid making chocolate covered strawberries on humid days if possible. Humidity can cause chocolate to bloom (develop a white, powdery appearance) and can make the setting process more difficult.
Let Them Breathe: After dipping, don’t crowd the strawberries too closely on the baking sheet. They need air circulation around them to set properly and evenly.
Serve at Room Temperature: While you’ll store them in the fridge, always let chocolate covered strawberries sit at room temperature for about 10-15 minutes before serving. The flavor and texture are much better when not ice cold.
Common Mistakes to Avoid
Even with such a simple recipe, there are a few pitfalls that can turn your chocolate covered strawberries from perfect to problematic:
Using Wet Strawberries: This is the number one mistake. Water is chocolate’s enemy. Even a tiny bit of moisture will cause the chocolate to seize into a grainy, unusable mess. Always dry strawberries thoroughly and let them sit for a few minutes after washing to ensure they’re completely moisture-free.
Refrigerating Too Long: While refrigeration is fine for storage, leaving chocolate covered strawberries in the fridge for too long (especially uncovered) can cause condensation when you bring them back to room temperature. This creates a sweaty appearance and can make the chocolate look dull. Store them properly covered and don’t refrigerate for more than 24 hours before serving.
Overheating the Chocolate: Chocolate is delicate and can burn or seize if heated too quickly or at too high a temperature. Always use short microwave intervals with thorough stirring, or use gentle heat with a double boiler. Scorched chocolate is grainy and impossible to salvage.
Dipping Cold Strawberries: Taking strawberries straight from the fridge and dipping them in warm chocolate causes temperature shock. The chocolate will set too quickly, creating cracks and an uneven coating. Always let strawberries come to room temperature first.
Making Them Too Far in Advance: While chocolate covered strawberries can be made ahead, they’re best within 24 hours. After that, the moisture from the strawberries can start to break down the chocolate, creating a wet layer between the fruit and coating. The strawberries also begin to soften and release juice, which can make them soggy.
Storage & Meal Prep
Proper storage is key to keeping your chocolate covered strawberries fresh and beautiful:
Refrigerator Storage: Store chocolate covered strawberries in a single layer in an airtight container lined with paper towels. The paper towels will absorb any excess moisture. They’ll keep for 24-48 hours in the refrigerator, but they’re truly best within the first 24 hours.
Room Temperature Storage: If you’re serving them within 4-6 hours, you can leave them at room temperature in a cool, dry place away from direct sunlight. This is ideal for party situations where you want them looking their best.
Avoid Freezing: Unlike many desserts, chocolate covered strawberries don’t freeze well. The strawberries become mushy when thawed, and the texture is never quite right. Always make them fresh or within a day of serving.
Preventing Condensation: When removing from the refrigerator, let them sit in the closed container for about 10 minutes before opening. This allows them to gradually come to room temperature and prevents condensation from forming on the chocolate.
Serving Tips: Transfer chocolate covered strawberries to your serving platter just before guests arrive. If they sit out too long in a warm room, the chocolate can become soft and the strawberries can release moisture.
Make-Ahead & Freezer Notes
Planning ahead for a party or special occasion? Here’s what you need to know:
Best Timeline: The ideal make-ahead window is 12-24 hours before serving. Make them the night before or early morning of your event for optimal freshness and appearance.
Advance Prep Steps: You can wash and dry your strawberries up to 4 hours in advance. Store them on paper towels at room temperature. Wait to melt and dip the chocolate until you’re ready to complete the recipe.
Chocolate Prep: Chop chocolate bars or portion out chocolate chips in advance and store in an airtight container. This saves time when you’re ready to start dipping.
Freezing (Not Recommended): While I don’t recommend freezing finished chocolate covered strawberries, if you absolutely must, here’s the best method: Flash freeze them on a baking sheet for 2 hours, then transfer to a freezer-safe container with parchment paper between layers. Thaw slowly in the refrigerator overnight before bringing to room temperature. Be aware that texture and appearance will be compromised.
Better Alternative to Freezing: Instead of freezing finished strawberries, consider making chocolate-covered strawberry “bites” using freeze-dried strawberries dipped in chocolate. These actually freeze beautifully and maintain their quality.
Day-of Timeline: If making on the day of serving, complete the recipe at least 1-2 hours before guests arrive to allow time for the chocolate to fully set and for you to arrange them beautifully on a platter.
Reheating (Not Applicable): These are served cold or at room temperature, so no reheating is needed. Simply remove from refrigeration 15-20 minutes before serving.
Serving Suggestions
Chocolate covered strawberries are versatile enough to fit into many different serving situations:
Romantic Dessert: Arrange chocolate covered strawberries on a beautiful platter with fresh whipped cream in a small bowl for dipping, alongside flutes of champagne or sparkling wine. Add some fresh mint leaves for garnish and a few extra fresh strawberries for color contrast.
Dessert Board Centerpiece: Make chocolate covered strawberries the star of a dessert charcuterie board. Surround them with chocolate truffles, macarons, fresh berries, small cookies, and nuts for an Instagram-worthy spread.
Brunch Table: Serve alongside other brunch favorites like mini pastries, fruit salad, yogurt parfaits, and mimosas. They add elegance without being too heavy for morning or midday gatherings.
Coffee Pairing: These pair beautifully with hot coffee, espresso, or cappuccino. The slight bitterness of coffee complements the sweet chocolate perfectly.
Wine Pairing: Serve with dessert wines like Port, late-harvest Riesling, or Moscato d’Asti. For non-alcoholic options, try them with sparkling cider or berry-infused iced tea.
Party Platter: Arrange on a tiered cake stand or elegant platter with fresh flowers around the base. This creates height and visual interest at buffet tables or dessert stations.
Individual Servings: For formal dinners, place 2-3 chocolate covered strawberries on each dessert plate with a small dollop of whipped cream and a drizzle of chocolate sauce on the plate for a restaurant-style presentation.
Gift Packaging: Arrange in a beautiful gift box lined with tissue paper, or package in clear cellophane bags tied with ribbons for party favors or hostess gifts.
FAQs Section
Q: Why won’t my chocolate stick to the strawberries?
A: The most common reason is moisture on the strawberries. Make absolutely sure they’re completely dry before dipping. Even a tiny bit of water will prevent the chocolate from adhering properly. Also ensure your strawberries are at room temperature, not cold from the refrigerator.
Q: Can I use chocolate chips instead of chocolate bars?
A: Yes! Chocolate chips work perfectly well. For the best results, use high-quality chocolate chips. Some people prefer adding a small amount of coconut oil or shortening when using chips to help them melt more smoothly, as chocolate chips contain stabilizers that can make them slightly thicker when melted.
Q: How do I prevent the chocolate from cracking?
A: Cracking usually happens when there’s a temperature differential. Make sure your strawberries are at room temperature (not cold) before dipping. Also, don’t refrigerate the dipped strawberries immediately – let them set at room temperature first, then refrigerate if needed. Chocolate that’s been overheated can also crack, so use gentle heat when melting.
Q: Can I make these more than a day ahead?
A: While you can make them 2 days in advance, they’re truly best within 24 hours. After that, moisture from the strawberries can start to break down the chocolate coating, and the berries begin to soften and release juice. For best results, make them the day before or morning of your event.
Q: My chocolate is thick and hard to work with. What can I do?
A: Your chocolate may have gotten too cool. Reheat it very briefly (10-15 seconds) in the microwave or return it to your double boiler. If you’re starting fresh, add a teaspoon of coconut oil or vegetable shortening to help thin the chocolate and make it easier to work with.
Q: Can I use candy melts instead of real chocolate?
A: Yes, candy melts work well and are actually easier for beginners because they’re formulated to melt smoothly and set quickly. They come in many colors too, which is fun for themed parties. However, real chocolate tastes better and has a more luxurious flavor. It’s a trade-off between convenience and taste.
Q: Do I need to temper the chocolate?
A: No, tempering isn’t necessary for this recipe. Tempering is a technique used by professional chocolatiers to create a specific crystal structure in chocolate for a perfect snap and shine, but it’s not required for delicious home-made chocolate covered strawberries. Simply melting the chocolate properly will give you great results.
Conclusion
Making perfect chocolate covered strawberries at home is one of those magical kitchen experiences where something simple becomes something spectacular. With just two main ingredients and about 30 minutes of your time, you can create desserts that look like they came from an expensive chocolate boutique. Whether you’re preparing them for a romantic dinner, a holiday celebration, a brunch with friends, or just because it’s Tuesday and you deserve something special, these chocolate covered strawberries never disappoint.
The beauty of this recipe is that it’s completely beginner-friendly while still offering endless opportunities for creativity and personalization. From simple classic versions to elaborately decorated works of edible art, you can make them exactly how you want them. Each batch is an opportunity to try new flavor combinations, different types of chocolate, or creative toppings.
Now it’s your turn to create some magic in your kitchen! I’d love to hear how your chocolate covered strawberries turn out. Did you try any of the variations? What was your favorite topping combination? Leave a comment below sharing your experience, and don’t forget to pin this recipe to your Pinterest boards so you can find it again when you need an elegant dessert solution. Happy dipping!