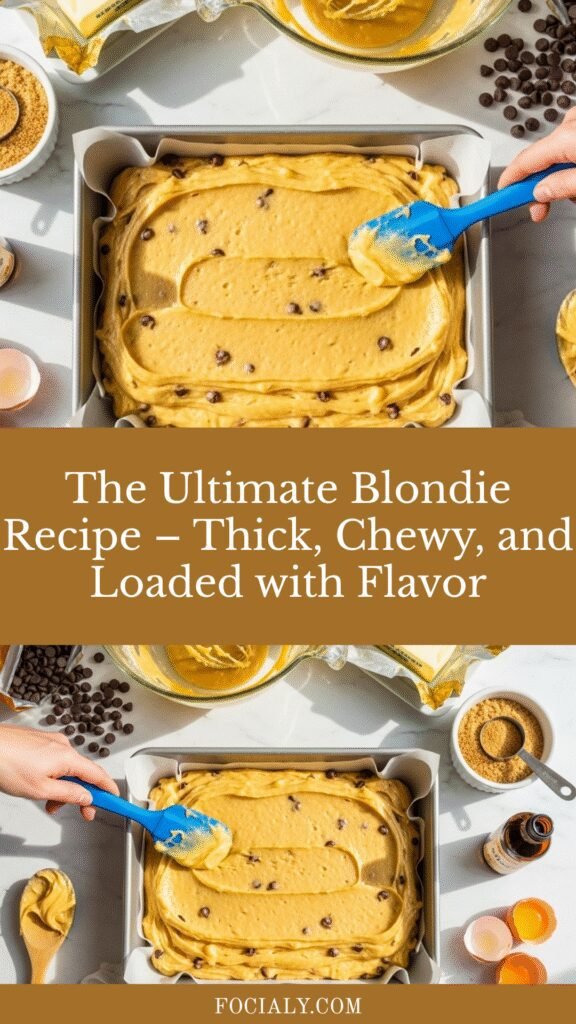
The Ultimate Blondie Recipe – Thick, Chewy, and Loaded with Flavor
If you’ve ever wondered what happens when you take everything you love about brownies and swap the chocolate for rich, buttery brown sugar goodness, you’ve discovered the magic of blondies! These golden bars are dense, chewy, and packed with deep caramel-vanilla flavor that’s absolutely addictive. Think of them as brownies’ sophisticated cousin—equally indulgent but with a whole different personality.
Blondies are the ultimate crowd-pleasing dessert that works for literally any occasion. Need something quick for a bake sale? Blondies. Want to impress guests at a dinner party? Blondies with vanilla ice cream. Looking for an afternoon pick-me-up with coffee? You guessed it—blondies! They’re incredibly versatile, endlessly customizable, and come together in one bowl with ingredients you probably already have in your pantry.
What makes this blondie recipe truly special is the perfect balance of textures—crispy edges, chewy centers, and that gorgeous crackly top that looks as impressive as it tastes. Whether you fold in chocolate chips, butterscotch chips, nuts, or keep them plain and simple, these blondies deliver pure comfort in every bite. They’re easier than cookies (no chilling required!), simpler than cake (no frosting needed!), and more unique than your standard brownie. Let’s dive into creating the best blondies you’ve ever tasted!
History / Background
The blondie has a fascinating history that’s often overshadowed by its more famous chocolate cousin, the brownie. While brownies appeared in American cookbooks around the late 1890s, blondies emerged shortly after as bakers experimented with removing cocoa from brownie recipes. The earliest known printed recipe for “blondies” appeared in the 1940s, though similar “butterscotch brownies” had been made in home kitchens for decades before that.
The name “blondie” is a playful reference to their light golden color, which stands in direct contrast to the dark “brunette” brownies. Some food historians believe blondies may actually predate chocolate brownies, as molasses-based bar cookies were common in colonial American baking when chocolate was still expensive and hard to obtain. These early versions would have relied on brown sugar, molasses, and butter—ingredients that were more accessible to everyday home cooks.
Blondies gained significant popularity during the mid-20th century when American home baking was at its peak. The 1950s and 1960s saw them featured in community cookbooks, church bake sales, and school fundraisers across the country. They were particularly beloved in the Midwest and South, where brown sugar and butter-based desserts were kitchen staples.
Unlike brownies, which have a fairly standardized recipe, blondies have always been more free-form and creative. Regional variations include adding pecans in the South, white chocolate chips on the West Coast, and toffee bits in New England. Today, blondies have experienced a renaissance in artisan bakeries and food blogs, where they’re celebrated for their nostalgic charm and infinite customization possibilities. They represent the American tradition of taking simple pantry ingredients and transforming them into something truly special—a perfect example of home baking at its finest.
Why You’ll Love This Recipe
This blondie recipe is everything you want in a homemade dessert—ridiculously easy to make, impossible to mess up, and absolutely delicious every single time. Unlike finicky cakes or temperamental cookies, blondies are incredibly forgiving and consistently deliver that perfect chewy texture everyone craves.
Here’s why this recipe will become your new favorite go-to dessert:
- One-bowl wonder – No mixer required! Everything comes together in a single bowl with just a whisk and spoon
- Ready in 30 minutes – From start to finish, including baking time, you’re looking at half an hour max
- Pantry-friendly ingredients – Made with basic baking staples you likely already have on hand
- Foolproof recipe – Perfect for beginner bakers and experienced home cooks alike
- Endlessly customizable – Add chocolate chips, nuts, dried fruit, candy pieces, or swirls of caramel
- Better than bakery – That homemade buttery flavor and chewy texture can’t be beat
- Budget-friendly – Makes 16 generous squares for just a few dollars
- No chilling required – Unlike cookie dough, you can mix and bake immediately
- Perfect texture every time – Crispy edges, gooey center, and that signature crackly top
- Great for gifting – Wrap individual squares for perfect homemade gifts
- Kid-approved – Even picky eaters love these golden treats
- Freezer-friendly – Make ahead and freeze for up to 3 months
The best part? These blondies actually taste better the next day as the flavors develop and the texture becomes even chewier. They’re the ultimate make-ahead dessert that gets you maximum praise for minimal effort!
Ingredient Notes
Understanding your ingredients is the key to perfect blondies every time. Here’s what you need to know:
Unsalted Butter: This is the foundation of blondie flavor. Use real butter, not margarine or spreads—the rich, creamy taste is irreplaceable. Melted butter creates that signature dense, fudgy texture. Unsalted lets you control the salt level perfectly. If you only have salted butter, reduce the added salt to ¼ teaspoon.
Light Brown Sugar: The star ingredient that gives blondies their characteristic caramel-vanilla flavor and chewy texture. The molasses in brown sugar adds moisture and depth. Light brown sugar is preferred for its milder flavor, but dark brown sugar works if you want a deeper molasses taste. Don’t pack it too firmly when measuring—a gentle pack is perfect.
Granulated Sugar: Adds sweetness and helps create that beautiful crackly top. The combination of brown and white sugar gives you the best of both worlds—chewiness from brown sugar and crispness from white sugar.
Eggs: Bind everything together and add richness. Room temperature eggs incorporate more easily into the batter. Two large eggs are the perfect amount for a 9×13 pan. They provide structure without making the blondies cakey.
Vanilla Extract: Use pure vanilla extract, not imitation—the flavor difference is noticeable in such a simple recipe. It enhances the buttery, caramel notes and rounds out the sweetness beautifully.
All-Purpose Flour: Provides structure. Don’t overmix once you add the flour, or your blondies will be tough instead of tender. For gluten-free blondies, use a 1:1 gluten-free flour blend.
Baking Powder: Just a small amount gives a slight lift without making them cakey. This keeps them dense and chewy while preventing them from being too flat.
Salt: Essential! Salt balances the sweetness and enhances all the other flavors. Don’t skip it—unsalted desserts taste flat and one-dimensional.
Optional Mix-ins: This is where you can get creative! Chocolate chips, white chocolate chips, butterscotch chips, chopped nuts (pecans, walnuts, or macadamias), toffee bits, dried cranberries, shredded coconut, or even a swirl of Nutella. Add 1-1½ cups of your favorite mix-ins.
Equipment Needed
You don’t need any fancy equipment to make perfect blondies! Here’s your simple setup:
- 9×13-inch baking pan – Metal pans conduct heat better and create crispier edges, while glass pans bake more evenly. Either works beautifully!
- Parchment paper or aluminum foil – Line your pan for easy removal and cleanup (life-changing tip!)
- Large mixing bowl – For combining all your ingredients
- Medium saucepan or microwave-safe bowl – For melting the butter
- Whisk – For mixing the wet ingredients smoothly
- Rubber spatula or wooden spoon – For folding in flour and mix-ins
- Measuring cups and spoons – Accurate measurements ensure consistent results
- Toothpick or cake tester – For checking doneness
- Cooling rack – Allows air circulation for even cooling
- Sharp knife – For cutting clean squares (wipe between cuts for the neatest edges!)
Pro tip: Lining your pan with parchment paper with overhang on two sides creates “handles” that let you lift the entire block of blondies out for super easy cutting!
PrintThe Ultimate Blondie Recipe – Thick, Chewy, and Loaded with Flavor

These classic blondies are thick, chewy, and loaded with buttery brown sugar flavor. With crispy edges, a gooey center, and endless customization options, they’re the perfect easy dessert that comes together in one bowl!
- Prep Time: 10 minutes
- Cook Time: 25 minutes
- Total Time: 35 minutes
- Yield: 16 squares 1x
- Category: Dessert
- Method: Baking
- Cuisine: American
- Diet: Vegetarian
Ingredients
- ½ cup (1 stick) unsalted butter, melted and slightly cooled
- 1 cup packed light brown sugar
- ½ cup granulated sugar
- 2 large eggs, at room temperature
- 2 teaspoons pure vanilla extract
- 1½ cups all-purpose flour
- 1 teaspoon baking powder
- ½ teaspoon salt
- 1 cup chocolate chips, butterscotch chips, or chopped nuts (optional but highly recommended!)
Instructions
- Preheat and prep: Preheat your oven to 350°F (175°C). Line a 9×13-inch baking pan with parchment paper or aluminum foil, leaving a 2-inch overhang on two opposite sides (this makes removal so much easier!). Lightly grease the parchment or foil with cooking spray or butter.
- Melt the butter: In a medium saucepan over low heat or in a microwave-safe bowl, melt the butter completely. Let it cool for 3-5 minutes—you want it warm but not hot, or it will cook the eggs in the next step.
- Mix the wet ingredients: Pour the melted butter into a large mixing bowl. Add the brown sugar and granulated sugar, then whisk vigorously for about 1 minute until the mixture is smooth, glossy, and well combined. The sugar should be fully incorporated into the butter.
- Add eggs and vanilla: Crack in the eggs one at a time, whisking well after each addition. The mixture should become lighter in color and slightly thick. Add the vanilla extract and whisk until everything is beautifully combined and smooth.
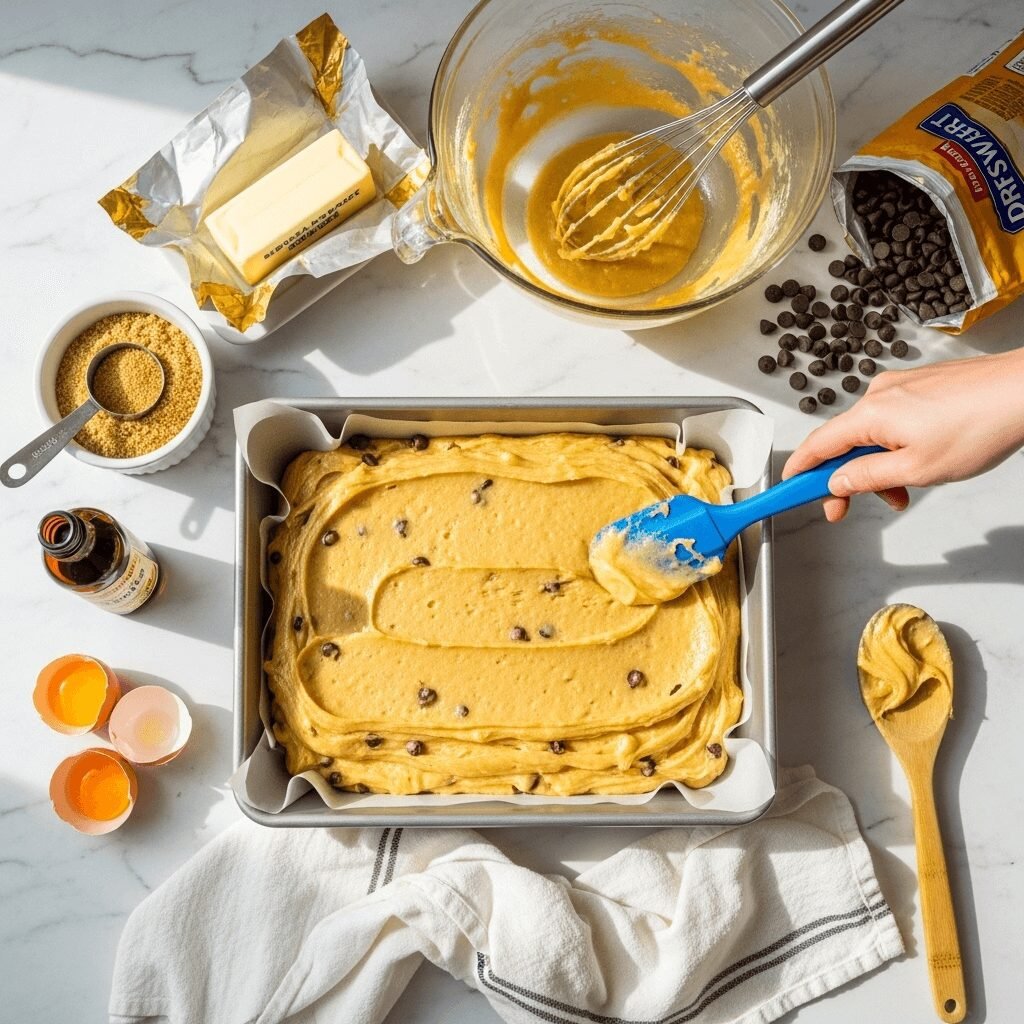
- Incorporate dry ingredients: In a separate bowl (or directly over the wet mixture if you’re going for minimal dishes), whisk together the flour, baking powder, and salt. Pour the dry ingredients over the wet ingredients. Using a rubber spatula or wooden spoon, gently fold everything together until just combined. Don’t overmix—stop as soon as you no longer see dry flour streaks. The batter will be thick and glossy.
- Add mix-ins: If using chocolate chips, nuts, or other mix-ins, fold them in gently until evenly distributed throughout the batter.
- Spread in pan: Scrape the batter into your prepared pan. Use your spatula to spread it evenly into all corners—the batter is thick, so take your time to get it level. Smooth the top as best you can.
- Bake: Place the pan on the center rack of your preheated oven and bake for 22-28 minutes. The blondies are done when the edges are set and golden brown, the center looks just barely set (it will jiggle very slightly when you gently shake the pan), and a toothpick inserted into the center comes out with just a few moist crumbs. Don’t overbake—slightly underbaked is better than overbaked for maximum chewiness!
- Cool completely: Remove from the oven and place the pan on a cooling rack. This is the hardest part—let the blondies cool completely in the pan for at least 30 minutes (ideally 1 hour) before cutting. They’ll continue to set as they cool.
- Cut and serve: Use the parchment paper overhang to lift the entire block of blondies out of the pan onto a cutting board. Using a sharp knife (wipe it clean between cuts), slice into 16 squares. Serve and watch them disappear!
Notes
- Don’t overmix: Once you add the flour, mix only until combined. Overmixing develops gluten and makes blondies tough and cakey instead of chewy.
- Check early: Oven temperatures vary. Start checking at 22 minutes. The center should look slightly underdone—it will continue cooking as it cools.
- Mix-in options: Feel free to use any combination of chocolate chips, white chocolate chips, butterscotch chips, peanut butter chips, chopped pecans, walnuts, toffee bits, or even M&Ms!
- Storage: Keep in an airtight container at room temperature for up to 4 days, or refrigerate for up to a week.
Nutrition
- Serving Size: 1 square (1/16 of recipe)
- Calories: 215
- Sugar: 22g
- Sodium: 125mg
- Fat: 9g
- Saturated Fat: 5g
- Unsaturated Fat: 3g
- Trans Fat: 0g
- Carbohydrates: 32g
- Fiber: 1g
- Protein: 3g
- Cholesterol: 40mg
Note: Nutrition information is calculated without optional mix-ins and will vary based on specific ingredients used and portion sizes.
Tips & Variations
The beauty of blondies is how easily you can customize them to suit your taste preferences or dietary needs. Here are some delicious ways to make this recipe your own:
Flavor Variations:
- Salted Caramel Blondies: Swirl in ¼ cup caramel sauce and sprinkle with flaky sea salt before baking
- Brown Butter Blondies: Brown the butter before mixing for incredible nutty depth (cool completely first!)
- Espresso Blondies: Add 1 tablespoon instant espresso powder to enhance flavor complexity
- Maple Pecan Blondies: Replace ¼ cup brown sugar with maple syrup and add 1 cup toasted pecans
- Lemon Blondies: Add 1 tablespoon lemon zest and replace vanilla with lemon extract for a bright twist
- Coconut Blondies: Fold in 1 cup shredded coconut and ½ cup macadamia nuts
Mix-In Combinations:
- Classic: 1 cup semi-sweet chocolate chips
- Triple Chip: ⅓ cup each of dark chocolate, white chocolate, and butterscotch chips
- Chunky Monkey: ½ cup chocolate chips, ½ cup chopped walnuts, and ¼ cup banana chips
- Turtle: ½ cup chocolate chips, ½ cup chopped pecans, plus caramel drizzle
- S’mores: ½ cup chocolate chips, ½ cup mini marshmallows, and crushed graham crackers on top
- Kitchen Sink: ½ cup chocolate chips, ¼ cup toffee bits, ¼ cup chopped pretzels
Dietary Modifications:
- Gluten-Free: Use 1:1 gluten-free flour blend (Bob’s Red Mill works perfectly)
- Dairy-Free: Replace butter with coconut oil or vegan butter
- Lower Sugar: Reduce sugar by ¼ cup and add extra vanilla for sweetness perception
- Egg-Free: Use 2 flax eggs (2 tablespoons ground flaxseed + 6 tablespoons water, let sit 5 minutes)
Presentation Ideas:
- Cut into small squares and serve as petit fours at parties
- Cut into larger rectangles and serve warm with ice cream as a restaurant-style dessert
- Use cookie cutters to make fun shapes for kids’ parties
- Drizzle with melted chocolate or caramel for an elegant finish
Pro Chef Tips
Elevate your blondies from great to absolutely extraordinary with these professional baking techniques:
1. Use a kitchen scale: For the most consistent results, weigh your flour (1½ cups = 190g). Measuring by volume can vary significantly depending on how you scoop, leading to dry or overly dense blondies.
2. Room temperature eggs are crucial: Cold eggs don’t emulsify properly with the butter-sugar mixture, resulting in a grainier texture. Let eggs sit on the counter for 30 minutes, or place them in warm water for 5 minutes before using.
3. Don’t skip the cooling time: This is when the magic happens! As blondies cool, the sugars crystallize and the texture transforms from cake-like to that perfect chewy consistency. Cutting them warm will give you a crumbly mess.
4. Line your pan properly: Using parchment paper with overhang creates perfect handles for lifting out the entire block, which means you get clean, professional-looking edges on every square.
5. The toothpick test is your friend: Insert a toothpick into the center—it should come out with a few moist crumbs, not wet batter but definitely not clean. Remember, blondies continue cooking from residual heat as they cool.
6. Toast your nuts: If adding pecans or walnuts, toast them in a 350°F oven for 5-7 minutes first. This brings out their oils and intensifies their flavor dramatically.
7. Save some mix-ins for the top: Reserve ¼ cup of your chocolate chips or nuts and press them into the top of the batter before baking. This creates a beautiful, professional-looking finish.
8. Underbake slightly: When in doubt, take them out a minute early rather than a minute late. Overbaked blondies are dry and crumbly; slightly underbaked ones are chewy and perfect.
9. Use quality vanilla: In such a simple recipe, the quality of your vanilla extract really shows. Spring for pure vanilla extract rather than imitation—your taste buds will thank you.
10. Let the pan cool on a rack: Don’t let the pan sit directly on your countertop after baking. The trapped heat on the bottom will continue cooking the blondies and can make the bottom edges tough.
Common Mistakes to Avoid
Even though blondies are beginner-friendly, these common pitfalls can affect your results:
1. Overmixing the batter: Once you add the flour, mix only until you no longer see dry streaks. Overmixing develops gluten, which makes blondies tough, dense, and cake-like instead of tender and chewy. Use gentle folding motions rather than vigorous stirring.
2. Overbaking: This is the #1 mistake! Blondies look underdone when they’re actually perfect. The center should still jiggle slightly when you shake the pan. Remember, they firm up as they cool. An overbaked blondie is dry, crumbly, and disappointing.
3. Adding hot melted butter: If your butter is too hot when you add it to the eggs, it will cook them and create a grainy, curdled texture. Let melted butter cool for 5 minutes until it’s warm but not hot to the touch.
4. Skipping the parchment paper: Without it, your blondies can stick to the pan, and you’ll struggle to cut clean squares. Parchment paper is a game-changer for easy removal and cleanup.
5. Cutting too soon: I know it’s hard to wait, but cutting blondies while they’re still warm will give you a crumbly mess. They need at least 30 minutes (ideally an hour) to set properly. Your patience will be rewarded with perfect, clean-cut squares.
6. Using cold eggs: Cold eggs don’t incorporate smoothly into the batter, resulting in an uneven texture. Always let your eggs come to room temperature, or warm them in a bowl of warm water for 5 minutes.
7. Not measuring brown sugar correctly: Brown sugar should be packed into your measuring cup, but not so firmly that it’s compressed into a hard brick. A gentle pack is perfect—the sugar should hold its shape when turned out but still be somewhat fluffy.
Storage & Meal Prep
Blondies are incredibly storage-friendly, making them perfect for advance preparation or enjoying over several days:
Room Temperature Storage: Store completely cooled blondies in an airtight container at room temperature for up to 4-5 days. Layer them between sheets of parchment paper to prevent sticking. Keep the container in a cool, dry place away from direct sunlight or heat sources.
Refrigerator Storage: While not necessary, refrigerating blondies extends their shelf life to about 7-10 days. Store in an airtight container or wrap individually in plastic wrap. The texture becomes even chewier when cold, which many people prefer! Let them come to room temperature for 10-15 minutes before serving, or enjoy them cold for a firmer, fudgier texture.
Individual Wrapping: For lunch boxes or grab-and-go treats, wrap individual squares tightly in plastic wrap, then place all wrapped squares in a freezer bag or container. This keeps them fresh and makes portion control easy.
Keeping Them Fresh: To maintain that soft, chewy texture, place a slice of bread in the container with your blondies. The bread will dry out while keeping the blondies moist—an old baker’s trick that really works!
Reheating: While blondies are delicious at room temperature, warming them creates an extra-special treat:
- Microwave: 10-15 seconds makes them warm and gooey
- Oven: Wrap in foil and warm at 300°F for 5-7 minutes
- Air fryer: 2-3 minutes at 300°F gives you crispy edges with a warm center
Make-Ahead & Freezer Notes
Blondies are one of the best make-ahead desserts, perfect for preparing in advance for parties, gifts, or just having something sweet on hand:
Baking in Advance: Blondies actually taste better the day after baking as the flavors meld and develop. Bake them up to 2 days before you need them, let them cool completely, then store in an airtight container at room temperature. They’ll be perfect when you’re ready to serve!
Freezing Baked Blondies: This is the best method for long-term storage:
- Let blondies cool completely after baking
- Cut into squares or leave as a whole slab
- Wrap tightly in plastic wrap, then in aluminum foil, or place in a freezer-safe container
- Label with the date and contents
- Freeze for up to 3 months
Thawing Frozen Blondies:
- Counter method: Leave wrapped blondies at room temperature for 2-3 hours until completely thawed
- Refrigerator method: Transfer to the fridge the night before you need them
- Quick method: Unwrap and microwave for 20-30 seconds until warmed through
Freezing Unbaked Batter: While less common, you can freeze the batter:
- Spread batter in your prepared pan
- Cover tightly with plastic wrap and foil
- Freeze for up to 2 months
- Bake from frozen, adding 5-10 extra minutes to the baking time
Individual Freezing for Portion Control: Wrap individual squares in plastic wrap, then place all wrapped squares in a large freezer bag. This allows you to pull out just one or two blondies at a time—perfect for controlling portions or having a quick dessert ready whenever a craving hits!
Gift-Worthy Presentation: Frozen blondies make excellent homemade gifts. Thaw them, stack in a decorative container or wrap in cellophane tied with ribbon, and you’ve got a thoughtful present that looks as good as it tastes!
Serving Suggestions
While blondies are absolutely delicious on their own, these serving ideas take them to the next level:
Classic Pairings:
- Vanilla ice cream: The traditional pairing—serve warm blondies with a scoop melting on top
- Whipped cream: Light and airy, it adds a nice contrast to the dense blondie
- Cold milk: The ultimate nostalgic combination for a simple afternoon treat
- Hot coffee or espresso: The bitterness balances the sweetness perfectly
Gourmet Presentations:
- Dessert platter: Cut into small squares and arrange with fresh berries and chocolate sauce
- À la mode: Warm blondie, vanilla ice cream, caramel sauce, and a sprinkle of flaky sea salt
- Sundae style: Top with ice cream, hot fudge, whipped cream, and a cherry
- Layered dessert: Crumble blondies and layer with pudding and whipped cream in glasses
Beverage Pairings:
- Hot chocolate or chocolate milk
- Chai tea or spiced tea
- Iced coffee with cream
- Caramel macchiato
- Glass of dessert wine like Moscato or Port
- Cold brew coffee for a sophisticated afternoon treat
Creative Serving Ideas:
- Crumble over yogurt parfaits for breakfast
- Use as a base for ice cream sandwiches
- Warm and top with fresh strawberries and cream
- Serve with salted caramel sauce for dipping
- Add to milkshakes for a cookies-and-cream style treat
- Cut into triangles and arrange like petit fours for fancy occasions
For Special Events:
- Birthday parties: Stick a candle in a large blondie square for a fun alternative to cake
- Potlucks: Cut into small squares and arrange on a platter—easy finger food dessert
- Bridal/baby showers: Cut into decorative shapes with cookie cutters
- Holiday gatherings: Add festive sprinkles or seasonal mix-ins
Kid-Friendly Options: Serve with a glass of milk for after-school snacks, or pack in lunch boxes with a napkin. Kids also love helping decorate the tops with extra chocolate chips before baking!
FAQs Section
Q: What’s the difference between blondies and brownies?
A: The main difference is chocolate! Brownies contain cocoa powder or melted chocolate, giving them their signature dark color and chocolate flavor. Blondies use brown sugar as their primary flavoring, creating a butterscotch-vanilla taste with a golden color. Both have similar dense, chewy textures, but the flavor profiles are completely different. Think of blondies as vanilla brownies or butterscotch brownies!
Q: Why are my blondies cakey instead of chewy?
A: This usually happens from overmixing the batter after adding flour, using too much flour, or overbaking. To get that perfect chewy texture, measure flour carefully (better yet, weigh it!), mix only until combined after adding flour, and slightly underbake—the center should look just barely set. Also, make sure you’re using the right ratio of brown sugar to white sugar, as brown sugar provides moisture and chewiness.
Q: Can I make blondies without brown sugar?
A: While brown sugar provides the characteristic butterscotch flavor and chewy texture, you can substitute with all granulated white sugar in a pinch. However, the flavor will be less complex and more vanilla-forward, and the texture may be slightly less chewy. For a closer match, add 1 tablespoon of molasses to white sugar for each cup of brown sugar called for.
Q: How do I know when blondies are done baking?
A: Blondies are tricky because they look underdone when they’re actually perfect! Look for these signs: edges are set and pulling slightly away from the pan, the top has a light golden color with small cracks, and a toothpick inserted in the center comes out with moist crumbs (not wet batter, but definitely not clean). The center will jiggle very slightly when you gently shake the pan. Remember, they continue to set as they cool!
Q: Why do my blondies have a crispy/hard top?
A: A thin crispy layer on top is normal and desirable—it’s from the sugar caramelizing! However, if the entire top is hard and overly crispy, you likely overbaked them or your oven temperature was too high. Invest in an oven thermometer to check accuracy. Also, avoid overbaking—take them out when they still look slightly underdone in the center.
Q: Can I double this recipe?
A: Absolutely! This recipe doubles beautifully. Use a large roasting pan (approximately 10×15 inches) or two 9×13 pans. The baking time will be similar, possibly adding just 2-3 minutes, but start checking at the 25-minute mark. Just make sure your oven can fit the larger pan and has good air circulation around it.
Q: What’s the best way to get clean cuts?
A: The secret is patience and a sharp knife! Let the blondies cool completely (at least 30 minutes, ideally an hour). Use a sharp chef’s knife and wipe it clean with a damp cloth between each cut. If you lined the pan with parchment paper overhang, lift the entire block out onto a cutting board for easiest cutting. Some people even chill blondies in the fridge for 30 minutes before cutting for the cleanest edges.
Q: Can I use this recipe to make blondie cookies?
A: Yes! Chill the dough for at least 30 minutes, then scoop into balls and bake on a parchment-lined cookie sheet at 350°F for 10-12 minutes. They’ll spread and flatten as they bake. Keep in mind the texture will be slightly different—more like cookies than bars—but equally delicious!
Conclusion
These homemade blondies are proof that sometimes the simplest recipes are the most satisfying. With their rich butterscotch-vanilla flavor, chewy texture, and endless customization options, they’re the perfect go-to dessert for any occasion. Whether you’re baking them for a special celebration, whipping them up for an after-school treat, or making them just because you’re craving something sweet and comforting, these blondies deliver every single time.
The beauty of this recipe is its versatility—dress it up with gourmet mix-ins and a scoop of artisan ice cream, or keep it simple and classic with just the basic batter. Either way, you’re getting a homemade dessert that tastes like it came from an expensive bakery but requires minimal effort and ingredients you already have on hand.
I hope these blondies bring as much joy to your kitchen as they have to mine! There’s something so rewarding about pulling a pan of golden, perfectly baked blondies from the oven and watching them disappear within hours (or minutes!). They’re the kind of recipe you’ll make over and over, tweaking and customizing until you find your perfect version.
Ready to bake the best blondies ever? Grab your mixing bowl and let’s get started! Don’t forget to leave a comment below telling me which mix-ins you chose and how they turned out. And please, save this recipe to your Pinterest boards so you can find it easily whenever the blondie craving strikes. Happy baking! 🧈✨