The Ultimate Butter Cake Recipe – Melt-in-Your-Mouth Perfection Every Time
If you’ve been searching for that perfect, classic butter cake recipe that delivers tender, buttery perfection every single time, you’ve landed in exactly the right place! This traditional butter cake is everything a homemade cake should be—rich, moist, incredibly flavorful, and surprisingly simple to make from scratch.
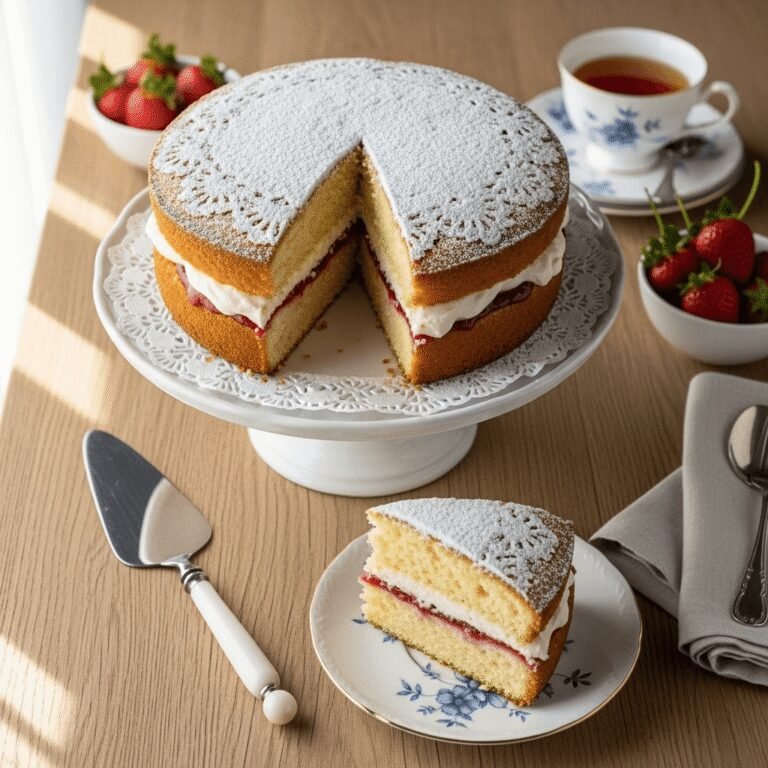
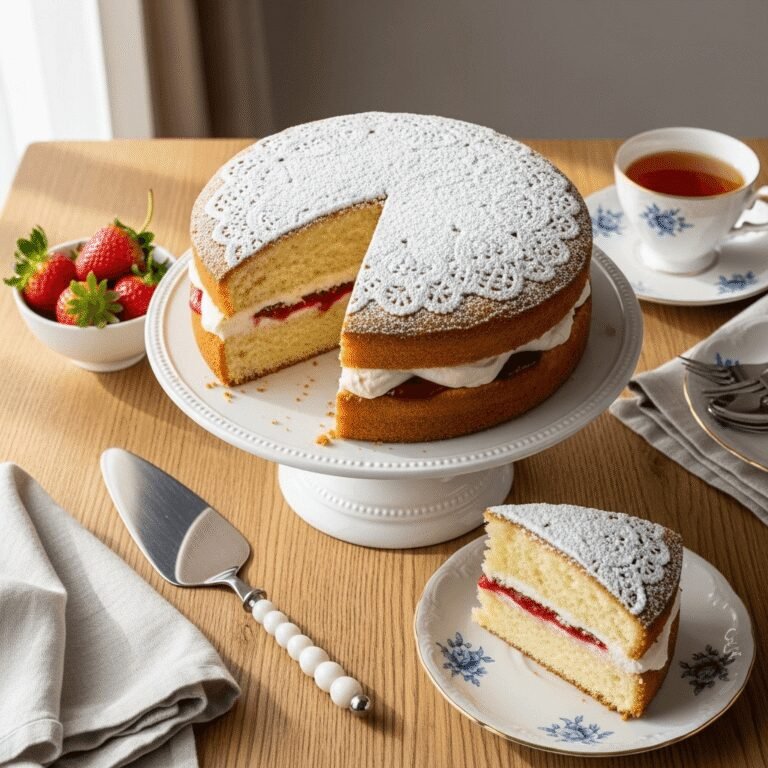
Unlike fancy layered cakes that require advanced decorating skills, this butter cake celebrates simplicity at its finest. It’s the kind of cake your grandmother might have baked on Sunday afternoons, filling the entire house with that unmistakable aroma of butter and vanilla. Serve it for birthdays, holiday gatherings, afternoon tea parties, or those moments when you simply crave a slice of something sweet and comforting. It’s equally wonderful as a casual weeknight dessert or dressed up with fresh berries and whipped cream for special occasions.
What makes this butter cake truly special is its versatility. Enjoy it plain with a dusting of powdered sugar, serve it with a dollop of whipped cream and fresh strawberries, or transform it into the base for trifles and layered desserts. The possibilities are genuinely endless, and the result is consistently delicious.
History / Background
The butter cake has deep roots in European baking traditions, particularly in England and France, where butter has long been treasured as a premium baking ingredient. The classic pound cake—one of butter cake’s closest relatives—dates back to the 1700s and got its name from the original recipe’s simple formula: one pound each of butter, sugar, eggs, and flour.
As European settlers brought their treasured recipes to America, the butter cake evolved and adapted to regional preferences and ingredient availability. In the American South, butter cakes became centerpieces at church socials and family reunions, often baked in bundt pans or simple loaf pans. The Pennsylvania Dutch communities perfected their own versions, while Southern bakers added their signature touches with ingredients like buttermilk and extra vanilla.
What distinguishes a true butter cake from other yellow cakes is the creaming method—that crucial technique of beating butter and sugar together until light and fluffy, which creates the cake’s characteristic tender crumb and rich flavor. This method became widely popular in American households during the mid-20th century when electric stand mixers made the process accessible to home bakers everywhere.
Today, butter cake remains a beloved classic precisely because it doesn’t try to be anything other than what it is: a simple, honest celebration of quality ingredients coming together in perfect harmony. It’s proof that sometimes the most traditional recipes are traditional for very good reasons.
Why You’ll Love This Recipe
This homemade butter cake recipe strikes that perfect balance between impressive results and straightforward preparation. You don’t need professional baking skills or fancy equipment—just quality ingredients and a bit of patience during the creaming process. The result is a cake that tastes like it came from an upscale bakery but costs a fraction of the price.
Here’s why this butter cake will become your new favorite:
- Incredibly moist and tender – The proper ratio of butter to flour creates that melt-in-your-mouth texture that keeps everyone coming back for seconds
- Rich, authentic butter flavor – Real butter (no shortcuts!) delivers that incomparable taste that artificial flavorings simply cannot replicate
- Simple pantry ingredients – Everything you need is probably already in your kitchen right now
- Foolproof technique – The step-by-step method takes the guesswork out of achieving perfect results
- Versatile serving options – Enjoy it plain, frosted, glazed, or with fresh fruit and cream
- Budget-friendly – Costs significantly less than store-bought cakes and tastes infinitely better
- Make-ahead friendly – Bakes beautifully in advance for stress-free entertaining
- Kid-approved classic – Even picky eaters love this timeless, crowd-pleasing cake
- Perfect for any occasion – Dress it up or keep it casual depending on your needs
Ingredient Notes
Understanding your ingredients is the first step toward baking success. Here’s what you’ll need and why each component matters:
Unsalted Butter – The star of the show! Use high-quality unsalted butter at room temperature for the best flavor and texture. Unsalted allows you to control the salt level precisely. European-style butter with higher fat content creates an even richer cake, though regular unsalted butter works beautifully. Don’t substitute with margarine or oil—you’ll lose that essential butter cake flavor.
Granulated Sugar – Provides sweetness and helps create the cake’s tender structure through the creaming process. The sugar crystals create tiny air pockets when beaten with butter, contributing to the light texture.
Eggs – Large eggs at room temperature incorporate more smoothly into the batter. They provide structure, moisture, and richness. Cold eggs can cause the batter to curdle, so plan ahead and let them sit out for 30 minutes before baking.
All-Purpose Flour – Forms the cake’s structure. Measure carefully using the spoon-and-level method (spoon flour into your measuring cup and level with a knife) to avoid dense, heavy results. Cake flour can be substituted for an even more tender crumb.
Whole Milk – Adds moisture and creates a tender texture. Full-fat milk works best, though 2% can be substituted in a pinch. Buttermilk can replace regular milk for a tangier flavor and even more tender results.
Baking Powder – The leavening agent that helps the cake rise and creates that light, fluffy texture. Make sure yours is fresh (check the expiration date!) for optimal results.
Pure Vanilla Extract – Enhances all the other flavors without overwhelming the butter. Use real vanilla extract, not imitation, for the best taste.
Salt – Just a pinch balances the sweetness and enhances all the other flavors. Don’t skip it!
Equipment Needed
Having the right tools makes baking significantly easier and more enjoyable. Here’s what you’ll need:
- 9×13-inch baking pan or two 9-inch round cake pans – For your cake batter
- Electric stand mixer or hand mixer – Essential for properly creaming the butter and sugar
- Medium mixing bowl – For whisking together dry ingredients
- Measuring cups and spoons – Accurate measurements are crucial in baking
- Rubber spatula – For scraping down the bowl and folding ingredients
- Whisk – For combining dry ingredients
- Cooling rack – Allows air circulation for even cooling
- Parchment paper – Lines the pan for easy release
- Toothpick or cake tester – Checks for doneness
- Sifter or fine-mesh strainer (optional) – Creates a lighter texture by aerating dry ingredients
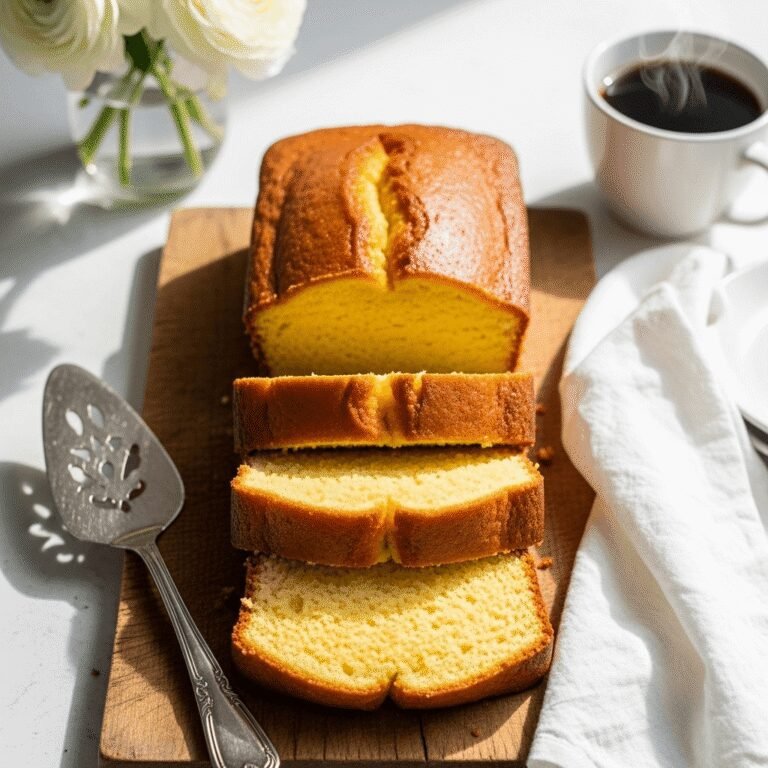
Butter Cake Recipe
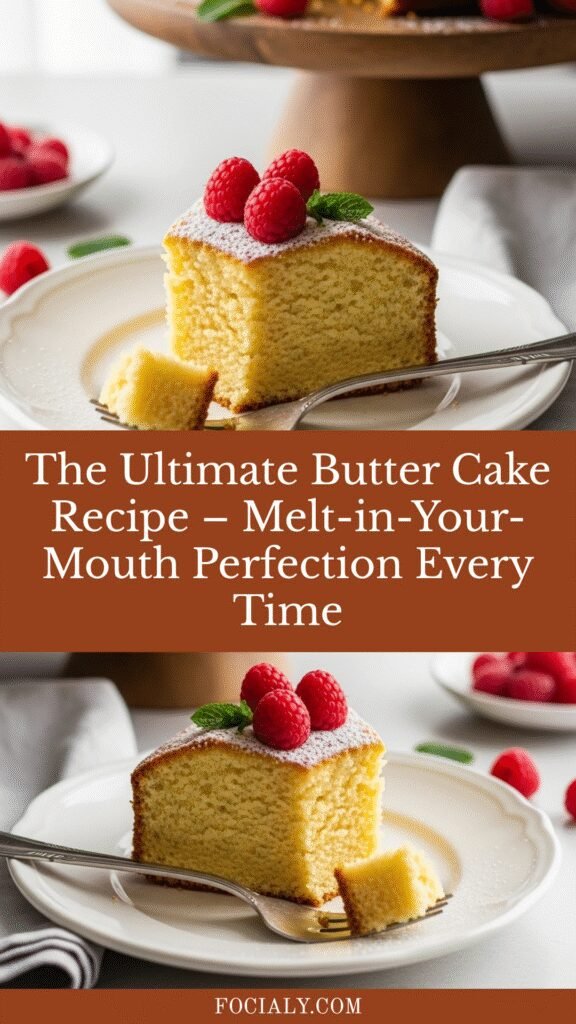
This classic homemade butter cake is rich, moist, and incredibly tender with an authentic butter flavor that melts in your mouth. Perfect for any occasion, this simple yet impressive cake uses basic pantry ingredients to create bakery-quality results right in your own kitchen.
- Prep Time: 20 minutes
- Cook Time: 35 minutes
- Total Time: 55 minutes (plus cooling time)
- Yield: 12 servings 1x
- Category: Dessert
- Method: Baking
- Cuisine: American
- Diet: Vegetarian
Ingredients
- 1 cup (2 sticks) unsalted butter, softened to room temperature
- 2 cups granulated sugar
- 4 large eggs, room temperature
- 3 cups all-purpose flour
- 1 tablespoon baking powder
- ½ teaspoon salt
- 1 cup whole milk, room temperature
- 2 teaspoons pure vanilla extract
Instructions
- Prepare your oven and pan: Preheat your oven to 350°F (175°C). Grease your 9×13-inch baking pan thoroughly with butter or cooking spray, then line the bottom with parchment paper for foolproof release. Alternatively, prepare two 9-inch round pans if making a layer cake.
- Cream the butter and sugar: In your stand mixer bowl fitted with the paddle attachment (or using a large bowl with a hand mixer), beat the softened butter on medium speed for about 2 minutes until smooth and creamy. Gradually add the sugar and continue beating on medium-high speed for 4-5 minutes, stopping occasionally to scrape down the sides of the bowl. The mixture should become pale, fluffy, and significantly increased in volume. This step is crucial—don’t rush it!
- Add the eggs: Reduce mixer speed to medium-low. Add eggs one at a time, beating well after each addition (about 30 seconds per egg). The mixture should look smooth and emulsified. If it looks slightly curdled, don’t worry—it will come together when you add the flour. Add the vanilla extract and mix until combined.
- Combine dry ingredients: In a separate medium bowl, whisk together the flour, baking powder, and salt until evenly distributed. This ensures your leavening agent is distributed throughout the cake.
- Alternate wet and dry ingredients: With your mixer on low speed, add the flour mixture in three additions, alternating with the milk in two additions. Begin and end with the flour mixture. The pattern should be: flour, milk, flour, milk, flour. Mix each addition just until combined—overmixing develops gluten and creates a tough cake. Use your rubber spatula to scrape the bottom and sides of the bowl, ensuring everything is evenly incorporated.
- Pour and smooth the batter: Transfer the batter to your prepared pan(s). Use your spatula to spread it evenly, smoothing the top and making sure it reaches all corners. Gently tap the pan on the counter a few times to release any large air bubbles.
- Bake to perfection: Place the pan in your preheated oven on the center rack. Bake for 30-35 minutes (for a 9×13 pan) or 25-30 minutes (for two 9-inch rounds). The cake is done when the top is golden brown, the edges pull slightly away from the pan, and a toothpick inserted into the center comes out clean or with just a few moist crumbs. The cake should spring back when gently pressed.
- Cool properly: Remove from the oven and place the pan on a wire cooling rack. Let the cake cool in the pan for 15-20 minutes. This resting period prevents the cake from breaking apart. Then, carefully run a knife around the edges and invert onto the cooling rack to cool completely. If you lined the pan with parchment, the cake should release easily. Remove the parchment paper and allow the cake to cool completely before frosting or serving.
Notes
- Room temperature ingredients are essential: Butter, eggs, and milk should all be at room temperature (about 65-70°F) for proper emulsification and the best texture. Cold ingredients can cause the batter to curdle or mix unevenly.
- Don’t overbake: Butter cakes can dry out quickly if baked too long. Start checking at the minimum time. The cake is done when a toothpick comes out with a few moist crumbs, not completely clean.
- Measuring flour correctly: Too much flour is the most common cause of dry, dense cakes. Use the spoon-and-level method: spoon flour into your measuring cup and level off with a straight edge. Never pack or scoop directly from the bag.
- Avoid overmixing: Once you add the flour, mix just until you can’t see dry streaks anymore. Overmixing develops gluten, which creates a tough, chewy texture instead of tender crumb.
- Pan size matters: If using different-sized pans, adjust baking time accordingly. Shallower pans bake faster; deeper pans need more time.
Nutrition
- Serving Size: 1 slice (1/12 of cake)
- Calories: 385
- Sugar: 33g
- Sodium: 180mg
- Fat: 18g
- Saturated Fat: 11g
- Unsaturated Fat: 6g
- Trans Fat: 0g
- Carbohydrates: 52g
- Fiber: 1g
- Protein: 5g
- Cholesterol: 105mg
Nutrition information is approximate and calculated per unfrosted slice.
Tips & Variations
Brown Butter Variation: Take your butter cake to the next level by browning the butter first. Melt the butter in a saucepan over medium heat, swirling occasionally, until it turns golden brown with a nutty aroma. Let it cool and solidify to room temperature before using.
Lemon Butter Cake: Add 2 tablespoons fresh lemon zest to the butter-sugar mixture and replace ½ cup milk with fresh lemon juice for a bright, citrusy twist.
Chocolate Chip Addition: Fold in 1 cup of mini chocolate chips into the finished batter for a delightful surprise in every bite.
Almond Flavor: Replace 1 teaspoon of vanilla with almond extract for a subtle nutty undertone that pairs beautifully with fresh berries.
Buttermilk Version: Substitute the whole milk with buttermilk and reduce baking powder to 2 teaspoons while adding ½ teaspoon baking soda for extra tender results and tangy flavor.
Coconut Butter Cake: Replace ½ cup of milk with canned coconut milk and fold in ½ cup sweetened shredded coconut for tropical flair.
Spiced Butter Cake: Add 1 teaspoon cinnamon, ½ teaspoon nutmeg, and ¼ teaspoon cardamom to the dry ingredients for a warmly spiced version.
Pro Chef Tips
Tip #1: Master the creaming method – The key to a light, tender butter cake is properly creaming the butter and sugar. This process incorporates air into the batter, creating tiny pockets that expand during baking. Don’t rush this step—set a timer for the full 4-5 minutes even when your arm gets tired or you think it looks “good enough.”
Tip #2: Test your oven temperature – Home ovens are notoriously inaccurate. Invest in an oven thermometer to ensure your actual temperature matches what the dial says. Even 25 degrees off can significantly affect baking results, causing cakes to brown too quickly or take much longer than expected.
Tip #3: Create a level cake – Professional bakers use cake strips (damp fabric strips wrapped around pans) to ensure even baking and level tops. You can DIY this by soaking paper towels, wringing them out, wrapping them around your pan, and securing with pins. This prevents the edges from setting too quickly.
Tip #4: The toothpick test isn’t everything – While a toothpick should come out with just a few moist crumbs, also look for other signs of doneness: the cake should spring back when gently pressed, pull slightly away from pan edges, and smell fragrant and fully baked.
Tip #5: Enhance with simple syrup – Professional bakers often brush simple syrup (equal parts sugar and water, heated until dissolved) on cake layers before frosting. This adds moisture and helps the cake stay fresh longer.
Common Mistakes to Avoid
Using cold ingredients: Cold butter won’t cream properly with sugar, and cold eggs can cause the batter to curdle and mix unevenly. Always bring butter and eggs to room temperature—this typically takes 30-60 minutes on the counter. If you’re in a hurry, place eggs in a bowl of warm water for 5-10 minutes.
Overmixing the batter: Once you add flour, gluten development begins. Overmixing creates tough, chewy texture instead of the tender crumb you want. Mix on low speed just until you can’t see dry flour streaks, then stop immediately.
Opening the oven door too early: Resist the temptation to peek before at least 25 minutes of baking time. Opening the door releases heat and can cause the cake to sink in the middle as it hasn’t set its structure yet.
Not measuring accurately: Baking is chemistry, and ratios matter enormously. Too much flour creates dry, dense results; too little causes collapse. Invest in a kitchen scale for the most accurate measurements, or use the proper spoon-and-level method for measuring cups.
Skipping the pan preparation: Even if you think your pan is well-greased, that extra minute spent properly preparing it (greasing + parchment paper) prevents heartbreak when your beautiful cake sticks and tears apart during removal.
Storage & Meal Prep
Room Temperature Storage: Once completely cooled, store your unfrosted butter cake covered tightly with plastic wrap or in an airtight container at room temperature for up to 3 days. The butter content helps keep it moist naturally.
Refrigerator Storage: If your kitchen is particularly warm or humid, or if you’ve added frosting, refrigerate the cake. Cover it tightly and store for up to 5 days. Allow slices to come to room temperature for 20-30 minutes before serving for the best flavor and texture.
Protecting Cake Layers: If you’ve sliced your cake into layers for filling or frosting, place plastic wrap directly on the cut surfaces to prevent drying. This is especially important if you’re working with your cake over several days.
Reheating Tips: For the best experience with refrigerated cake, let individual slices sit at room temperature for 15-20 minutes. Alternatively, microwave a slice for 10-15 seconds to restore that fresh-baked warmth and softness.
Make-Ahead & Freezer Notes
Baking in Advance: This butter cake is an excellent make-ahead dessert. Bake it 1-2 days before you need it, let it cool completely, wrap it tightly in plastic wrap, and store at room temperature. The flavor actually improves slightly as the cake has time to mature, and the texture remains perfectly moist.
Freezing Unfrosted Cake: Butter cake freezes beautifully for up to 3 months. Cool completely, wrap tightly in two layers of plastic wrap followed by aluminum foil, or use a freezer-safe zip-top bag with all air pressed out. Label with the date so you remember when you froze it.
Freezing Frosted Cake: If you’ve already frosted your cake, you can still freeze it. Place it in the freezer uncovered for 1-2 hours until the frosting firms up, then wrap carefully in plastic wrap and foil. This prevents the wrapping from sticking to and ruining your beautiful frosting.
Thawing Instructions: Transfer frozen cake to the refrigerator the night before you need it, allowing it to thaw slowly overnight. For faster thawing, leave it at room temperature for 2-3 hours, still wrapped to prevent condensation from forming on the surface. Never microwave frozen cake to thaw it, as this creates a gummy texture.
Freezing Individual Slices: Cut the cake into individual portions, wrap each slice separately in plastic wrap, and store all slices together in a freezer bag. This allows you to grab single servings whenever a cake craving strikes without thawing the entire cake.
Serving Suggestions
This versatile butter cake pairs wonderfully with countless accompaniments. Here are some delicious serving ideas:
Fresh Berries and Whipped Cream: The classic combination never fails. Serve slices with a generous dollop of freshly whipped cream and a handful of mixed berries—strawberries, blueberries, and raspberries all complement the rich butter flavor beautifully.
Ice Cream Pairing: Transform your cake into an à la mode dessert with a scoop of vanilla bean, butter pecan, or salted caramel ice cream. The temperature contrast between warm cake and cold ice cream is absolutely divine.
Coffee or Tea Service: This cake shines during afternoon tea or coffee gatherings. The tender crumb pairs perfectly with hot beverages, and the simple flavor won’t compete with your drink of choice.
Simple Dusting: Sometimes simplicity is best. A light dusting of powdered sugar through a fine-mesh strainer creates an elegant presentation without overwhelming the pure butter flavor.
Chocolate Ganache: Pour warm chocolate ganache over cooled cake for a decadent dessert that looks and tastes impressive. The bittersweet chocolate perfectly balances the sweet, buttery cake.
Fruit Compote: Serve with warm fruit compote—try blueberry, cherry, or mixed berry. The slight tartness of cooked fruit provides a delightful contrast to the sweet, rich cake.
Lemon Curd: Spread homemade or store-bought lemon curd between layers or on individual slices for a bright, tangy complement to the buttery richness.
Cream Cheese Frosting: The tanginess of cream cheese frosting provides beautiful balance against the sweet cake. This combination is particularly popular in the American South.
FAQs Section
Q: Can I use salted butter instead of unsalted?
A: While unsalted butter is preferred because it allows you to control the salt content precisely, you can use salted butter in a pinch. Simply omit the salt called for in the recipe. Keep in mind that different brands of salted butter contain varying amounts of salt, so results may vary slightly.
Q: Why did my cake turn out dense and heavy?
A: Dense cake usually results from one of three issues: overmixing the batter after adding flour (which develops too much gluten), using too much flour (often from packing the measuring cup), or not creaming the butter and sugar long enough to incorporate sufficient air. Make sure you measure flour correctly using the spoon-and-level method and cream butter and sugar for the full 4-5 minutes.
Q: Can I make this cake without a mixer?
A: Technically yes, but it’s quite challenging and the results won’t be as light and fluffy. Creaming butter and sugar by hand requires significant arm strength and patience—expect to spend 10-15 minutes whisking vigorously. A hand mixer is a much better investment than attempting this entirely by hand.
Q: How do I know when my cake is perfectly done?
A: Look for several signs: the top should be golden brown, the edges should pull slightly away from the pan sides, a toothpick inserted in the center should come out with just a few moist crumbs (not wet batter), and the cake should spring back when gently pressed. Start checking at the minimum baking time to avoid overbaking.
Q: Can I halve this recipe for a smaller cake?
A: Absolutely! Simply cut all ingredient quantities in half and bake in an 8-inch square pan or 9-inch round pan. Reduce the baking time to 25-30 minutes and check for doneness starting at 20 minutes. The smaller cake will bake faster than a full-sized one.
Q: Why did the top of my cake crack?
A: Surface cracks usually indicate your oven temperature was too high, causing the top to set and brown before the inside finished baking and rising. This forces the still-liquid center to break through the top crust. Use an oven thermometer to verify your actual temperature, and consider reducing the temperature by 25 degrees if this happens repeatedly.
Q: Can I add mix-ins like chocolate chips or nuts?
A: Definitely! Fold in up to 1 cup of chocolate chips, chopped nuts, or dried fruit after mixing the batter. Toss your mix-ins with a tablespoon of flour first to prevent them from sinking to the bottom during baking.
Conclusion
There you have it—the ultimate butter cake recipe that delivers bakery-quality results right from your own kitchen! This classic cake proves that simple ingredients, when combined with proper technique and a little patience, create something truly special. The tender, moist crumb and rich butter flavor make every bite absolutely irresistible.
Whether you’re celebrating a special occasion, bringing dessert to a potluck, or simply treating your family to something homemade and delicious, this butter cake rises to every occasion. The beauty of this recipe lies not just in its wonderful taste, but also in its versatility—dress it up with elegant frosting and fresh flowers for weddings, keep it simple with powdered sugar for weeknight desserts, or transform it into the base for elaborate layered creations.
I’d absolutely love to hear how your butter cake turns out! Drop a comment below letting me know if you tried any of the variations, and don’t forget to rate this recipe. Your feedback helps other home bakers and means the world to me.
Ready to start baking? Pin this recipe to your favorite Pinterest board so you can find it easily whenever that cake craving strikes. Share it with friends and family who appreciate homemade goodness, and tag me in your baking photos—I genuinely love seeing your beautiful creations!
Happy baking, and may your kitchen always smell like butter, sugar, and vanilla! 🧈🍰