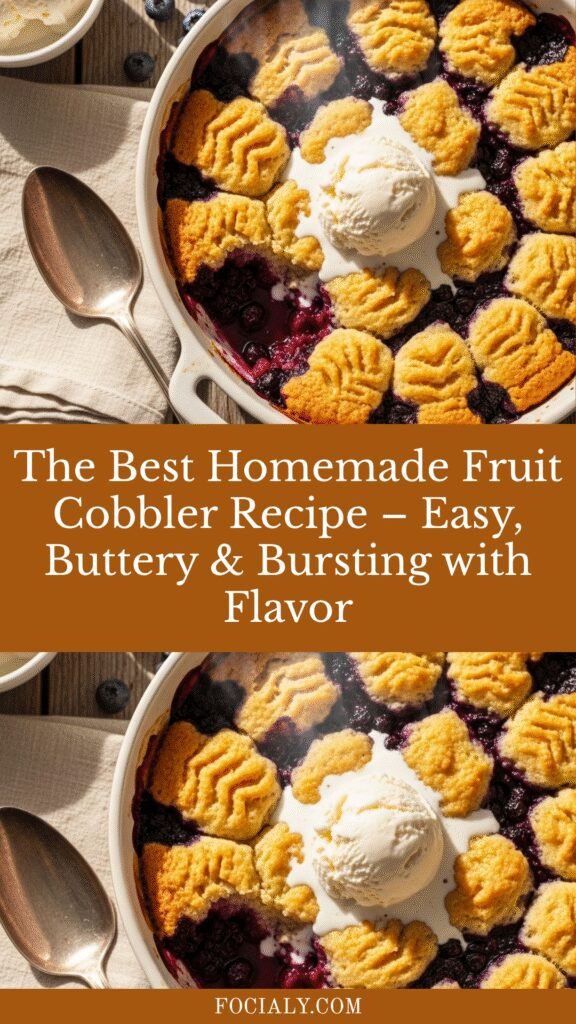
The Best Homemade Fruit Cobbler Recipe – Easy, Buttery & Bursting with Flavor
There’s something absolutely magical about a warm fruit cobbler fresh from the oven—the bubbling fruit juices, the golden-brown biscuit topping, and that irresistible aroma that fills your entire kitchen. This homemade fruit cobbler recipe is the ultimate comfort dessert that brings together tender, juicy fruit with a buttery, slightly crispy topping that’s somewhere between a biscuit and a cake.
Whether you’re using fresh summer peaches, tart blackberries, sweet blueberries, or a medley of mixed fruits, this versatile cobbler recipe works beautifully with whatever’s in season or sitting in your freezer. It’s the kind of dessert that makes any occasion feel special—from casual weeknight dinners to holiday gatherings and summer barbecues. Serve it warm with a scoop of vanilla ice cream melting on top, and you’ve got yourself a dessert that’ll have everyone asking for seconds.
The best part? This fruit cobbler comes together in less than an hour with simple pantry ingredients you probably already have on hand. No fancy techniques, no complicated steps—just straightforward, foolproof baking that delivers spectacular results every single time.
History / Background
Cobbler is a quintessentially American dessert with roots dating back to the early British colonists who settled in North America during the 17th and 18th centuries. When these settlers arrived, they craved the familiar suet puddings and fruit pies from their homeland, but they lacked the proper ingredients and equipment to recreate these dishes. Necessity became the mother of invention, and cobbler was born from this culinary improvisation.
The name “cobbler” likely comes from the dessert’s appearance—the biscuit topping, dropped in spoonfuls over the fruit, resembles a cobbled street with its uneven, bumpy surface. Unlike traditional British pies that required precise pastry-making skills and pie tins, cobblers were baked in simple cast iron skillets or Dutch ovens, making them accessible to frontier cooks and homesteaders.
Cobbler became particularly popular in the American South, where abundant fruit orchards and berry patches provided endless variations. Each region developed its own style: some prefer a cake-like topping, others swear by biscuit-style crusts, and some Southern cooks make their cobblers with a thin batter that magically rises up around the fruit during baking.
During the Great Depression, cobbler gained even more popularity as an economical dessert that could stretch seasonal fruit to feed large families. It required no expensive butter for pie crust, and home cooks could adjust the sugar content based on what they could afford. Today, cobbler remains a beloved American classic that celebrates simplicity, seasonal ingredients, and the comforting flavors of home.
Why You’ll Love This Recipe
This fruit cobbler recipe hits all the right notes for home bakers who want maximum flavor with minimum fuss. It’s the kind of recipe that makes you look like a baking superstar without requiring professional pastry skills or hours in the kitchen.
Here’s why this cobbler will become your go-to dessert:
- Incredibly versatile – Works with practically any fruit combination, fresh or frozen
- Budget-friendly – Uses affordable pantry staples and whatever fruit is on sale
- No mixer required – Everything comes together with simple stirring
- Beginner-friendly – Perfect for novice bakers, with foolproof results
- Crowd-pleaser – Appeals to all ages, from kids to grandparents
- Make-ahead friendly – Can be prepared in advance for stress-free entertaining
- Customizable sweetness – Easy to adjust sugar levels based on fruit tartness
- Impressive presentation – Looks like you spent hours when it took less than 20 minutes of prep
- Perfect for any season – Summer berries, fall apples, winter citrus, spring rhubarb
- Comfort food at its finest – Delivers that warm, nostalgic, home-baked feeling
Ingredient Notes
For the Fruit Filling:
Fresh or frozen fruit (5-6 cups): The star of your cobbler! Peaches, blueberries, blackberries, cherries, apples, or mixed berries all work beautifully. Fresh fruit gives slightly better texture, but frozen is perfectly acceptable and convenient—just don’t thaw before using. The fruit provides natural pectin that helps thicken the filling as it bakes.
Granulated sugar (¾ – 1 cup): Sweetens the fruit and draws out the juices to create that signature syrupy filling. Adjust based on fruit sweetness—tart berries need more, ripe peaches need less. You can substitute with coconut sugar or a blend with brown sugar for deeper flavor.
Cornstarch or tapioca starch (2-3 tablespoons): Essential for thickening the fruit juices into a luscious, spoonable consistency rather than a soupy mess. Cornstarch is most common, but tapioca starch works great too and handles freezing better if you’re making this ahead.
Lemon juice (1-2 tablespoons): Brightens the fruit flavor and adds necessary acidity that balances sweetness. Fresh is best, but bottled works in a pinch.
Vanilla extract (1 teaspoon): Enhances the fruit’s natural sweetness and adds aromatic depth.
Spices (optional): Cinnamon, nutmeg, or ginger complement certain fruits beautifully—especially apples, peaches, and pears.
For the Cobbler Topping:
All-purpose flour (1½ cups): Creates the structure for your biscuit-like topping. For a whole grain option, substitute up to half with whole wheat pastry flour.
Granulated sugar (½ cup): Sweetens the topping and helps it brown beautifully. Reserve a tablespoon for sprinkling on top.
Baking powder (2 teaspoons): The leavening agent that makes your topping rise and become fluffy.
Salt (½ teaspoon): Enhances all the flavors and balances sweetness.
Cold butter (6 tablespoons): Creates tender, flaky texture and rich flavor. Must be cold to create the right texture—cut into small cubes before using. Unsalted is preferred so you can control the salt level.
Milk (¾ cup): Brings the dry ingredients together into a thick, spoonable batter. Whole milk gives the richest results, but any milk works. Buttermilk creates an extra-tender, tangy topping.
Vanilla extract (1 teaspoon): Adds another layer of flavor to the topping.
Equipment Needed
- 9×13-inch baking dish or 10-inch cast iron skillet (oven-safe)
- Large mixing bowl for the topping
- Medium mixing bowl for the fruit filling
- Whisk or fork for mixing dry ingredients
- Pastry cutter or fork for cutting butter into flour (or use your fingers)
- Measuring cups and spoons
- Wooden spoon or rubber spatula for stirring
- Sharp knife and cutting board (if using fresh fruit that needs prep)
- Oven mitts
- Cooling rack
- Ice cream scoop (optional, for serving)
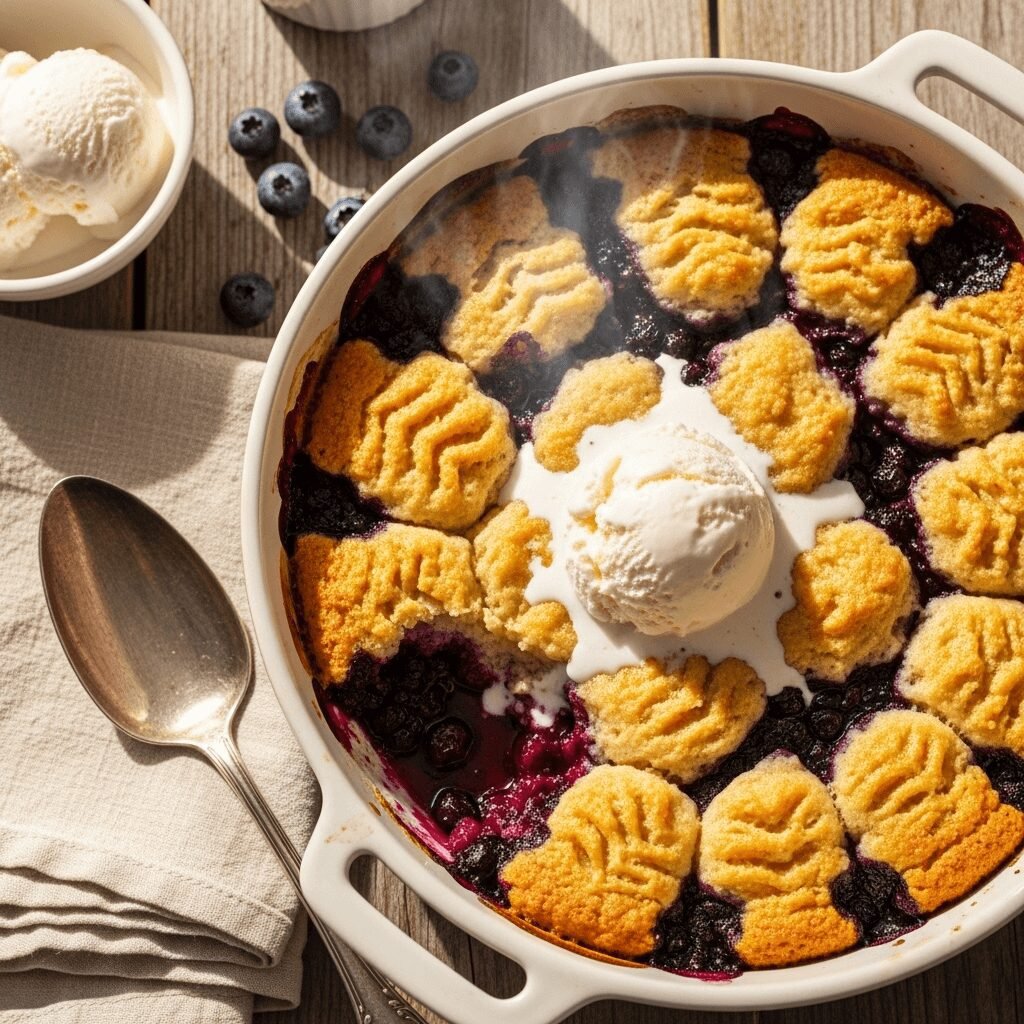
Fruit Cobbler Recipe

This easy homemade fruit cobbler features juicy, bubbling fruit topped with golden, buttery biscuit-style topping. Perfect with vanilla ice cream, this classic American dessert works with any fruit and comes together in under an hour.
- Prep Time: 20 minutes
- Cook Time: 40-45 minutes
- Total Time: 1 hour 5 minutes
- Yield: 8-10 servings 1x
- Category: Dessert
- Method: Baking
- Cuisine: American
- Diet: Vegetarian
Ingredients
For the Fruit Filling:
- 5-6 cups fresh or frozen fruit (peaches, berries, cherries, or mixed fruit)
- ¾ – 1 cup granulated sugar (adjust based on fruit sweetness)
- 2-3 tablespoons cornstarch
- 2 tablespoons fresh lemon juice
- 1 teaspoon vanilla extract
- ½ teaspoon ground cinnamon (optional, great with peaches or apples)
- ¼ teaspoon ground nutmeg (optional)
For the Cobbler Topping:
- 1½ cups all-purpose flour
- ½ cup granulated sugar, plus 1 tablespoon for sprinkling
- 2 teaspoons baking powder
- ½ teaspoon salt
- 6 tablespoons cold unsalted butter, cut into small cubes
- ¾ cup whole milk
- 1 teaspoon vanilla extract
Instructions
- Preheat and prep: Preheat your oven to 375°F (190°C). Lightly grease a 9×13-inch baking dish or 10-inch cast iron skillet with butter or cooking spray.
- Prepare the fruit filling: In a medium bowl, combine your fruit with sugar, cornstarch, lemon juice, vanilla, and spices (if using). Toss gently until the fruit is evenly coated. The mixture will look dry at first—that’s normal. Pour the fruit mixture into your prepared baking dish and spread it into an even layer.
- Make the cobbler topping: In a large bowl, whisk together flour, ½ cup sugar, baking powder, and salt. Add the cold butter cubes and use a pastry cutter, fork, or your fingertips to work the butter into the flour until the mixture resembles coarse crumbs with some pea-sized butter pieces remaining.
- Add wet ingredients: Pour in the milk and vanilla extract. Stir with a wooden spoon just until a thick, shaggy batter forms. Don’t overmix—some lumps are perfectly fine and actually desirable for a tender topping.
- Top the fruit: Drop spoonfuls of the batter over the fruit filling, spacing them somewhat evenly but leaving some gaps for the fruit to bubble through. The batter will spread during baking, but it won’t completely cover the fruit—this is what creates that beautiful cobbled appearance. Sprinkle the remaining tablespoon of sugar over the topping.
- Bake: Place the cobbler on a baking sheet (to catch any drips) and bake for 40-45 minutes, until the topping is golden brown and the fruit is bubbling vigorously around the edges. The topping should be firm to the touch and cooked through—no wet batter should remain.
- Cool and serve: Let the cobbler cool for at least 15-20 minutes before serving. This allows the fruit juices to thicken properly. Serve warm with vanilla ice cream, whipped cream, or a drizzle of heavy cream.
Notes
- Frozen fruit: No need to thaw frozen fruit before using. Add an extra tablespoon of cornstarch and 5-10 minutes to the baking time.
- Sweetness adjustment: Taste your fruit before adding sugar. Very ripe, sweet fruit may need only ¾ cup sugar, while tart berries might need the full cup or even slightly more.
- Topping texture: For an extra-crispy topping, brush with melted butter and sprinkle with coarse sugar before baking.
- Testing doneness: Insert a toothpick into the topping—it should come out clean or with just a few moist crumbs.
- Serving size: This makes a generous 9×13 pan that easily serves 8-10 people. Use a smaller 8×8 dish for 4-6 servings and reduce fruit to 3-4 cups.
Nutrition
- Serving Size: 1 serving (⅒ of recipe)
- Calories: 285
- Sugar: 34g
- Sodium: 185mg
- Fat: 7g
- Saturated Fat: 4g
- Unsaturated Fat: 2g
- Trans Fat: 0g
- Carbohydrates: 54g
- Fiber: 3g
- Protein: 3g
- Cholesterol: 18mg
Note: Nutrition information is approximate and varies based on fruit used and exact measurements. This calculation is based on peach filling.
Tips & Variations
Fruit Combinations to Try:
- Classic Peach Cobbler: 6 cups sliced peaches with cinnamon and nutmeg
- Triple Berry: Equal parts blueberries, blackberries, and raspberries
- Cherry Almond: Pitted cherries with ½ teaspoon almond extract in the topping
- Apple Cinnamon: 6 cups sliced Granny Smith apples with extra cinnamon
- Peach-Blueberry: 3 cups each peaches and blueberries
- Mixed Stone Fruit: Combination of peaches, plums, and nectarines
- Strawberry Rhubarb: 3 cups each for a sweet-tart combination
Topping Variations:
- Brown Sugar Topping: Replace half the white sugar with brown sugar for caramel notes
- Oat Streusel: Add ½ cup rolled oats to the topping mixture for extra texture
- Cinnamon Swirl: Add 1 teaspoon cinnamon to the topping batter and swirl it through
- Nutty Cobbler: Sprinkle ½ cup chopped pecans or almonds over the topping before baking
- Lemon Cobbler: Add 1 tablespoon lemon zest to the topping for bright citrus flavor
- Buttermilk Biscuit: Replace regular milk with buttermilk for tangier, more tender topping
Dietary Modifications:
- Gluten-Free: Use 1:1 gluten-free flour blend and add ¼ teaspoon xanthan gum
- Dairy-Free: Use coconut oil instead of butter and non-dairy milk
- Lower Sugar: Reduce sugar in filling by ¼ cup and use stevia or monk fruit sweetener
- Vegan: Replace butter with vegan butter and use plant-based milk
Pro Chef Tips
Perfect Fruit Consistency: Cut fruit into uniform sizes so everything cooks evenly. Pieces that are too large won’t soften properly, while tiny pieces turn to mush.
Don’t Skip the Lemon Juice: Even with sweet fruit, that touch of acidity is crucial. It brightens flavors and prevents the cobbler from tasting flat or one-dimensional.
Cold Butter is Key: Keep your butter in the fridge until the moment you need it. Cold butter creates pockets of steam during baking, resulting in a flakier, more biscuit-like topping instead of a dense, cake-like one.
Resist Overmixing: When adding milk to your dry ingredients, stir just until combined. Overmixing develops gluten, which creates a tough, chewy topping instead of tender and fluffy.
Use a Baking Sheet: Always place your cobbler dish on a rimmed baking sheet before it goes in the oven. Fruit juices bubble over surprisingly often, and this saves you from a smoky kitchen and a messy oven.
Let It Bubble: Your cobbler isn’t done until you see vigorous bubbling around the edges. This means the cornstarch has activated and thickened the juices properly. If you pull it out too early, you’ll have soup.
Cooling is Crucial: I know it’s tempting to dig in immediately, but letting the cobbler rest for 15-20 minutes allows the filling to set up. You’ll get clean, beautiful servings instead of a runny mess.
Reheat in the Oven: Microwave makes the topping soggy. For best results, reheat individual portions in a 350°F oven for 10-15 minutes to restore that crispy-topped magic.
Common Mistakes to Avoid
Using Wet or Room Temperature Butter: This creates a dense, cake-like topping instead of the desired fluffy, biscuit texture. Always use cold butter straight from the refrigerator and work quickly so it doesn’t warm up.
Not Adjusting Sugar for Fruit Sweetness: Treating all fruits the same leads to desserts that are either tooth-achingly sweet or disappointingly bland. Always taste your fruit first and adjust accordingly—tart cherries need more sugar than ripe peaches.
Skipping the Thickener: Without cornstarch or tapioca, you’ll end up with fruit soup instead of a spoonable, cohesive filling. Don’t skip this ingredient or reduce the amount—your cobbler needs it.
Overcrowding the Topping: Trying to completely cover the fruit with topping creates a gummy, undercooked layer. Those gaps are intentional—they let steam escape and allow the fruit to bubble through attractively.
Cutting Fruit Too Small: Tiny fruit pieces break down into mush during baking. Keep slices or chunks at least ½-inch thick so they hold their shape and provide nice texture.
Not Preheating the Oven: Starting in a cold oven extends baking time and can result in a gummy bottom layer. Always preheat fully so the cobbler starts cooking immediately with proper heat distribution.
Serving Too Soon: Cutting into hot cobbler before it sets means watery servings and burnt tongues. Exercise patience and let it rest—your reward will be better texture and safer eating temperature.
Storage & Meal Prep
Room Temperature: Cobbler can sit at room temperature, loosely covered with foil, for up to 4 hours after baking. This is perfect for dinner parties where you want to serve it slightly warm without keeping the oven on.
Refrigerator Storage: Once completely cooled, cover your cobbler tightly with plastic wrap or aluminum foil, or transfer individual portions to airtight containers. It will keep in the refrigerator for 4-5 days. The topping loses some crispness but the flavors actually deepen and meld beautifully.
Reheating from Fridge: For best results, reheat individual portions in a 350°F oven for 15-20 minutes until warmed through. You can also microwave portions for 30-60 seconds, though the topping won’t be as crispy. To revive crispness, place reheated portions under the broiler for 1-2 minutes, watching carefully.
Freezer Storage: Cobbler freezes surprisingly well! Let it cool completely, then wrap the entire dish tightly in plastic wrap followed by a layer of aluminum foil, or cut into portions and freeze individually in airtight containers. Properly wrapped cobbler keeps for up to 3 months in the freezer.
Reheating from Frozen: Thaw overnight in the refrigerator, then reheat covered at 350°F for 20-25 minutes. For a slightly crispier result, uncover for the last 5 minutes. You can also reheat individual frozen portions in the microwave for 2-3 minutes, stirring halfway through.
Make-Ahead & Freezer Notes
Prep Fruit in Advance: You can prepare your fruit filling up to 24 hours ahead. Mix fruit with sugar, cornstarch, lemon juice, and spices, then store covered in the refrigerator. Give it a quick stir before pouring into your baking dish, as some liquid will have accumulated at the bottom.
Make Topping Ahead: Combine all dry ingredients and cut in the butter, then refrigerate this mixture in an airtight container for up to 2 days. When ready to bake, simply add the milk and vanilla, stir, and proceed with the recipe.
Complete Assembly, Bake Later: Assemble the entire unbaked cobbler up to 8 hours in advance. Cover tightly with plastic wrap and refrigerate. Add 5-10 minutes to the baking time since you’re starting with a cold dish.
Freezing Unbaked Cobbler: Assemble the cobbler in a freezer-safe, oven-safe dish. Wrap extremely well in plastic wrap and foil. Freeze for up to 2 months. When ready to bake, remove plastic wrap, re-cover with foil, and bake from frozen at 375°F for 60-75 minutes. Remove foil for the last 15 minutes to brown the topping.
Freezing Baked Cobbler: Cool completely and wrap well as described above. Freeze up to 3 months. Thaw overnight in the refrigerator and reheat covered at 350°F for 25-30 minutes.
Best Results: For the crispiest topping, always bake fresh or freeze unbaked and bake from frozen. Pre-baked and reheated cobbler is still delicious but won’t have quite the same textural perfection as fresh-baked.
Serving Suggestions
Classic Accompaniments:
- Vanilla Ice Cream: The absolute classic pairing—let it melt into the warm fruit
- Whipped Cream: Light and fluffy, either homemade or store-bought
- Heavy Cream Drizzle: Pour cold heavy cream directly over warm cobbler
- Crème Fraîche: Tangy and sophisticated, a French twist on the American classic
- Greek Yogurt: For a breakfast-appropriate, protein-packed option
Beverage Pairings:
- Hot Coffee: The bitterness balances the sweet fruit perfectly
- Sweet Tea: A Southern tradition with any fruit dessert
- Milk: Cold milk with warm cobbler is nostalgic comfort
- Dessert Wine: Late harvest Riesling or Moscato d’Asti
- Bourbon or Whiskey: A small pour for the adults at the table
Occasion-Specific Serving:
For brunch, serve cobbler at room temperature with Greek yogurt and granola sprinkled on top. For dinner parties, plate individually with a quenelle of vanilla ice cream and a mint leaf. For BBQs and potlucks, serve directly from the baking dish with ice cream on the side. For holiday gatherings, elevate with brandied whipped cream and a dusting of powdered sugar.
Complete Dessert Menu Ideas:
- Summer BBQ: Fruit cobbler, lemon bars, watermelon slices, sweet tea
- Fall Harvest Dinner: Apple cobbler, pumpkin pie, hot cider, caramel sauce
- Sunday Supper: Berry cobbler, biscuits, fried chicken, collard greens
- Brunch Spread: Peach cobbler, quiche, fresh fruit salad, mimosas
FAQs Section
Can I use frozen fruit without thawing it first?
Absolutely! In fact, it’s better not to thaw frozen fruit before using it in cobbler. Frozen fruit goes directly from freezer to baking dish, which prevents it from becoming mushy. Just add an extra tablespoon of cornstarch to handle the additional moisture that frozen fruit releases, and expect to add 5-10 minutes to the baking time. Don’t rinse frozen fruit—use it straight from the bag with any ice crystals intact.
Why is my cobbler topping gummy or doughy?
This usually happens when the oven temperature is too low or the cobbler hasn’t baked long enough. Make sure your oven is fully preheated to 375°F before the dish goes in. The cobbler needs to bake until the topping is deep golden brown and firm to the touch, and the fruit is bubbling vigorously—not just around the edges but throughout. A gummy topping can also result from overmixing the batter, which develops too much gluten, or from covering the fruit too completely, which traps steam.
How do I know when my cobbler is done?
Look for three visual cues: the topping should be deep golden brown (not pale), the fruit should be bubbling enthusiastically around the edges and through the gaps in the topping, and the top should feel firm when gently touched. You can also insert a toothpick into the thickest part of the topping—it should come out clean or with just a few moist crumbs, not wet batter. The internal temperature should reach about 200°F if you want to use a thermometer.
Can I make cobbler in individual ramekins?
Yes! Individual cobblers are adorable and perfect for portion control or entertaining. Use 6-8 ounce ramekins and fill them about ⅔ full with fruit mixture, then top with a few spoonfuls of batter. Place the ramekins on a baking sheet and reduce the baking time to 25-30 minutes. Watch them carefully since smaller portions cook faster. These are perfect for dinner parties since everyone gets their own serving.
What’s the difference between cobbler, crisp, and crumble?
Great question! Cobbler has a biscuit or cake-like topping dropped in spoonfuls over fruit. Crisp has a streusel topping made from butter, flour, sugar, and oats that’s crumbled over the fruit, creating a crunchy texture. Crumble is similar to crisp but traditionally doesn’t include oats—just a buttery, sandy mixture. All three are delicious, just different textures and techniques!
My fruit filling is too runny. What went wrong?
Runny filling usually means one of three things: you didn’t use enough cornstarch, the cobbler wasn’t baked long enough for the cornstarch to fully activate, or you cut into it too soon before the filling had time to set. Make sure you’re using the full 2-3 tablespoons of cornstarch (3 tablespoons for frozen or very juicy fruit), bake until vigorously bubbling, and let it rest for at least 15-20 minutes before serving. The filling continues to thicken as it cools.
Can I reduce the sugar to make it healthier?
You can definitely reduce the sugar, but be mindful of both sweetness and texture. The sugar in the filling isn’t just for sweetness—it also draws out fruit juices and helps create that syrupy consistency. You can safely reduce filling sugar by ¼ cup without major issues. For the topping, you can reduce sugar by 2-3 tablespoons. Beyond that, the flavor balance and texture start to suffer. Consider using naturally sweet fruit like ripe peaches or adding a pinch of cinnamon or vanilla for perceived sweetness without extra sugar.
Conclusion
There you have it—everything you need to make the most incredible, crowd-pleasing fruit cobbler that’ll have everyone coming back for seconds! This recipe truly is foolproof, forgiving, and flexible enough to work with whatever fruit you have on hand, making it the perfect year-round dessert for any occasion.
Whether you’re baking this for a summer potluck, a cozy fall evening, or a special holiday gathering, fruit cobbler delivers comfort and nostalgia in every single bite. There’s something deeply satisfying about pulling a golden, bubbling cobbler from your oven, knowing you created something both beautiful and delicious with your own hands.
Don’t forget—the secret to cobbler greatness is using good fruit, not overmixing your topping, and having the patience to let it cool just enough before diving in. And of course, vanilla ice cream is practically mandatory!
I’d absolutely love to hear how your cobbler turns out! Did you use peaches, berries, or maybe an adventurous fruit combination? Did you serve it at a special gathering or just enjoy it on a random Tuesday because you deserved something sweet? Drop a comment below and share your experience—I read every single one and love connecting with fellow bakers.
If you loved this recipe, please save it to your Pinterest boards so you can find it again, and share it with friends and family who’d appreciate an easy, delicious dessert recipe. There’s nothing better than spreading the joy of homemade cobbler!
Happy baking, and enjoy every warm, fruity, buttery bite! 🍑🫐🥧