The Best Homemade Hot Fudge Sauce Recipe (Better Than Store-Bought!)

There’s something absolutely magical about homemade hot fudge sauce. This rich, velvety chocolate sauce transforms ordinary vanilla ice cream into a restaurant-quality dessert in minutes. Unlike the jar varieties you find at the grocery store, homemade hot fudge sauce has a deep, complex chocolate flavor with a glossy sheen that cascades over ice cream like liquid silk.
What makes this hot fudge sauce truly special is its incredible texture. When poured warm over cold ice cream, it creates that signature shell-like coating that’s thick enough to cling to every bite but still luxuriously smooth. It’s the perfect balance of bitter dark chocolate and just-right sweetness, with a hint of vanilla that rounds out the flavor profile beautifully.
This hot fudge sauce is incredibly versatile. Drizzle it over brownies, use it as a dip for fresh strawberries, swirl it into milkshakes, or layer it in parfaits. It’s the ultimate dessert topping that home cooks have been perfecting in their kitchens for generations. The best part? You probably already have all the ingredients in your pantry, and it comes together in just 10 minutes on your stovetop.
History / Background
The story of hot fudge sauce is deeply intertwined with American ice cream parlor culture. While chocolate sauce has ancient roots dating back to the Aztecs who first combined cacao with other ingredients, the thick, glossy hot fudge sauce we know and love today is distinctly American.
Hot fudge sauce as we know it was popularized in the early 1900s during the golden age of American soda fountains and ice cream parlors. The famous hot fudge sundae was reportedly created in 1906 by C.C. Brown’s ice cream parlor in Hollywood, California. Clarence Clifton Brown developed a rich chocolate sauce that would harden slightly when poured over cold ice cream, creating a delightful textural contrast that became an instant sensation.
The name “hot fudge” is somewhat misleading since it doesn’t actually contain traditional fudge candy. Instead, it refers to the sauce’s thick, fudge-like consistency and rich chocolate flavor. The key difference between hot fudge and regular chocolate sauce lies in the addition of butter and corn syrup, which give hot fudge its characteristic glossy appearance and its unique ability to thicken upon contact with cold ice cream.
During the mid-20th century, hot fudge sundaes became an iconic American dessert, featured prominently in diners, drugstore soda fountains, and ice cream shops across the country. The combination of vanilla ice cream, hot fudge, whipped cream, nuts, and a cherry on top became a cultural symbol of American indulgence and nostalgia.
Today, while many people reach for jarred hot fudge sauce, the homemade version remains superior in both flavor and texture, connecting modern home cooks to a cherished piece of American culinary history.
Why You’ll Love This Recipe
This homemade hot fudge sauce will quickly become your go-to dessert topping. Once you taste the difference between homemade and store-bought, there’s absolutely no going back. The depth of chocolate flavor is incomparable, and making it from scratch gives you complete control over the sweetness and richness levels.
Here’s why this recipe is a keeper:
- Quick and Easy – Ready in just 10 minutes from start to finish with simple stovetop preparation
- Minimal Ingredients – Uses just 6 basic pantry staples you likely already have on hand
- Rich, Restaurant-Quality Flavor – Tastes like it came from an upscale ice cream parlor
- Perfect Texture – Creates that signature glossy coating that slightly firms up on cold ice cream
- Customizable Sweetness – Adjust sugar levels to your preference for bittersweet or sweeter sauce
- Budget-Friendly – Costs a fraction of premium jarred versions while tasting infinitely better
- Impressive Yet Simple – Elevates any dessert with minimal effort, perfect for entertaining
- Stores Beautifully – Keeps in the refrigerator for up to two weeks and reheats perfectly
- No Artificial Ingredients – Pure, real chocolate flavor without preservatives or additives
- Versatile – Works with countless desserts beyond just ice cream sundaes
Ingredient Notes
Understanding your ingredients is key to making perfect hot fudge sauce. Each component plays a specific role in creating that signature texture and flavor.
Unsweetened Cocoa Powder – Use high-quality Dutch-process or natural cocoa powder. Dutch-process cocoa creates a smoother, less acidic flavor with a deeper color, while natural cocoa has a more intense chocolate taste. Both work beautifully, so choose based on your preference.
Granulated Sugar – Provides sweetness and helps create the smooth texture. You can reduce the amount by up to 25% if you prefer a more bittersweet sauce, or substitute with coconut sugar for a deeper, caramel-like flavor.
Light Corn Syrup – This is the secret ingredient that gives hot fudge its glossy sheen and prevents crystallization. It also helps the sauce maintain its smooth texture when stored. If you prefer to avoid corn syrup, you can substitute with golden syrup or honey, though the flavor will be slightly different.
Heavy Cream – Creates the luxurious, velvety texture and adds richness. Heavy whipping cream works best because of its high fat content. Half-and-half can be substituted for a lighter version, but the sauce won’t be quite as thick and rich.
Unsalted Butter – Adds richness and helps create that smooth, flowing consistency. Always use unsalted so you can control the salt level. The butter also contributes to the sauce’s ability to create that slightly firm coating on ice cream.
Vanilla Extract – A small amount goes a long way in rounding out the chocolate flavor and adding depth. Use pure vanilla extract rather than imitation for the best results.
Salt – Just a pinch enhances all the other flavors and balances the sweetness, making the chocolate taste more complex and sophisticated.
Semi-Sweet Chocolate Chips (Optional) – Adding chopped chocolate or chips takes the sauce to an even more decadent level, creating an ultra-rich, double-chocolate experience. This is optional but highly recommended for chocolate lovers.
Equipment Needed
Making hot fudge sauce requires very minimal equipment, most of which you likely already have in your kitchen:
- Medium Saucepan – A 2-quart heavy-bottomed saucepan works perfectly and distributes heat evenly
- Whisk – Essential for creating a smooth, lump-free sauce
- Measuring Cups and Spoons – For accurate measurements
- Rubber Spatula – Helps scrape down the sides of the pan and ensures nothing gets wasted
- Glass Storage Jar – A mason jar or airtight container for storing leftovers
- Ladle or Small Pitcher – For easy pouring when serving warm
Hot Fudge Sauce Recipe

This homemade hot fudge sauce is rich, glossy, and incredibly easy to make. With deep chocolate flavor and a velvety smooth texture, it’s perfect for drizzling over ice cream, brownies, or any dessert that needs a luxurious chocolate upgrade.
- Prep Time: 5 minutes
- Cook Time: 5 minutes
- Total Time: 10 minutes
- Yield: 2 cups (about 16 servings) 1x
- Category: Dessert, Sauce
- Method: Stovetop
- Cuisine: American
- Diet: Vegetarian
Ingredients
- ¾ cup unsweetened cocoa powder
- 1 cup granulated sugar
- 1 cup light corn syrup
- ½ cup heavy cream
- 4 tablespoons unsalted butter
- 1 teaspoon pure vanilla extract
- ¼ teaspoon salt
- ½ cup semi-sweet chocolate chips (optional, for extra richness)
Instructions
- Combine the dry ingredients. In a medium saucepan, whisk together the cocoa powder, sugar, and salt until well combined and no lumps remain. This ensures your sauce will be perfectly smooth.
- Add the corn syrup. Pour the corn syrup into the saucepan with the dry ingredients. Whisk thoroughly until the mixture is smooth and the cocoa powder is fully incorporated. The mixture will be quite thick at this stage.
- Add the cream. Pour in the heavy cream and whisk until everything is well combined. The mixture will start to loosen up and become more liquid.
- Heat the mixture. Place the saucepan over medium heat. Stir continuously with a whisk to prevent scorching on the bottom. Bring the mixture to a gentle boil, whisking frequently. This should take about 3-4 minutes.
- Simmer and thicken. Once the mixture reaches a boil, reduce the heat to medium-low and let it simmer gently for 2-3 minutes, stirring frequently. The sauce will thicken slightly and develop a beautiful glossy appearance. Don’t over-boil or the sauce may become too thick.
- Remove from heat and add butter. Take the saucepan off the heat and immediately add the butter, stirring until it’s completely melted and incorporated into the sauce. The butter adds richness and gives the sauce its signature silky texture.
- Stir in vanilla. Add the vanilla extract and stir well to combine. If you’re using chocolate chips, add them now and stir until they’re completely melted and the sauce is ultra-smooth.
- Cool slightly and serve. Let the hot fudge sauce cool for 2-3 minutes before serving. It should be warm but not scalding hot. Pour generously over your favorite ice cream and watch it create that beautiful glossy coating.
Notes
- The sauce will thicken as it cools. If it becomes too thick when stored, simply reheat gently with a splash of cream to restore the perfect consistency.
- For a deeper chocolate flavor, use Dutch-process cocoa powder.
- Don’t skip the corn syrup – it’s what gives the sauce its glossy appearance and prevents sugar crystallization.
- The sauce can be made ahead and stored in the refrigerator for up to 2 weeks in an airtight container.
- To reheat, warm gently in the microwave in 15-second intervals, stirring between each, or reheat in a saucepan over low heat with a splash of cream.
Nutrition
- Serving Size: 2 tablespoons
- Calories: 145
- Sugar: 22g
- Sodium: 45mg
- Fat: 5g
- Saturated Fat: 3g
- Unsaturated Fat: 2g
- Trans Fat: 0g
- Carbohydrates: 26g
- Fiber: 1g
- Protein: 1g
- Cholesterol: 12mg
Note: Nutrition information is approximate and will vary based on specific ingredients used and optional additions like chocolate chips.
Tips & Variations
Dark Chocolate Hot Fudge: Replace the semi-sweet chocolate chips with dark chocolate (70% cacao) for a more sophisticated, less sweet sauce with intense chocolate flavor.
Mexican Hot Fudge: Add ½ teaspoon of ground cinnamon and a pinch of cayenne pepper for a warming, spiced version reminiscent of Mexican hot chocolate.
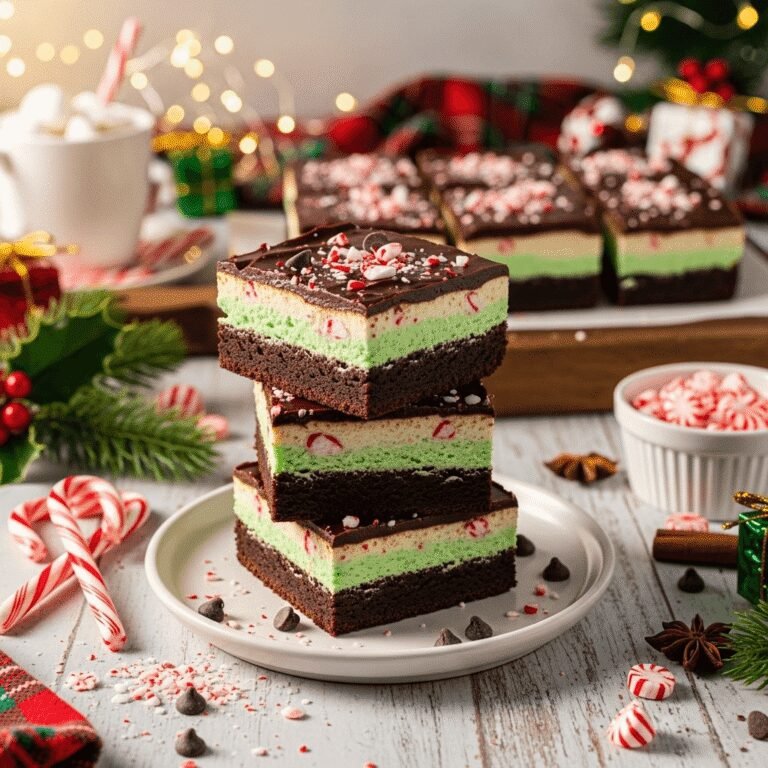
Mint Chocolate Fudge Sauce: Replace the vanilla extract with peppermint extract (start with ½ teaspoon and adjust to taste) for a refreshing twist perfect for the holidays.
Peanut Butter Hot Fudge: Stir in ¼ cup of creamy peanut butter along with the butter for a peanut butter cup-inspired sauce.
Salted Caramel Hot Fudge: Add an extra ¼ teaspoon of sea salt and drizzle with caramel sauce when serving for a sweet-and-salty combination.
Coffee-Enhanced: Add 1 tablespoon of instant espresso powder to the dry ingredients to deepen the chocolate flavor without making it taste like coffee.
Coconut Hot Fudge: Replace the heavy cream with full-fat coconut cream and use coconut oil instead of butter for a dairy-free version.
Bourbon Hot Fudge: Add 1-2 tablespoons of bourbon or dark rum after removing from heat for an adults-only version.
Pro Chef Tips
Use a candy thermometer if you want perfect consistency every time. The sauce should reach 220°F (104°C) for the ideal thickness that will coat ice cream beautifully without becoming too hard.
Don’t rush the whisking. Taking the time to thoroughly whisk the cocoa powder with the sugar before adding liquids prevents lumps and ensures a silky-smooth sauce. Even tiny cocoa lumps can ruin the texture.
Control your heat carefully. Medium heat is your friend here. Too high, and you risk scorching the chocolate, which creates a bitter, burnt flavor that can’t be fixed. If you see any wisps of smoke, immediately remove from heat.
Add a tablespoon of instant espresso powder to intensify the chocolate flavor without making the sauce taste like coffee. This is a professional pastry chef secret that makes chocolate taste more “chocolatey.”
Bloom your cocoa powder for even richer flavor. Mix the cocoa powder with a tablespoon of hot water before adding it to the recipe, stirring until it forms a paste. This technique intensifies the chocolate flavor.
Use European-style butter with higher fat content (82% or more) for an even more luxurious, restaurant-quality sauce with superior mouthfeel.
Add the butter off-heat to prevent it from separating or becoming greasy. The residual heat from the sauce is enough to melt it perfectly while maintaining the ideal emulsion.
Strain the finished sauce through a fine-mesh sieve if you want ultra-smooth, professional results, especially if you added chocolate chips that didn’t fully melt.
Common Mistakes to Avoid
Scorching the bottom of the pan. This happens when the heat is too high or you’re not stirring frequently enough. Always use medium heat and keep that whisk moving, especially once the mixture starts to warm up. Scorched chocolate tastes bitter and burnt, and there’s no recovering from it.
Not whisking out the cocoa lumps initially. Cocoa powder clumps easily, and once you add liquids, those lumps become nearly impossible to dissolve. Take an extra minute at the beginning to thoroughly whisk the dry ingredients together and break up any clumps with the back of a spoon.
Over-boiling the sauce. While you do want to bring it to a boil, letting it boil too vigorously or for too long will make the sauce too thick and potentially grainy. A gentle simmer for 2-3 minutes is all you need once it reaches a boil.
Substituting ingredients without understanding the chemistry. Each ingredient serves a purpose. The corn syrup isn’t just for sweetness – it prevents crystallization and creates that glossy sheen. If you must substitute, use golden syrup or agave nectar, not just more sugar.
Adding vanilla too early. Vanilla extract contains alcohol, and if added during cooking, much of its delicate flavor will evaporate. Always add it after removing the pan from heat to preserve that beautiful vanilla aroma and taste.
Not letting it cool slightly before serving. Hot fudge straight from the stove can be dangerously hot and won’t have the right consistency. Give it 2-3 minutes to cool to the perfect serving temperature where it’s warm enough to flow but thick enough to coat.
Storing it improperly. Always transfer cooled sauce to an airtight container. Exposure to air will cause it to form a skin on top and absorb refrigerator odors. A glass jar with a tight-fitting lid works perfectly.
Storage & Meal Prep
Proper storage is key to enjoying this hot fudge sauce for weeks to come. The great news is that it keeps beautifully and actually tastes even better after the flavors have had time to meld together.
Refrigerator Storage: Transfer the completely cooled hot fudge sauce to a clean glass jar or airtight container. It will keep in the refrigerator for up to 2 weeks. The sauce will thicken considerably when cold, becoming almost solid, but this is completely normal.
Reheating Instructions: To reheat, scoop the desired amount into a microwave-safe bowl and heat in 15-second intervals, stirring between each interval until it reaches the desired consistency. If the sauce seems too thick, add a tablespoon of heavy cream or milk and stir well. Alternatively, you can reheat it in a small saucepan over low heat on the stovetop, stirring constantly and adding cream if needed to thin it out.
Portion Control Tip: Consider storing the sauce in multiple smaller jars rather than one large container. This way, you only open and reheat what you need, keeping the rest fresh and preventing temperature fluctuations that can affect quality.
Countertop Storage: Hot fudge sauce should not be stored at room temperature for more than 2 hours due to the dairy content. Always refrigerate leftovers promptly.
Signs of Spoilage: Discard the sauce if you notice any mold, off-smells, or if it has been stored longer than 2 weeks. The high sugar content helps preserve it, but the cream and butter mean it won’t last indefinitely.
Make-Ahead & Freezer Notes
Hot fudge sauce is an excellent make-ahead option, perfect for having on hand whenever a dessert craving strikes or when you need a quick but impressive topping for impromptu entertaining.
Make-Ahead Instructions: You can prepare this hot fudge sauce up to 2 weeks in advance. Simply make the full recipe, let it cool completely, and store it in the refrigerator in an airtight container. This actually works in your favor, as the flavors deepen and meld beautifully over time.
Freezer-Friendly: Yes! Hot fudge sauce freezes exceptionally well for up to 3 months. Freeze it in portions using ice cube trays for easy single-serving portions, then transfer the frozen cubes to a freezer bag. You can also freeze it in small mason jars (leave 1 inch of headspace for expansion) or freezer-safe containers.
Thawing Instructions: For best results, thaw frozen hot fudge sauce in the refrigerator overnight. Once thawed, reheat as you would refrigerated sauce – either in the microwave in 15-second intervals or in a saucepan over low heat, stirring frequently. You may need to add a splash of cream to restore the original consistency.
Quick Thaw Method: If you’re in a hurry, place the sealed container of frozen sauce in a bowl of warm (not hot) water, changing the water every few minutes until thawed enough to scoop out. Then microwave or heat on the stovetop as directed.
Portion Freezing Tip: Freeze the sauce in the portions you most commonly use. If you typically make sundaes for four people, freeze it in four portions. This eliminates the need to thaw more than you’ll use.
Serving Suggestions
While hot fudge sauce is most famously paired with vanilla ice cream, its uses extend far beyond the classic sundae. Here are creative ways to serve this versatile sauce:
Classic Pairings: Pour warm over vanilla, chocolate, or coffee ice cream. Create an old-fashioned hot fudge sundae with whipped cream, chopped nuts, and a maraschino cherry. Layer it in a parfait glass with ice cream and whipped cream for an elegant presentation.
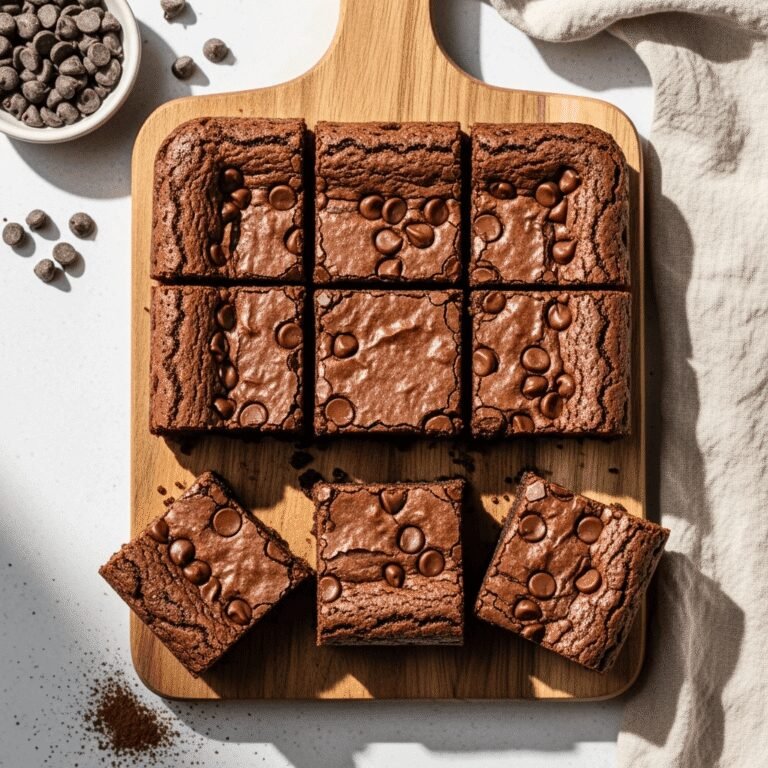
Baked Goods: Drizzle over brownies, pound cake, angel food cake, or cheesecake. Use it as a filling between cake layers or as a topping for cupcakes. Serve alongside warm chocolate chip cookies for dipping.
Breakfast Treats: Pour over pancakes, waffles, or French toast for a decadent weekend breakfast. Swirl into oatmeal or yogurt for a chocolate-lover’s breakfast bowl. Drizzle over crepes filled with strawberries and cream.
Fruit Combinations: Use as a dipping sauce for fresh strawberries, banana slices, or apple wedges. Pour over grilled peaches or pears for a sophisticated dessert. Layer with fresh berries in a trifle.
Beverage Enhancer: Stir a spoonful into hot coffee for a homemade mocha. Swirl into milkshakes or blend into smoothies. Mix into hot milk for an ultra-rich hot chocolate.
Fancy Plated Desserts: Create decorative drizzles on plates before adding your dessert for restaurant-style presentation. Pool a small amount on the plate and place a slice of cake or pie on top. Use a squeeze bottle to create elegant patterns and designs.
Drink Pairings: Serve alongside a cold glass of milk, hot coffee, or espresso. For adults, pair with a dessert wine, port, or bourbon. A hot cup of peppermint tea creates a lovely contrast to the rich chocolate.
FAQs Section
Can I make hot fudge sauce without corn syrup?
Yes, though the texture will be slightly different. Substitute the corn syrup with an equal amount of golden syrup, honey, or agave nectar. Keep in mind that honey will add its own distinct flavor. You can also use maple syrup, though this will make the sauce slightly thinner. Some cooks successfully use a combination of additional sugar and a tablespoon of water, though this may result in a sauce that’s less glossy and more prone to crystallization.
Why is my hot fudge sauce grainy or gritty?
Graininess usually occurs from sugar crystallization, which happens when sugar crystals form during cooking. This can be caused by stirring too much once the sugar has dissolved, cooking at too high a temperature, or not using enough corn syrup (which prevents crystallization). To fix grainy sauce, try reheating it gently with an additional tablespoon of corn syrup and stirring until smooth. Prevention is key: use the corn syrup as directed and avoid stirring excessively once the mixture begins to boil.
How do I make my hot fudge sauce thicker or thinner?
To thicken the sauce, simmer it for an additional 1-2 minutes, allowing more liquid to evaporate. Let it cool, as it will thicken further as it cools. For a thinner consistency, add heavy cream or whole milk, one tablespoon at a time, stirring until you reach your desired texture. Remember that the sauce thickens significantly when refrigerated, so always thin it with cream when reheating if needed.
Can I make this dairy-free or vegan?
Absolutely! Replace the heavy cream with full-fat coconut cream or oat cream for the best results. Substitute the butter with coconut oil or vegan butter. The corn syrup is already vegan-friendly. Use dairy-free chocolate chips if you’re adding those. The flavor will have a slight coconut undertone if using coconut products, which many people find delicious. The texture will be nearly identical to the dairy version.
Why does my hot fudge sauce separate or look oily?
Separation typically occurs when the fat (butter or cream) separates from the other ingredients, usually due to overheating or temperature shock. To fix separated sauce, remove it from heat and vigorously whisk in a tablespoon of cream. You can also use an immersion blender to re-emulsify the mixture. To prevent separation, add the butter after removing the pan from heat and maintain medium (not high) heat throughout cooking.
How can I make this sauce less sweet?
Reduce the granulated sugar by ¼ cup and increase the cocoa powder by 2 tablespoons for a more bittersweet sauce. Use dark chocolate chips (70% cacao or higher) instead of semi-sweet. You can also add an extra pinch of salt, which balances sweetness and enhances chocolate flavor. Some bakers add a teaspoon of instant espresso powder, which deepens the chocolate taste and makes it taste less sugary.
Can kids help make hot fudge sauce?
Definitely! This is a wonderful recipe for teaching kitchen skills. Young children can help measure ingredients and whisk the dry ingredients together. Older kids can handle the whisking at the stove with supervision, as this recipe involves manageable temperatures and straightforward techniques. Just maintain close supervision during the cooking process, as the mixture does get quite hot. The reward of homemade ice cream sundaes makes it an especially motivating cooking project for kids.
Conclusion
There’s truly nothing quite like homemade hot fudge sauce. This simple recipe transforms ordinary pantry ingredients into an extraordinary dessert topping that rivals anything you’d find at a gourmet ice cream shop. The deep, rich chocolate flavor, the glossy appearance, and that perfect thick-yet-pourable consistency make every spoonful feel like a special treat.
The beauty of this recipe lies not just in its incredible taste, but in its versatility and ease. In just 10 minutes, you can create something that elevates everything from a simple bowl of vanilla ice cream to an elaborate plated dessert. Whether you’re looking for a quick weeknight treat, planning a special celebration, or need a reliable make-ahead dessert component, this hot fudge sauce delivers every single time.
I’d love to hear how your hot fudge sauce turned out! Did you try any of the variations? What did you serve it on? Leave a comment below sharing your experience, and don’t forget to rate this recipe. If you loved it, please click that Pin button and save this recipe to your Pinterest boards – your followers will thank you when they discover this game-changing recipe!
Happy cooking, and may your desserts always be drizzled with homemade chocolate perfection! 🍫