The Ultimate Wedding Cake Recipe: Bakery-Style Elegance Made at Home
There’s something undeniably magical about a towering, pristine wedding cake—those delicate layers, the velvety frosting, and the way it becomes the centerpiece of one of life’s most beautiful celebrations. While many assume that creating a wedding cake is reserved for professional bakers, I’m here to tell you that with patience, the right techniques, and this foolproof recipe, you can absolutely make a stunning wedding cake in your own kitchen.
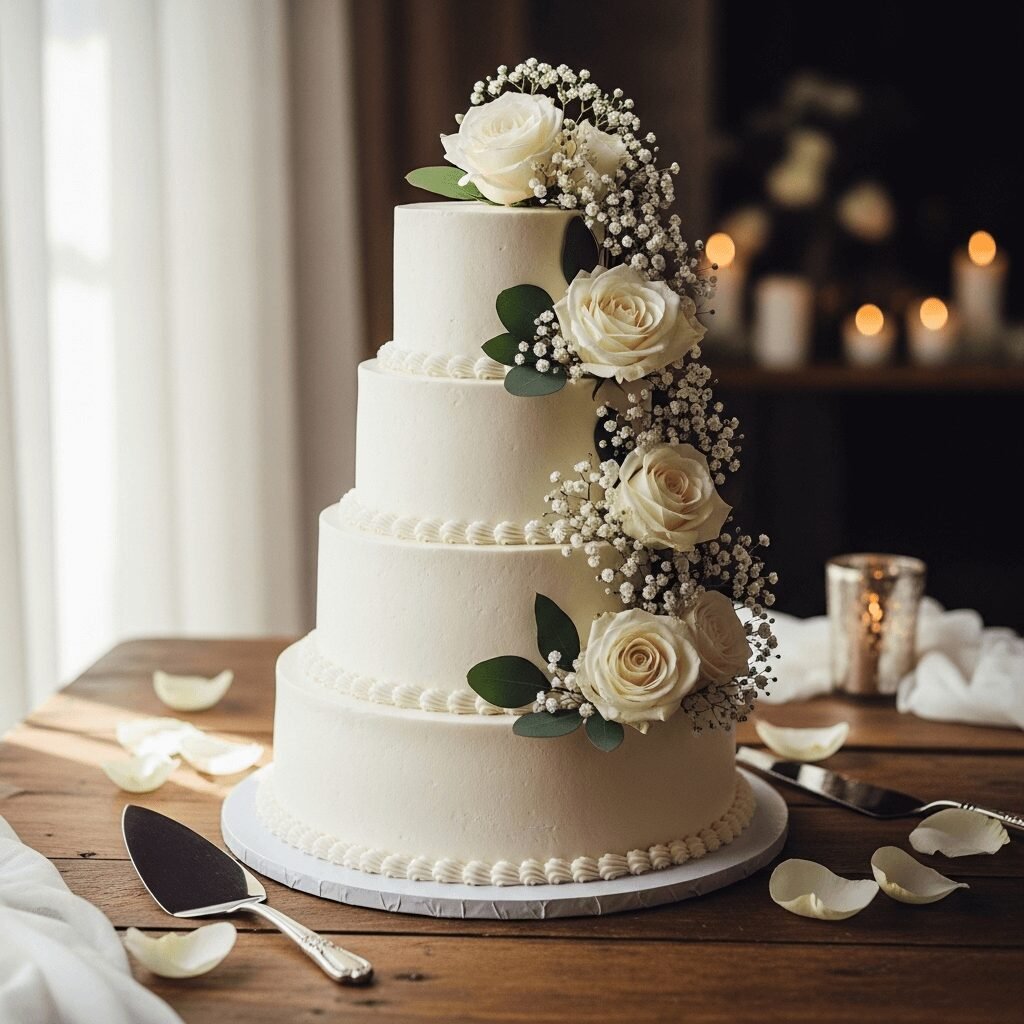
This classic vanilla wedding cake recipe features four moist, tender layers of almond-kissed vanilla cake paired with silky Swiss meringue buttercream. It’s the kind of cake that looks breathtaking on a decorated table and tastes even better than it looks. Whether you’re baking for your own special day, helping a friend, or simply wanting to master an impressive dessert skill, this recipe will guide you through every step with confidence. The cake itself is beautifully balanced—not too sweet, with a fine, tender crumb that holds up perfectly under layers of frosting and decorations.
History / Background
Wedding cakes have been part of marriage celebrations for centuries, with roots tracing back to ancient Rome, where a barley cake was broken over the bride’s head to symbolize fertility and good fortune. The tradition evolved through medieval England, where guests would bring small cakes that were stacked as high as possible—if the couple could kiss over the tower without toppling it, prosperity was assured.
The modern tiered wedding cake as we know it emerged in Victorian England during the 1850s. Queen Victoria’s wedding cake in 1840 was a landmark moment, weighing 300 pounds and adorned with elaborate royal icing decorations. This sparked a trend among the wealthy, and white icing became symbolic of purity and virginity, establishing the tradition of the pristine white wedding cake.
The classic white or vanilla wedding cake became the American standard throughout the 20th century, often featuring almond flavoring as a subtle nod to European traditions. Almond was considered a symbol of good luck and fertility, making it a meaningful addition to wedding celebrations. Today’s wedding cakes range from elaborate fondant creations to rustic naked cakes, but the traditional vanilla layer cake with buttercream remains the most beloved and requested style. It’s timeless, elegant, and universally loved—a blank canvas for any wedding theme or decoration style.
Why You’ll Love This Recipe
This wedding cake recipe strikes the perfect balance between impressive presentation and achievable home baking. I’ve tested and refined this recipe dozens of times to ensure it works beautifully for bakers of all skill levels, and the results speak for themselves.
Here’s why this recipe will become your go-to for special occasions:
- Foolproof and reliable – Uses straightforward techniques that guarantee success, even if you’ve never made a tiered cake before
- Bakery-quality texture – Produces an incredibly moist, fine-crumbed cake that rivals professional bakeries
- Make-ahead friendly – Cake layers can be baked days in advance and frozen, making the process less stressful
- Stable for stacking – The cake structure is sturdy enough to support multiple tiers without collapsing
- Versatile flavor base – The subtle vanilla-almond flavor pairs beautifully with any filling or frosting
- Feeds a crowd – This recipe yields enough cake for 60-75 servings, depending on how you cut it
- Budget-conscious – Making your own wedding cake can save hundreds or even thousands of dollars
- Customizable decorating – Works perfectly with buttercream, fondant, fresh flowers, or minimalist styling
- Freezes beautifully – Extra layers freeze perfectly for up to three months without losing quality
Ingredient Notes
Understanding your ingredients is key to baking success, especially with a showstopper like wedding cake. Here’s what you need to know:
Cake Flour – This is essential for that tender, fine crumb. Cake flour has less protein than all-purpose flour, resulting in a softer texture. If you don’t have cake flour, you can substitute by removing 2 tablespoons from each cup of all-purpose flour and replacing it with cornstarch.
Unsalted Butter – Using unsalted butter allows you to control the salt level in your cake. Make sure it’s at room temperature for proper creaming. European-style butter with higher fat content will produce an even more luxurious cake.
Granulated Sugar – White sugar provides structure and sweetness without adding color or competing flavors. Don’t substitute with other sweeteners in this recipe, as sugar plays a crucial structural role.
Egg Whites – Using only egg whites (not whole eggs) keeps the cake pristine white and creates an incredibly light texture. Save those yolks for making pastry cream or crème brûlée!
Whole Milk – The fat content in whole milk contributes to moisture and richness. You can use 2% milk in a pinch, but avoid skim milk.
Almond Extract – This is the secret ingredient that gives wedding cakes their distinctive flavor. Use pure almond extract, not imitation, for the best taste. If you have nut allergies, substitute with additional vanilla extract.
Vanilla Extract – Pure vanilla extract is worth the investment. It provides depth and rounds out all the other flavors.
Baking Powder – Make sure yours is fresh (check the expiration date). Old baking powder won’t give you the lift you need.
Salt – A small amount of salt enhances all the other flavors and balances the sweetness.
For the Swiss Meringue Buttercream:
Egg Whites – These are whipped with sugar over heat to create a stable, silky meringue base that’s less sweet than American buttercream.
Granulated Sugar – Creates the meringue structure and adds sweetness.
Unsalted Butter – Lots of it! This is what makes the buttercream so incredibly smooth and delicious. It must be at room temperature but not too soft.
Vanilla and Almond Extracts – Flavor the buttercream to complement the cake layers.
Equipment Needed
Having the right tools makes this project so much easier. Here’s what you’ll need:
- Three 9-inch round cake pans (you’ll bake in batches if making a four-tier cake)
- Parchment paper for lining pans
- Stand mixer with paddle and whisk attachments (or hand mixer, though a stand mixer is highly recommended)
- Large mixing bowls (at least 2-3)
- Rubber spatulas for folding and scraping
- Wire cooling racks
- Cake strips (optional but helpful for even baking)
- Offset spatula for frosting
- Cake turntable (makes frosting dramatically easier)
- Bench scraper for smooth sides
- Cake boards in various sizes for tiered assembly
- Dowel rods or plastic cake supports for stacking tiers
- Piping bags and tips for decorating (optional)
- Large serrated knife or cake leveler
- Kitchen scale (optional but recommended for precision)
- Double boiler or heatproof bowl over simmering water for the buttercream
- Candy thermometer (optional for checking meringue temperature)
Wedding Cake Recipe
This elegant vanilla wedding cake features four layers of moist, tender almond-vanilla cake paired with silky Swiss meringue buttercream. Bakery-quality results that you can achieve at home with patience and the right techniques.
- Prep Time: 1 hour
- Cook Time: 35 minutes
- Total Time: 4 hours (including cooling and assembly)
- Yield: 60-75 servings 1x
- Category: Dessert
- Method: Baking
- Cuisine: American
- Diet: Vegetarian
Ingredients
For the Vanilla Almond Cake (makes 4 nine-inch layers):
- 6 cups cake flour, spooned and leveled
- 2 tablespoons baking powder
- 1½ teaspoons salt
- 2 cups (4 sticks) unsalted butter, room temperature
- 4 cups granulated sugar
- 12 large egg whites, room temperature
- 2 cups whole milk, room temperature
- 2 tablespoons pure vanilla extract
- 1 tablespoon pure almond extract
For the Swiss Meringue Buttercream (enough for filling and frosting):
- 10 large egg whites
- 2½ cups granulated sugar
- ¼ teaspoon salt
- 5 cups (10 sticks) unsalted butter, room temperature, cut into tablespoons
- 2 tablespoons pure vanilla extract
- 1 teaspoon pure almond extract
Instructions
For the Cake Layers:
- Prepare your pans: Preheat oven to 350°F (175°C). Grease three 9-inch round cake pans thoroughly with butter or baking spray. Line the bottoms with parchment paper circles, then grease the parchment. Lightly dust with flour and tap out excess. If using cake strips, soak them and wrap around pans.
- Combine dry ingredients: In a large bowl, whisk together the cake flour, baking powder, and salt. Set aside.
- Cream butter and sugar: In the bowl of a stand mixer fitted with the paddle attachment, beat the room-temperature butter on medium speed for about 2 minutes until smooth. Gradually add the sugar and beat on medium-high speed for 4-5 minutes until light, fluffy, and nearly white in color. Stop and scrape down the bowl several times.
- Add egg whites gradually: With the mixer on medium-low speed, add the egg whites one at a time, beating well after each addition. The mixture may look slightly curdled—this is normal. Scrape down the bowl as needed.
- Combine wet ingredients: In a liquid measuring cup, combine the milk, vanilla extract, and almond extract.
- Alternate additions: With the mixer on low speed, add the flour mixture in three additions, alternating with the milk mixture in two additions (begin and end with flour). Mix each addition just until incorporated—do not overmix. After the final addition, finish mixing by hand with a rubber spatula, scraping the bottom and sides to ensure no pockets of flour remain.
- Bake the first batch: Divide the batter evenly among the three prepared pans (about 3 cups of batter per pan for even layers). Smooth the tops with an offset spatula. Gently tap the pans on the counter 2-3 times to release air bubbles. Bake for 28-35 minutes, until a toothpick inserted in the center comes out clean and the tops spring back when lightly pressed.
- Cool properly: Let cakes cool in pans on wire racks for 15 minutes, then carefully invert onto racks. Remove parchment paper and flip right-side up to cool completely. Repeat the entire process to make your fourth layer (or make all four at once if you have four pans).
- Prepare for assembly: Once completely cool, wrap each layer tightly in plastic wrap and refrigerate for at least 2 hours or freeze for easier handling. This makes frosting much easier and results in cleaner, more professional layers.
For the Swiss Meringue Buttercream:
- Create the meringue: Combine egg whites, sugar, and salt in the heatproof bowl of your stand mixer. Place the bowl over a pot of simmering water (don’t let the bowl touch the water). Whisk constantly by hand until the sugar is completely dissolved and the mixture reaches 160°F on a candy thermometer, about 3-5 minutes. You should not feel any grains of sugar when you rub a bit between your fingers.
- Whip to stiff peaks: Transfer the bowl to your stand mixer fitted with the whisk attachment. Beat on medium-high speed for 10-12 minutes until the meringue forms stiff, glossy peaks and the bowl is cool to the touch.
- Add butter gradually: Reduce speed to medium-low. Add the butter one tablespoon at a time, waiting until each piece is incorporated before adding the next. The mixture may look curdled or soupy at some point—keep mixing! It will come together into silky buttercream.
- Flavor and finish: Once all the butter is incorporated and the buttercream is smooth, add the vanilla and almond extracts. Beat on low speed for 1-2 minutes. If the buttercream seems too soft, refrigerate for 15 minutes, then beat again. If it seems too stiff, briefly warm the bowl with a warm towel and beat until smooth.
Assembly:
- Level layers: Using a long serrated knife or cake leveler, trim the domed tops off each cake layer to create flat, even surfaces.
- Create a crumb coat: Place one cake layer on a cake board or serving plate. Spread a generous layer of buttercream on top (about ¾ cup). Repeat with remaining layers, stacking evenly. Apply a thin layer of frosting all over the cake—this is your crumb coat. Refrigerate for 30 minutes until firm.
- Final frosting: Apply a thicker layer of buttercream all over the chilled cake. Use an offset spatula and cake turntable to create smooth sides. For sharp edges, use a bench scraper held at a 90-degree angle while spinning the turntable.
- Decorate: Pipe borders, add fresh flowers, or keep it elegantly simple. Refrigerate until 1 hour before serving for best texture.
Notes
- Room temperature ingredients are crucial – They incorporate more evenly and create better texture
- Don’t skip the crumb coat – This prevents crumbs from ruining your final frosting layer
- Buttercream troubleshooting – If it curdles during mixing, keep beating; if it’s soupy, chill briefly then beat again
- For a taller cake, use deeper pans (2 inches instead of 1.5 inches) and adjust baking time to 35-40 minutes
- Flavor variations – Add lemon zest, use different extracts, or incorporate freeze-dried fruit powder for color and flavor
Nutrition
- Serving Size: 1 slice (based on 75 servings)
- Calories: 385
- Sugar: 32g
- Sodium: 145mg
- Fat: 22g
- Saturated Fat: 14g
- Unsaturated Fat: 7g
- Trans Fat: 0g
- Carbohydrates: 44g
- Fiber: 0.5g
- Protein: 3g
- Cholesterol: 60mg
Tips & Variations
Flavor Variations:
- Lemon Wedding Cake: Add 2 tablespoons lemon zest to the batter and replace almond extract with lemon extract. Use lemon curd between layers.
- Champagne Cake: Replace ½ cup of milk with champagne and add champagne extract to the buttercream.
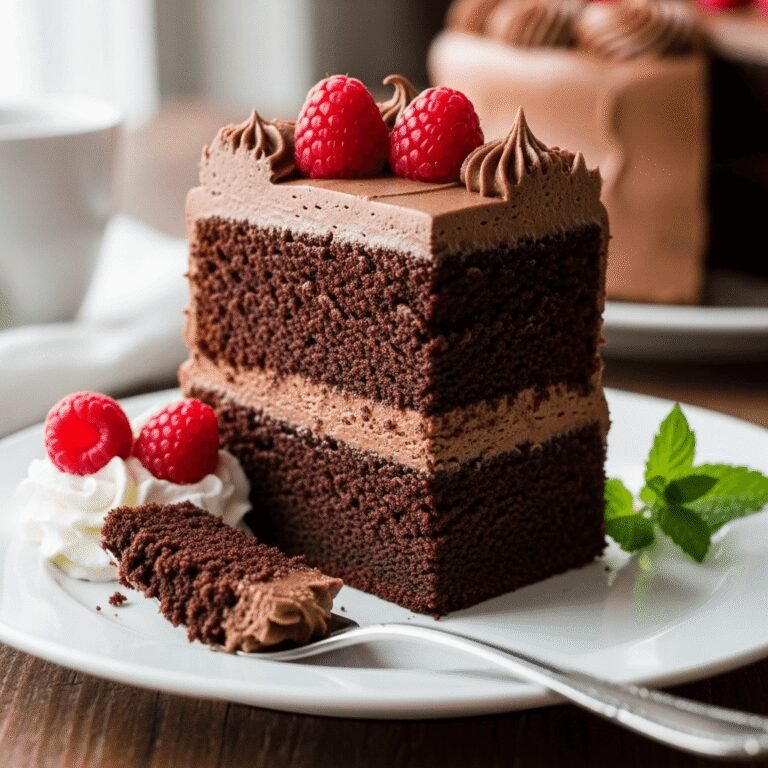
- Chocolate Lovers: Make a chocolate ganache filling between layers while keeping the vanilla cake and buttercream exterior.
- Berry Bliss: Add fresh berry compote or preserves between cake layers for a fruity surprise.
- Rose or Lavender: Add 1-2 teaspoons of food-grade rose water or lavender extract for an elegant botanical twist.
Decoration Ideas:
- Keep it minimal with a “naked” or semi-naked style showing the layers
- Add fresh flowers (make sure they’re food-safe and pesticide-free)
- Create an ombré effect with colored buttercream
- Pipe elegant rosettes, ruffles, or classic shell borders
- Add metallic accents with edible gold leaf
- Incorporate seasonal fruits like figs, berries, or citrus slices
Make it Gluten-Free: Use a high-quality 1:1 gluten-free baking flour blend (one that includes xanthan gum). The texture will be slightly different but still delicious.
Size Adjustments: To make a smaller cake, halve the recipe for two 9-inch layers. For a larger multi-tiered cake with various sizes, use this recipe as your base and scale batches according to your pan sizes.
Pro Chef Tips
Temperature is everything: Room temperature ingredients (butter, eggs, milk) are the most important factor for a tender, evenly-textured cake. Cold ingredients can cause the batter to curdle and result in a dense cake. Set everything out 2-3 hours before baking.
Weigh your flour: If you have a kitchen scale, use it. Cake flour should weigh 114g per cup. Measuring by weight eliminates the #1 cause of dry cake—too much flour from packing the measuring cup.
Don’t overmix: Once you add the flour, mix just until no streaks remain. Overmixing develops gluten, which makes cake tough and chewy instead of tender. Finish mixing by hand with a spatula for best control.
Use cake strips: These insulated fabric strips keep the edges of your cake from baking faster than the center, resulting in perfectly flat tops that don’t need excessive trimming.
Master the buttercream temperature: Swiss meringue buttercream is temperature-sensitive. If it’s too warm, it will be soupy. If it’s too cold, it will be stiff and hard to spread. Ideal working temperature is around 72-75°F. Use a warm towel around the bowl or brief refrigeration to adjust as needed.
Chill between steps: Cold cake is easier to frost. Chilling between the crumb coat and final coat ensures professional-looking results. Cold buttercream also holds its shape better for decorating.
Support your tiers properly: If making a multi-tiered cake, always use dowel rods or plastic supports between tiers. Insert them into the bottom tier before placing the next tier on top. This prevents the weight from crushing the lower layers.
Practice piping: If you’re planning intricate piping work, practice your borders and designs on parchment paper before working on the actual cake. This builds confidence and muscle memory.
Common Mistakes to Avoid
Opening the oven door too early: Resist the urge to check your cakes before the 25-minute mark. Opening the door releases heat and can cause cakes to sink in the middle. The first 20 minutes are crucial for structure development.
Using old leavening agents: Baking powder loses potency over time. If yours is more than 6 months old, test it by mixing ½ teaspoon with hot water—it should bubble vigorously. Weak baking powder results in dense, flat cakes.
Adding butter to buttercream too quickly: When making Swiss meringue buttercream, patience is key. Adding butter too fast can cause the mixture to break and become greasy. Add one tablespoon at a time, waiting for each to incorporate before adding more.
Not leveling your cake layers: Even if your layers look fairly flat, they likely have a slight dome. Always trim the tops for perfectly level, professional-looking tiers. Save the scraps for cake pops or trifles!
Attempting assembly in a warm kitchen: Buttercream melts quickly in warm temperatures. If your kitchen is above 75°F, work in short intervals and return the cake to the refrigerator frequently. Consider assembling and decorating in the coolest room of your house.
Refrigerating decorated cake uncovered: Always cover your finished cake or keep it in a cake box to prevent it from absorbing refrigerator odors and to protect the frosting from drying out. If you’ve added fresh flowers, add them just before serving.
Storage & Meal Prep
Room Temperature Storage: An unfrosted cake can sit at room temperature for 1 day if wrapped tightly. A fully frosted cake with buttercream can sit at cool room temperature (below 70°F) for up to 6 hours. Beyond that, refrigeration is recommended.
Refrigerator Storage: Store the finished cake in the refrigerator for up to 5 days. Cover loosely with plastic wrap or place in a cake box to prevent the frosting from absorbing odors. Always bring the cake to room temperature before serving (about 1-2 hours) for the best flavor and texture.
Individual Slice Storage: Wrap individual slices tightly in plastic wrap, then place in airtight containers. These will keep in the refrigerator for up to 5 days and maintain better texture than cutting from a whole cake multiple times.
Leftover Buttercream: Store extra buttercream in an airtight container in the refrigerator for up to 1 week or freeze for up to 3 months. Before using, bring to room temperature and re-whip in your stand mixer until smooth and fluffy again.
Make-Ahead & Freezer Notes
Freezing Cake Layers (Highly Recommended): This is the secret to stress-free wedding cake preparation. Bake your cake layers, cool them completely, then wrap each layer tightly in plastic wrap followed by aluminum foil. Freeze for up to 3 months. Frozen cake layers are actually easier to frost because they’re firmer and produce fewer crumbs. Thaw in the refrigerator overnight before assembling.
Freezing Buttercream: Swiss meringue buttercream freezes beautifully for up to 3 months. Store in airtight containers, then thaw overnight in the refrigerator. Bring to room temperature and re-whip until silky and smooth before using.
Make-Ahead Timeline for Events:
- 3 months ahead: Bake and freeze all cake layers
- 1 month ahead: Make and freeze buttercream
- 2 days ahead: Thaw cake layers and buttercream in refrigerator
- 1 day ahead: Assemble cake, apply crumb coat and final frosting, refrigerate overnight
- Day of: Add fresh flowers or final decorations, bring to room temperature 1-2 hours before serving
Reheating: While cake is typically served cold or at room temperature, if you prefer a slightly warm cake, individual slices can be microwaved for 10-15 seconds. This is lovely during winter months.
Freezing Decorated Cake: You can freeze a fully frosted cake for up to 1 month. Place it in the freezer uncovered for 30 minutes to firm up the frosting, then wrap carefully in plastic wrap and aluminum foil. Thaw in the refrigerator for 8 hours before bringing to room temperature.
Serving Suggestions
A wedding cake is the star of the dessert table, but consider these complementary elements to round out your celebration:
Beverage Pairings:
- Champagne or Prosecco – The classic choice that cuts through the richness of buttercream
- Dessert wine – Moscato or late-harvest Riesling offers sweet harmony
- Coffee service – Set up an espresso or coffee bar for those who want a warm beverage
- Specialty cocktails – A signature drink that matches your wedding colors
- Dessert liqueurs – Amaretto or Frangelico echo the almond notes in the cake
Accompanying Desserts: While the wedding cake is the centerpiece, many couples offer additional sweets:
- Fresh berry tarts or fruit galettes for a lighter option
- Chocolate truffles or bonbons as take-home favors
- Macarons in wedding colors displayed around the cake
- Individual mini desserts like panna cotta or chocolate mousse cups
- A groom’s cake for a fun second option
Presentation Ideas:
- Display on a decorated cake table with coordinating linens and florals
- Surround the base with fresh flower petals or greenery
- Use a vintage cake stand or modern acrylic display
- Add ambient lighting with votives or string lights
- Include a special cake knife and server (often a keepsake)
- Create a stunning backdrop for photos
Timing: Typically, wedding cake is served after dinner and first dances, but before guests begin leaving. Cut the cake during a designated cake-cutting moment for photos, then have catering staff portion and serve slices to guests.
FAQs Section
Can I make this cake without almond extract? Absolutely! If you have nut allergies or simply prefer a pure vanilla flavor, replace the almond extract with an equal amount of vanilla extract. The cake will still be delicious, just with a more straightforward vanilla profile. You can also experiment with other extracts like lemon, orange, or even coconut.
Why did my buttercream curdle or look soupy? Don’t panic—this is common with Swiss meringue buttercream! If it looks curdled, the butter was likely too cold. Keep beating on medium speed and it will come together (this can take 5-10 minutes). If it’s soupy, the butter was too warm. Place the bowl in the refrigerator for 10-15 minutes, then beat again until smooth. Temperature is everything with this frosting.
How far in advance can I bake the cake layers? You can bake the cake layers up to 3 months in advance if you freeze them properly. Wrap each cooled layer tightly in plastic wrap, then in aluminum foil, and freeze. Thaw in the refrigerator overnight before assembling. Frozen cake layers actually frost more easily because they’re firmer and produce fewer crumbs!
Do I need to refrigerate a buttercream-frosted cake? It depends on the temperature and timeline. Swiss meringue buttercream is stable at room temperature (below 70°F) for 4-6 hours, making it safe for a typical wedding reception. However, if your event is outdoors in warm weather or if the cake is assembled more than 6 hours before serving, refrigeration is recommended. Always bring the cake to room temperature before serving for the best texture and flavor.
Can I use this recipe for cupcakes instead? Yes! This batter makes excellent wedding cupcakes. Fill cupcake liners about 2/3 full and bake at 350°F for 18-22 minutes. This recipe yields approximately 60-72 cupcakes. Top with a swirl of Swiss meringue buttercream for elegant individual desserts.
What’s the best way to transport a tiered wedding cake? Transport each tier separately, then stack them at the venue. Always refrigerate tiers before transport to firm up the buttercream. Use non-skid shelf liner under cake boards, drive slowly, and avoid sudden stops. If possible, have someone hold the cake box steady during transport. Never attempt to transport a fully stacked tiered cake unless you’re a professional with a proper cake carrier.
How do I cut and serve wedding cake evenly? For a 9-inch round cake, start by cutting a circle about 2 inches in from the edge, then cut that outer ring into 1.5-inch slices. Continue cutting concentric circles and slicing. A 9-inch round cake, when cut into proper wedding-size slices (about 1 inch by 2 inches), yields approximately 15-20 servings per layer.
Conclusion
Creating a wedding cake from scratch is one of the most meaningful ways to personalize your special day or show love to someone celebrating theirs. Yes, it requires time and patience, but the sense of accomplishment and the reactions from guests make every minute worthwhile. This recipe has been tested and perfected to give you bakery-quality results right in your home kitchen.
Remember, the most beautiful cakes aren’t necessarily the most perfect—they’re made with love, care, and the joy of celebrating a significant milestone. Don’t stress if your frosting isn’t perfectly smooth or if your layers are slightly uneven. Those small imperfections make your cake uniquely yours, and I promise no one will notice them once they taste how delicious it is!
I’d love to hear about your wedding cake adventures! Have you tried this recipe? Are you planning to make your own wedding cake, or are you baking for someone else’s special day? Drop a comment below with your questions, experiences, or photos. And if you loved this recipe, please save it to your Pinterest boards—I have a feeling you’ll want to come back to it again and again for anniversaries, bridal showers, and other celebrations.
Happy baking, and here’s to love, cake, and happily ever after! 🍰💕