Classic Christmas Sugar Cookies Recipe – Soft, Buttery & Perfect for Decorating

There’s something utterly magical about Christmas sugar cookies. These buttery, tender cookies are a beloved holiday tradition that brings families together in kitchens across America every December. With their perfectly soft centers, lightly crisp edges, and smooth surface that’s ideal for decorating with royal icing, these classic Christmas cookies are more than just a dessert—they’re edible memories in the making.
Whether you’re baking with kids, preparing cookie platters for neighbors, hosting a cookie decorating party, or simply want to fill your home with the warm, vanilla-scented aroma of the holidays, this foolproof recipe delivers bakery-quality results every single time. These aren’t your ordinary sugar cookies—they hold their shape beautifully during baking (no spreading!), have the most incredible buttery flavor, and stay soft for days when stored properly. From Santa-shaped cookies to Christmas trees, snowflakes, and reindeer, these versatile cookies are your blank canvas for holiday creativity.
History / Background
Sugar cookies have a rich history that dates back to the 1700s in Nazareth, Pennsylvania, where German Protestant settlers created what they called “Nazareth Sugar Cakes.” These early cookies were made with simple pantry staples—butter, sugar, flour, and eggs—ingredients that were precious commodities at the time.
The tradition of decorating sugar cookies specifically for Christmas gained popularity in Victorian-era America during the mid-1800s. As sugar became more affordable and accessible to middle-class families, elaborate cookie decorating became a cherished holiday activity. Families would gather around kitchen tables to roll out dough and create festive shapes using tin cookie cutters, often passed down through generations.
The connection between sugar cookies and Christmas strengthened further in the early 20th century when commercial cookie cutters in holiday shapes became widely available through mail-order catalogs like Sears & Roebuck. By the 1950s, decorating Christmas sugar cookies had become a quintessential American holiday tradition, featured in women’s magazines, holiday cookbooks, and television cooking shows.
Today, Christmas sugar cookies represent more than just a sweet treat—they embody the warmth of family traditions, the joy of creative expression, and the spirit of generosity that defines the holiday season. The simple act of baking and decorating these cookies continues to create cherished memories that last a lifetime.
Why You’ll Love This Recipe
This isn’t just another sugar cookie recipe—it’s THE recipe you’ll return to year after year. I’ve spent years perfecting this formula, testing different butter-to-flour ratios, experimenting with various mixing methods, and adjusting ingredient temperatures to create what I genuinely believe are the best Christmas sugar cookies you’ll ever make.
Here’s why this recipe stands out:
- No chilling required before rolling – The dough is perfectly workable immediately, saving you precious time during busy holiday baking
- Cookies hold their shape beautifully – Your snowflakes will have crisp points and your Christmas trees won’t morph into blobs
- Incredibly soft and tender texture – These stay bakery-soft for up to a week when stored properly
- Rich, buttery vanilla flavor – Every bite tastes like Christmas should taste
- Kid-friendly and foolproof – Perfect for little hands to help with rolling, cutting, and decorating
- Makes a large batch – Yields approximately 36-48 cookies depending on cutter size, perfect for gift-giving
- Budget-friendly ingredients – Uses simple pantry staples you likely already have
- Decorating-friendly surface – The smooth top is ideal for royal icing, fondant, or simple sprinkles
- Freezer-friendly dough and baked cookies – Make ahead for stress-free holiday entertaining
Ingredient Notes
Let’s talk about what makes these Christmas sugar cookies so incredibly delicious. Each ingredient plays a crucial role in creating that perfect texture and flavor.
Unsalted Butter (room temperature): The foundation of rich, buttery flavor. Room temperature butter (around 65-68°F) creams beautifully with sugar, creating the tender crumb structure. Always use unsalted so you can control the salt level. European-style butter with higher fat content creates even richer cookies.
Granulated Sugar: Provides sweetness and helps create the classic sugar cookie texture. The sugar crystals cream with butter to incorporate air, making cookies tender rather than dense.
Egg: Acts as a binder and adds richness. One large egg is the perfect amount for this recipe. Make sure it’s room temperature so it incorporates smoothly without breaking the butter emulsion.
Vanilla Extract: Use pure vanilla extract, not imitation. This is where so much flavor comes from—don’t skimp! Mexican or Tahitian vanilla adds beautiful complexity.
All-Purpose Flour: The structure-builder. I recommend spooning flour into your measuring cup and leveling off rather than scooping, which can pack in 25% more flour and create dry cookies.
Baking Powder: Creates just a tiny bit of lift for soft, tender cookies without making them cakey or puffy.
Salt: Enhances all the flavors and balances the sweetness. Even just 1/4 teaspoon makes a noticeable difference.
Almond Extract (optional): Just 1/4 teaspoon adds incredible depth and makes people wonder what your secret ingredient is. It doesn’t taste like almonds—it just makes the cookies taste more “Christmas-y.”
Possible Substitutions: You can use salted butter (reduce added salt to 1/8 teaspoon), substitute half the vanilla with lemon extract for lemon cookies, or use cake flour for even more tender cookies (increase to 3 1/4 cups).
Equipment Needed
Having the right tools makes Christmas cookie baking so much easier and more enjoyable. Here’s what you’ll need:
- Stand mixer or electric hand mixer – For creaming butter and sugar to fluffy perfection
- Large mixing bowls – At least two for combining wet and dry ingredients
- Measuring cups and spoons – Accurate measurements are key to consistent results
- Rolling pin – A heavy, marble or wooden rolling pin works best for even dough thickness
- Cookie cutters – Choose festive shapes like stars, trees, snowflakes, gingerbread people, stockings, and candy canes
- Baking sheets – At least 2-3 rimmed baking sheets for efficient batch baking
- Parchment paper or silicone baking mats – Prevents sticking and ensures even baking
- Wire cooling racks – Essential for properly cooling cookies before decorating
- Bench scraper or offset spatula – Helps transfer cut cookies to baking sheets without distortion
- Small offset spatula – Perfect for spreading royal icing
- Piping bags and tips – If you’re decorating with detailed royal icing designs
- Pastry cloth and rolling pin cover (optional) – Prevents sticking without excess flour
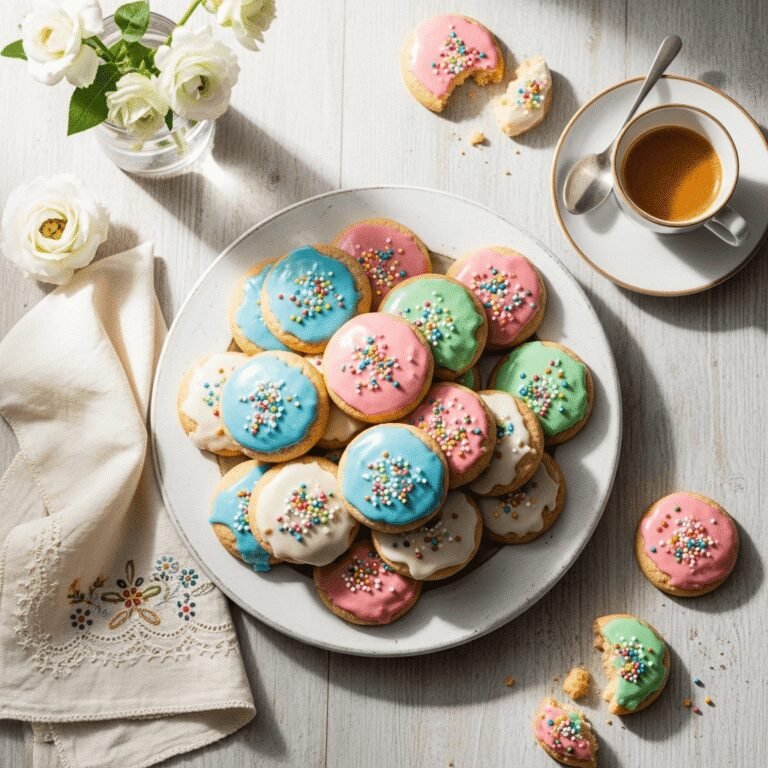
Xmas Cookies Recipe

These classic Christmas sugar cookies are soft, buttery, and hold their shape perfectly for decorating. With a tender crumb and rich vanilla flavor, they’re the ultimate holiday cookie that stays soft for days. Perfect for cookie exchanges, gift-giving, or decorating with family!
- Prep Time: 20 minutes
- Cook Time: 10 minutes
- Total Time: 30 minutes
- Yield: 36-48 cookies (depending on cutter size) 1x
- Category: Dessert, Cookies
- Method: Baking
- Cuisine: American
- Diet: Vegetarian
Ingredients
- 1 cup (226g) unsalted butter, softened to room temperature
- 1 cup (200g) granulated sugar
- 1 large egg, room temperature
- 2 teaspoons pure vanilla extract
- 1/4 teaspoon almond extract (optional but recommended)
- 3 cups (375g) all-purpose flour, spooned and leveled
- 1 1/2 teaspoons baking powder
- 1/2 teaspoon salt
For Decorating (optional):
- Royal icing
- Food coloring gels
- Sprinkles, sanding sugar, edible glitter
- Fondant decorations
Instructions
- Preheat and Prepare: Preheat your oven to 350°F (175°C). Line 2-3 baking sheets with parchment paper or silicone baking mats. Set aside.
- Cream Butter and Sugar: In the bowl of a stand mixer fitted with the paddle attachment (or using a large bowl and hand mixer), beat the softened butter on medium speed for about 1 minute until smooth and creamy. Add the granulated sugar and beat on medium-high speed for 3-4 minutes until the mixture is light, fluffy, and pale in color. Scrape down the sides and bottom of the bowl as needed.
- Add Wet Ingredients: Add the room temperature egg, vanilla extract, and almond extract (if using) to the butter mixture. Beat on medium speed for about 1 minute until fully incorporated and smooth. The mixture should look creamy and unified.
- Combine Dry Ingredients: In a separate medium bowl, whisk together the flour, baking powder, and salt until evenly distributed. This ensures your leavening is evenly distributed throughout the dough.
- Mix Dough: With your mixer on low speed, gradually add the flour mixture to the butter mixture, mixing just until combined and no flour streaks remain. The dough will be thick and slightly soft but not sticky. Do not overmix, or your cookies will be tough.
- Roll Out Dough: Divide the dough in half for easier handling. On a lightly floured surface (or between two sheets of parchment paper to minimize flour absorption), roll out one portion of dough to about 1/4-inch thickness for soft cookies, or 1/8-inch for crisper cookies. Keep the second portion covered while you work.
- Cut Shapes: Using your favorite holiday cookie cutters, cut out shapes and use a thin spatula or bench scraper to carefully transfer them to your prepared baking sheets, spacing them about 2 inches apart. These cookies don’t spread much, but spacing allows for even heat circulation. Gather scraps, re-roll once, and cut more shapes.
- Bake: Bake for 9-11 minutes, depending on size. The cookies are done when the edges are just barely starting to turn the lightest golden color—the centers will look slightly underdone, but they’ll continue cooking on the hot pan. Do NOT overbake, or they’ll be dry.
- Cool: Let cookies cool on the baking sheet for 5 minutes (this is when they firm up), then carefully transfer to a wire rack to cool completely before decorating. Cookies must be completely cool, or icing will melt.
- Decorate: Once completely cooled, decorate with royal icing, sprinkles, or your favorite cookie decorations. Allow decorated cookies to dry completely before stacking or storing (typically 4-6 hours for royal icing).
Notes
- Room Temperature Ingredients: This is crucial for proper creaming and smooth dough. Set butter and eggs out 1-2 hours before baking.
- Don’t Overwork the Dough: Re-rolling scraps more than once incorporates too much flour and creates tough cookies.
- Watch Baking Time: Ovens vary significantly. Start checking at 8 minutes for small cookies. They should look barely done—they firm up as they cool.
- Thickness Matters: 1/4-inch thickness creates soft, chewy cookies (my preference). 1/8-inch creates crisper, snappier cookies.
- Chilling Option: While not required, you can chill dough for 30 minutes if your kitchen is very warm or the dough feels too soft to roll.
Nutrition
- Serving Size: 1 cookie (based on 42 cookies)
- Calories: 95
- Sugar: 5g
- Sodium: 45mg
- Fat: 5g
- Saturated Fat: 3g
- Unsaturated Fat: 2g
- Trans Fat: 0g
- Carbohydrates: 12g
- Fiber: 0g
- Protein: 1g
- Cholesterol: 17mg
Note: Nutrition information is an estimate based on undecorated cookies and may vary based on specific ingredients used and cookie size. Decorations like royal icing will add additional calories and sugar.
Tips & Variations
The beauty of Christmas sugar cookies lies in their versatility. Here are some delicious ways to customize this recipe:
Flavor Variations:
- Lemon Sugar Cookies: Replace vanilla with lemon extract and add 1 tablespoon lemon zest to the dough
- Brown Butter Sugar Cookies: Brown the butter before using (you’ll need to start with 1 1/4 cups to account for moisture loss), chill until solid, then proceed
- Chocolate Sugar Cookies: Replace 1/2 cup flour with 1/2 cup unsweetened cocoa powder
- Spiced Sugar Cookies: Add 1 teaspoon cinnamon, 1/4 teaspoon nutmeg, and 1/4 teaspoon ginger to the dry ingredients
- Eggnog Cookies: Replace vanilla extract with rum extract and add 1/4 teaspoon nutmeg
Texture Variations:
- Crispier Cookies: Roll thinner (1/8-inch) and bake 1-2 minutes longer
- Extra Soft Cookies: Add an extra 2 tablespoons butter and remove cookies when they look underdone
- Cakey Cookies: Increase baking powder to 2 teaspoons
Decorating Ideas Beyond Royal Icing:
- Brush with light corn syrup and dip in colorful sanding sugar before baking
- Drizzle with melted white or dark chocolate
- Press a Hershey’s Kiss into the center immediately after baking
- Sandwich two cookies with buttercream frosting
- Dust with powdered sugar for an elegant, minimalist look
Pro Chef Tips
After years of professional baking, here are my insider secrets for truly exceptional Christmas sugar cookies:
Temperature Control is Everything: Your butter should be around 65-68°F—cool to the touch but your finger leaves an indent. Too warm, and cookies will spread. Too cold, and the dough won’t cream properly.
Weigh Your Flour: If you have a kitchen scale, use it. 375g of flour is accurate every time, while cup measurements can vary by 25% depending on how you scoop. This is the number one cause of dry, tough cookies.
Don’t Skip the Stand Time: After mixing your dough, let it rest for 10 minutes before rolling. This allows the flour to fully hydrate and the gluten to relax, resulting in more tender cookies.
Use Parchment Between Dough and Rolling Pin: Instead of flouring your surface heavily (which dries out dough), roll dough between two sheets of parchment paper. Chill for 10 minutes if it gets too soft, then continue rolling.
The Toothpick Test Doesn’t Work: Unlike cakes, you can’t test cookies with a toothpick. Look for edges that are just barely set and centers that look slightly underdone. They’ll finish cooking on the pan.
Cool Completely Before Icing: I know waiting is hard, but decorating warm cookies will result in melted, streaky icing. Plan your timing so cookies have at least 45 minutes to cool while you prepare your royal icing.
Create an Assembly Line: When making multiple batches, rotate efficiently: while batch one bakes, roll and cut batch two. While batch two bakes, cool batch one. This maximizes oven time and minimizes total baking duration.
Freeze for Perfect Edges: For professional-looking cookies with impossibly sharp edges, freeze cut-out shapes on the baking sheet for 15 minutes before baking. They’ll hold their shape even better.
Common Mistakes to Avoid
Even experienced bakers make these sugar cookie mistakes. Here’s how to avoid them:
Mistake #1: Using Cold Ingredients
When your butter is too cold, it won’t cream properly with the sugar, resulting in dense, tough cookies. Solution: Plan ahead and set butter and eggs out 1-2 hours before baking.
Mistake #2: Overworking the Dough
Excessive mixing develops gluten, creating tough, chewy cookies instead of tender ones. Solution: Mix just until ingredients are combined, and re-roll scraps only once.
Mistake #3: Overbaking
Sugar cookies continue cooking after removal from the oven. Overbaked cookies are dry and hard. Solution: Remove when edges are barely set and centers look slightly underdone—they’ll firm up during cooling.
Mistake #4: Too Much Flour on the Work Surface
Excess flour gets incorporated into your dough during rolling, making cookies dry. Solution: Use minimal flour, or roll between parchment sheets.
Mistake #5: Decorating Too Soon
Applying royal icing to warm cookies causes it to melt and run. Solution: Cool cookies completely on wire racks (30-45 minutes) before decorating, and ensure icing is the right consistency.
Mistake #6: Inconsistent Thickness
Rolling dough unevenly results in some cookies burning while others are underdone. Solution: Use rolling pin rings or guide sticks to ensure uniform 1/4-inch thickness.
Storage & Meal Prep
Proper storage keeps your Christmas sugar cookies soft, fresh, and delicious for gift-giving and enjoying throughout the season.
Room Temperature Storage:
Store completely cooled, undecorated cookies in an airtight container with sheets of parchment paper between layers. They’ll stay fresh for up to 1 week at room temperature. Add a slice of bread to the container to maintain moisture—replace the bread every 2 days.
Decorated Cookies:
Once royal icing has completely dried and hardened (4-6 hours or overnight), store decorated cookies in a single layer in airtight containers. If you must stack them, place parchment or wax paper between layers. Decorated cookies stay fresh for up to 5 days.
Refrigerator Storage:
Not recommended for sugar cookies, as refrigeration can make them dry and absorb odors from other foods.
Reheating:
If cookies lose their soft texture, place them in an airtight container with a damp paper towel (not touching the cookies) for 2-3 hours. Alternatively, microwave 2-3 cookies with a cup of water for 8-10 seconds to soften.
Make-Ahead & Freezer Notes
Christmas cookie season is hectic, so prep ahead whenever possible!
Freezing Cookie Dough:
The unbaked dough freezes beautifully for up to 3 months. Shape into disks, wrap tightly in plastic wrap, then aluminum foil, and label with the date. To use, thaw overnight in the refrigerator, then let stand at room temperature for 20 minutes before rolling.
Freezing Cut-Out Shapes:
Cut out shapes, place on parchment-lined baking sheets, and freeze until solid (about 1 hour). Transfer frozen shapes to freezer bags, separated by parchment. Bake directly from frozen, adding 1-2 minutes to baking time.
Freezing Baked Cookies:
Completely cooled, undecorated cookies freeze perfectly for up to 3 months. Layer between parchment in airtight containers or freezer bags. Thaw at room temperature for 20-30 minutes before decorating or serving.
Freezing Decorated Cookies:
Yes, you can freeze decorated cookies! After royal icing has completely hardened, freeze in single layers in rigid containers for up to 2 months. Thaw in the container at room temperature to prevent condensation from ruining decorations.
Make-Ahead Timeline:
- 1 month ahead: Make and freeze dough
- 2 weeks ahead: Bake and freeze undecorated cookies
- 1 week ahead: Bake and store in airtight containers
- 2-3 days ahead: Decorate cookies (icing needs time to harden)
Serving Suggestions
Christmas sugar cookies are wonderfully versatile. Here are delightful ways to serve them:
Classic Cookie Platter:
Arrange decorated cookies on a festive platter with fresh greenery, cranberries, and cinnamon sticks for a beautiful holiday centerpiece.
Cookie Gift Boxes:
Layer decorated cookies in bakery boxes or holiday tins with tissue paper for thoughtful neighbor gifts, teacher appreciation, or holiday party hostess presents.
Cookie Decorating Party:
Bake cookies ahead, then set up a decorating station with bowls of royal icing, food coloring, sprinkles, and various decorating tools. Perfect for kids’ parties or family gatherings!
Hot Beverage Pairings:
Serve alongside hot chocolate, eggnog, mulled cider, peppermint mochas, or classic coffee for a cozy winter treat.
Dessert Board Addition:
Include sugar cookies on a holiday dessert charcuterie board with brownies, fudge, chocolate truffles, and seasonal fruit.
Ice Cream Sandwiches:
Use two cookies to sandwich softened vanilla, peppermint, or eggnog ice cream. Roll edges in mini chocolate chips or crushed candy canes.
With Holiday Soups:
The slightly sweet cookies provide a delightful contrast to savory soups like butternut squash, tomato bisque, or French onion soup during holiday dinners.
FAQs Section
Q: Why didn’t my cookies hold their shape?
A: The most common causes are dough that’s too warm or butter that was overly softened. Make sure your butter is cool room temperature (65-68°F), and if your kitchen is warm, chill the cut-out shapes on the baking sheet for 15 minutes before baking.
Q: Can I make these cookies without almond extract?
A: Absolutely! The almond extract adds wonderful depth, but the cookies are still delicious with just vanilla extract. You could also substitute with lemon extract or increase vanilla to 2 1/2 teaspoons.
Q: How do I prevent my cookies from spreading?
A: This recipe is specifically formulated not to spread, but if you’re experiencing spreading, check that you’re using enough flour (weigh it if possible), your baking powder is fresh, and your butter isn’t overly soft. Also ensure your baking sheets aren’t hot when you place dough on them.
Q: What’s the best way to get clean edges when cutting cookies?
A: Dip your cookie cutter in flour before each cut, press straight down firmly without twisting, and use a small offset spatula or bench scraper to transfer shapes to the baking sheet. For professional results, freeze cut shapes for 15 minutes before baking.
Q: How thick should I roll the dough?
A: For soft, tender cookies (my preference), roll to 1/4-inch thickness. For crispier cookies with more snap, roll to 1/8-inch. Use rolling pin rings or guide sticks to ensure consistency.
Q: Can I make these dairy-free or vegan?
A: You can substitute vegan butter (stick form, not tub) cup-for-cup, and use a flax egg (1 tablespoon ground flaxseed + 3 tablespoons water, let sit 5 minutes) instead of the egg. The texture will be slightly different but still delicious.
Q: My cookies turned out hard and crunchy—what happened?
A: They were likely overbaked or too much flour was incorporated. Sugar cookies should be removed from the oven when they look barely done—the centers might even look slightly underdone. They firm up considerably as they cool.
Conclusion
There’s truly nothing quite like the magic of homemade Christmas sugar cookies—the buttery aroma that fills your kitchen, the joy of decorating them with loved ones, the satisfaction of gifting beautiful cookie platters, and the simple pleasure of enjoying a tender, perfectly sweet cookie with your afternoon coffee.
This recipe has become my go-to every holiday season, and I’ve shared it with countless friends and family members who now consider it their essential Christmas cookie recipe too. The dough is forgiving and easy to work with, the cookies hold their shape beautifully for decorating, and most importantly, they taste absolutely incredible—buttery, tender, and perfectly sweet.
Whether you’re a seasoned baker or attempting sugar cookies for the first time, I promise this recipe will become your new holiday tradition. The smiles on your loved ones’ faces when they bite into these tender, delicious cookies are absolutely priceless.
I’d love to hear how your Christmas sugar cookies turn out! Drop a comment below with your decorating theme, save this recipe for your holiday baking, and please share your beautiful cookie creations on social media—tag me so I can see your masterpieces! Don’t forget to pin this recipe to your Christmas or Holiday Baking board on Pinterest so you can find it easily next time the cookie-baking mood strikes.
Happy baking, and may your holidays be filled with sweetness, warmth, and plenty of homemade cookies! 🎄🍪✨