Perfect French Madeleines Recipe: Buttery, Shell-Shaped Tea Cakes

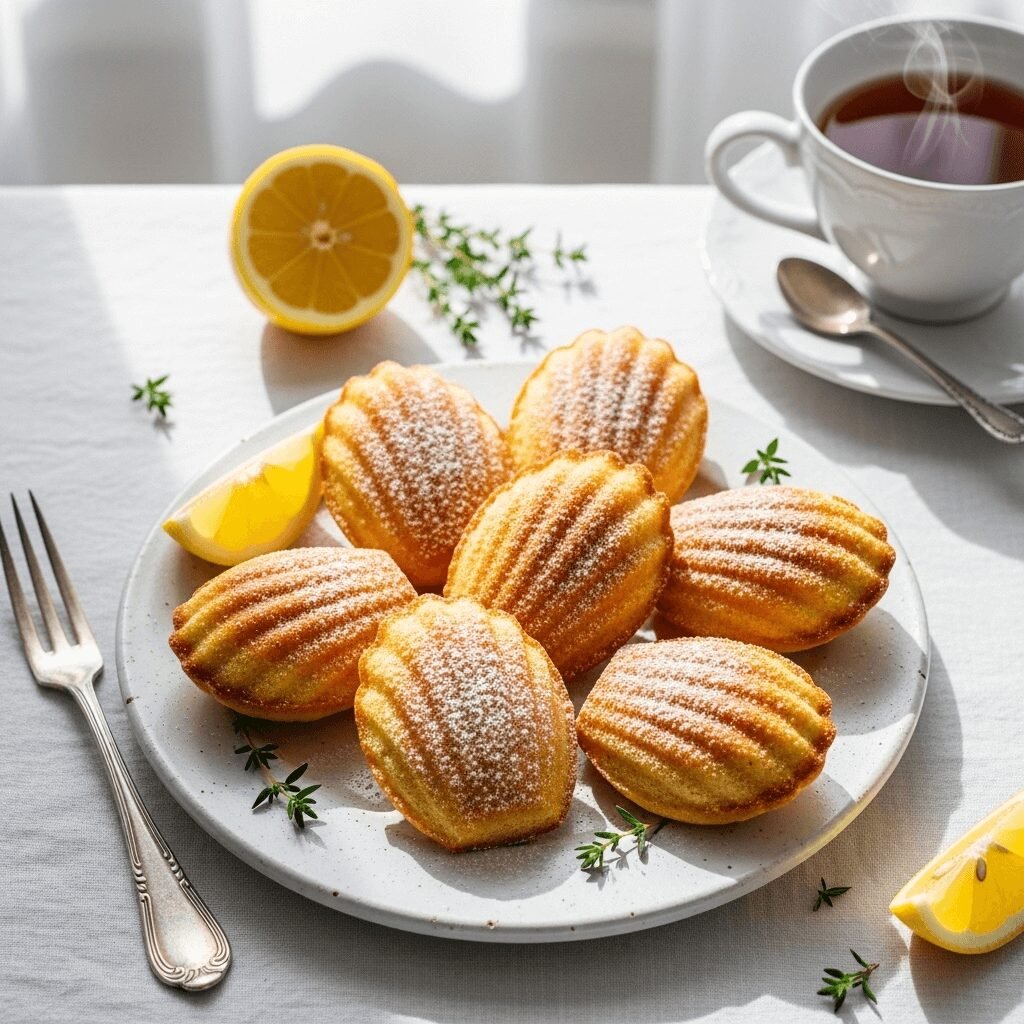
Madeleines are delicate, buttery French tea cakes with their iconic scalloped shell shape and distinctive bump (or “hump”) on the back. These petite sponge cakes are surprisingly light and airy with crispy, golden edges and a tender, moist interior that practically melts in your mouth. What makes madeleines truly special is their unique texture—somewhere between a cake and a cookie—and that subtle hint of lemon that brightens every bite.
These charming little cakes are perfect for afternoon tea, elegant brunch gatherings, or simply as a sweet treat with your morning coffee. They’re impressive enough to serve at special occasions yet simple enough to whip up on a weekday afternoon when you’re craving something homemade and delicious. Whether you’re hosting a baby shower, book club meeting, or just want to bring a touch of French elegance to your kitchen, madeleines are always a welcome addition to any dessert table.
History / Background
The madeleine has a rich history rooted in the Lorraine region of northeastern France, specifically the town of Commercy. While several legends surround the origin of these beloved cakes, the most popular story dates back to the 18th century. According to tradition, a young servant girl named Madeleine Paulmier baked these shell-shaped cakes for Stanisław Leszczyński, the exiled King of Poland and Duke of Lorraine, when his pastry chef abandoned the kitchen in a fit of rage during a dinner party.
The Duke was so enchanted by these delicate cakes that he named them after the clever young woman who saved his dessert course. The madeleines gained further fame when they were served to King Louis XV at Versailles, and from there, they became a staple of French pâtisserie.
In the literary world, madeleines achieved iconic status through Marcel Proust’s masterpiece “In Search of Lost Time” (1913), where the narrator’s taste of a madeleine dipped in tea triggers a flood of childhood memories—a moment so powerful it gave birth to the term “Proustian moment” in popular culture. This association cemented the madeleine’s place not just in culinary history but in artistic and literary tradition as well.
Today, madeleines remain a beloved treat throughout France and have captured hearts worldwide, representing the perfect marriage of simple ingredients transformed into something extraordinary through technique and tradition.
Why You’ll Love This Recipe
This madeleine recipe delivers that authentic French bakery experience right in your own kitchen. I’ve spent years perfecting this recipe to ensure you get that beautiful bump, crispy edges, and tender crumb every single time. The batter comes together quickly with ingredients you likely already have in your pantry, and the results taste like you spent hours in a Parisian pâtisserie.
Here’s why this recipe stands out:
- Foolproof technique – Detailed instructions ensure perfect results, even for first-time bakers
- Authentic texture – Achieves the signature crispy exterior and tender, fluffy interior
- That famous bump – Chilling method guarantees the distinctive “hump” madeleines are known for
- Quick prep time – Active hands-on time is just 15 minutes
- Make-ahead friendly – Batter rests overnight for enhanced flavor and texture
- Impressive presentation – These elegant cakes look bakery-quality with minimal effort
- Perfectly balanced sweetness – Not too sweet, making them ideal for pairing with coffee or tea
- Customizable flavoring – Easy to adapt with different extracts, zests, or add-ins
- Budget-friendly – Uses simple pantry staples without expensive ingredients
Ingredient Notes
All-Purpose Flour – The foundation of your madeleines. Provides structure while keeping them tender. For best results, spoon and level your flour rather than scooping directly from the bag, which can compact it and make your cakes dense.
Granulated Sugar – Sweetens the cakes and helps create that beautiful golden exterior. The sugar also contributes to the tender crumb structure.
Eggs – Use large eggs at room temperature. They incorporate better into the batter and create more volume. The eggs provide structure, richness, and that beautiful golden color.
Unsalted Butter – The star of the show! Use high-quality butter since the flavor really shines through. Browning the butter adds a nutty, caramelized depth that elevates these from good to extraordinary. Unsalted allows you to control the salt level precisely.
Honey – Adds moisture, helps the madeleines stay fresh longer, and contributes a subtle floral sweetness that complements the butter beautifully. You can substitute with an equal amount of additional sugar, but honey is traditional and worth using.
Baking Powder – The leavening agent that creates that signature rise and light, airy texture. Make sure yours is fresh (check the expiration date) for maximum lift.
Salt – Just a pinch enhances all the other flavors and balances the sweetness. Don’t skip it!
Lemon Zest – Provides that classic, subtle citrus note that’s traditional in madeleines. Use organic lemons if possible and zest before juicing. Orange zest or vanilla bean paste make excellent substitutions.
Vanilla Extract – Adds warmth and depth to the flavor profile. Pure vanilla extract is worth the investment for these delicate cakes.
Equipment Needed
- Madeleine pan – Essential! The traditional shell-shaped pan creates the signature look. Nonstick or silicone pans both work beautifully.
- Medium saucepan – For browning the butter
- Large mixing bowl – For combining the batter
- Medium mixing bowl – For the dry ingredients
- Whisk – For mixing both wet and dry ingredients
- Microplane or fine grater – For zesting the lemon
- Rubber spatula – For folding and scraping down the bowl
- Measuring cups and spoons – For accurate measurements
- Pastry brush – For greasing the madeleine pan
- Small spoon or piping bag – For filling the molds (piping bag gives more control)
- Cooling rack – Essential for proper cooling
- Plastic wrap – For covering the batter during the resting period
- Fine-mesh sieve – Optional, but great for dusting with powdered sugar
Madeleines Recipe

Classic French madeleines with crispy golden edges, a tender crumb, and the signature bump on top. These buttery, lemon-scented tea cakes are perfect for afternoon tea or elegant entertaining.
- Prep Time: 15 minutes (plus 1 hour chilling time)
- Cook Time: 10 minutes
- Total Time: 1 hour 25 minutes
- Yield: 24 madeleines 1x
- Category: Dessert
- Method: Baking
- Cuisine: French
- Diet: Vegetarian
Ingredients
- 10 tablespoons (140g) unsalted butter, plus extra for greasing pan
- 2 large eggs, at room temperature
- ⅔ cup (130g) granulated sugar
- 2 tablespoons honey
- 1 tablespoon lemon zest (from about 2 lemons)
- 1 teaspoon pure vanilla extract
- 1 cup (125g) all-purpose flour
- 1 teaspoon baking powder
- ¼ teaspoon salt
- Powdered sugar, for dusting (optional)
Instructions
- Brown the butter: In a medium saucepan over medium heat, melt the butter, stirring frequently. Continue cooking until the butter turns golden brown and smells nutty, about 5-7 minutes. Watch carefully to prevent burning. Remove from heat and let cool to room temperature, about 20 minutes.
- Mix the wet ingredients: In a large mixing bowl, whisk together the eggs and granulated sugar vigorously for about 2 minutes until the mixture is thick, pale, and slightly increased in volume. Whisk in the honey, lemon zest, and vanilla extract until fully combined.
- Combine dry ingredients: In a medium bowl, whisk together the flour, baking powder, and salt until evenly distributed.
- Fold in flour mixture: Gently fold the dry ingredients into the egg mixture using a rubber spatula. Fold just until no flour streaks remain—be careful not to overmix, which can make the madeleines tough.
- Add browned butter: Slowly drizzle the cooled browned butter into the batter while gently folding. Make sure the butter is fully incorporated, scraping down the sides and bottom of the bowl. The batter will be thick and smooth.
- Rest the batter: Cover the bowl tightly with plastic wrap and refrigerate for at least 1 hour, or preferably overnight. This resting period is crucial for developing flavor and achieving that signature bump.
- Prepare the pan: When ready to bake, preheat your oven to 375°F (190°C). Generously brush the madeleine pan cavities with softened butter, making sure to get into all the grooves. Lightly dust with flour and tap out the excess.
- Fill the molds: Remove the batter from the refrigerator. Spoon or pipe about 1 tablespoon of batter into each madeleine mold, filling them about three-quarters full. Don’t spread the batter; it will spread naturally during baking.
- Bake: Place the pan in the preheated oven and bake for 10-12 minutes, until the madeleines have risen with a pronounced bump on the back and the edges are golden brown. The tops should spring back when lightly touched.
- Remove and cool: Remove from the oven and immediately tap the pan firmly on the counter once or twice to release steam. Carefully turn the madeleines out onto a cooling rack. If any stick, use a butter knife to gently loosen them. Let cool for 5 minutes.
- Serve: Dust with powdered sugar if desired and serve warm or at room temperature. Madeleines are best enjoyed within a few hours of baking when they’re at their most delicate and tender.
Notes
- Chilling is crucial: Don’t skip the resting time. Chilling the batter allows the flour to hydrate and helps create that characteristic bump during baking.
- Pan preparation matters: Thorough greasing and flouring prevents sticking and ensures clean release. Alternatively, use a nonstick spray with flour.
- Don’t overbake: Madeleines can go from perfectly golden to dry quickly. Watch them carefully in the last minutes of baking.
- Serve fresh: These are best the day they’re made, though they’ll keep for 2-3 days in an airtight container.
Nutrition
- Serving Size: 1 madeleine
- Calories: 95
- Sugar: 7g
- Sodium: 45mg
- Fat: 5g
- Saturated Fat: 3g
- Unsaturated Fat: 2g
- Trans Fat: 0g
- Carbohydrates: 11g
- Fiber: 0g
- Protein: 1g
- Cholesterol: 30mg
Tips & Variations
Chocolate Madeleines: Add 2 tablespoons of cocoa powder to the dry ingredients (reduce flour to scant 1 cup). For extra decadence, dip the cooled madeleines in melted dark chocolate.
Almond Madeleines: Replace ½ teaspoon of vanilla extract with almond extract and fold in ¼ cup finely ground almonds along with the flour.
Orange Madeleines: Swap lemon zest for orange zest and add 1 tablespoon of fresh orange juice to the batter for a bright citrus twist.
Earl Grey Madeleines: Steep 2 Earl Grey tea bags in the warm browned butter for 10 minutes, then remove bags and proceed with the recipe.
Pistachio Madeleines: Fold in ⅓ cup finely chopped pistachios and add a drop of almond extract for a beautiful, nutty variation.
Glazed Madeleines: Mix 1 cup powdered sugar with 2-3 tablespoons lemon juice or milk to create a glaze. Dip the cooled madeleines and let the glaze set.
Raspberry Madeleines: Press a fresh raspberry into the center of each madeleine before baking for a fruity burst.
Lavender Honey Madeleines: Add 1 teaspoon of culinary lavender to the honey and warm gently before adding to the batter. Strain out the lavender buds.
Pro Chef Tips
Temperature is everything: Room temperature eggs incorporate more easily and create better volume. Set them out 30 minutes before baking, or place them in warm water for 5-10 minutes.
Perfect browning: When browning butter, use a light-colored saucepan so you can see the color change. The butter solids should be golden brown, not dark brown or black—there’s a fine line between nutty and burned.
The overnight rest: While one hour is the minimum, overnight resting (up to 24 hours) produces even better results. The batter thickens, flavors meld, and you’ll get a more pronounced bump.
Pan placement matters: For the best bump formation, place the pan in the center of the oven where heat circulation is most even. Avoid opening the oven door during the first 8 minutes of baking.
The tap test: A firm tap on the counter after baking releases trapped steam and prevents the madeleines from becoming soggy. This professional technique ensures a crispy exterior.
Piping perfection: Transfer batter to a piping bag or zip-top bag with the corner snipped off for more controlled filling and less mess. This also helps create more uniform madeleines.
Flavor infusions: For deeper flavor, you can steep the lemon zest in the warm browned butter for 10 minutes before adding to the batter, then strain it out for a more subtle, infused taste.
Common Mistakes to Avoid
Skipping the resting time: Rushing and skipping the chill time results in flat madeleines without the signature bump. The cold batter hitting the hot pan creates the dramatic rise that forms the bump. Always rest at least one hour.
Overmixing the batter: Once you add the flour, fold gently just until combined. Overmixing develops gluten, resulting in tough, chewy madeleines instead of the delicate, tender texture you want.
Poor pan preparation: Inadequately greased pans lead to stuck madeleines and damaged shells. Be generous with butter and flour, or use baking spray with flour built in. Get into every crevice of those shell shapes.
Using hot butter: Adding warm or hot butter can scramble the eggs or deflate the batter. Always let your browned butter cool to room temperature before incorporating—this patience pays off.
Overbaking: Madeleines continue to cook slightly after leaving the oven due to residual heat. Remove them when they’re just golden around the edges and spring back when touched, even if the centers look slightly underdone. They’ll firm up as they cool.
Not serving fresh: These are meant to be enjoyed within hours of baking when they’re at peak freshness. The delicate texture changes significantly after the first day, becoming drier and less magical.
Storage & Meal Prep
Room Temperature Storage: Store madeleines in an airtight container at room temperature for up to 2 days. Place parchment paper between layers to prevent sticking. While they’re best fresh, they’ll remain enjoyable for a couple of days, though the crispy exterior will soften slightly.
Refrigeration: I don’t recommend refrigerating madeleines as it dries them out and changes their delicate texture. Room temperature storage is best for maintaining their tender crumb.
Refreshing Day-Old Madeleines: If your madeleines have lost their crispness, pop them in a 300°F (150°C) oven for 2-3 minutes to refresh them. This helps restore some of the original texture, especially on the edges.
Batter Storage: The prepared batter can be refrigerated for up to 24 hours before baking, which actually improves the flavor and texture. This makes madeleines an excellent make-ahead dessert option for entertaining.
Reheating: Warm madeleines briefly in a 300°F oven for 3-4 minutes or microwave for 5-10 seconds. Be careful not to overheat, as they can dry out quickly.
Make-Ahead & Freezer Notes
Make-Ahead Batter: Prepare the batter the night before and refrigerate overnight. This is actually the preferred method, as the extended rest time produces superior results. Just bring the batter out 10 minutes before filling the pans to make it easier to work with.
Freezing Baked Madeleines: While madeleines are best fresh, you can freeze them. Let them cool completely, then arrange in a single layer on a baking sheet and freeze until solid. Transfer to a freezer-safe container or bag with parchment between layers. Freeze for up to 1 month.
Thawing: Remove frozen madeleines from the freezer and let them come to room temperature on the counter for about 30 minutes. For best results, refresh them in a 300°F (150°C) oven for 3-5 minutes to restore some crispness.
Freezing Unbaked Batter: You can freeze the prepared batter in a freezer-safe container for up to 2 months. Thaw overnight in the refrigerator, then proceed with baking as directed. The texture may be slightly different but still delicious.
Best Practice: For entertaining, I recommend making the batter the day before and baking fresh the day you plan to serve. Nothing beats the aroma and texture of freshly baked madeleines.
Serving Suggestions
Madeleines shine when paired thoughtfully with complementary beverages and accompaniments:
Afternoon Tea: Serve alongside your favorite hot tea—Earl Grey, chamomile, or jasmine tea all pair beautifully with the delicate lemon flavor. Arrange on a tiered stand with other petit fours for an elegant tea party.
Coffee Pairing: The subtle sweetness of madeleines makes them perfect for dunking in espresso, cappuccino, or a simple café au lait. They’re substantial enough to hold up to coffee without becoming soggy.
Dessert Wines: Pair with sweet wines like Sauternes, late-harvest Riesling, or a sparkling Moscato for a sophisticated dessert course.
Fresh Berries: Serve with a bowl of fresh strawberries, raspberries, or blueberries and a dollop of lightly sweetened whipped cream or crème fraîche.
Chocolate Sauce: Drizzle with warm chocolate ganache or serve with a small cup of melted dark chocolate for dipping—this takes them from teatime treat to elegant dessert.
Ice Cream: Create an elegant sundae by placing warm madeleines alongside vanilla bean, lemon, or honey lavender ice cream.
Compote: Spoon berry compote or lemon curd alongside for added moisture and complementary flavors.
Brunch Spread: Include madeleines on a brunch buffet alongside croissants, fresh fruit, yogurt parfaits, and mimosas for a French-inspired morning feast.
FAQs Section
Q: Why didn’t my madeleines have the characteristic bump?
A: The bump comes from cold batter hitting a hot pan, causing rapid rise. Make sure you chill the batter for at least 1 hour (overnight is even better), and ensure your oven is fully preheated to 375°F. Also check that your baking powder is fresh—expired leavening won’t create adequate lift.
Q: Can I make madeleines without a special pan?
A: Technically yes, you can bake the batter in a mini muffin tin, but you won’t get the signature shell shape that makes madeleines so distinctive and beautiful. The specialized pan is really worth the investment if you plan to make these regularly—they’re inexpensive and widely available.
Q: My madeleines stuck to the pan. How do I prevent this?
A: Thorough pan preparation is crucial. Brush every crevice of the pan generously with softened butter, then dust with flour and tap out the excess. Alternatively, use a baking spray that contains flour. Make sure to turn the madeleines out immediately after baking while they’re still hot, as they become more difficult to release as they cool.
Q: Can I make these gluten-free?
A: Yes! Substitute the all-purpose flour with a 1:1 gluten-free baking blend that contains xanthan gum. Bob’s Red Mill and King Arthur both make excellent options. The texture will be slightly different but still delicious. Almond flour madeleines are another gluten-free variation, though they require a different recipe approach.
Q: How do I know when madeleines are done baking?
A: Madeleines are done when they’re golden brown around the edges, have formed a pronounced bump on the back, and spring back when gently pressed in the center. They typically take 10-12 minutes at 375°F. Watch carefully in the last few minutes as they can overbake quickly.
Q: Why are my madeleines dense instead of light and airy?
A: Dense madeleines usually result from overmixing the batter after adding flour, which develops too much gluten. Fold gently just until the flour disappears. Using too much flour (from packing the measuring cup) can also cause density—always spoon and level flour measurements.
Q: Can I flavor madeleines with something other than lemon?
A: Absolutely! Madeleines are wonderfully versatile. Try orange zest, lime zest, almond extract, vanilla bean paste, Earl Grey tea, lavender, rosewater, or cocoa powder. You can also fold in finely chopped nuts, mini chocolate chips, or dried fruit. Just keep additions to about ¼ cup so you don’t throw off the batter consistency.
Conclusion
There’s something truly magical about pulling a tray of golden, perfectly-bumped madeleines from your oven. These little French cakes may look fancy and intimidating, but as you’ve seen, they’re completely achievable in your home kitchen with just a handful of simple ingredients and a bit of patience. The reward—buttery, delicate cakes that taste like they came from a Parisian pâtisserie—is absolutely worth it.
Whether you’re treating yourself to an elegant afternoon tea, impressing guests at your next brunch gathering, or simply wanting to try your hand at a classic French recipe, these madeleines will deliver that perfect combination of crispy edges and tender, fluffy centers. Don’t forget that signature hint of lemon that makes each bite so refreshing!
I’d love to hear how your madeleines turn out! Did you try any of the flavor variations? What did you serve them with? Drop a comment below and share your experience. And if you loved this recipe, please save it to your favorite Pinterest board so you can find it again when the craving strikes. Your fellow home bakers will thank you for sharing this classic recipe!