The Ultimate Classic English Trifle Recipe – A Showstopping Layered Dessert

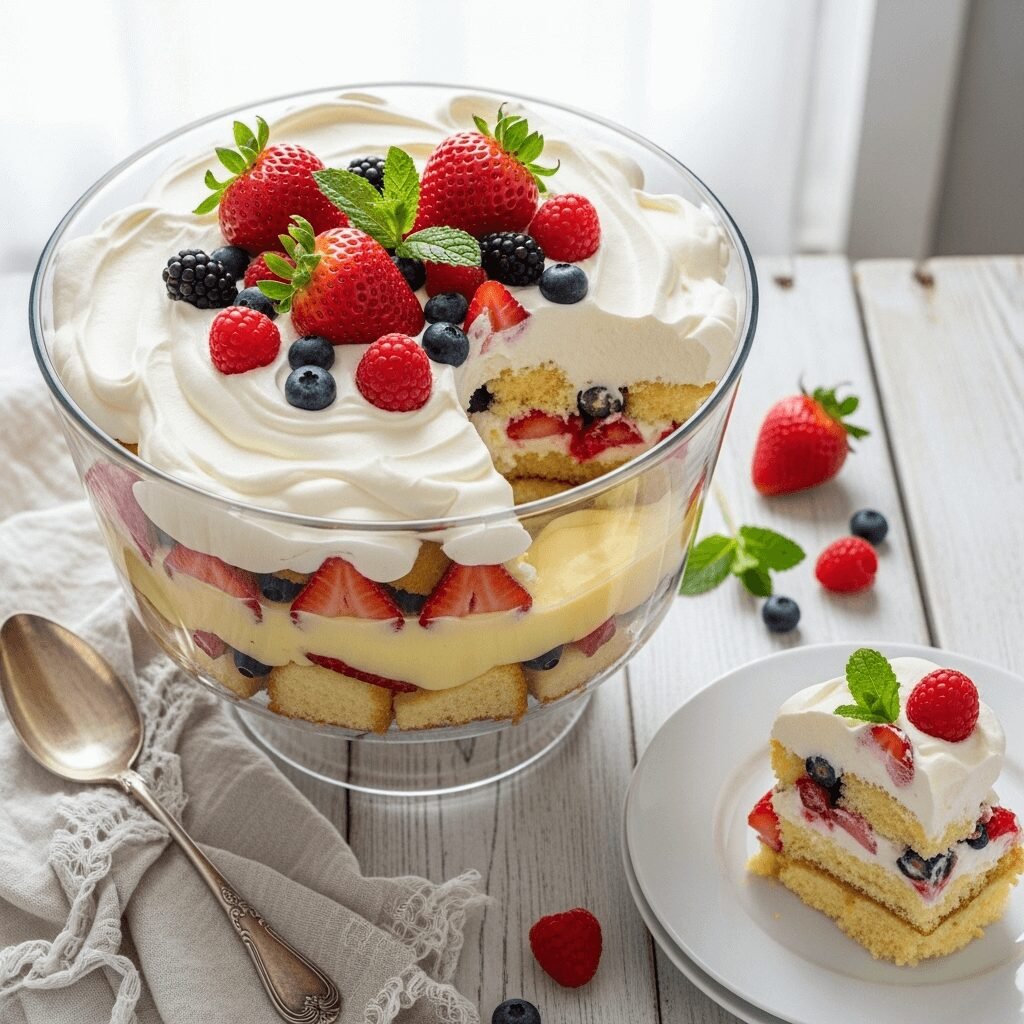
If you’ve ever wanted to serve a dessert that looks absolutely stunning but doesn’t require professional pastry skills, this classic English trifle is your answer. This gorgeous layered dessert combines fluffy sponge cake, rich custard, fresh fruit, and billowy whipped cream in a beautiful glass dish that shows off every delicious layer. It’s a crowd-pleasing showstopper that’s surprisingly simple to make, perfect for holidays, dinner parties, birthdays, or any time you want to impress your guests with minimal stress.
The beauty of trifle lies not just in its visual appeal but in its incredible versatility. You can customize it with your favorite fruits, switch up the cake layers, or even add a boozy twist for adult gatherings. Whether you’re hosting Thanksgiving, celebrating Christmas, planning a summer BBQ, or just treating your family to something special on Sunday, this traditional trifle recipe delivers every single time. The best part? You can make it ahead, which means less time in the kitchen and more time enjoying your celebration.
History / Background
The trifle has a fascinating history that dates back to 16th century England, though it looked quite different from the dessert we know and love today. The word “trifle” comes from the Old French word “trufle,” meaning something of little importance or a whimsical creation. The earliest versions were simple concoctions of thick cream flavored with sugar, ginger, and rosewater, served alongside biscuits.
By the 18th century, the trifle began to evolve into something closer to what we recognize today. English cooks started layering sponge cake soaked in sherry or sweet wine, adding custard (which had become more refined by this period), and topping everything with syllabub – a frothy mixture of cream and wine. The Victorians truly elevated the trifle to an art form, making it a centerpiece at elaborate dinner parties and celebrations.
The traditional English trifle became synonymous with British celebrations, particularly Christmas and other holiday gatherings. Different regions developed their own variations – some included jam, others used jelly (what Americans call Jell-O), and debate raged over whether trifle should include alcohol or remain family-friendly. When British colonists and immigrants traveled to America, Australia, and other parts of the world, they brought their beloved trifle recipes with them, leading to countless adaptations.
Today, trifle remains a beloved dessert across the English-speaking world. It represents more than just a sweet treat – it’s about bringing people together, creating something beautiful from simple ingredients, and carrying on a tradition that spans centuries. The modern American version often features fresh berries, vanilla pudding, and whipped topping, making it accessible and perfect for home cooks who want impressive results without complicated techniques.
Why You’ll Love This Recipe
This classic trifle recipe strikes the perfect balance between impressive presentation and easy execution. You don’t need any special baking skills, fancy equipment, or hard-to-find ingredients to create a dessert that looks like it came from a professional bakery. The layered approach means you’re simply assembling components rather than performing complex culinary techniques, making it wonderfully forgiving for cooks of all skill levels.
Here’s why this trifle will become your go-to special occasion dessert:
- Make-ahead friendly – Prepare it the day before your event and let the flavors meld beautifully in the refrigerator
- Visually stunning – The glass dish shows off gorgeous layers that immediately impress your guests
- Feeds a crowd – One trifle easily serves 10-12 people, making it perfect for parties and gatherings
- Customizable – Swap fruits, change up the cake, or add your favorite flavors to make it your own
- No baking required – If you use store-bought components, you won’t even turn on your oven
- Budget-friendly – Despite looking expensive and fancy, the ingredients are affordable and accessible
- Kid-approved – The combination of cake, fruit, and cream appeals to even picky eaters
- Great texture variety – Every spoonful delivers soft cake, creamy custard, juicy fruit, and fluffy cream
- Temperature perfect – Served chilled, it’s refreshing and light despite being indulgent
- Traditional with a twist – Honor the classic recipe while making it your own
Ingredient Notes
Sponge Cake or Pound Cake – The foundation of your trifle needs to be sturdy enough to soak up liquid without completely falling apart. Store-bought pound cake works beautifully and saves time, but you can also use angel food cake for a lighter version or leftover sponge cake. Avoid overly dense cakes that won’t absorb the flavors.
Vanilla Custard or Pudding – Traditional trifle uses homemade egg custard (crème anglaise), but instant vanilla pudding creates a foolproof, quick alternative that tastes delicious. If using instant pudding, prepare it according to package directions and let it set before assembling. For authentic British flavor, make custard using Bird’s Custard Powder, which is what many UK families use.
Fresh Berries – Strawberries, raspberries, and blueberries provide beautiful color and fresh flavor. You can use a single type or a gorgeous berry medley. Frozen berries work in a pinch but release more liquid, so thaw and drain them well. In winter, consider using canned peaches or mandarin oranges.
Sherry or Fruit Juice – Traditional trifle includes a drizzle of sweet sherry or cream sherry to moisten the cake layers. For a non-alcoholic version, use fruit juice (raspberry, strawberry, or orange work wonderfully) or simply omit this step. The alcohol adds depth and that authentic English trifle flavor.
Heavy Whipping Cream – Fresh whipped cream tops the trifle with clouds of deliciousness. You’ll need heavy cream with at least 36% fat content to whip properly. Add a touch of vanilla extract and powdered sugar for extra flavor. Cool Whip or other whipped toppings can substitute if you prefer.
Strawberry or Raspberry Jam – A thin layer of jam between some layers adds sweetness and helps the cake layers stick together slightly. Choose a high-quality jam without too many seeds for the smoothest texture.
Vanilla Extract – Pure vanilla extract enhances both the custard and whipped cream layers. Don’t skip this simple ingredient – it makes everything taste more luxurious.
Sugar – You’ll need sugar for sweetening the whipped cream and possibly adjusting the custard sweetness to your taste.
Equipment Needed
- Large glass trifle bowl or glass serving dish (8-10 cup capacity) – Shows off the beautiful layers
- Mixing bowls (various sizes) – For preparing custard, whipping cream, and mixing components
- Electric hand mixer or stand mixer – Essential for whipping cream to stiff peaks
- Whisk – For making smooth custard if going homemade
- Serrated knife – For cutting cake into cubes or slices
- Measuring cups and spoons – For accurate ingredient measurements
- Rubber spatula – For spreading layers evenly and scraping bowls clean
- Small saucepan (if making homemade custard) – For cooking egg-based custard
- Cutting board – For preparing fruit and cutting cake
- Plastic wrap or cover – For refrigerating the finished trifle
- Serving spoon or ladle – For portioning out servings
Trifle Recipe
This stunning classic English trifle features beautiful layers of tender sponge cake, rich vanilla custard, fresh berries, and fluffy whipped cream. It’s the perfect make-ahead dessert that looks incredibly impressive but comes together with simple assembly. Serve this showstopper at your next celebration and watch it disappear!
- Prep Time: 30 minutes
- Cook Time: 4 hours (chill Time)
- Total Time: 4 hours 30 minutes
- Yield: 10-12 servings 1x
- Category: Dessert
- Method: No-Bake Assembly
- Cuisine: British, English
- Diet: Vegetarian
Ingredients
- 1 pound store-bought pound cake or sponge cake, cut into 1-inch cubes
- ½ cup sweet sherry or raspberry juice (for soaking cake)
- 1 cup strawberry or raspberry jam
- 4 cups prepared vanilla custard or vanilla pudding (made from 2 boxes instant pudding)
- 4 cups fresh mixed berries (strawberries, raspberries, blueberries)
- 2 cups heavy whipping cream
- ¼ cup powdered sugar
- 2 teaspoons pure vanilla extract
- Fresh mint leaves for garnish (optional)
- Sliced almonds or crushed amaretti cookies for topping (optional)
Instructions
- Prepare your components. If using instant pudding, prepare it according to package directions and refrigerate until set (about 5 minutes). Wash and dry your berries thoroughly. If using strawberries, hull and slice them. Cut your pound cake into 1-inch cubes.
- Start the first layer. Arrange half of the cake cubes in the bottom of your trifle bowl, creating an even layer. Use your hands to gently press them together so there aren’t large gaps.
- Add moisture and flavor. Drizzle half of the sherry (or fruit juice) evenly over the cake layer, allowing it to soak in. Use a spoon to help distribute it evenly. This step adds flavor and keeps the cake tender.
- Spread the jam layer. Warm the jam slightly in the microwave (about 15 seconds) to make it spreadable. Spread half of the jam gently over the moistened cake layer using a rubber spatula.
- Add custard layer. Spoon half of the prepared custard or pudding over the jam layer, spreading it evenly to the edges of the bowl. This creates that gorgeous visible layer through the glass.
- Layer the berries. Arrange half of your fresh berries over the custard layer. If you’re using sliced strawberries, place some against the glass for a beautiful presentation, then fill in the center with mixed berries.
- Repeat the layers. Add the remaining cake cubes, pressing gently. Drizzle with the remaining sherry or juice. Spread the remaining jam over the cake, followed by the rest of the custard. Top with the remaining berries, again arranging some prettily against the glass sides.
- Make fresh whipped cream. In a large, chilled mixing bowl, combine the heavy cream, powdered sugar, and vanilla extract. Using an electric mixer, beat on medium-high speed until stiff peaks form (about 3-4 minutes). Don’t overbeat or you’ll make butter!
- Top the trifle. Spread or pipe the whipped cream over the top layer of berries, creating an attractive finish. You can make swoops and swirls with the back of a spoon for a rustic look, or use a piping bag with a star tip for a more formal presentation.
- Garnish and chill. If desired, garnish with a few perfect berries, fresh mint leaves, or a sprinkle of sliced almonds. Cover the trifle loosely with plastic wrap and refrigerate for at least 4 hours or overnight. This allows the flavors to meld and the cake to absorb all those delicious layers.
- Serve. When ready to serve, use a large serving spoon to scoop straight down through all the layers, ensuring each person gets every component in their serving.
Notes
- Cake options: Angel food cake, ladyfingers, or even brownie cubes can replace traditional pound cake for different flavor profiles.
- Make it boozy: Besides sherry, try amaretto, rum, Grand Marnier, or Chambord for adult gatherings.
- Custard consistency: If your custard seems too thick, whisk in a tablespoon or two of milk to make it more spreadable.
- Berry alternatives: Use canned peaches, mandarin oranges, fresh peaches, or cherries when berries aren’t in season.
- Dairy-free option: Use coconut cream whipped with powdered sugar instead of dairy whipped cream. 1 cup (approximately 1/12 of recipe)
Calories: 385
Sugar: 38g
Sodium: 245mg
Fat: 18g
Saturated Fat: 11g
Unsaturated Fat: 6g
Nutrition
- Serving Size: 1 cup (approximately 1/12 of recipe)
- Calories: 385
- Sugar: 38g
- Sodium: 245mg
- Fat: 18g
- Saturated Fat: 11g
- Unsaturated Fat: 6g
- Carbohydrates: 52g
- Fiber: 2g
- Protein: 5g
- Cholesterol: 78g
Nutrition information is approximate and will vary based on specific ingredients used.
Tips & Variations
Berry Trifle Variations: Create a single-berry trifle using only strawberries for a classic strawberry trifle, or go all-in on raspberries for an elegant raspberry version. Blueberry trifle with lemon curd instead of custard is absolutely divine in summer.
Chocolate Lovers’ Twist: Use chocolate cake or brownies for the base layers, chocolate pudding instead of vanilla custard, and top with chocolate shavings. You can even add layers of chocolate ganache for an ultra-decadent dessert.
Tropical Paradise Trifle: Replace berries with tropical fruits like mango, pineapple, and kiwi. Use coconut cream for the whipped topping and add a layer of passionfruit curd for incredible flavor.
Holiday Peppermint Trifle: During Christmas season, add crushed peppermint candies or candy canes between layers, use peppermint extract in your whipped cream, and incorporate chocolate cake for a festive red-and-white presentation.
Lighter Version: Use angel food cake, sugar-free pudding, reduced-fat whipped topping, and load up on extra fresh fruit to reduce calories while maintaining that impressive look.
Banana Pudding Trifle: Create a Southern-inspired version using vanilla wafers instead of cake, banana pudding, sliced bananas, and whipped cream for a nostalgic twist.
Adult Indulgence: Soak the cake layers in coffee liqueur, add a layer of mascarpone cheese mixed with the custard, and use espresso-soaked ladyfingers for a tiramisu-inspired trifle.
Pro Chef Tips
Chill your mixing bowl and beaters before whipping cream. Place them in the freezer for 15 minutes beforehand. Cold equipment helps the cream whip faster and achieve better volume, giving you those perfect stiff peaks that hold their shape beautifully on your trifle.
Layer strategically for visual impact. When arranging berries, deliberately place some of the prettiest ones against the glass sides of the bowl where they’ll be visible. This creates that magazine-worthy appearance that makes trifle so Instagram-worthy.
Don’t over-soak your cake layers. While you want the cake moist, too much liquid will make it mushy and cause the layers to collapse into each other. A light drizzle that gets absorbed quickly is perfect – you should still be able to see distinct cake pieces.
Make your custard extra smooth by straining it through a fine-mesh sieve before layering. This removes any lumps and creates that silky, professional texture that makes every spoonful perfect.
Let it rest overnight if possible. While 4 hours is the minimum chilling time, trifle actually improves after 24 hours as all the flavors marry together and the textures soften. The cake becomes perfectly tender, the custard settles, and everything melds into dessert perfection.
Use a piping bag for the whipped cream if you want a professional finish. Fit it with a large star tip and pipe rosettes or a decorative pattern across the top. This takes just a few extra minutes but elevates the presentation dramatically.
Balance your sweetness levels. Taste your custard and adjust sweetness before assembling. If it’s very sweet, consider using less sugar in your whipped cream. If your berries are particularly tart, you might want slightly sweeter custard. Balance is key to a dessert that’s enjoyable rather than cloying.
Common Mistakes to Avoid
Using cake that’s too fresh and soft. Day-old or slightly stale cake actually works better in trifle because it absorbs the liquids without falling apart completely. If your cake is very fresh, let the cubes sit out for an hour to dry slightly, or even toast them lightly.
Skipping the chilling time. I know it’s tempting to dig in right away, but trifle absolutely needs those hours in the refrigerator. Without proper chilling, the layers won’t set properly, the whipped cream will be too soft, and you’ll lose the beautiful layer definition when serving.
Making the layers too thick. If your cake or custard layers are too thick, guests will get overwhelming bites of single components rather than that perfect balance of all flavors. Aim for relatively thin, even layers throughout – this is especially important if you’re only doing two full sets of layers.
Using berries that are too wet. Moisture is the enemy of crisp layers. Make sure your berries are completely dry before adding them to the trifle, or they’ll create pools of liquid that make everything soggy. Pat them thoroughly with paper towels after washing.
Overwhipping the cream. Watch your whipped cream carefully as it thickens. Stop beating as soon as you reach stiff peaks. If you continue past this point, the cream will become grainy, separate, and eventually turn into butter. Stiff peaks should hold their shape when you lift the beater but still look smooth and creamy.
Storage & Meal Prep
Store your assembled trifle covered tightly with plastic wrap in the refrigerator for up to 3 days. The dessert actually holds up quite well, though the whipped cream may soften slightly over time and the cake will continue to absorb moisture from the other layers.
For the best texture and presentation, consume the trifle within 48 hours. After that, while still safe to eat if properly refrigerated, the layers begin to lose their distinct appearance and some of the textural contrast that makes trifle special.
If you notice your trifle developing excess liquid at the bottom (this can happen with very juicy berries), simply tilt your serving spoon slightly when portioning to leave most of that liquid behind. The dessert itself will still be perfectly delicious.
This dessert is not suitable for freezing due to the custard and whipped cream components, which separate and become grainy when thawed. However, you can freeze individual components before assembly if you’re planning ahead.
Leftover trifle can be portioned into individual serving glasses or containers, which actually makes for a lovely grab-and-go dessert for the next few days. Just cover each portion well with plastic wrap.
Make-Ahead & Freezer Notes
Trifle is arguably even better when made ahead, making it perfect for stress-free entertaining. You can fully assemble the trifle up to 24 hours before serving, stopping just before adding the whipped cream topping. Add the whipped cream layer within 2-4 hours of serving for the freshest appearance.
For maximum convenience, prepare all your components separately up to 2 days in advance. Keep the custard in an airtight container in the refrigerator, store cut cake cubes in a sealed container at room temperature, wash and prep your berries, and store them in the fridge. Then assemble everything the day before your event.
If you’re really pressed for time, you can even assemble the entire trifle including the whipped cream topping up to 24 hours ahead. The whipped cream will soften slightly and may weep a bit, but it will still taste delicious and look beautiful. Just add fresh berry garnishes right before serving to brighten it up.
While you can’t freeze assembled trifle successfully, you can freeze some components individually. Freeze berries when they’re at peak ripeness (wash, dry, and freeze in a single layer before transferring to bags), and you can even freeze cubes of pound cake for up to 3 months. Thaw both completely before use.
The absolute best method for make-ahead trifle is the “assembly line” approach: make your custard in the morning or even the night before, cube and lightly toast your cake, prep your berries, and then assemble everything in the afternoon. Add whipped cream as your final step about 2 hours before serving for the prettiest presentation.
Serving Suggestions
Trifle is substantial enough to stand alone as dessert, but serving it as part of a dessert spread works beautifully for larger gatherings. Pair it with simple butter cookies, shortbread, or delicate biscotti that guests can nibble alongside.
For holiday dinners, serve trifle after a traditional roast dinner – the light, fruity freshness provides wonderful contrast to heavy main courses. It’s particularly perfect after Christmas dinner or Thanksgiving feast when everyone’s already quite full.
At summer gatherings and BBQs, trifle shines as a refreshing finale to grilled meats and smoky sides. Serve it with glasses of sweet dessert wine, champagne, or even iced coffee for a sophisticated touch.
For afternoon tea parties or brunch gatherings, trifle works wonderfully alongside scones, finger sandwiches, and other light fare. Portion it into small glasses for individual servings that guests can easily manage while mingling.
Beverage pairings: Sweet dessert wines like Moscato or late-harvest Riesling complement the fruit beautifully. Coffee or espresso provides nice contrast to the sweetness. For something non-alcoholic, sparkling water with fresh fruit or berry-infused iced tea echoes the trifle’s flavors perfectly.
Consider the presentation vessel carefully. While traditional trifle bowls show off the layers gorgeously, you can also assemble individual trifles in wine glasses, mason jars, or small glass bowls for a modern twist that makes serving easy and portion control automatic.
FAQs Section
Can I make trifle without alcohol? Absolutely! Simply replace the sherry with fruit juice (raspberry, orange, or apple work wonderfully), or skip the liquid altogether if you prefer. Many families make trifle without alcohol, and it’s just as delicious. The sherry adds a subtle depth of flavor but isn’t essential to a great trifle.
How far in advance can I make trifle? You can make trifle up to 24 hours before serving, and many people think it tastes even better after sitting overnight. For the best results, add the whipped cream topping within 2-4 hours of serving. All individual components can be prepared 1-2 days ahead and assembled when ready.
Can I use instant pudding instead of homemade custard? Yes, instant vanilla pudding is a perfect substitute for traditional egg custard and is actually what many modern American trifle recipes call for. It’s quicker, foolproof, and tastes delicious. Prepare it according to package directions, let it set for 5 minutes, and use it exactly like you would custard.
What if I don’t have a trifle bowl? Any large glass bowl or even a clear glass baking dish works perfectly for trifle. The key is being able to see those beautiful layers through the sides. In a pinch, you can even make individual trifles in wine glasses, parfait glasses, or mason jars for a modern presentation.
Can I use frozen berries? Yes, but with caution. Frozen berries release a lot of liquid when thawed, which can make your trifle watery. If using frozen berries, thaw them completely, drain them very well, and pat them dry with paper towels before using. Fresh berries give better texture and appearance, but frozen works in a pinch.
Why did my whipped cream get runny? This usually happens from overwhipping (which causes the cream to separate) or using cream with too low a fat content (look for heavy cream with at least 36% fat). Make sure your bowl and beaters are cold, don’t overbeat past stiff peaks, and refrigerate the finished trifle promptly to keep the cream stable.
Can I make a trifle dairy-free? Yes! Use coconut cream or another plant-based whipped cream for the topping, and look for dairy-free pudding or custard options. The cake layer can be replaced with dairy-free pound cake or angel food cake. The result won’t be traditional, but it can still be delicious and beautiful.
Conclusion
There’s something truly magical about presenting a beautiful trifle at your gathering and watching faces light up. This classic English dessert combines simplicity with wow-factor in a way few other desserts can match. The gorgeous layers, the perfect balance of textures and flavors, and the make-ahead convenience make it a home cook’s secret weapon for impressive entertaining.
Whether you stick with the traditional berry and custard combination or venture into creative variations, trifle is forgiving, adaptable, and always crowd-pleasing. It’s a dessert with history and heart, connecting you to centuries of celebrations while creating new memories with your own loved ones.
I hope this recipe inspires you to create your own stunning trifle! Once you’ve tried it, you’ll understand why this beautiful dessert has remained beloved for generations. The combination of flavors and textures in every spoonful is pure magic.
I’d love to hear how your trifle turns out! Drop a comment below with your experience, any fun variations you tried, or questions you have. And if you loved this recipe, please pin it to your favorite Pinterest boards so you can find it easily next time you need an impressive dessert. Don’t forget to share it with your friends who love beautiful, delicious desserts – they’ll thank you! Happy cooking, and enjoy every layered, creamy, fruity bite!